👋 Introduction
Lightning Transcription is an iPhone/iPad app that automatically transcribes meetings, lectures, and interviews, identifies speakers, and generates meeting notes. Just stop recording — a 60-minute recording is transcribed in about 2 minutes. The first time you launch the app, a brief walkthrough explains privacy and requests microphone/speech recognition access.
Transcription, speaker identification, and on-device AI summaries are all processed on your device. Cloud AI summaries are optional — if you don't use them, your recordings never leave your device.
After recording, you can set the meeting "type" to Meeting, Lecture, or Interview on the meeting detail screen. Supported on iPhone (A14 or later) and iPad (M1 or later).
🎙️ Recording
📷 images/recording-1-en.png
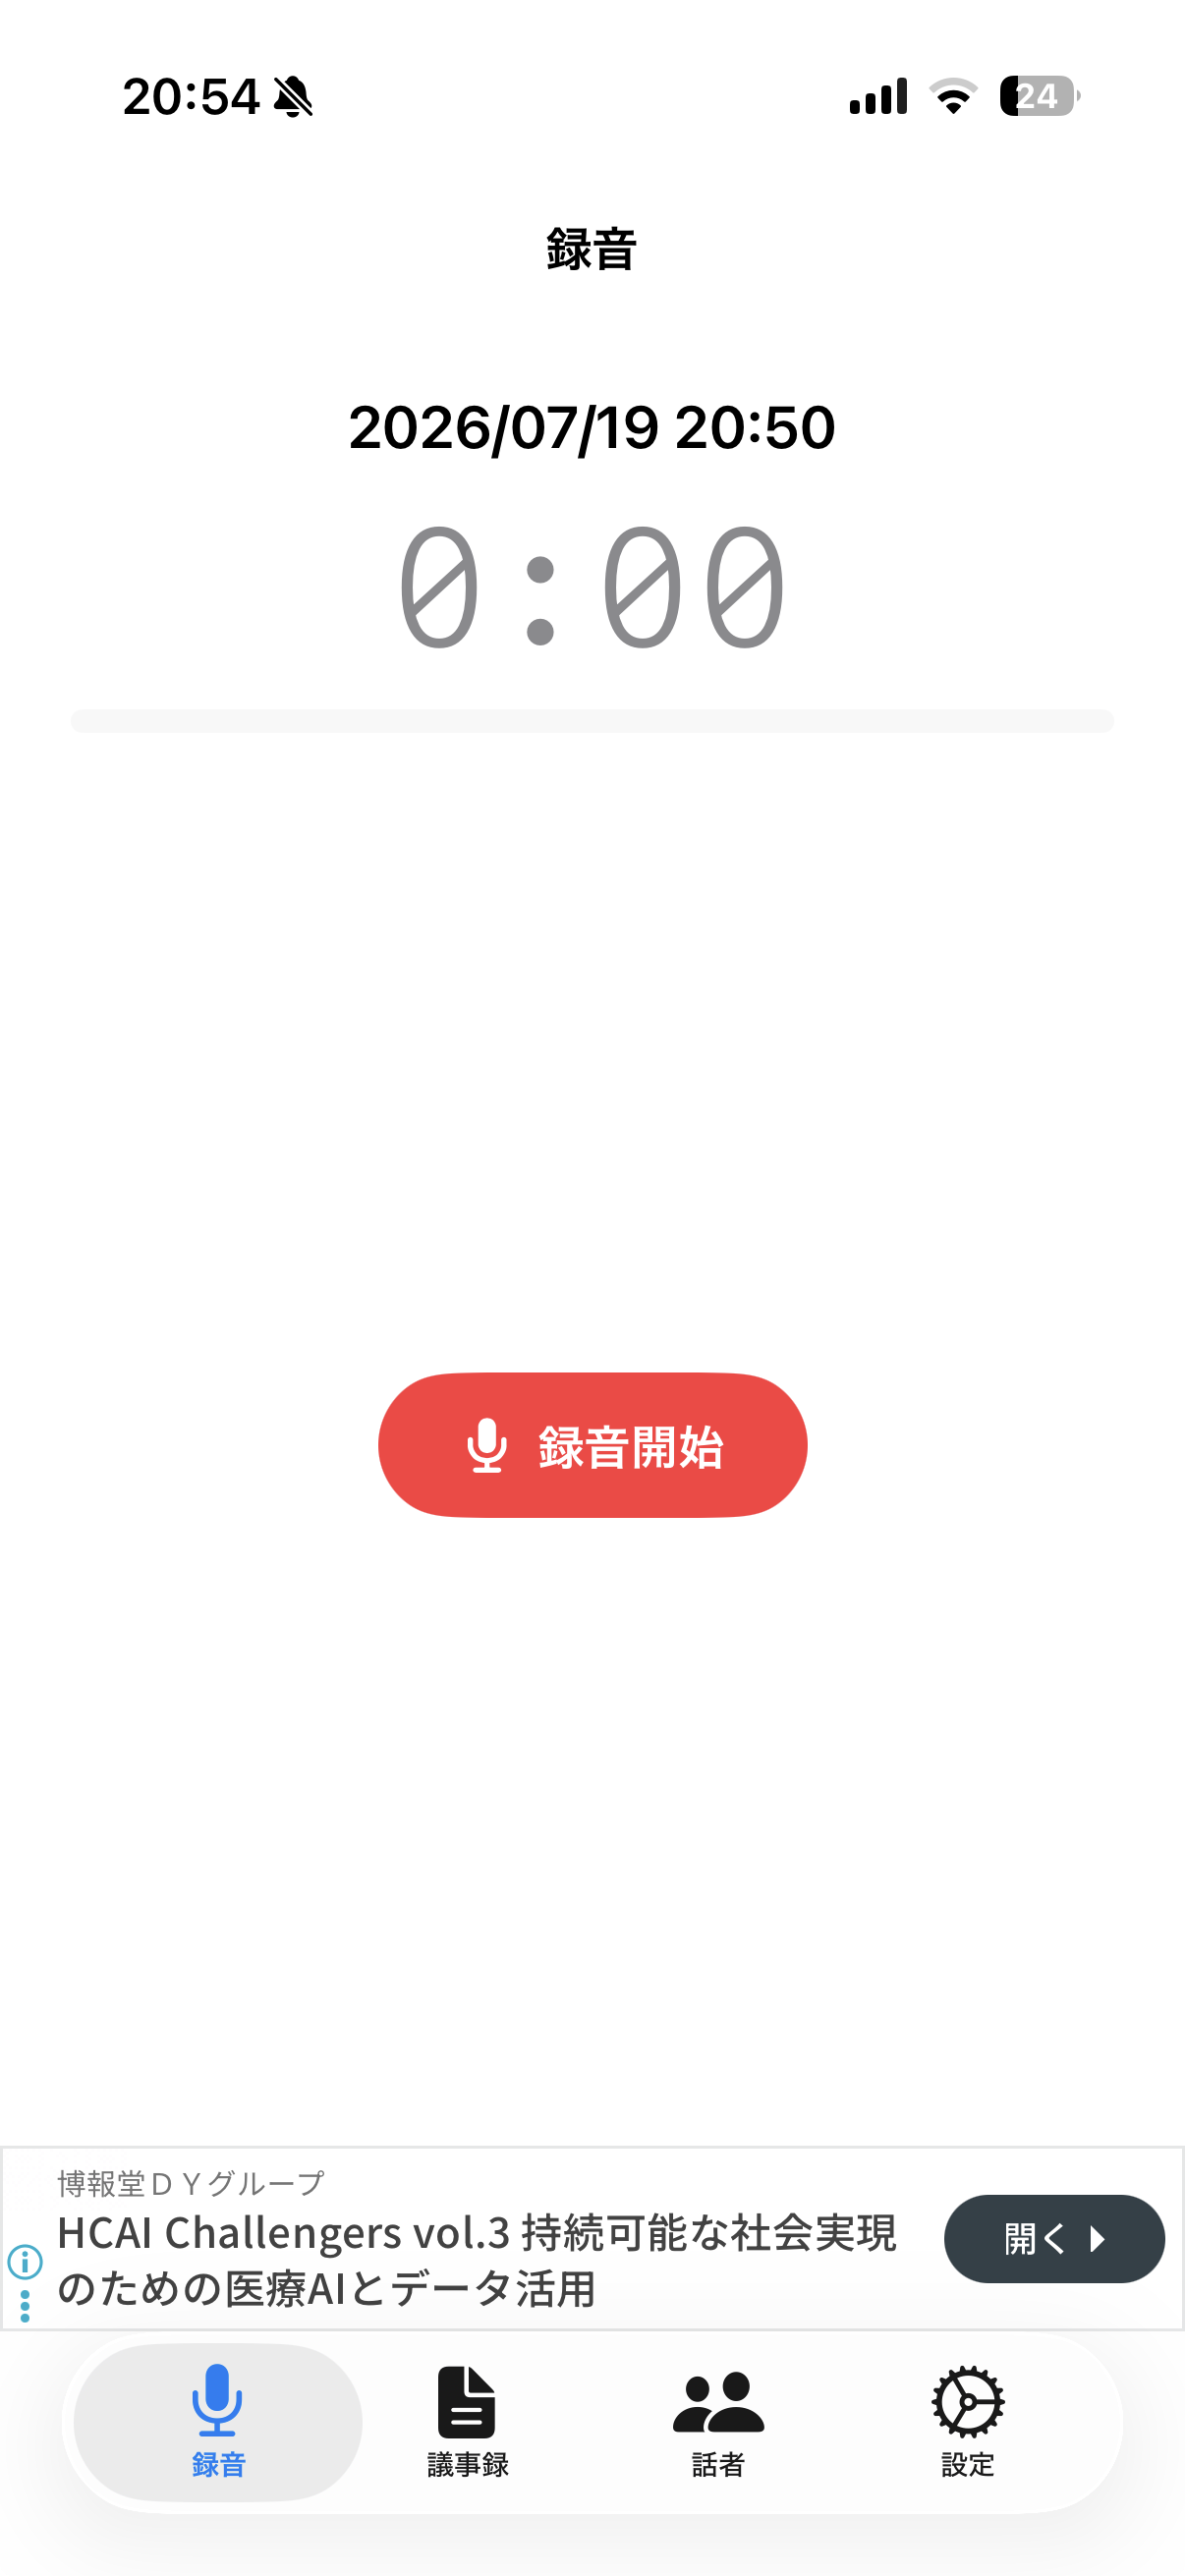
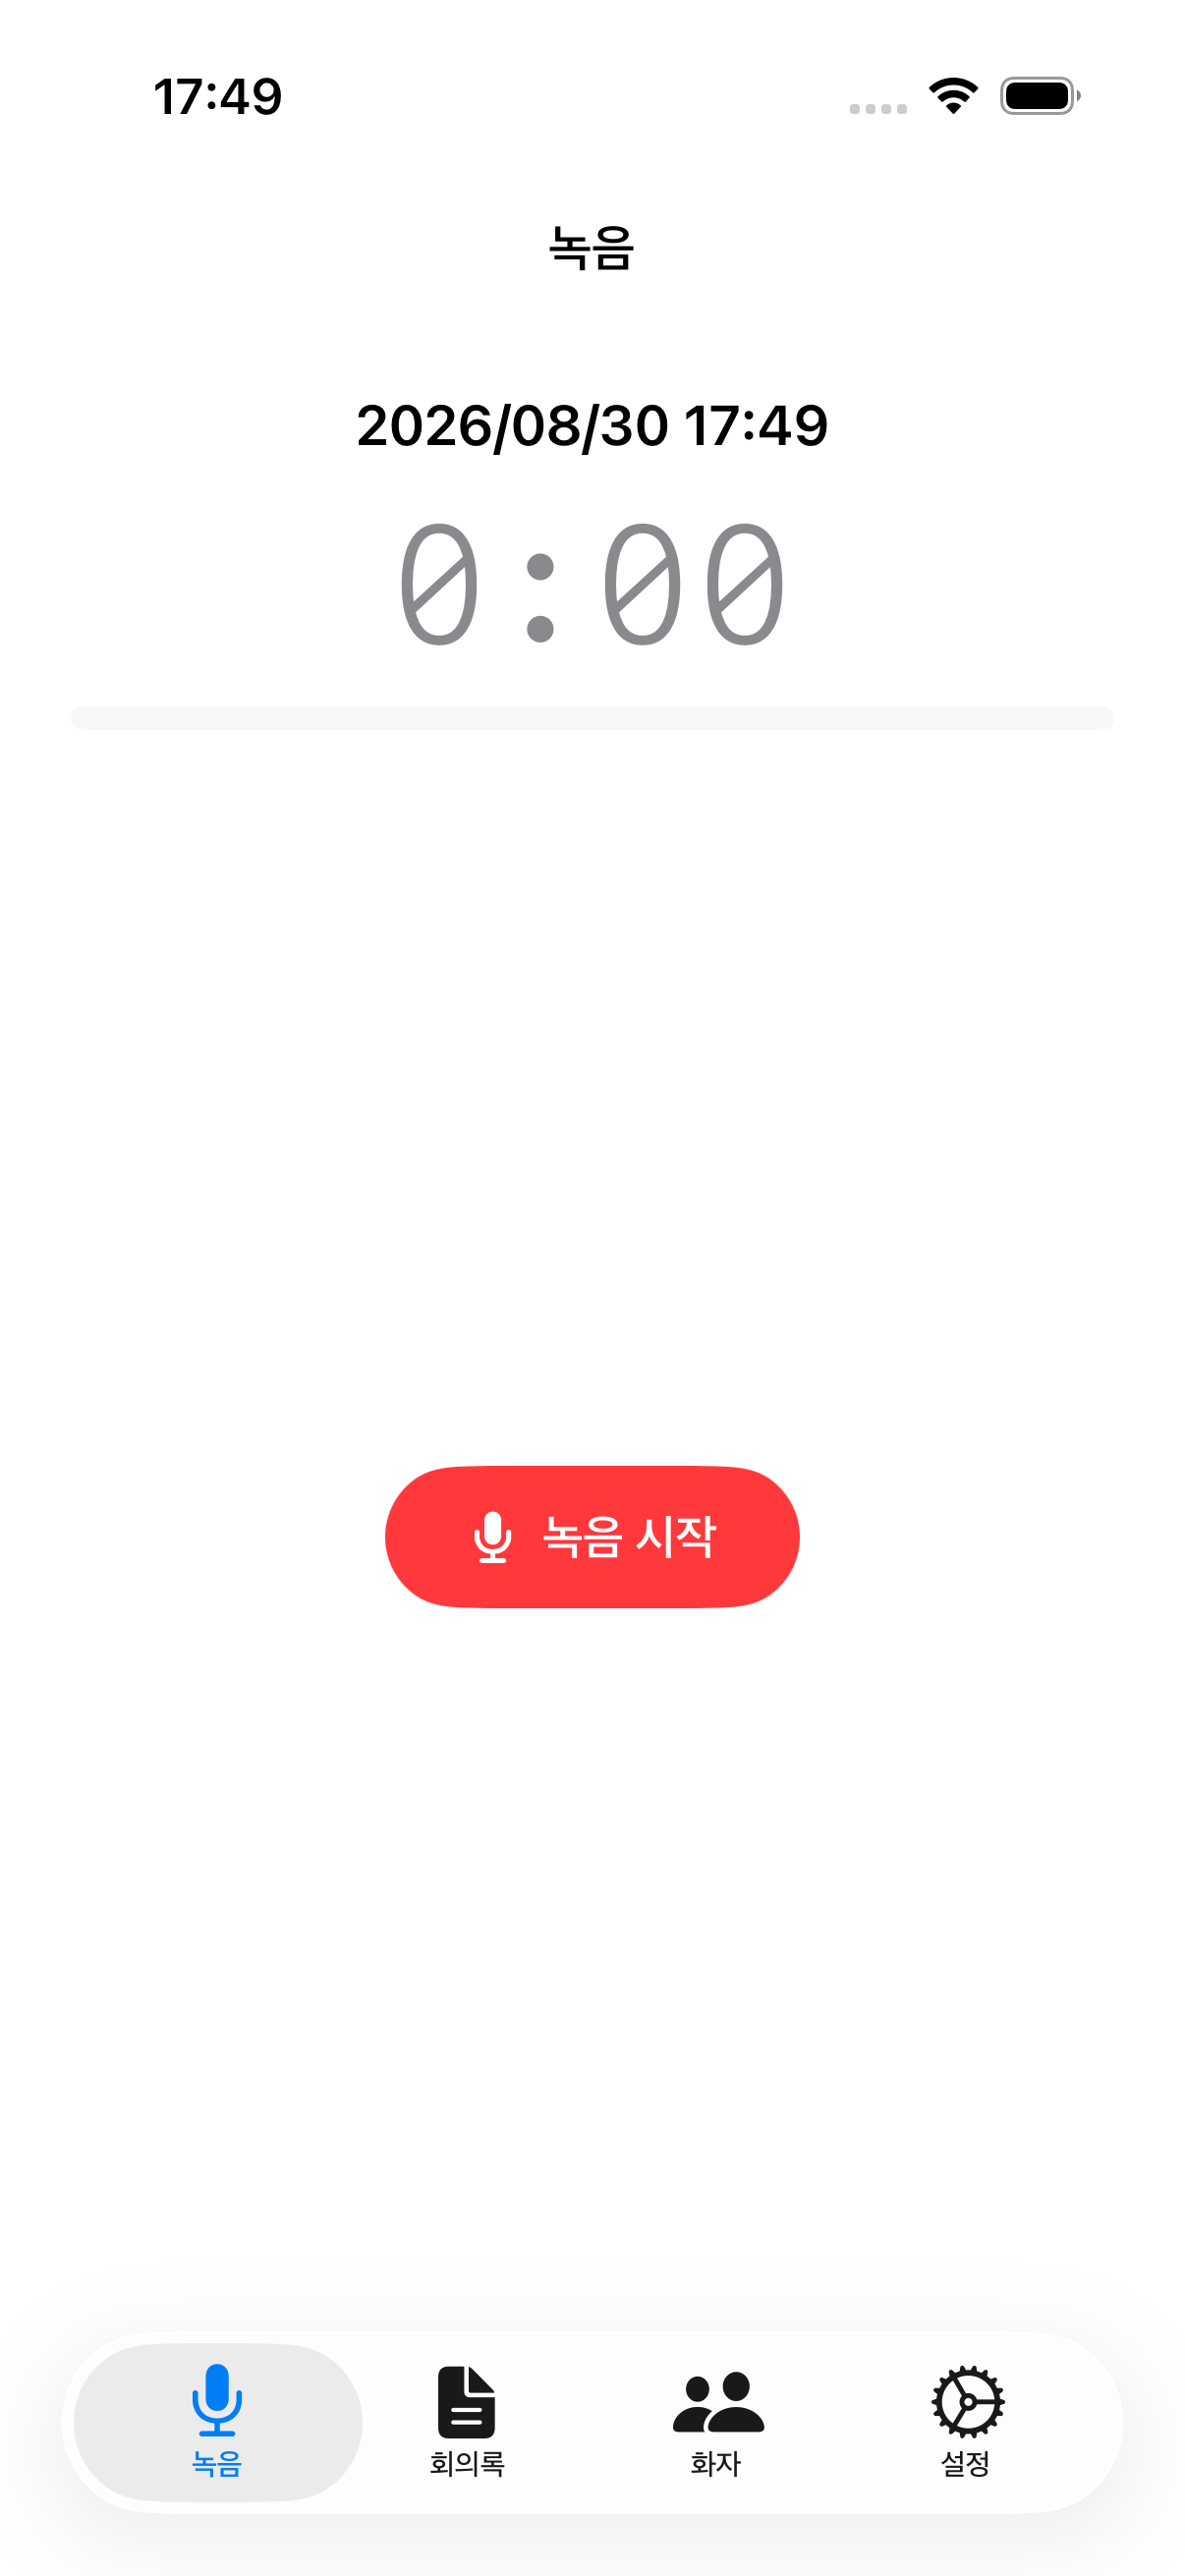
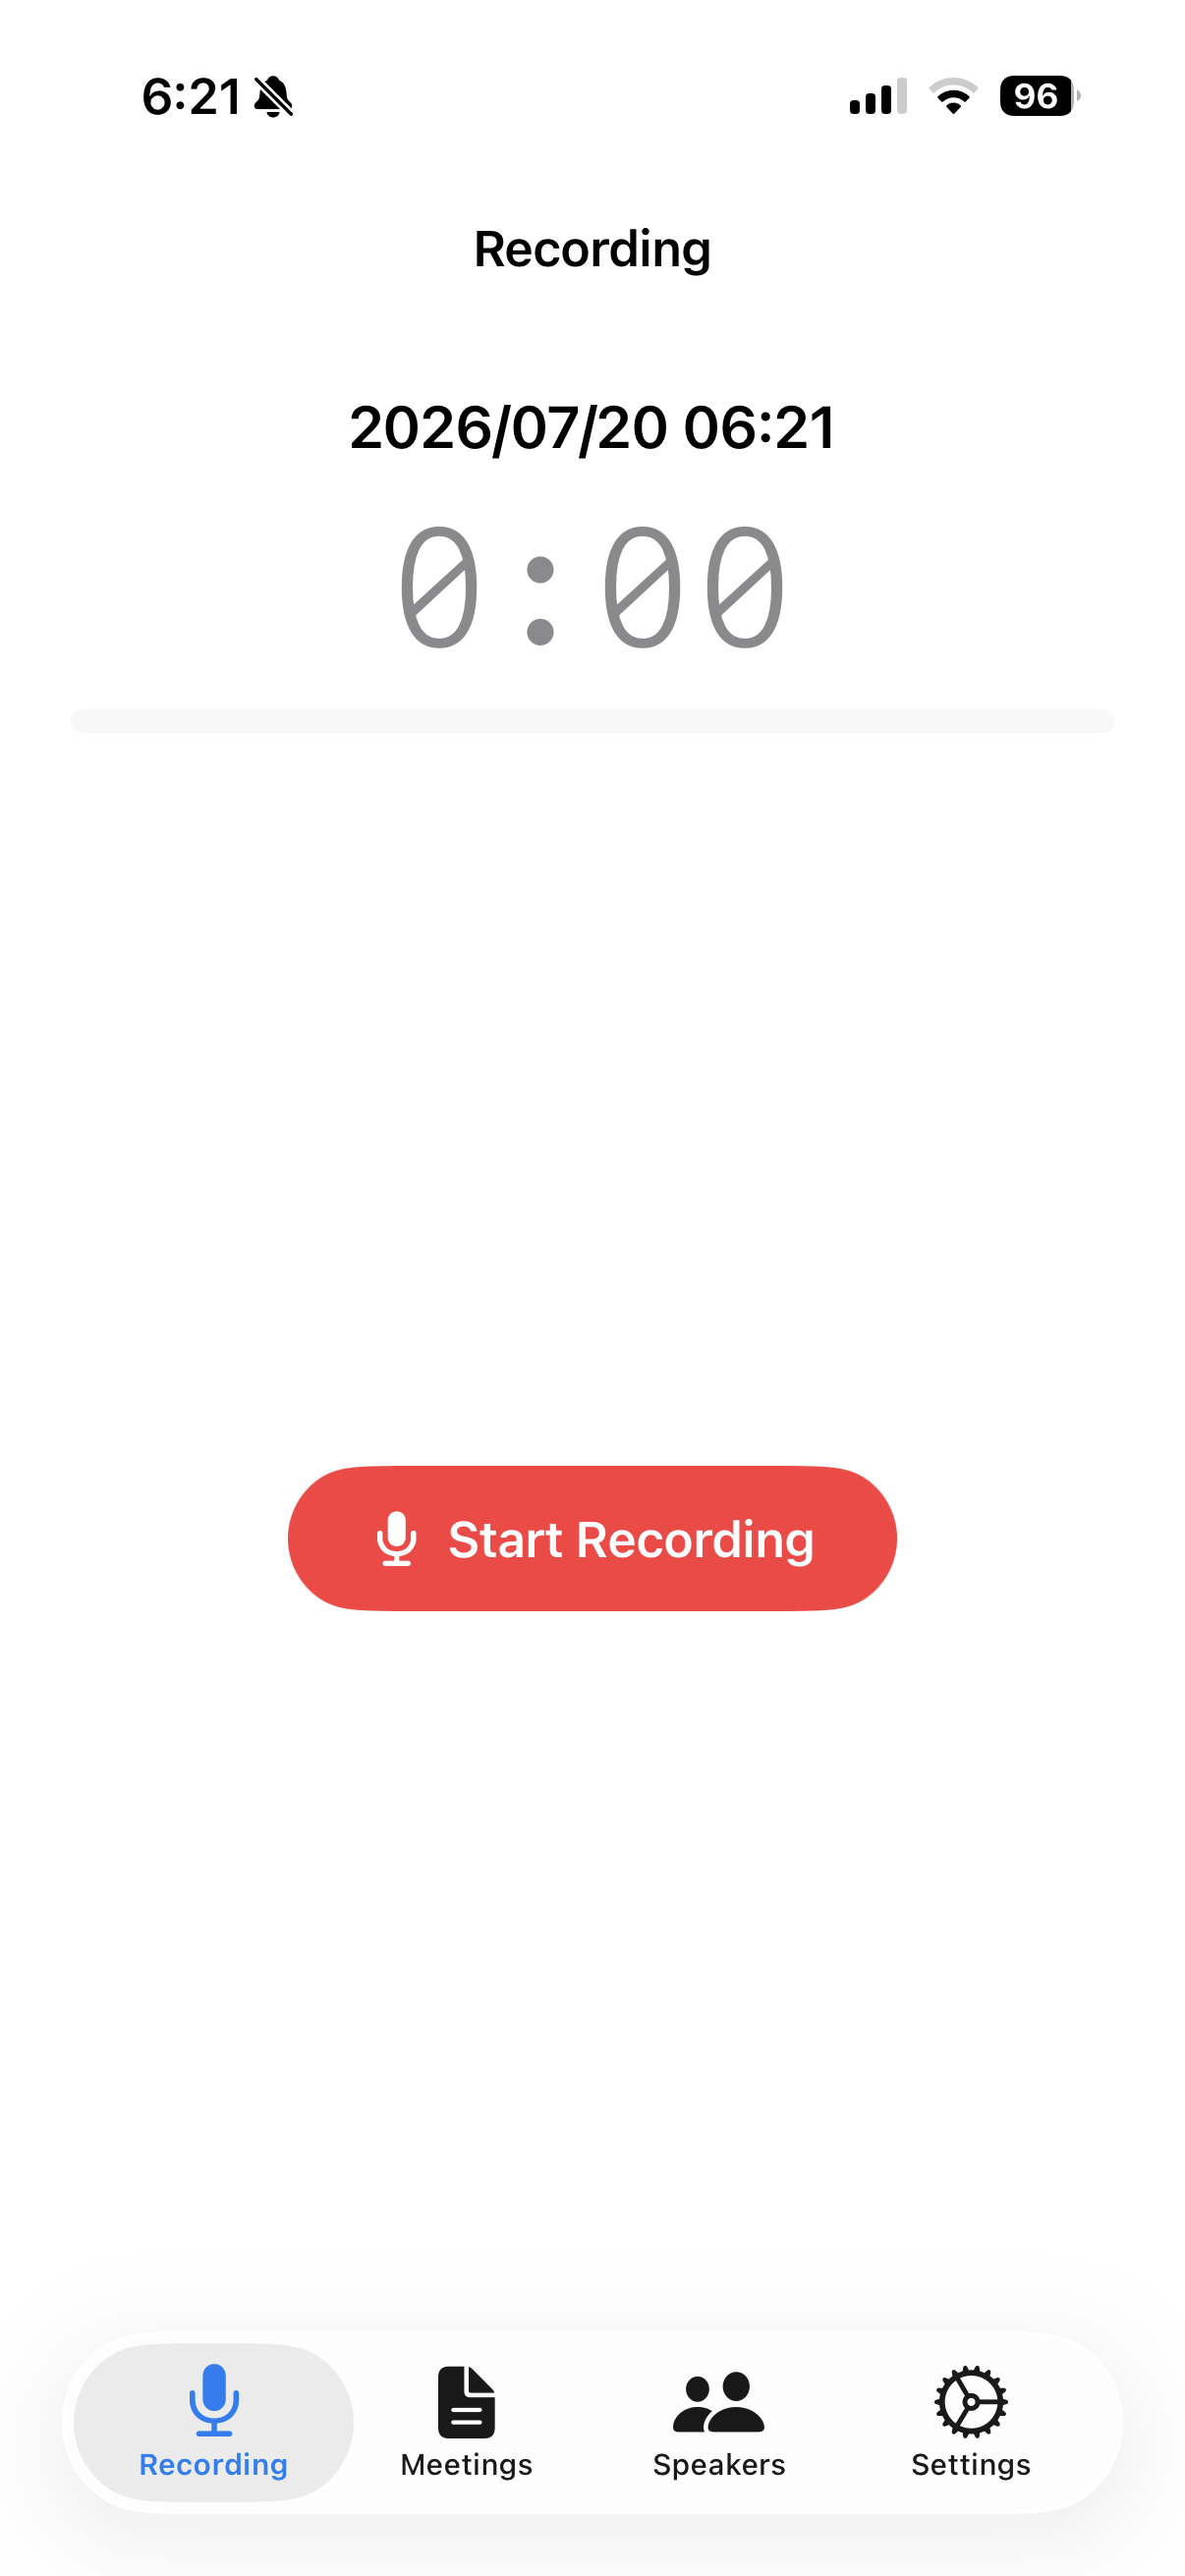
On the Recording tab, tap "Start Recording." A timer and audio level meter appear while recording, and a warning shows if no microphone input is detected.
- While recording: Pause / Stop
- While paused: Resume / Stop
When you stop, you'll see a "Recording saved" confirmation, and transcription and speaker separation start automatically.
Lock screen & Control Center
While recording, a Live Activity appears on the Lock Screen and in the Dynamic Island, letting you pause, resume, or stop. Pausing takes effect immediately, but resuming or stopping briefly opens the app to complete the action (due to background audio session constraints). You can also add a "Start Recording" control to Control Center or the Lock Screen — tapping it opens the app and starts recording automatically.
Choosing a meeting type
The meeting type (Meeting, Lecture, or Interview) isn't chosen on the recording screen — it's set afterward on the meeting detail screen via the "Type" picker. Your last choice becomes the default next time.
📂 Importing Audio & Video Files
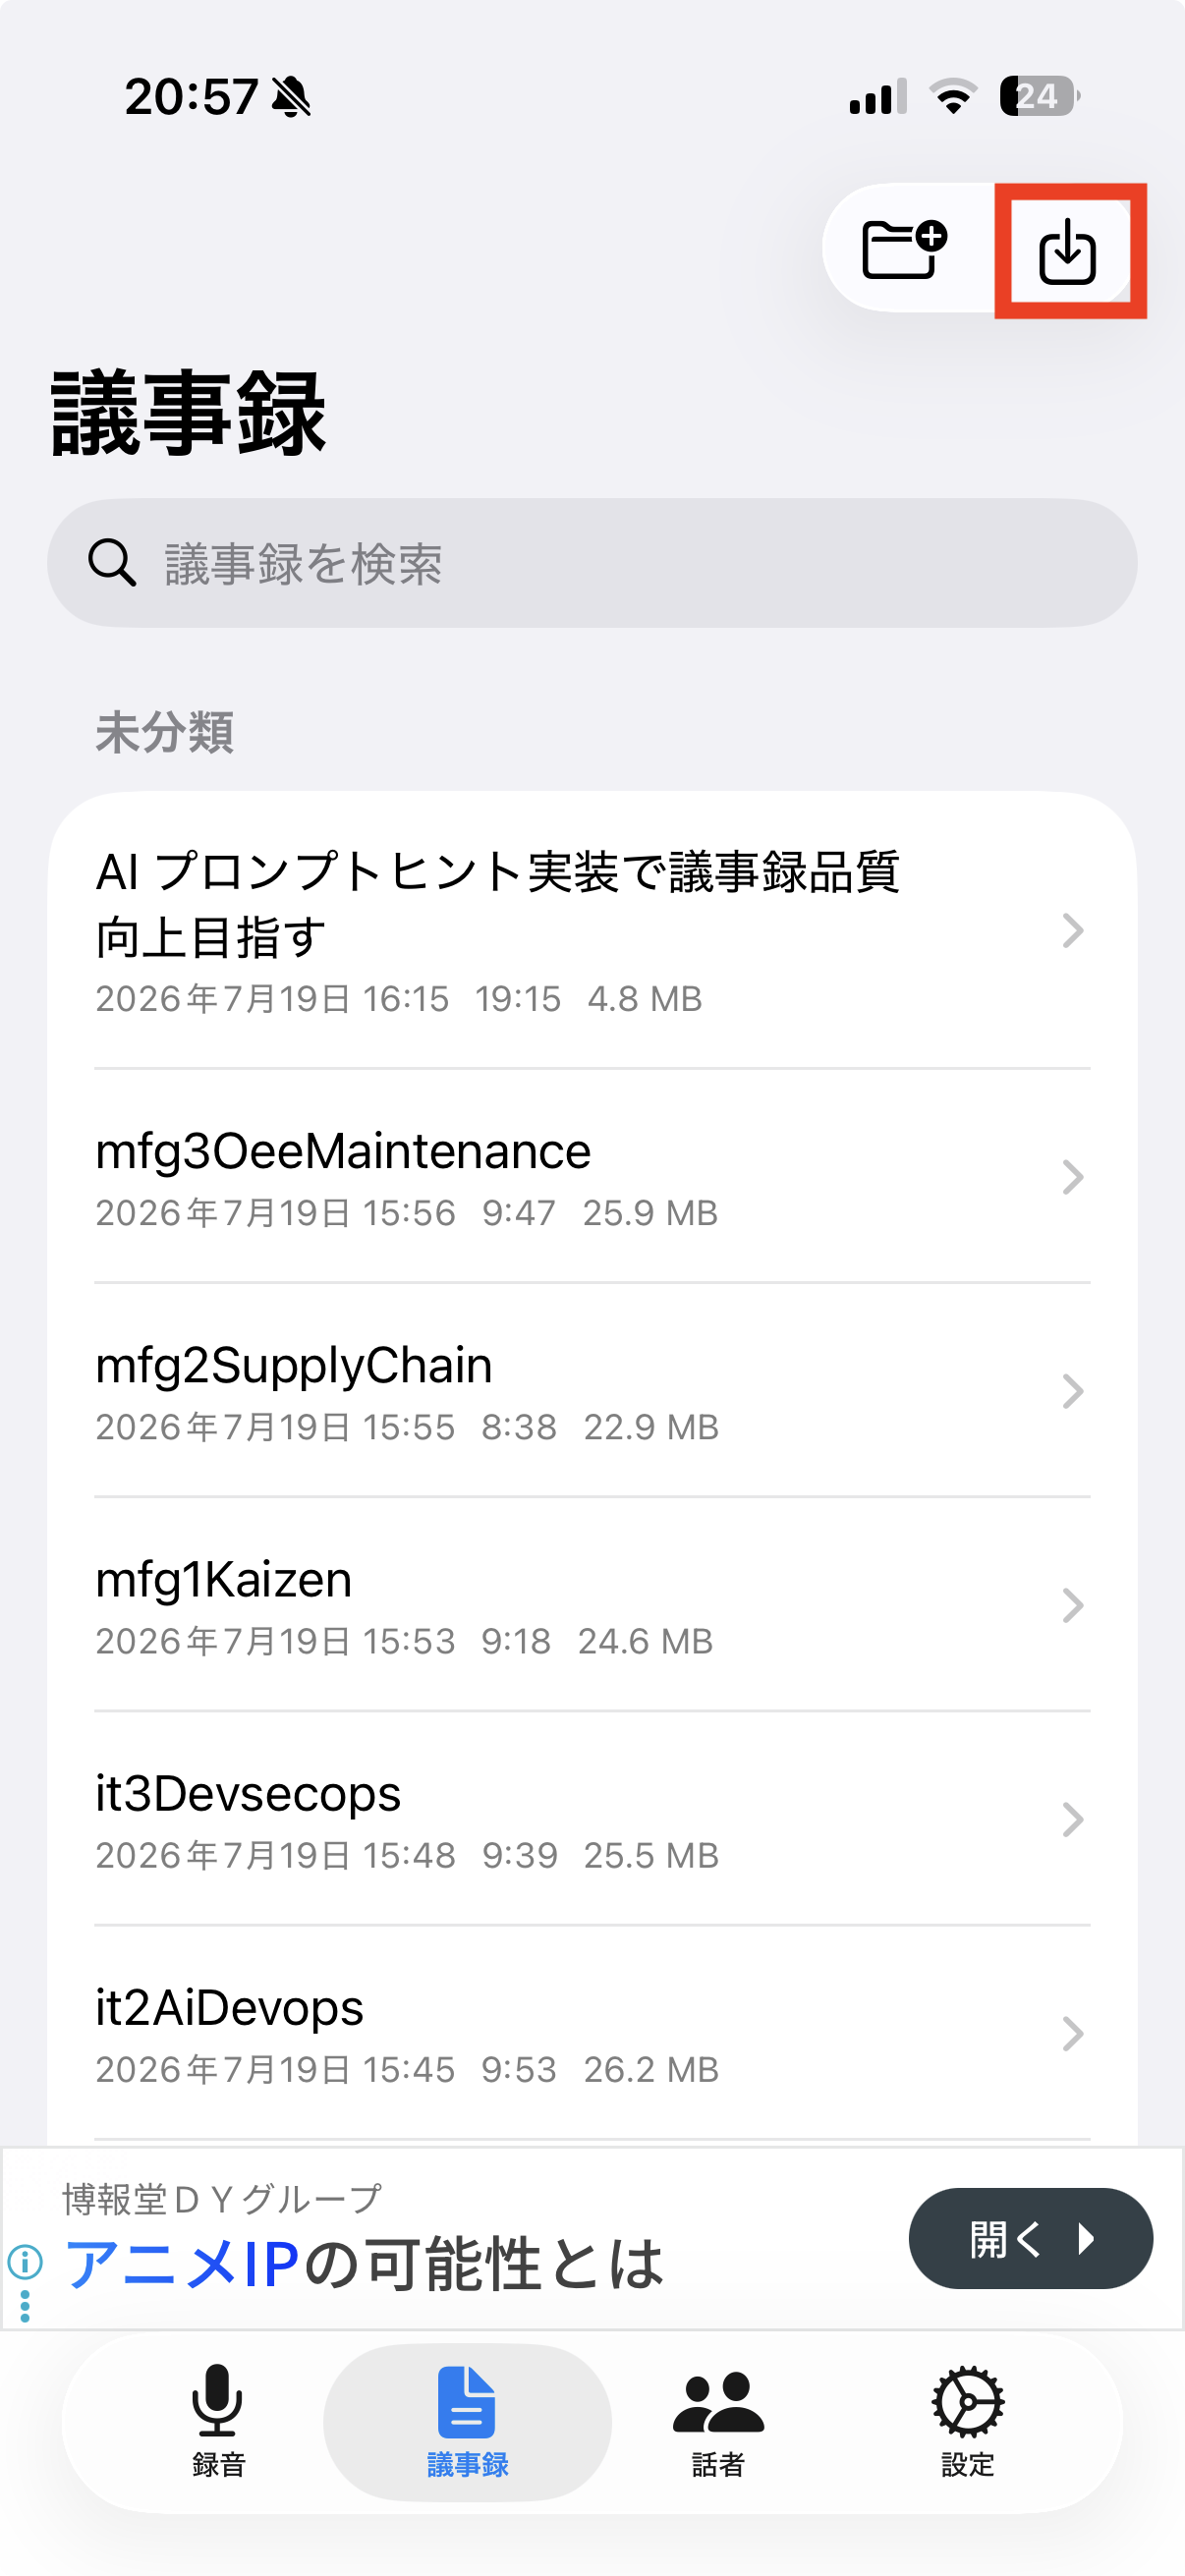
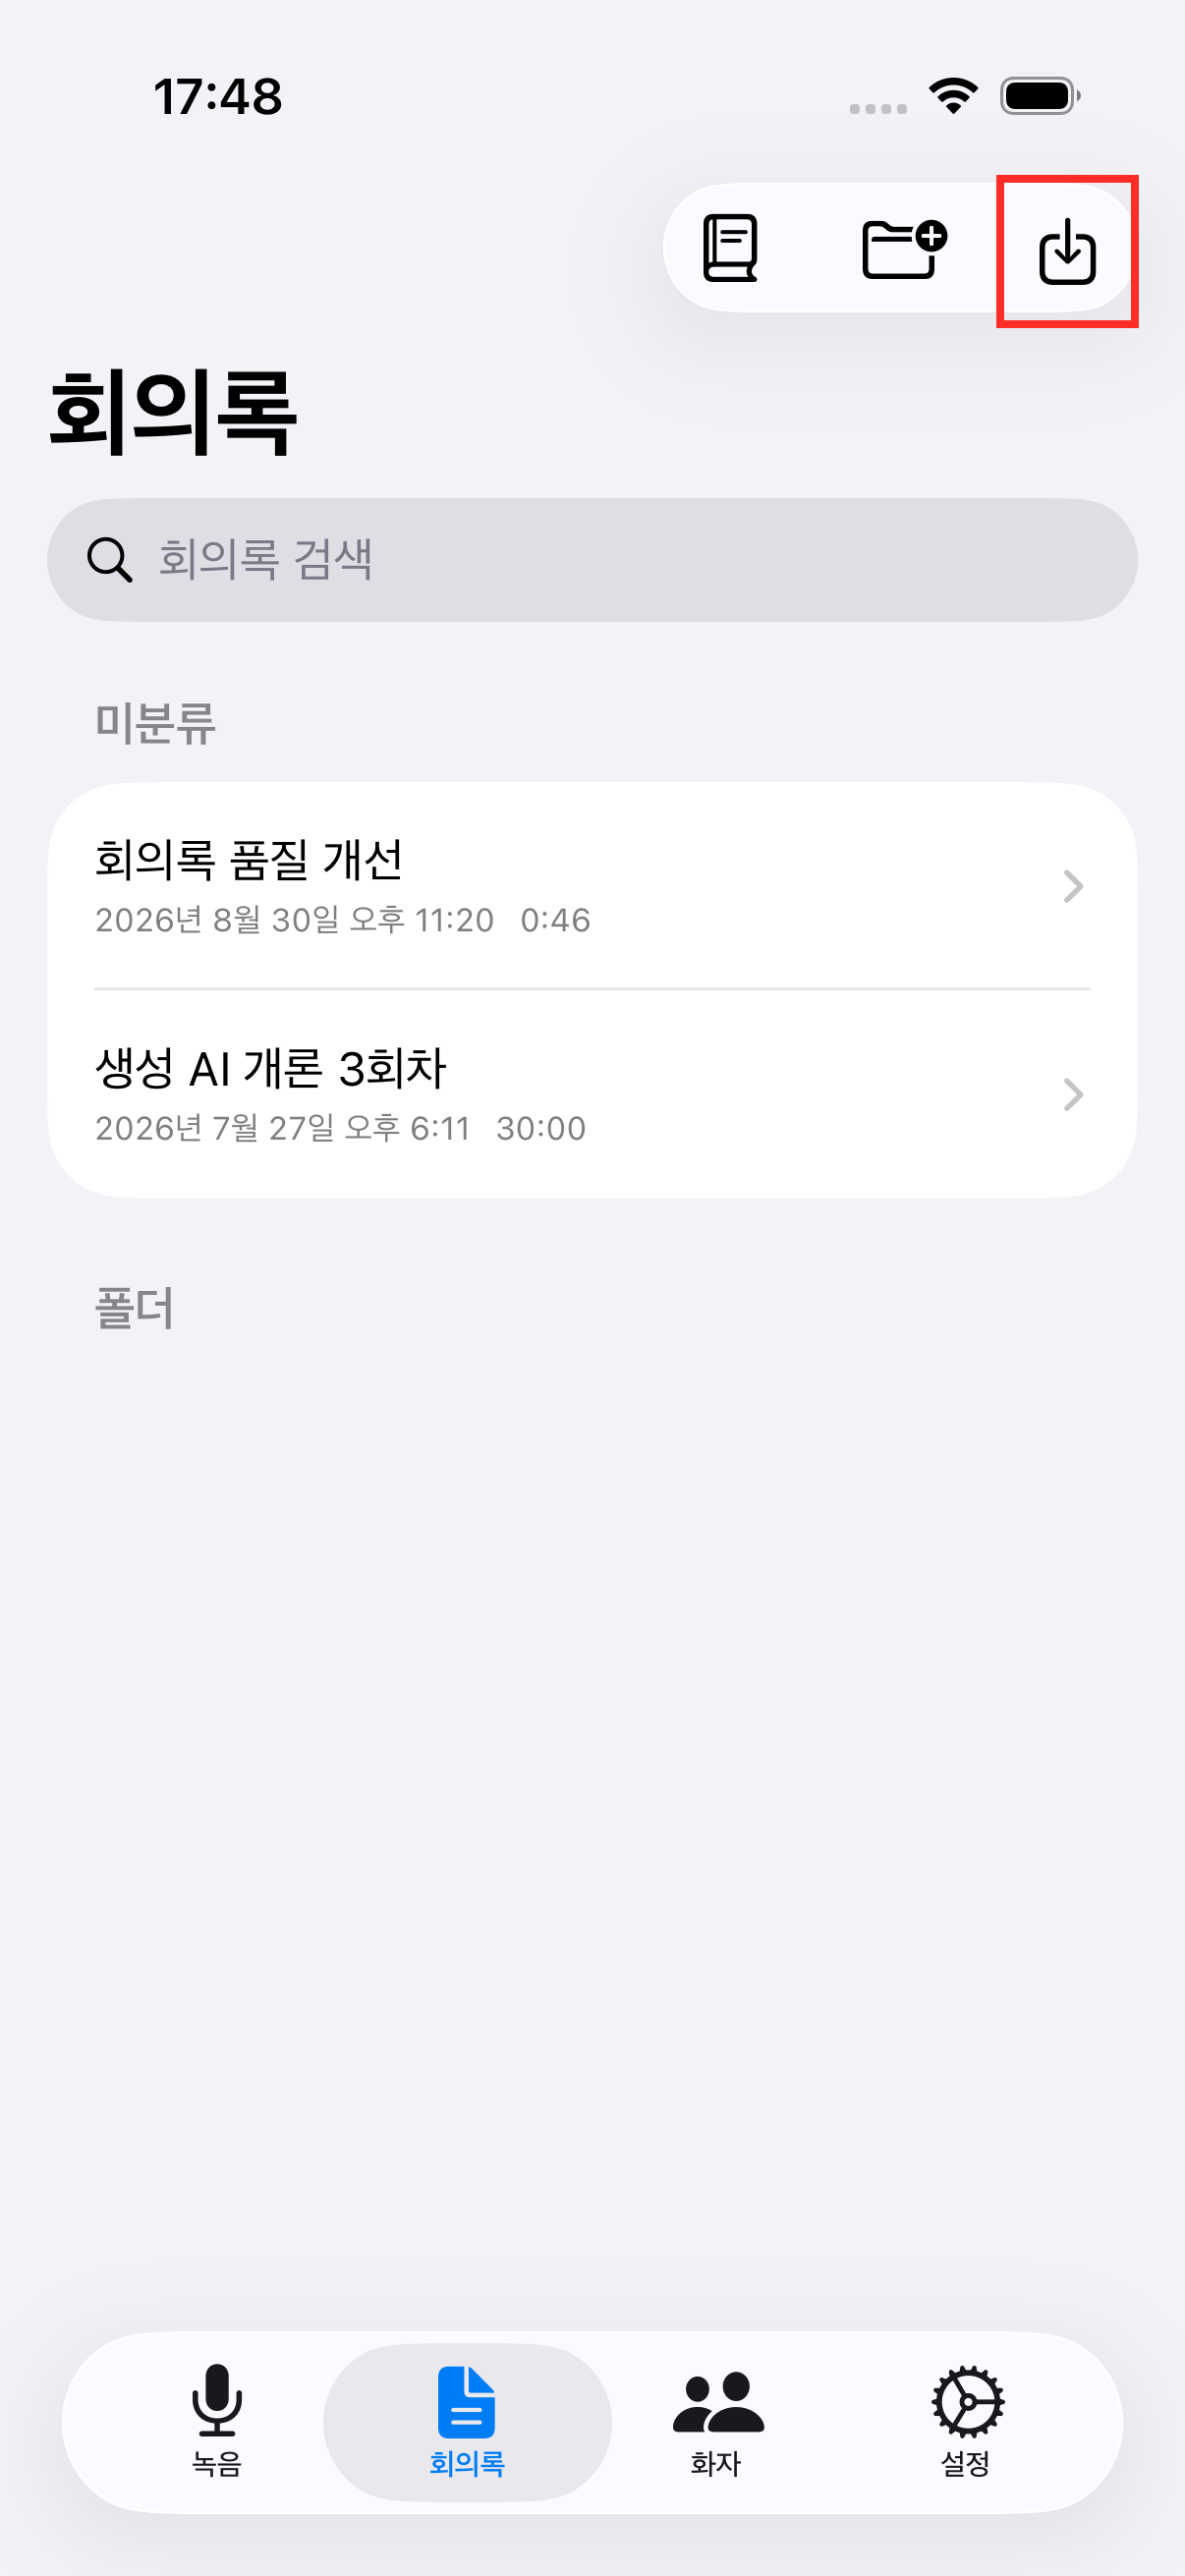
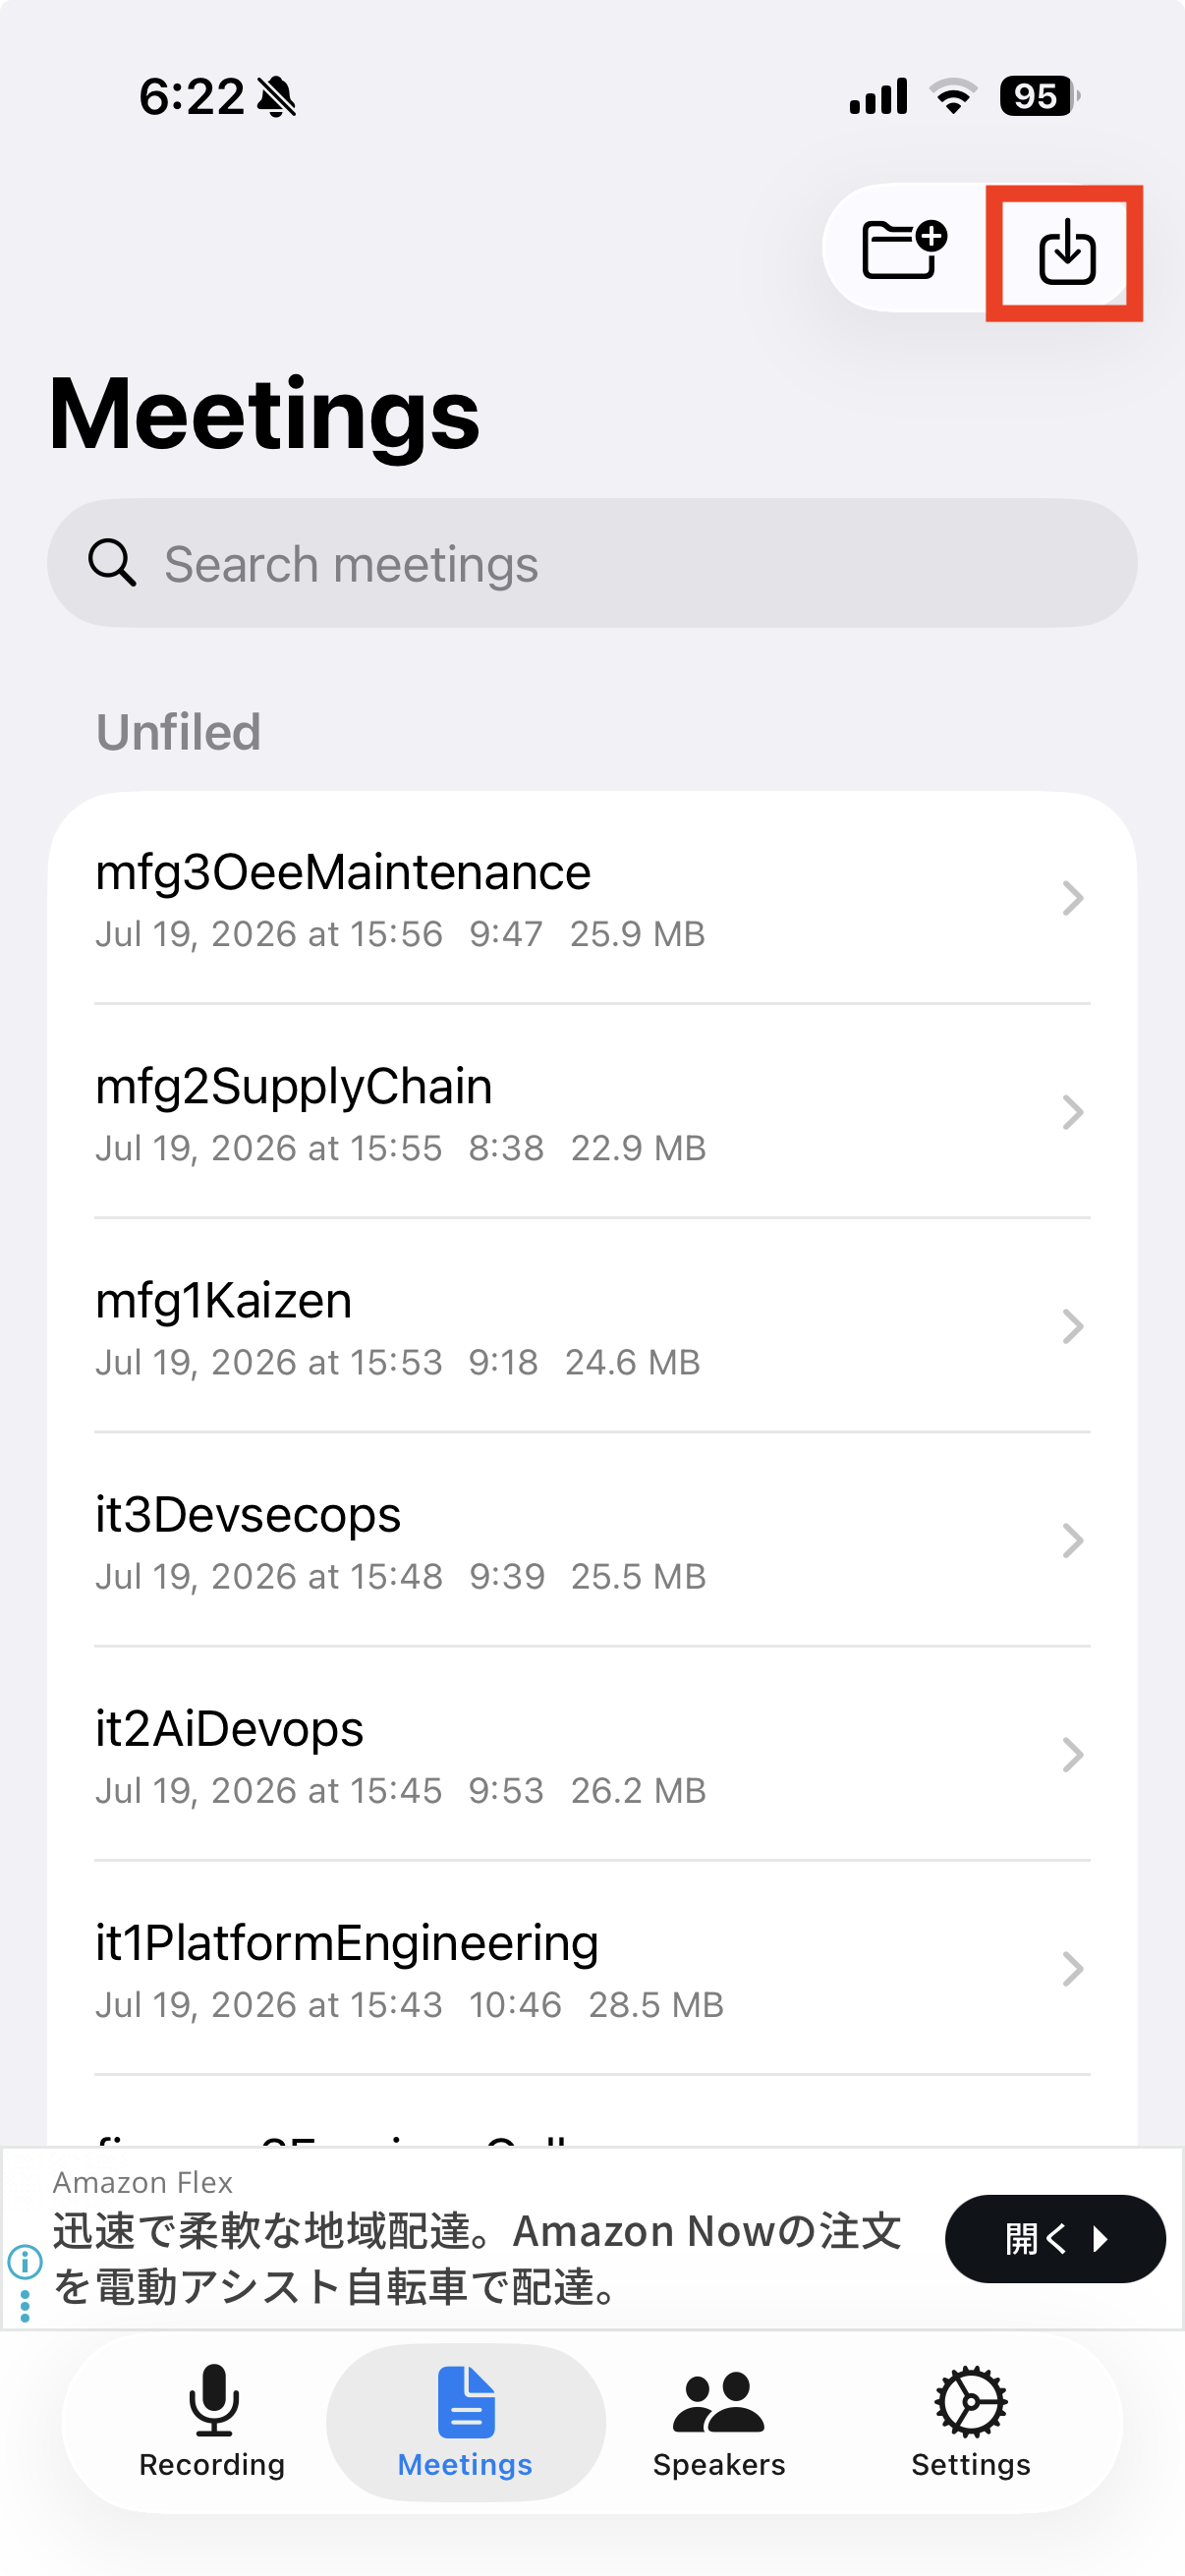
Tap the import icon (a downward arrow into a box) at the top of the Meetings tab to pick an existing audio or video file to transcribe. For video files, the audio track is extracted automatically. While importing, a status banner shows progress (transcribing, separating speakers, applying dictionary correction).
📷 images/import-1-en.png
✏️ Reviewing & Editing the Transcript
📷 images/transcript-1-en.png
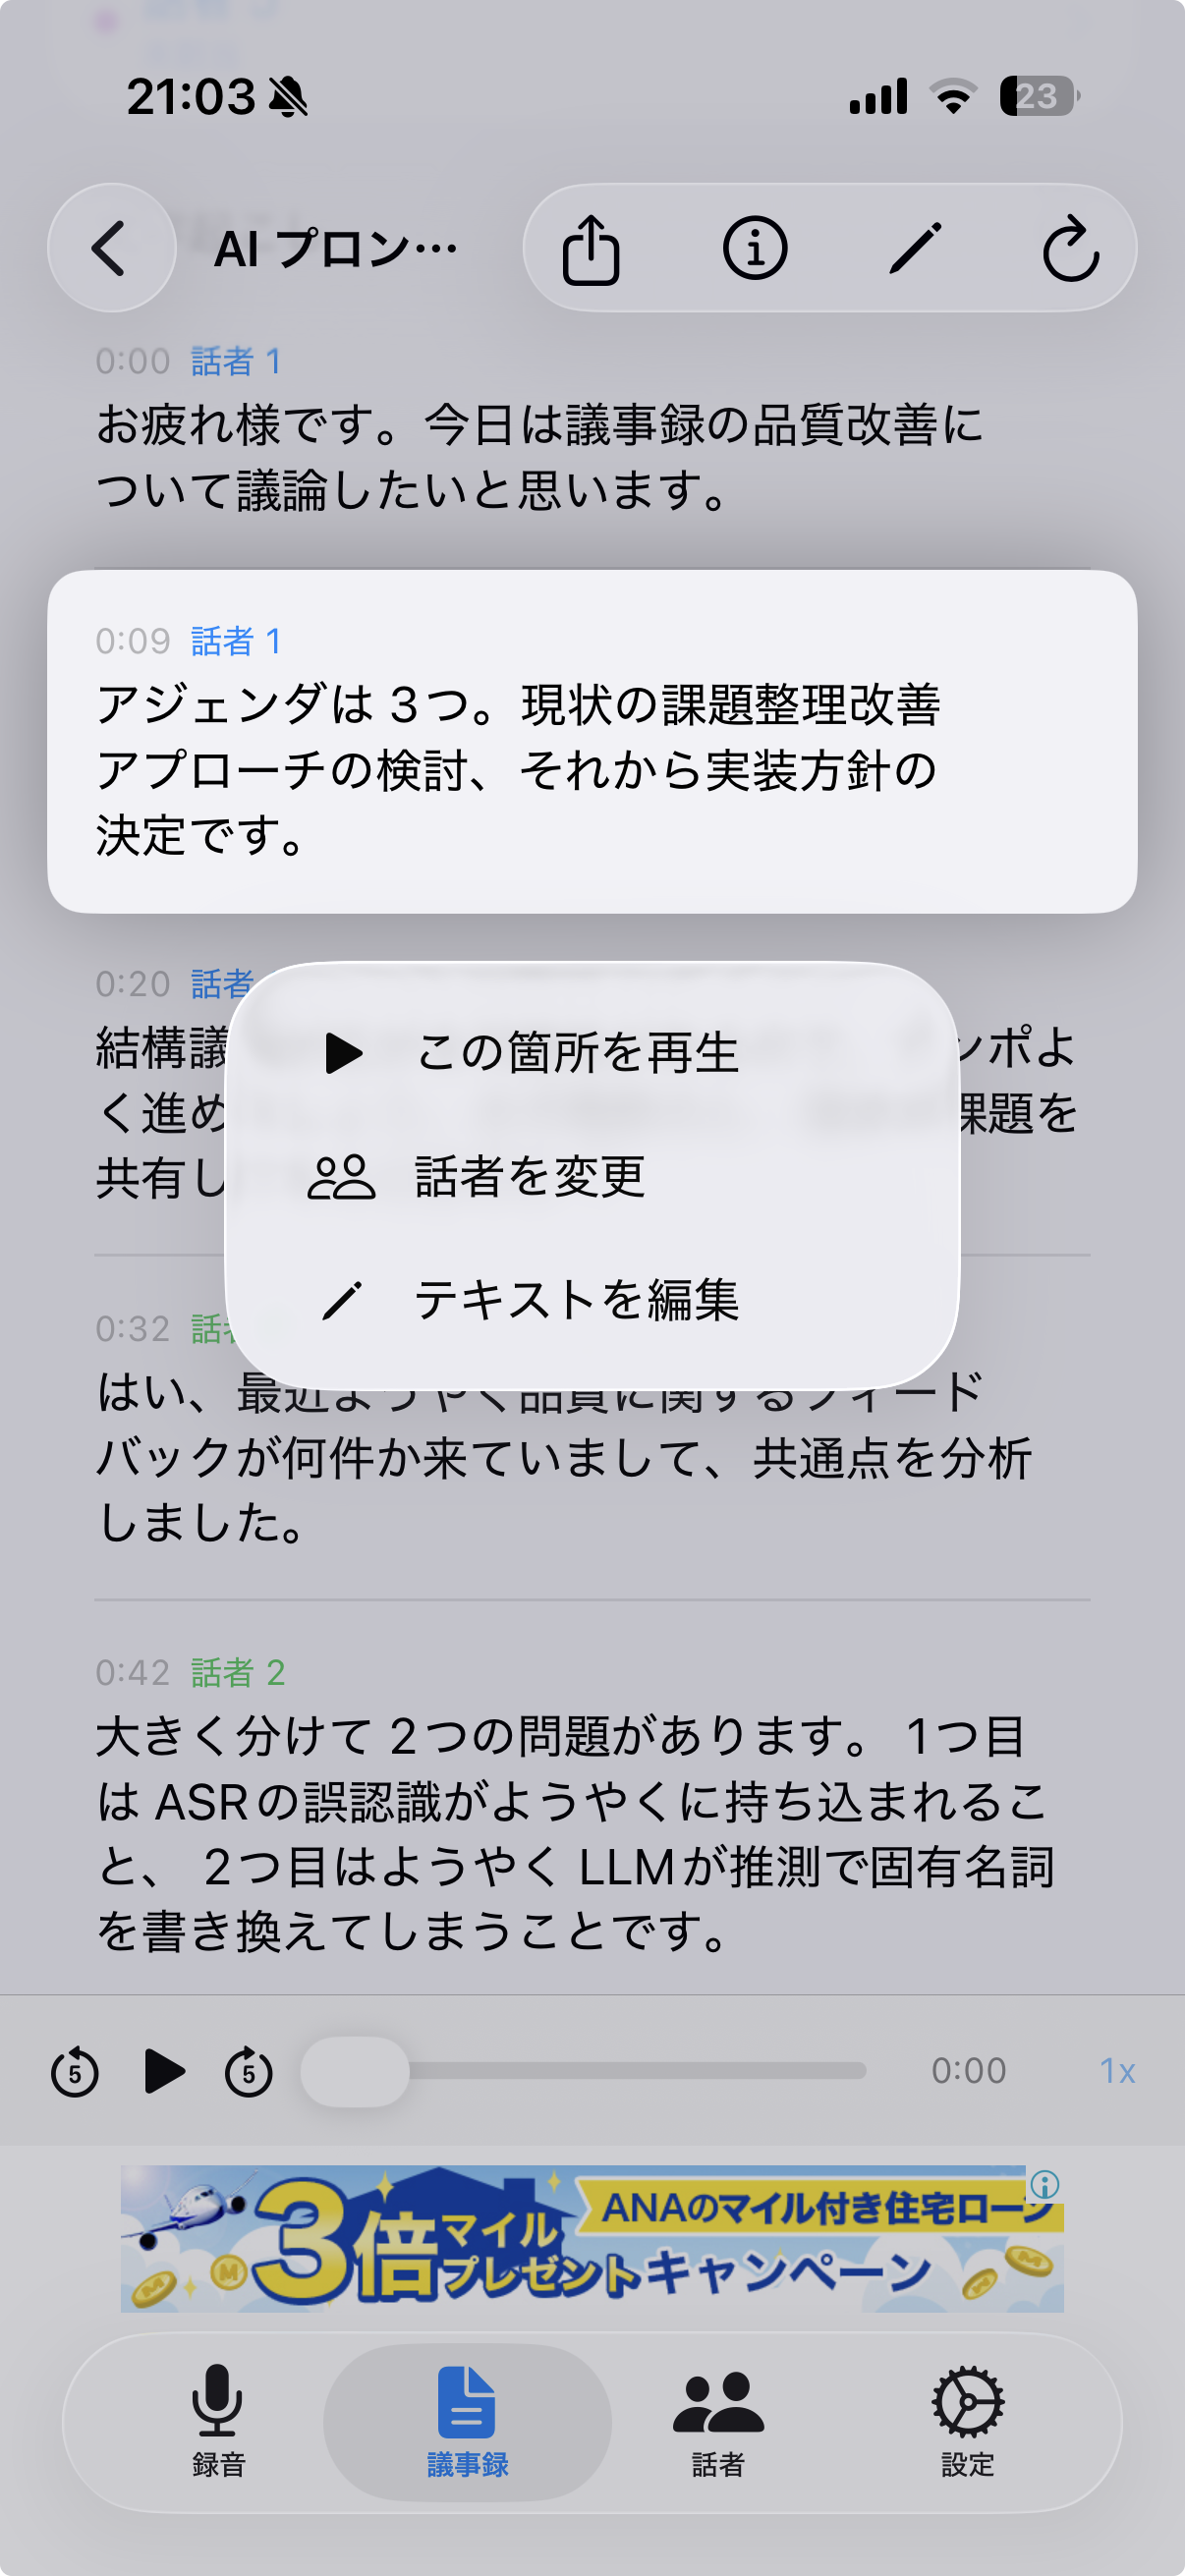
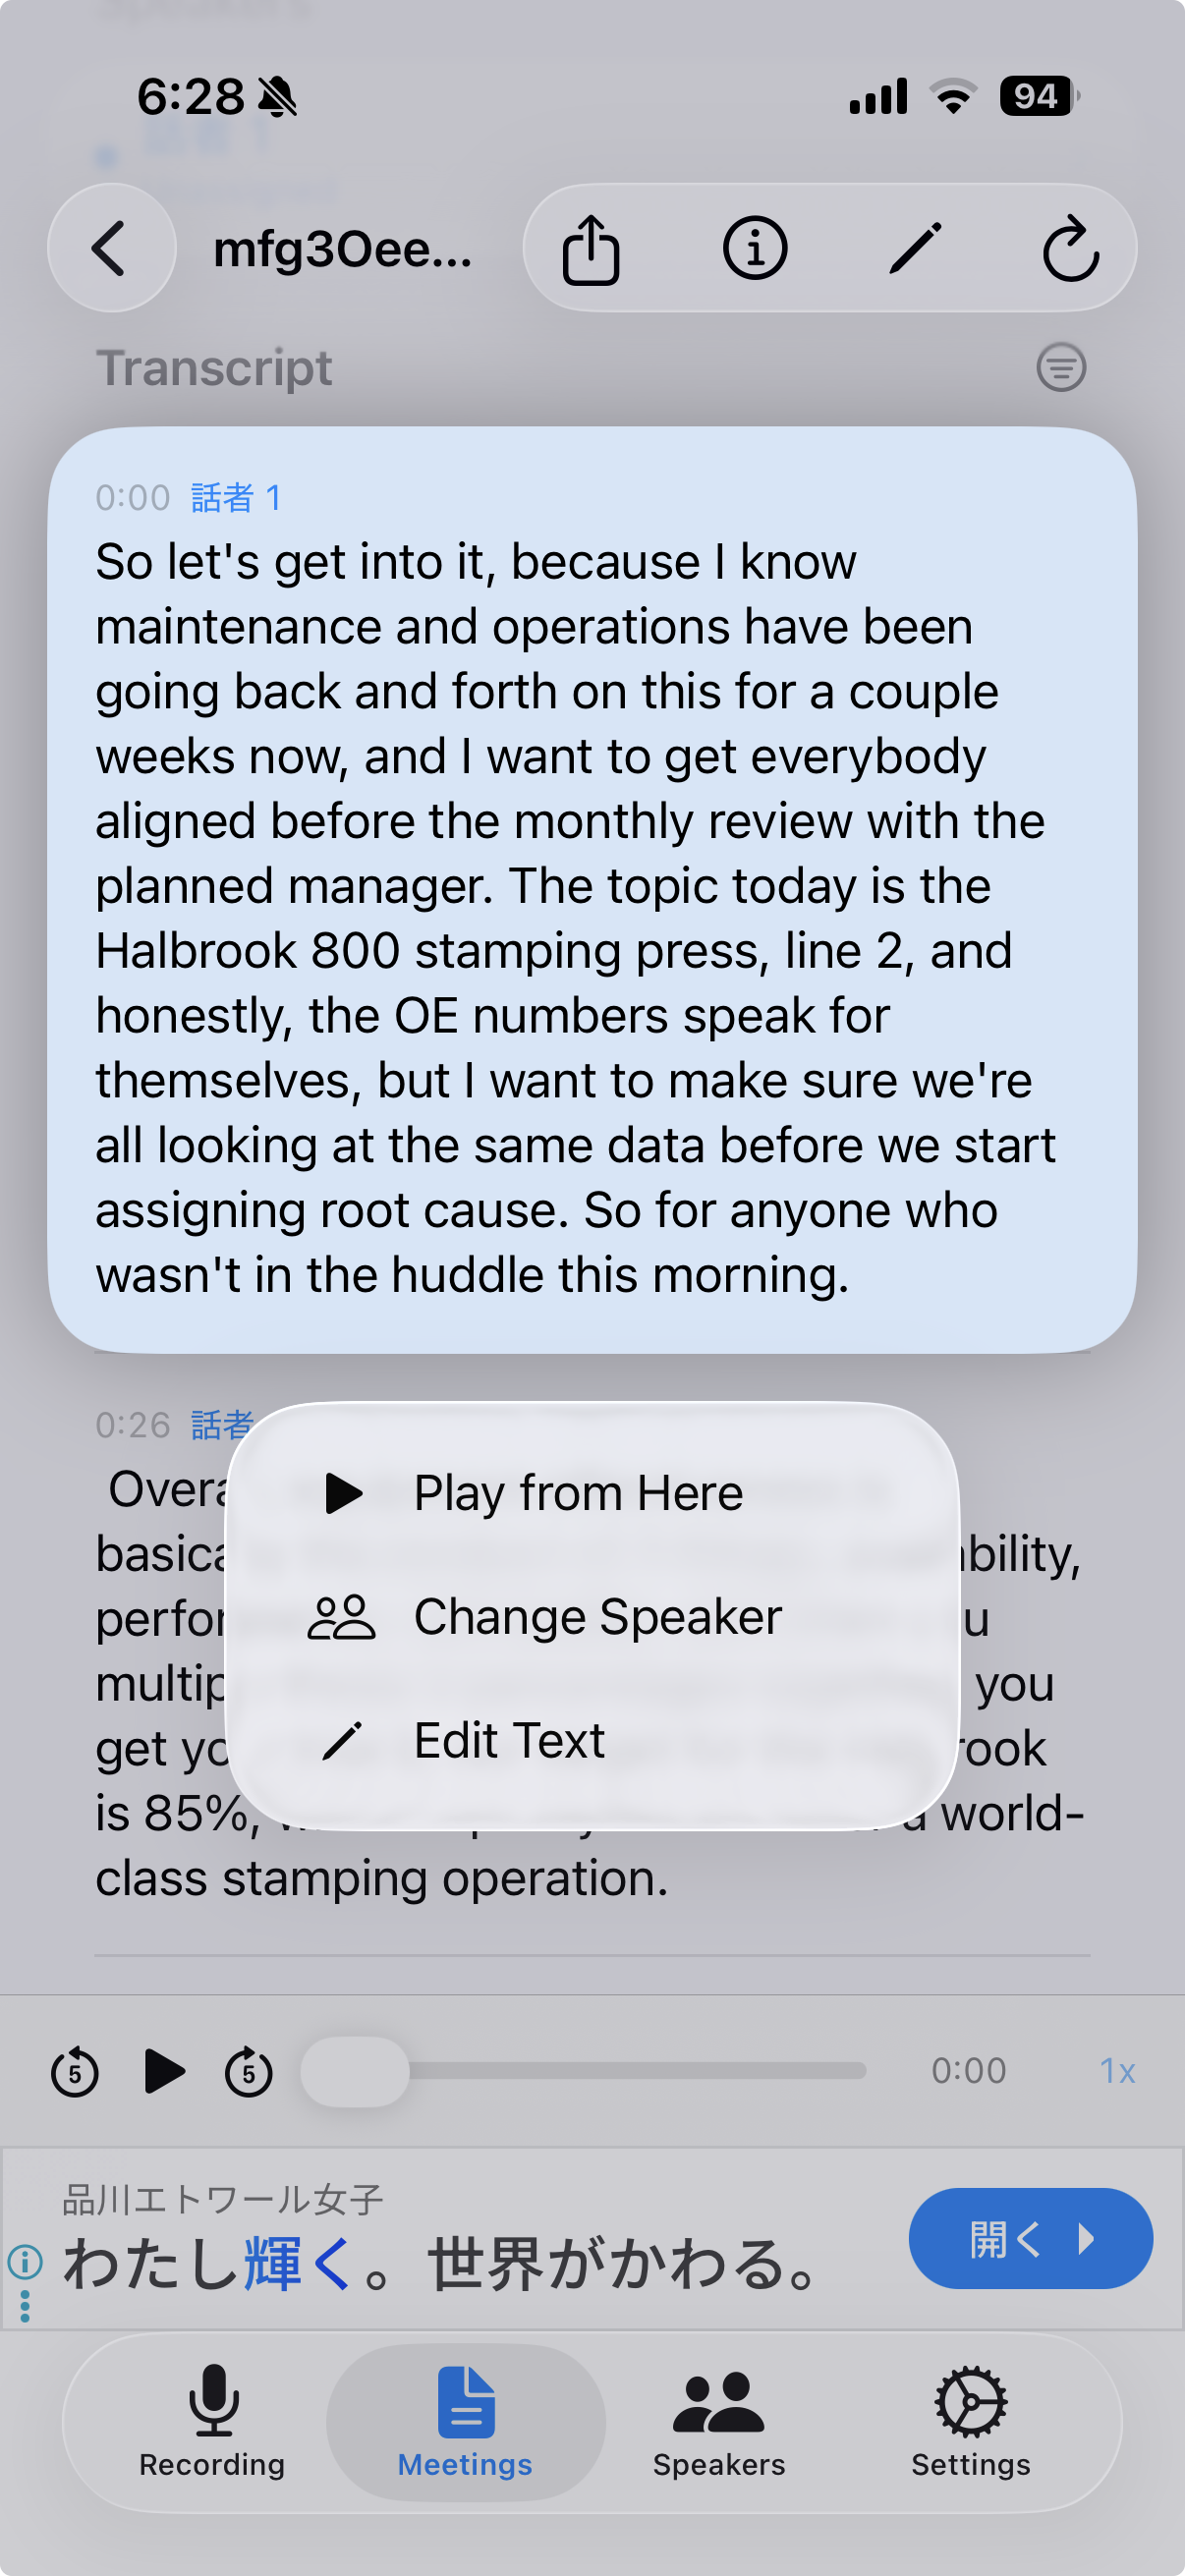
On the meeting detail screen, tapping a line plays that part of the recording. Long-pressing opens a menu with:
- Play this section
- Change speaker
- Edit text
Use "Edit text" to freely correct typos or mistranscriptions.
👥 Automatic Speaker Identification
When transcription finishes, the app matches each voice against previously learned voice profiles and automatically assigns a name on a match. Accuracy can be tuned in Settings via "Speaker Separation Sensitivity" and "Speaker Matching Level."
1
Check the auto-assignment
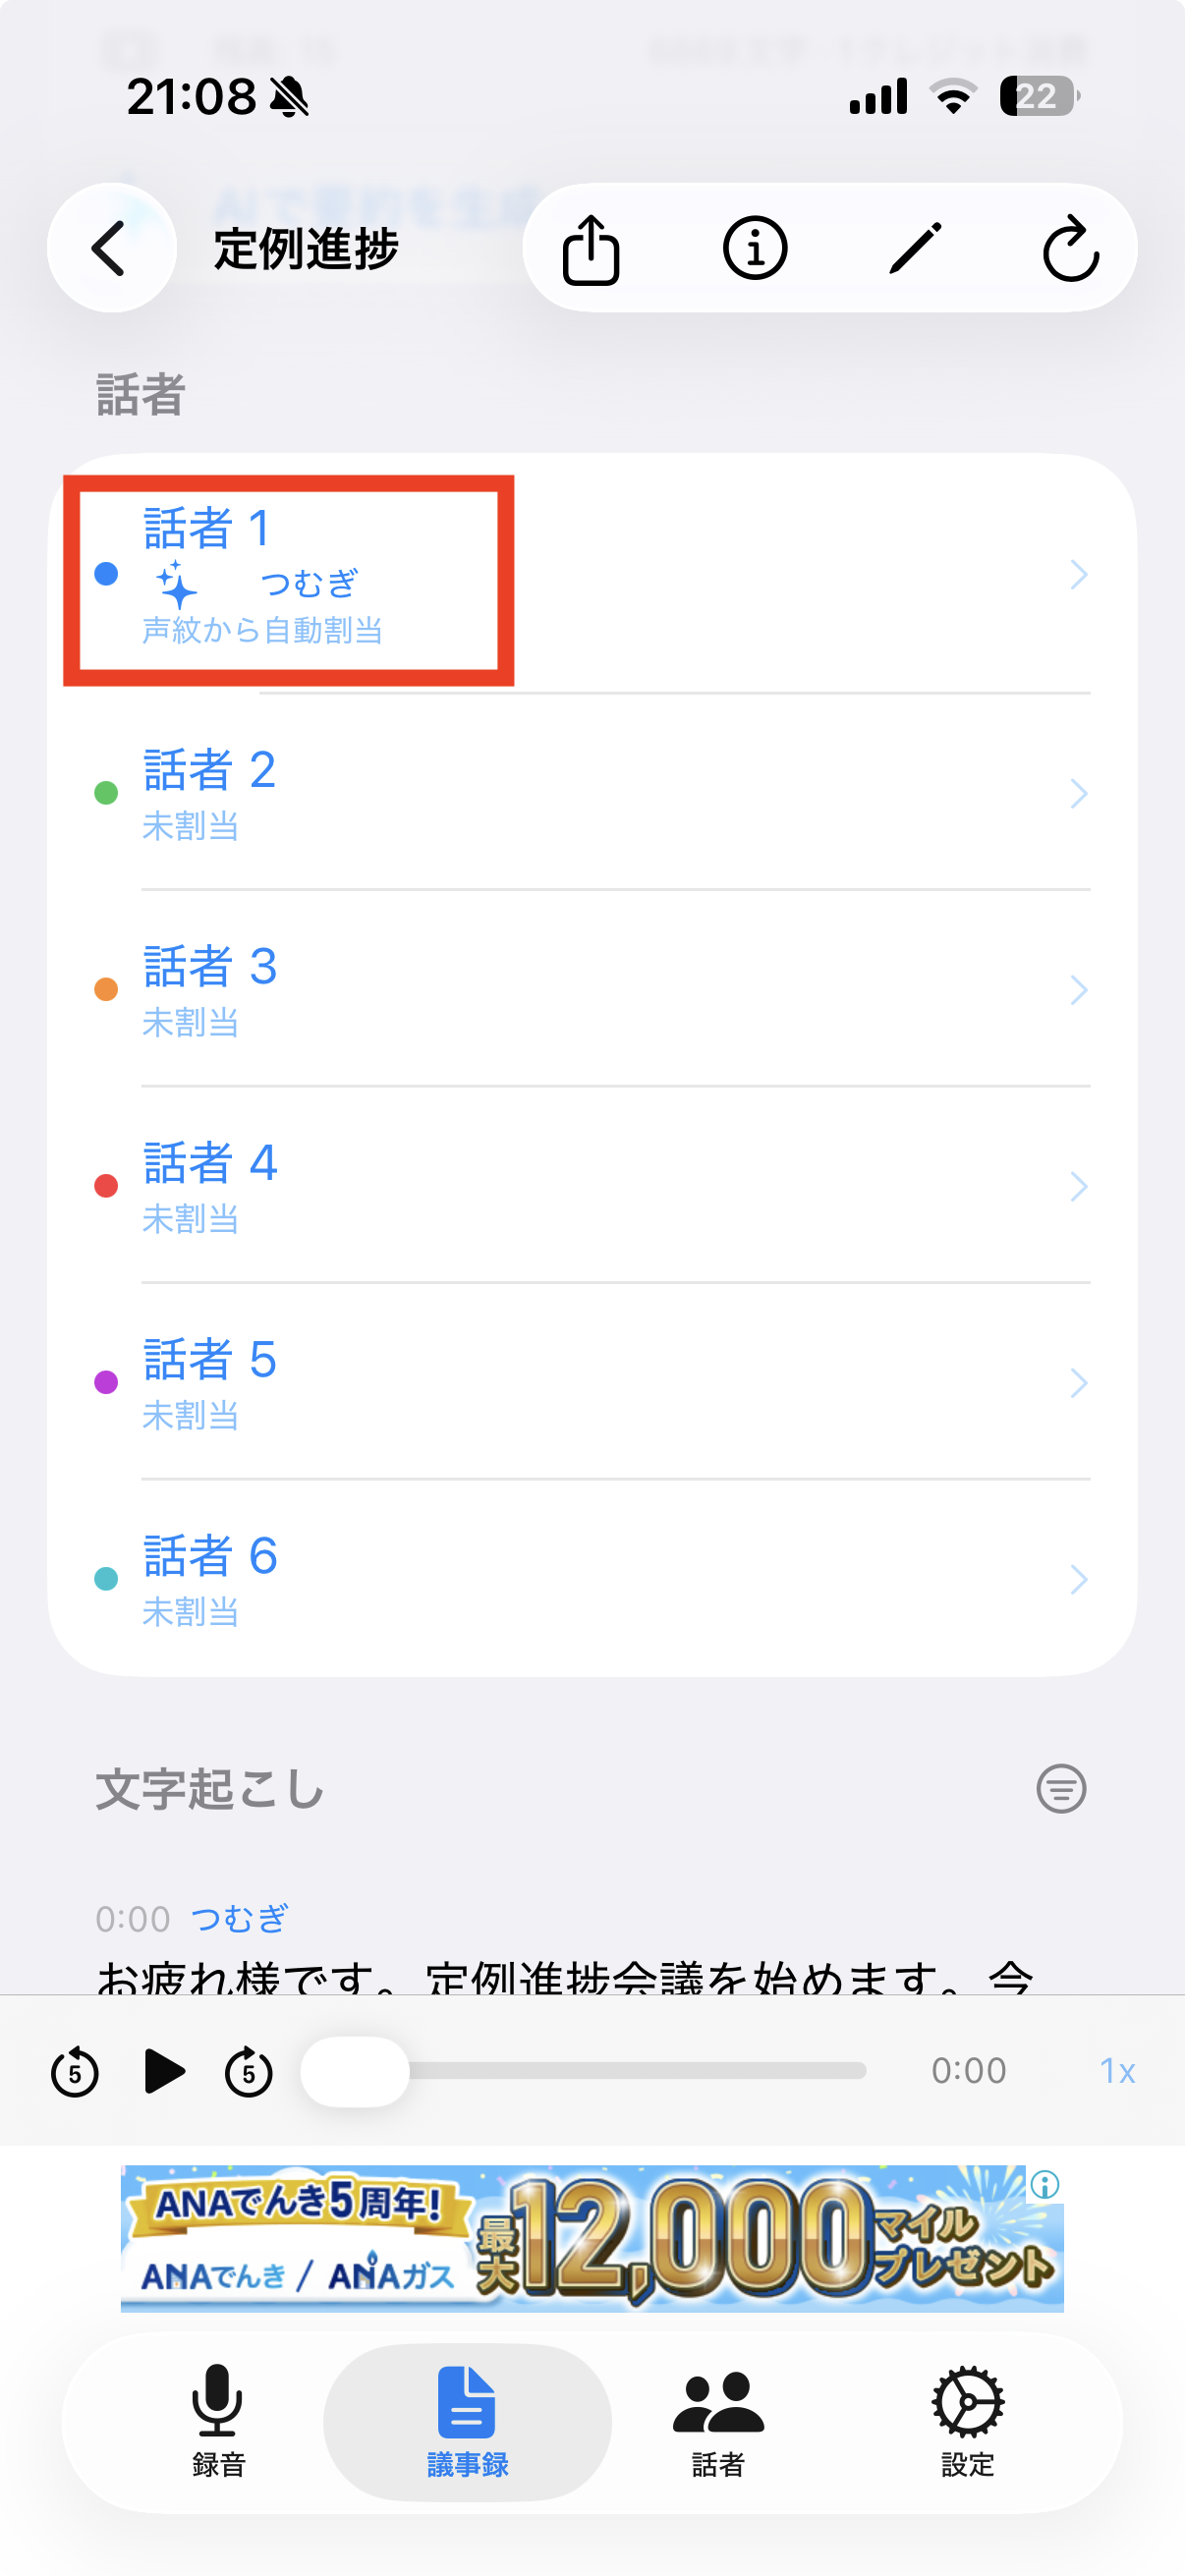
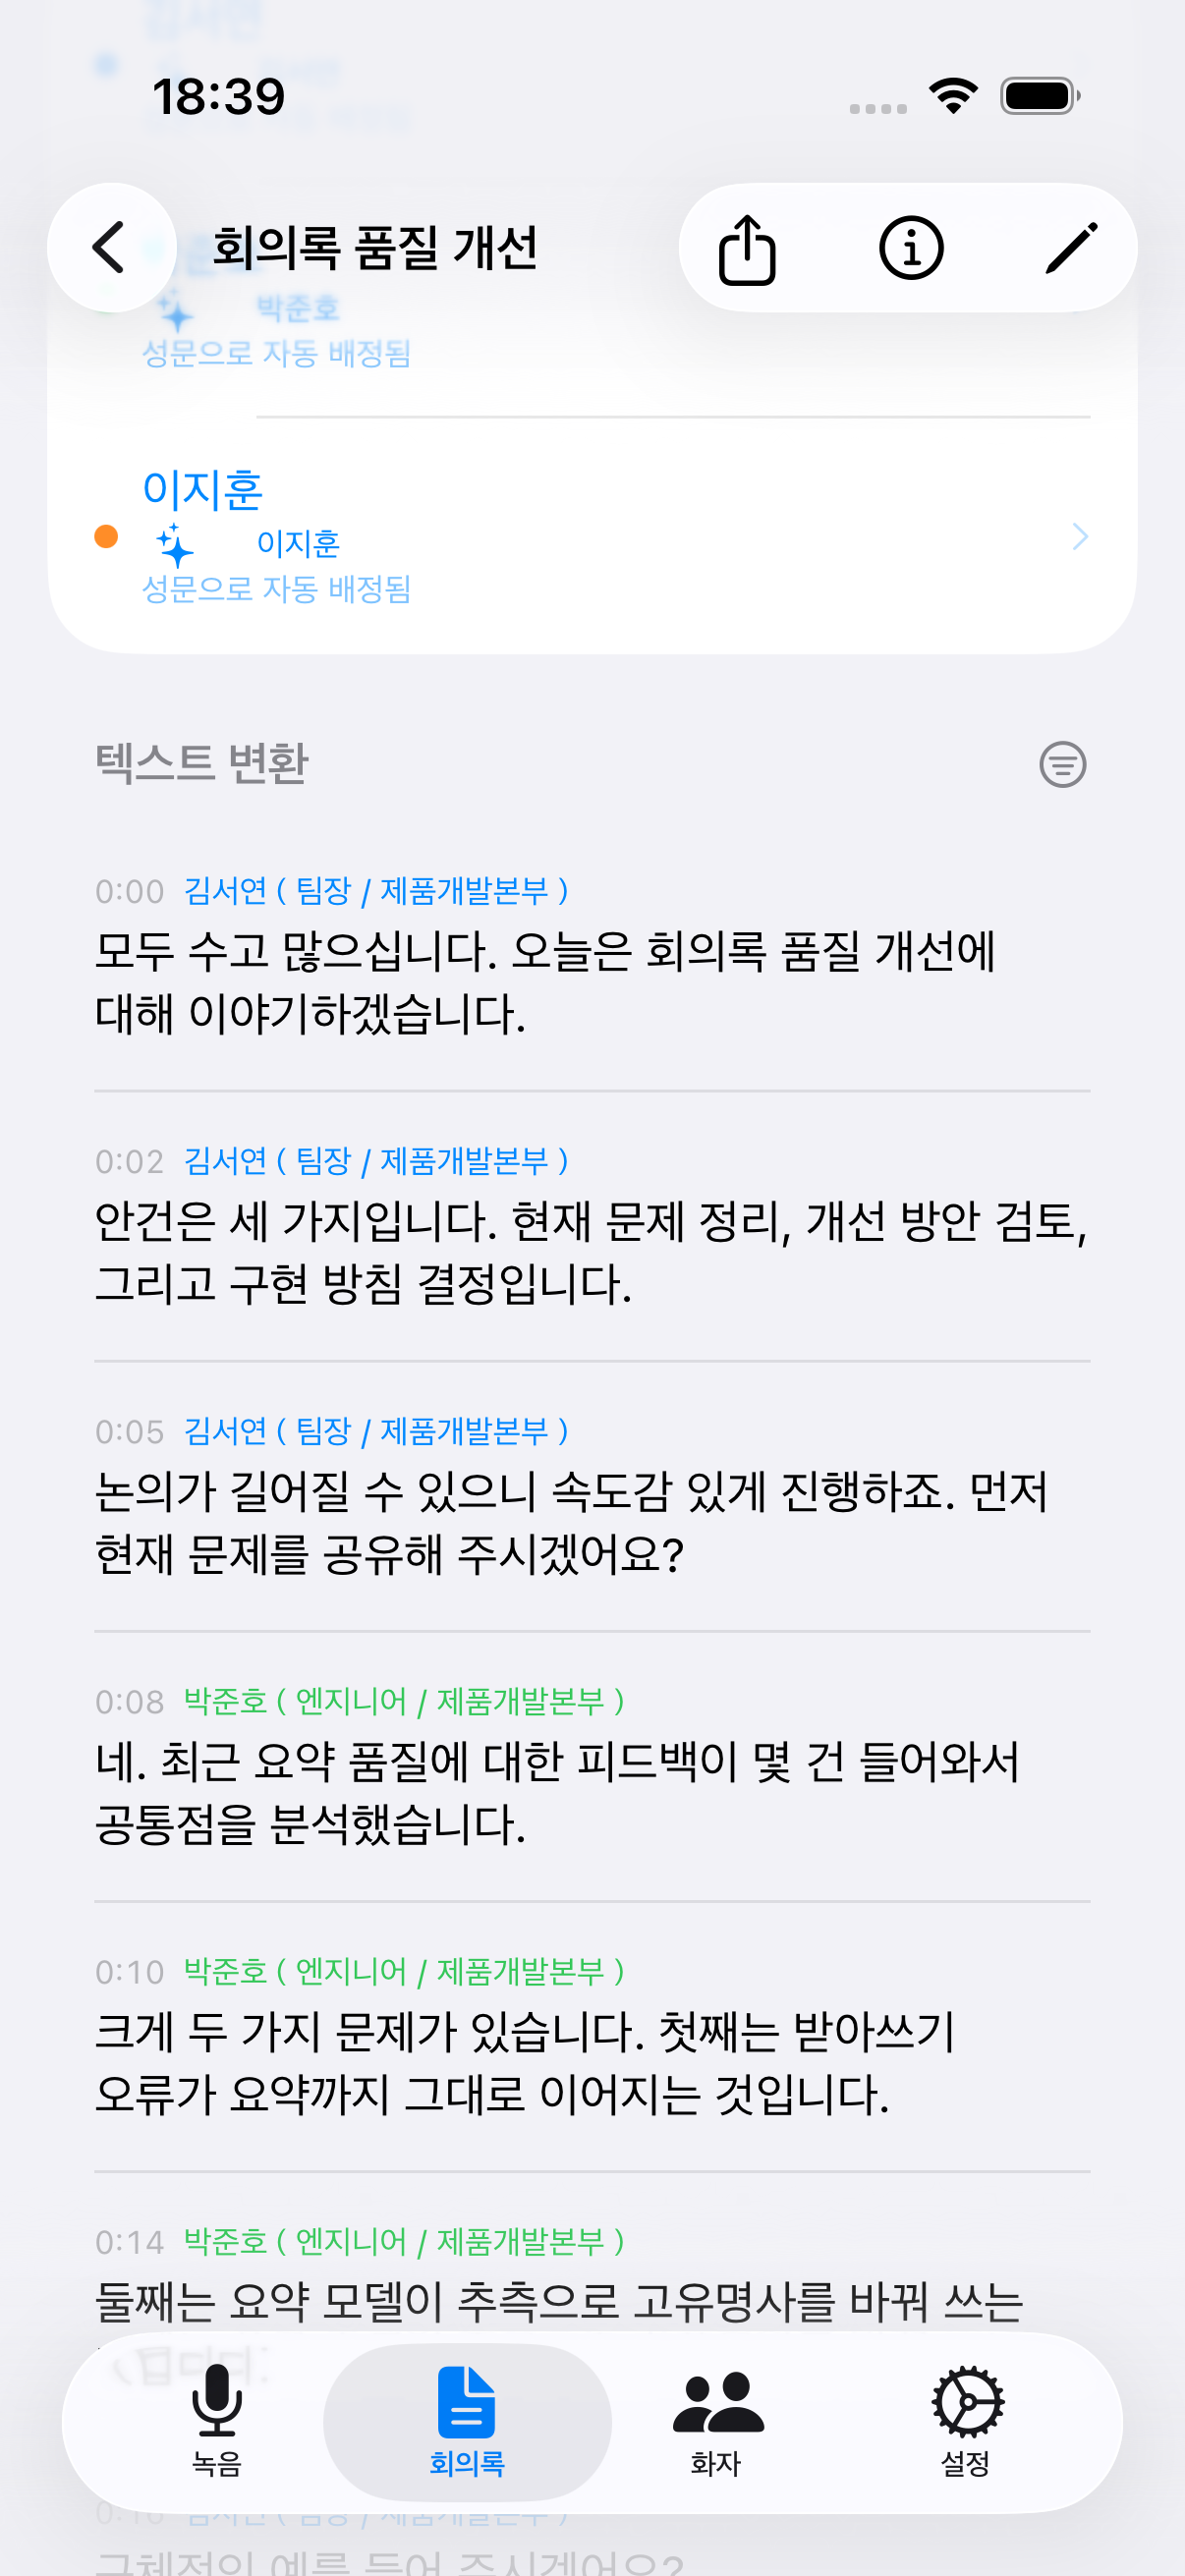
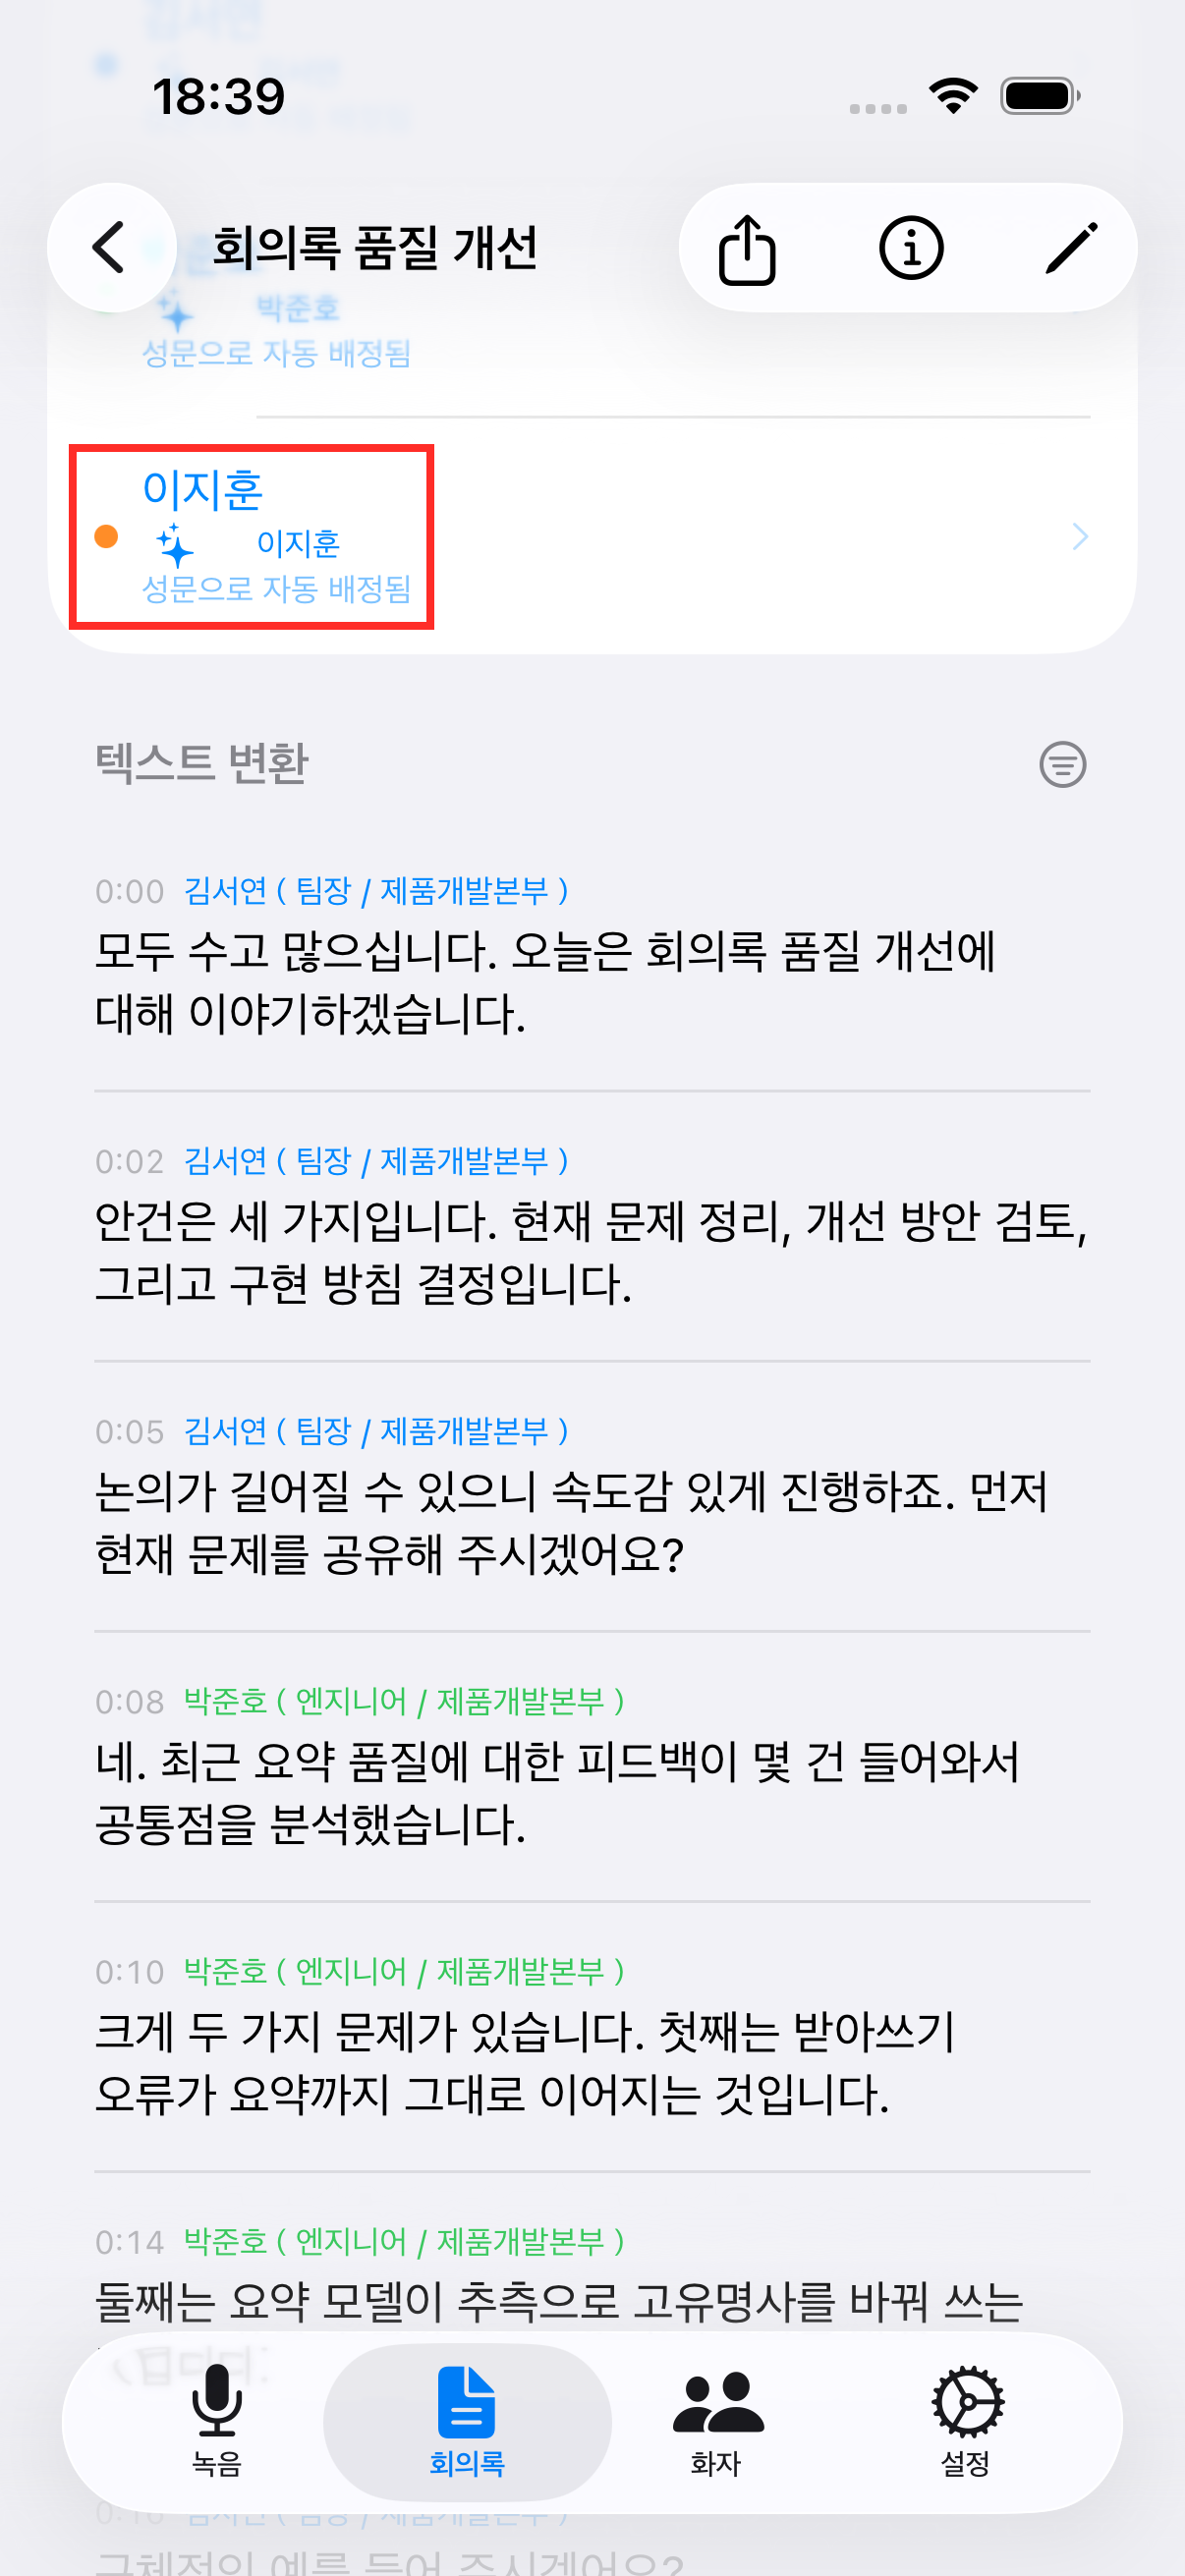
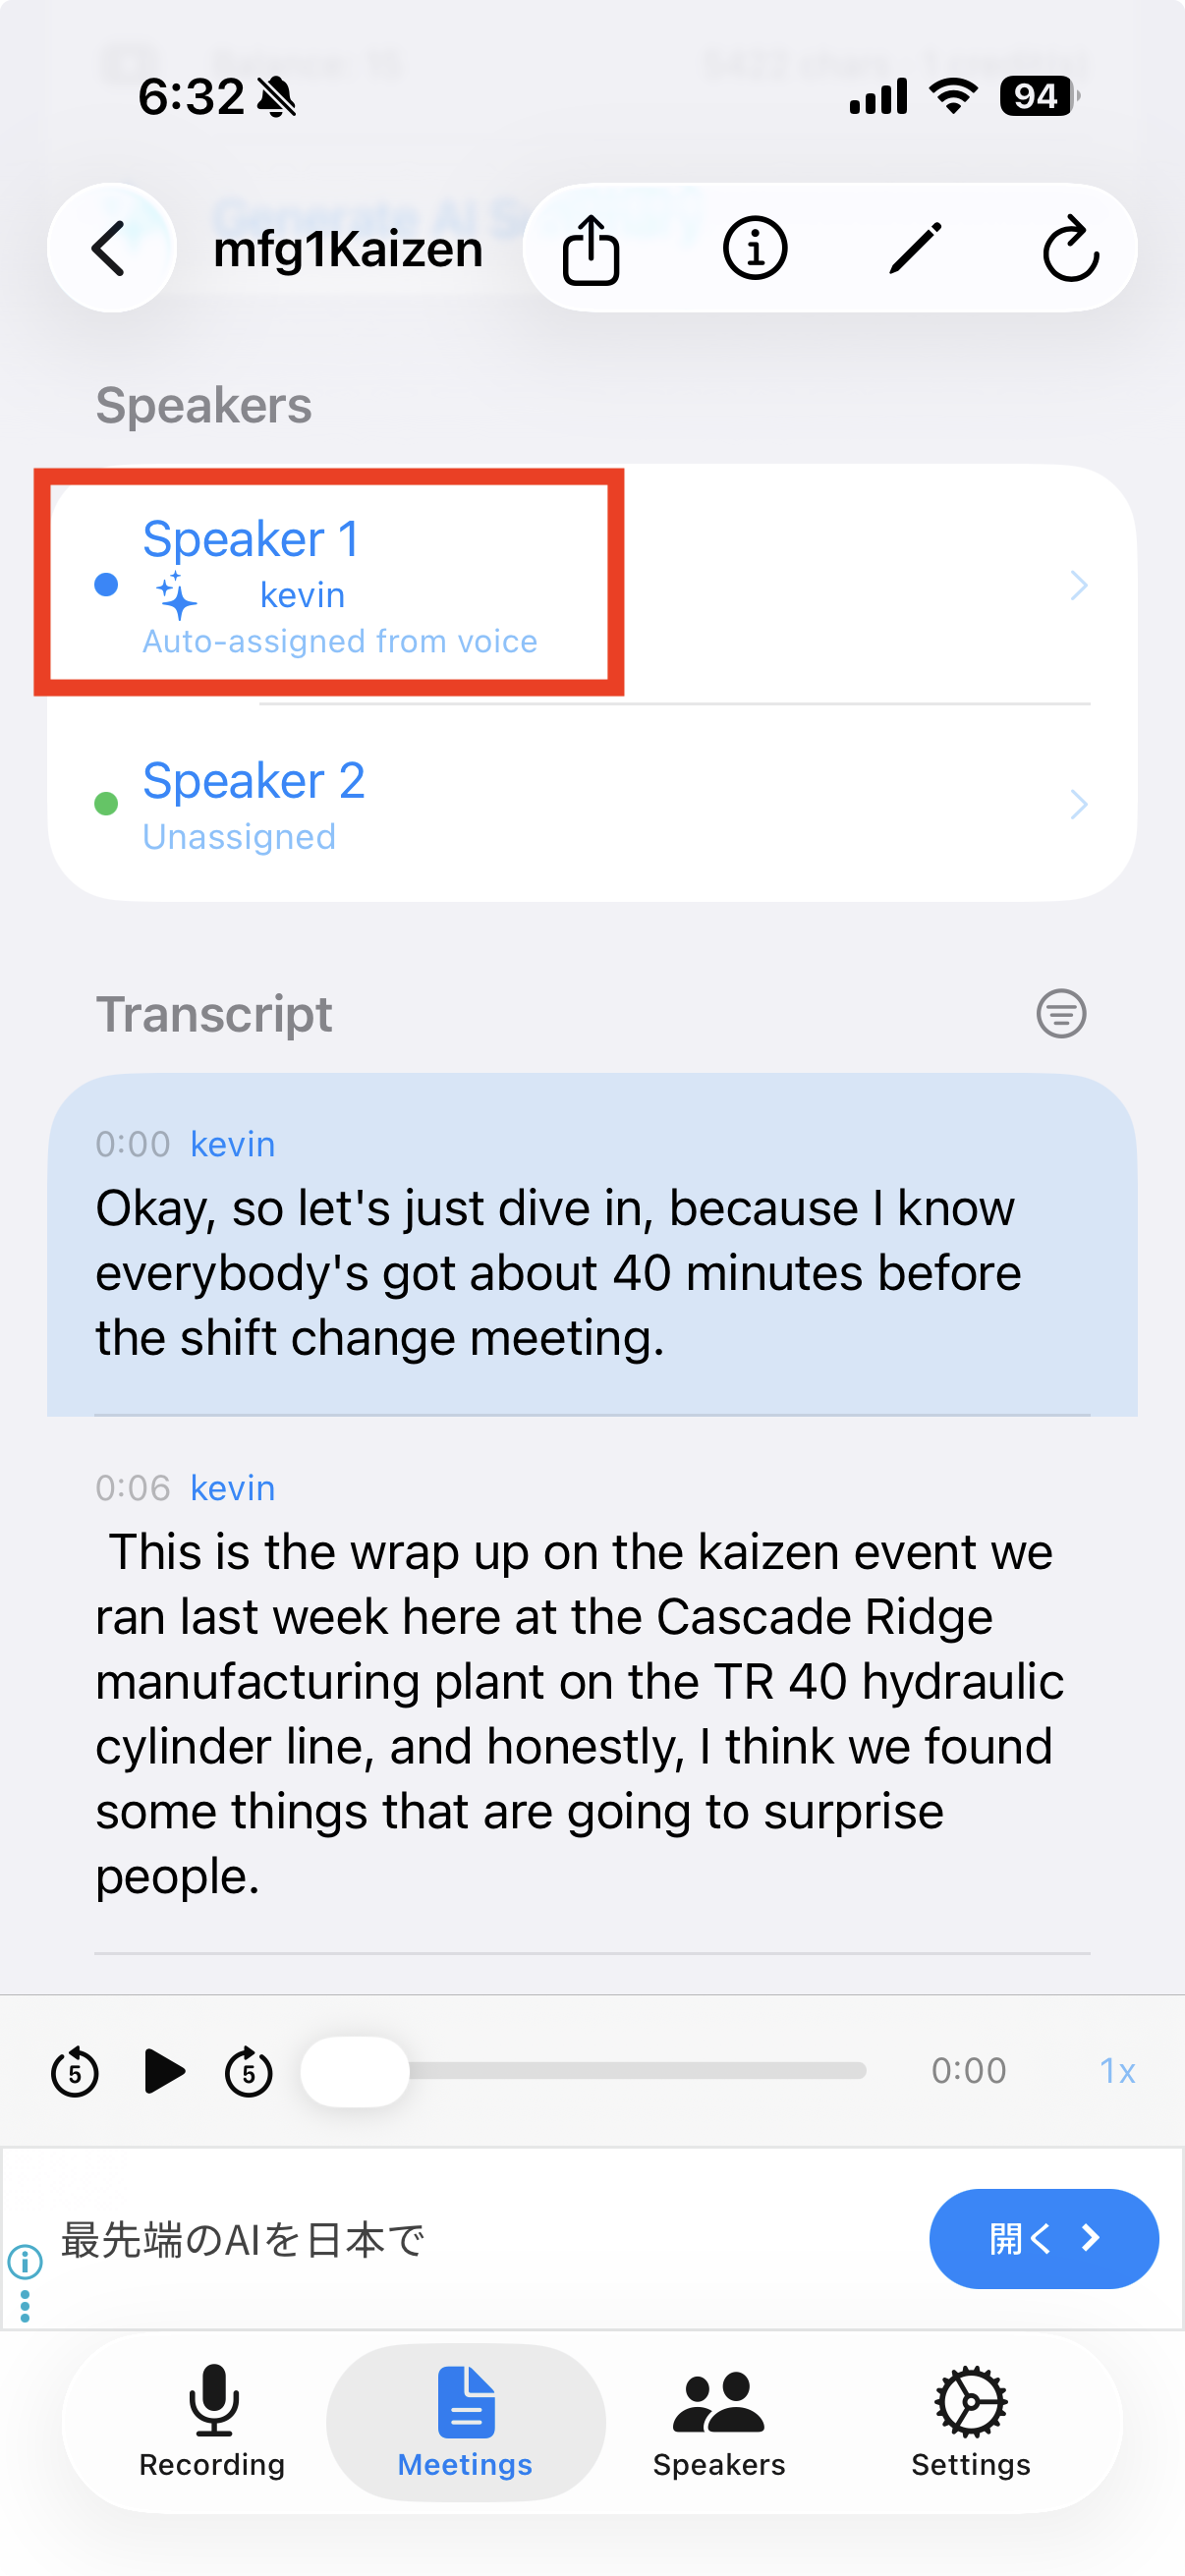
Auto-assigned speakers are marked with a ✨ and an "Auto-assigned from voice profile" label.
📷 images/speakers-1-en.png
2
Correct it manually
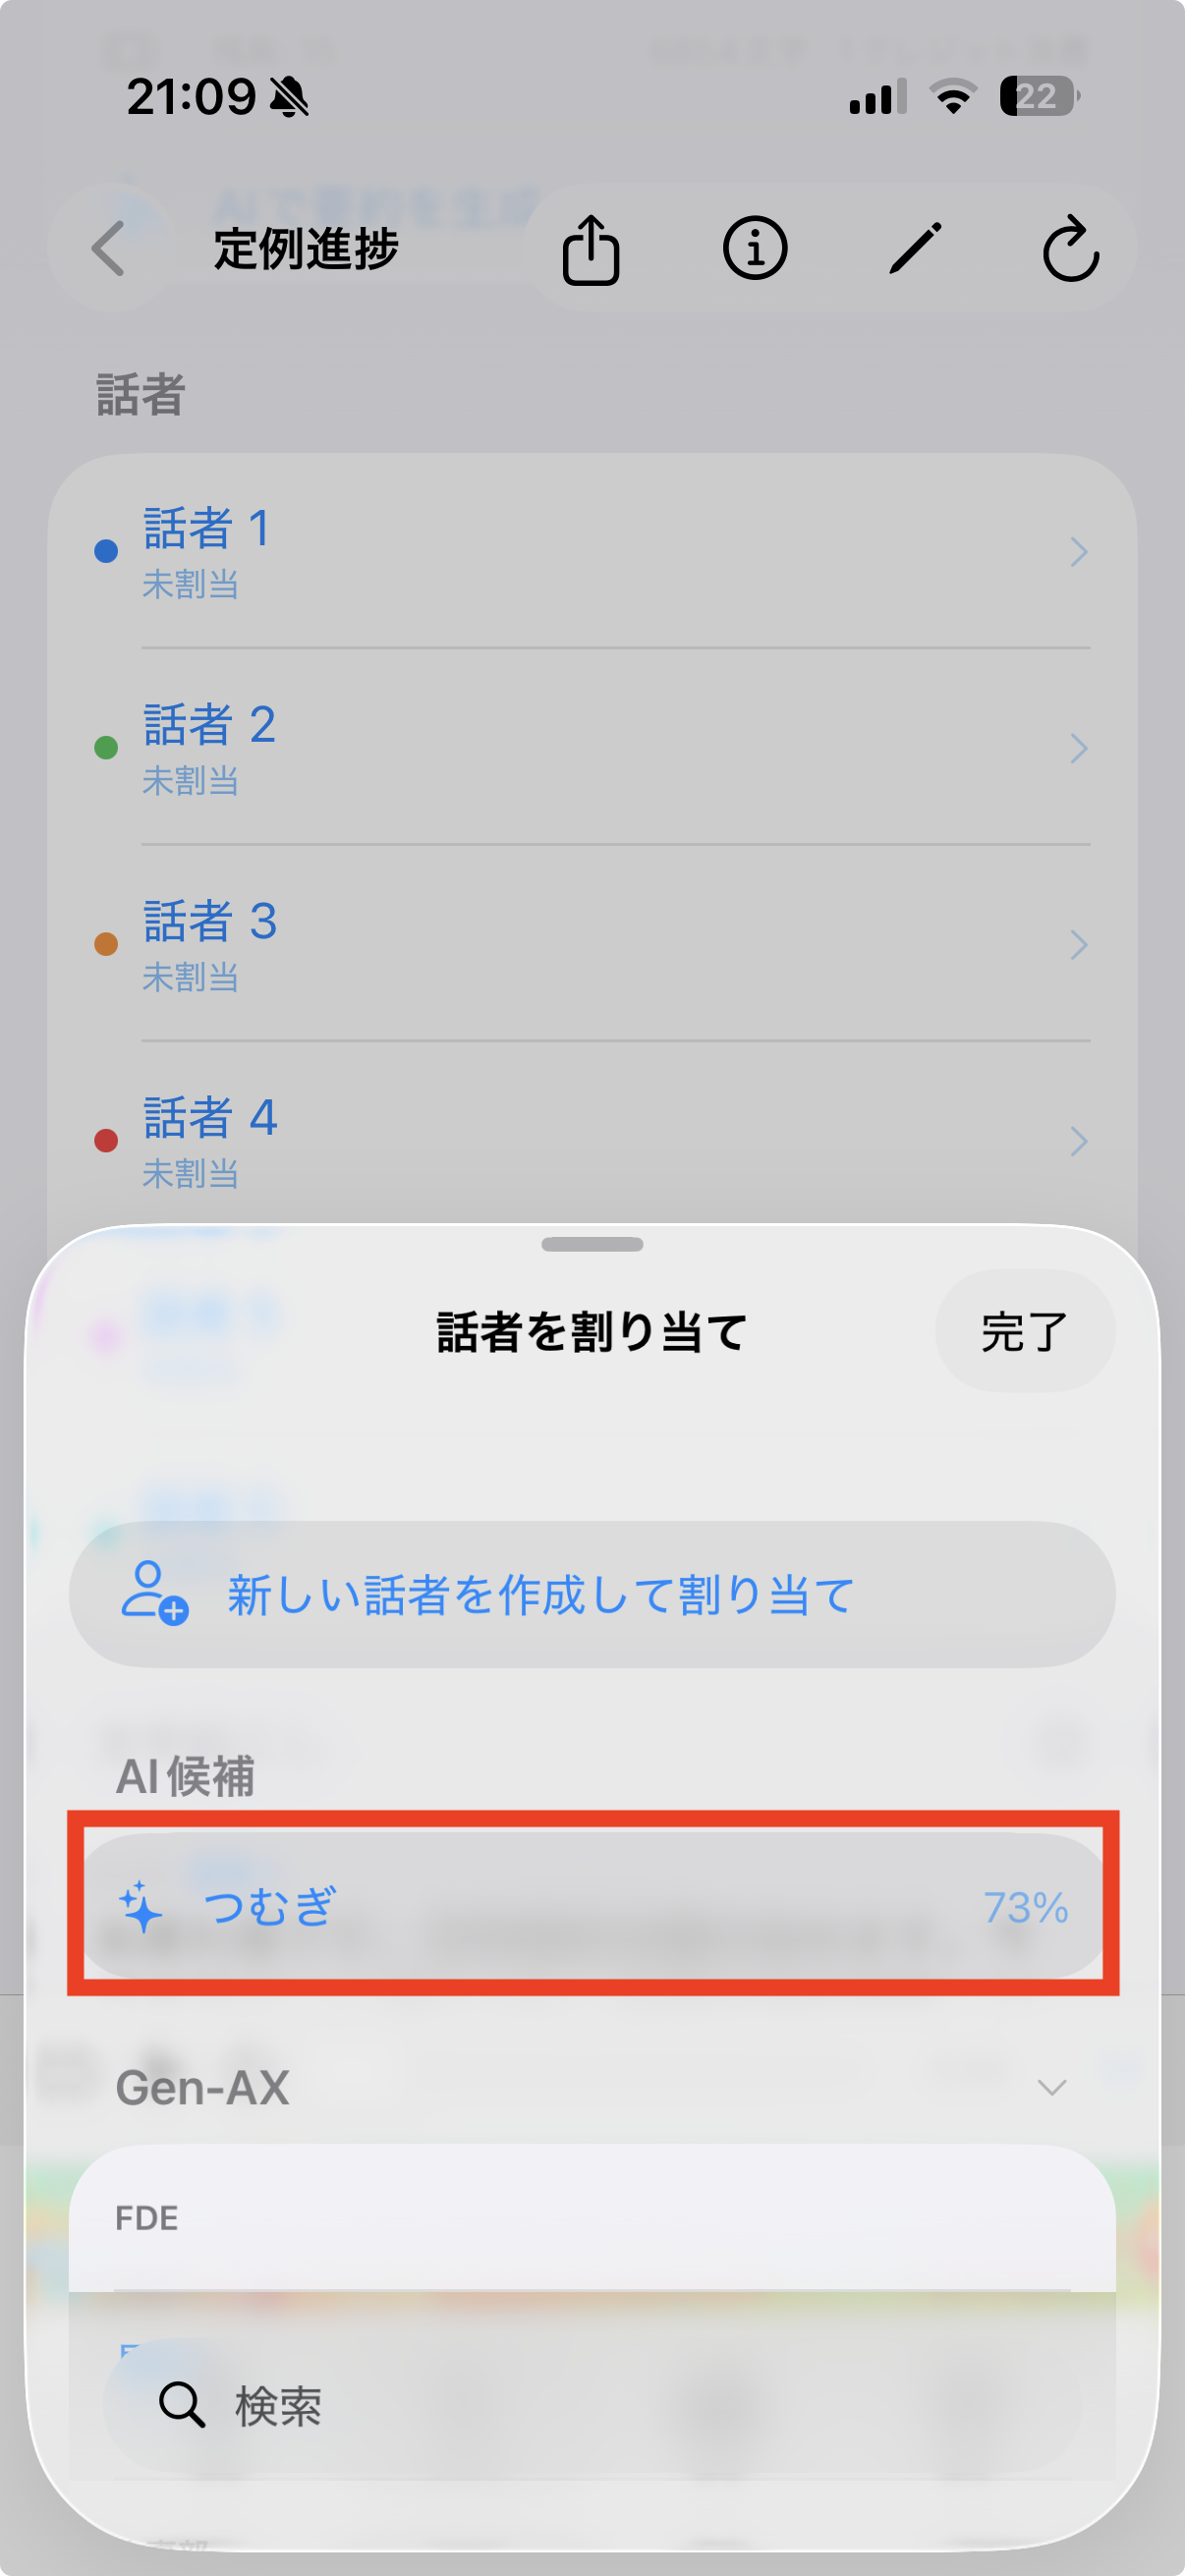
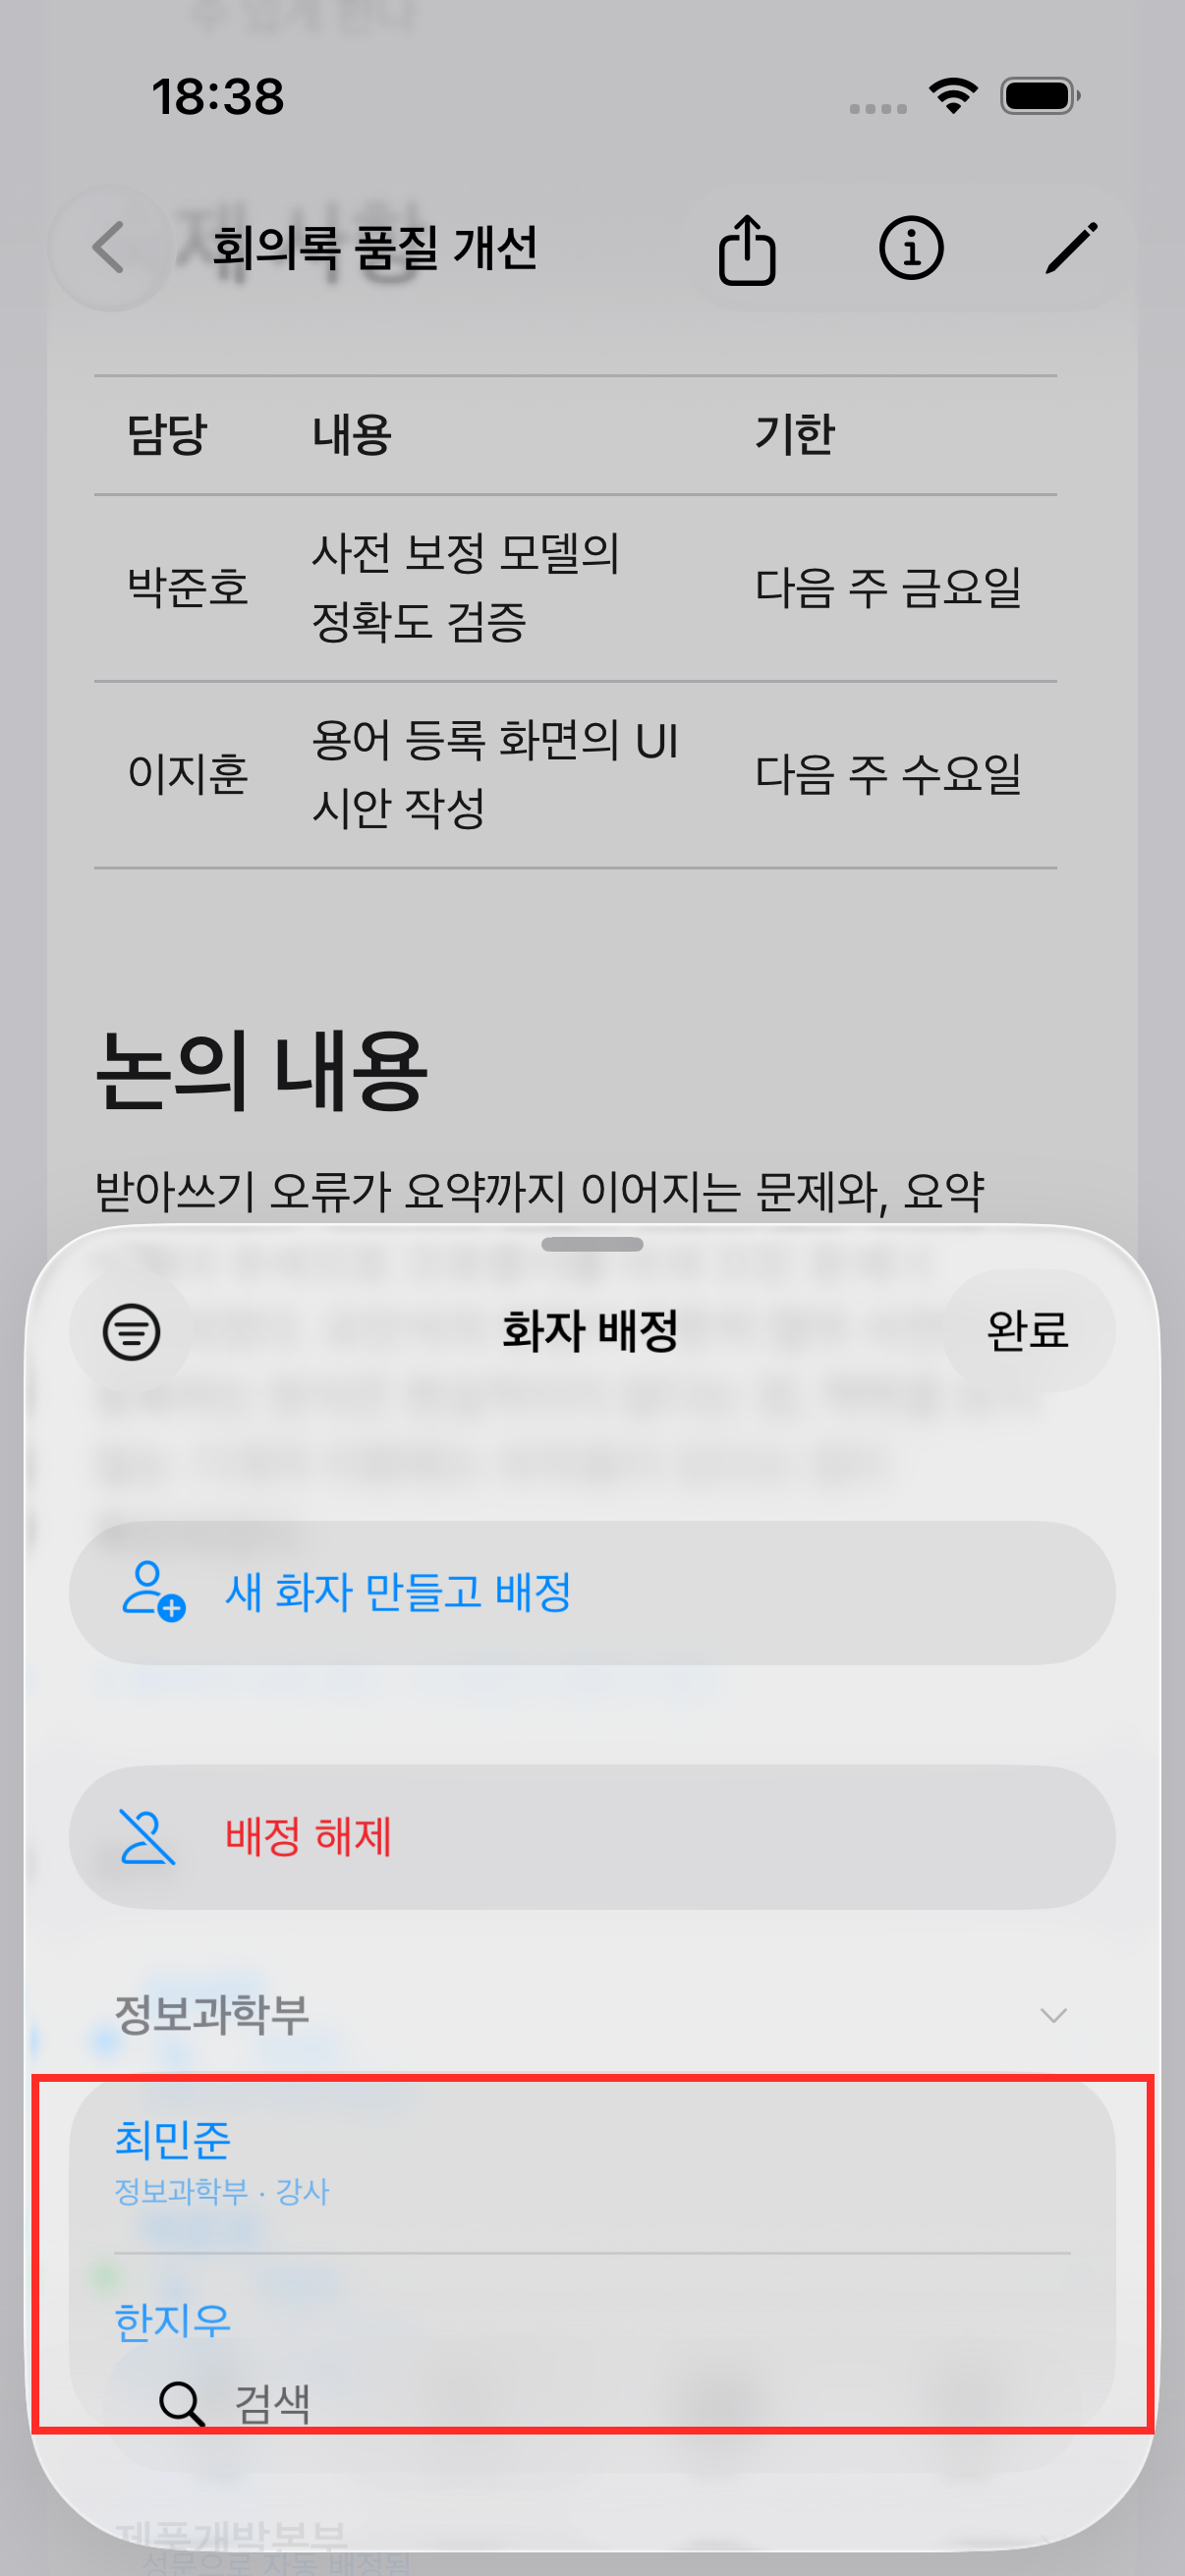
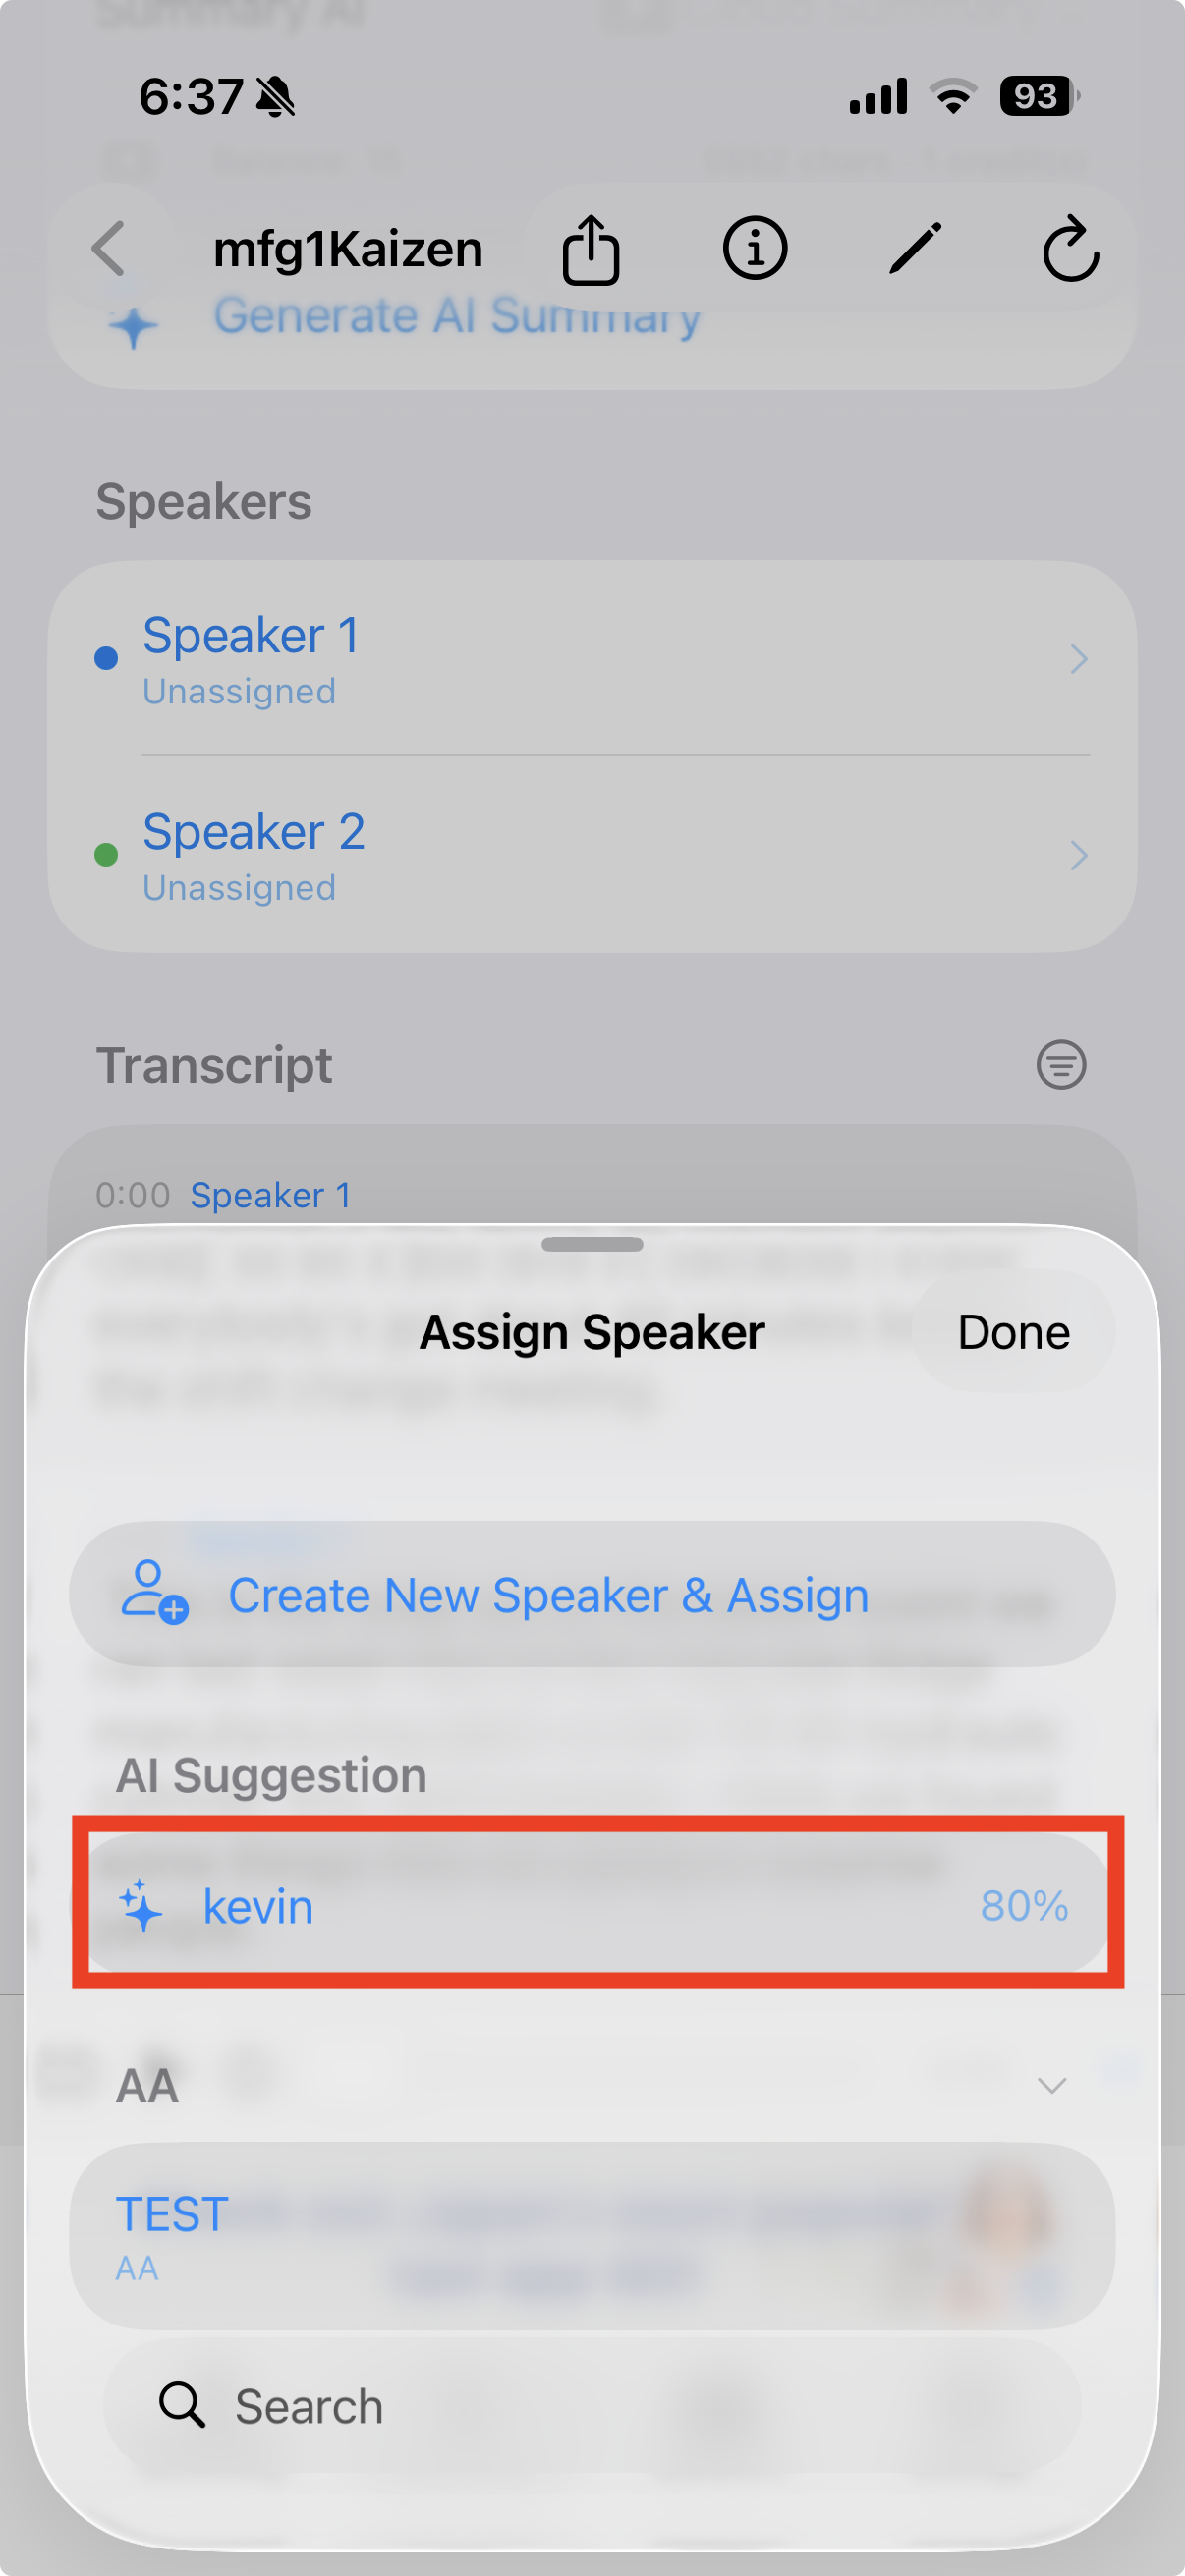
Tap a speaker name on the meeting detail screen to choose from AI suggestions (55%+ similarity) or your full list of registered people (grouped by company/department, searchable), or create a new person on the spot. Manually reassigning a segment automatically retrains that person's voice profile.
📷 images/speakers-2-en.png
3
Manage people
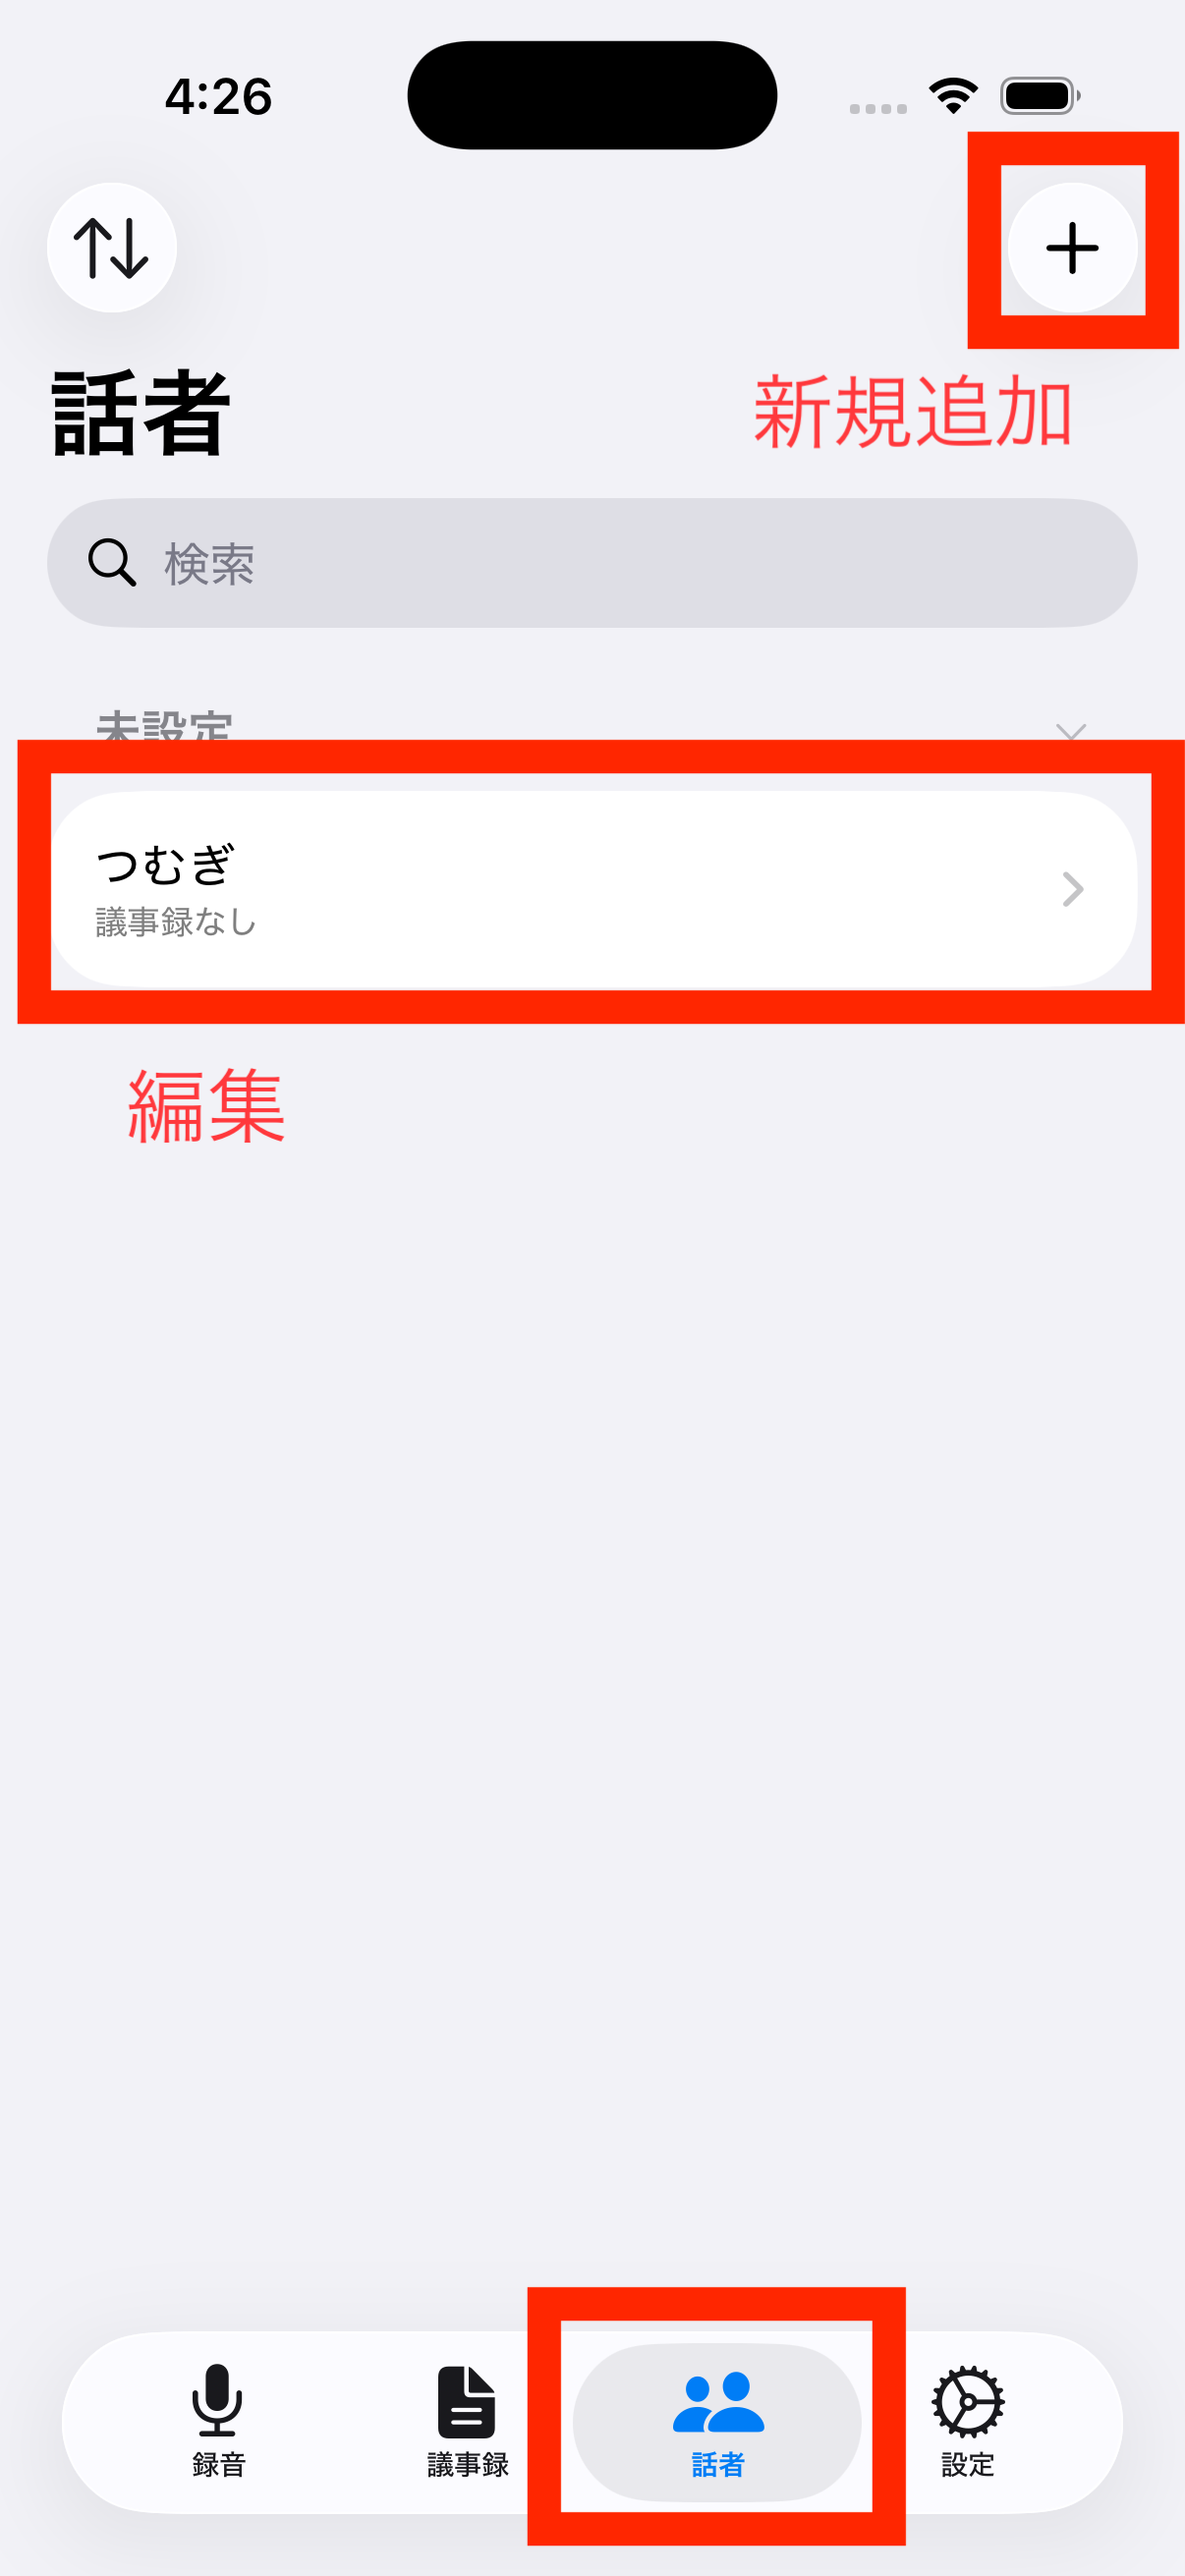
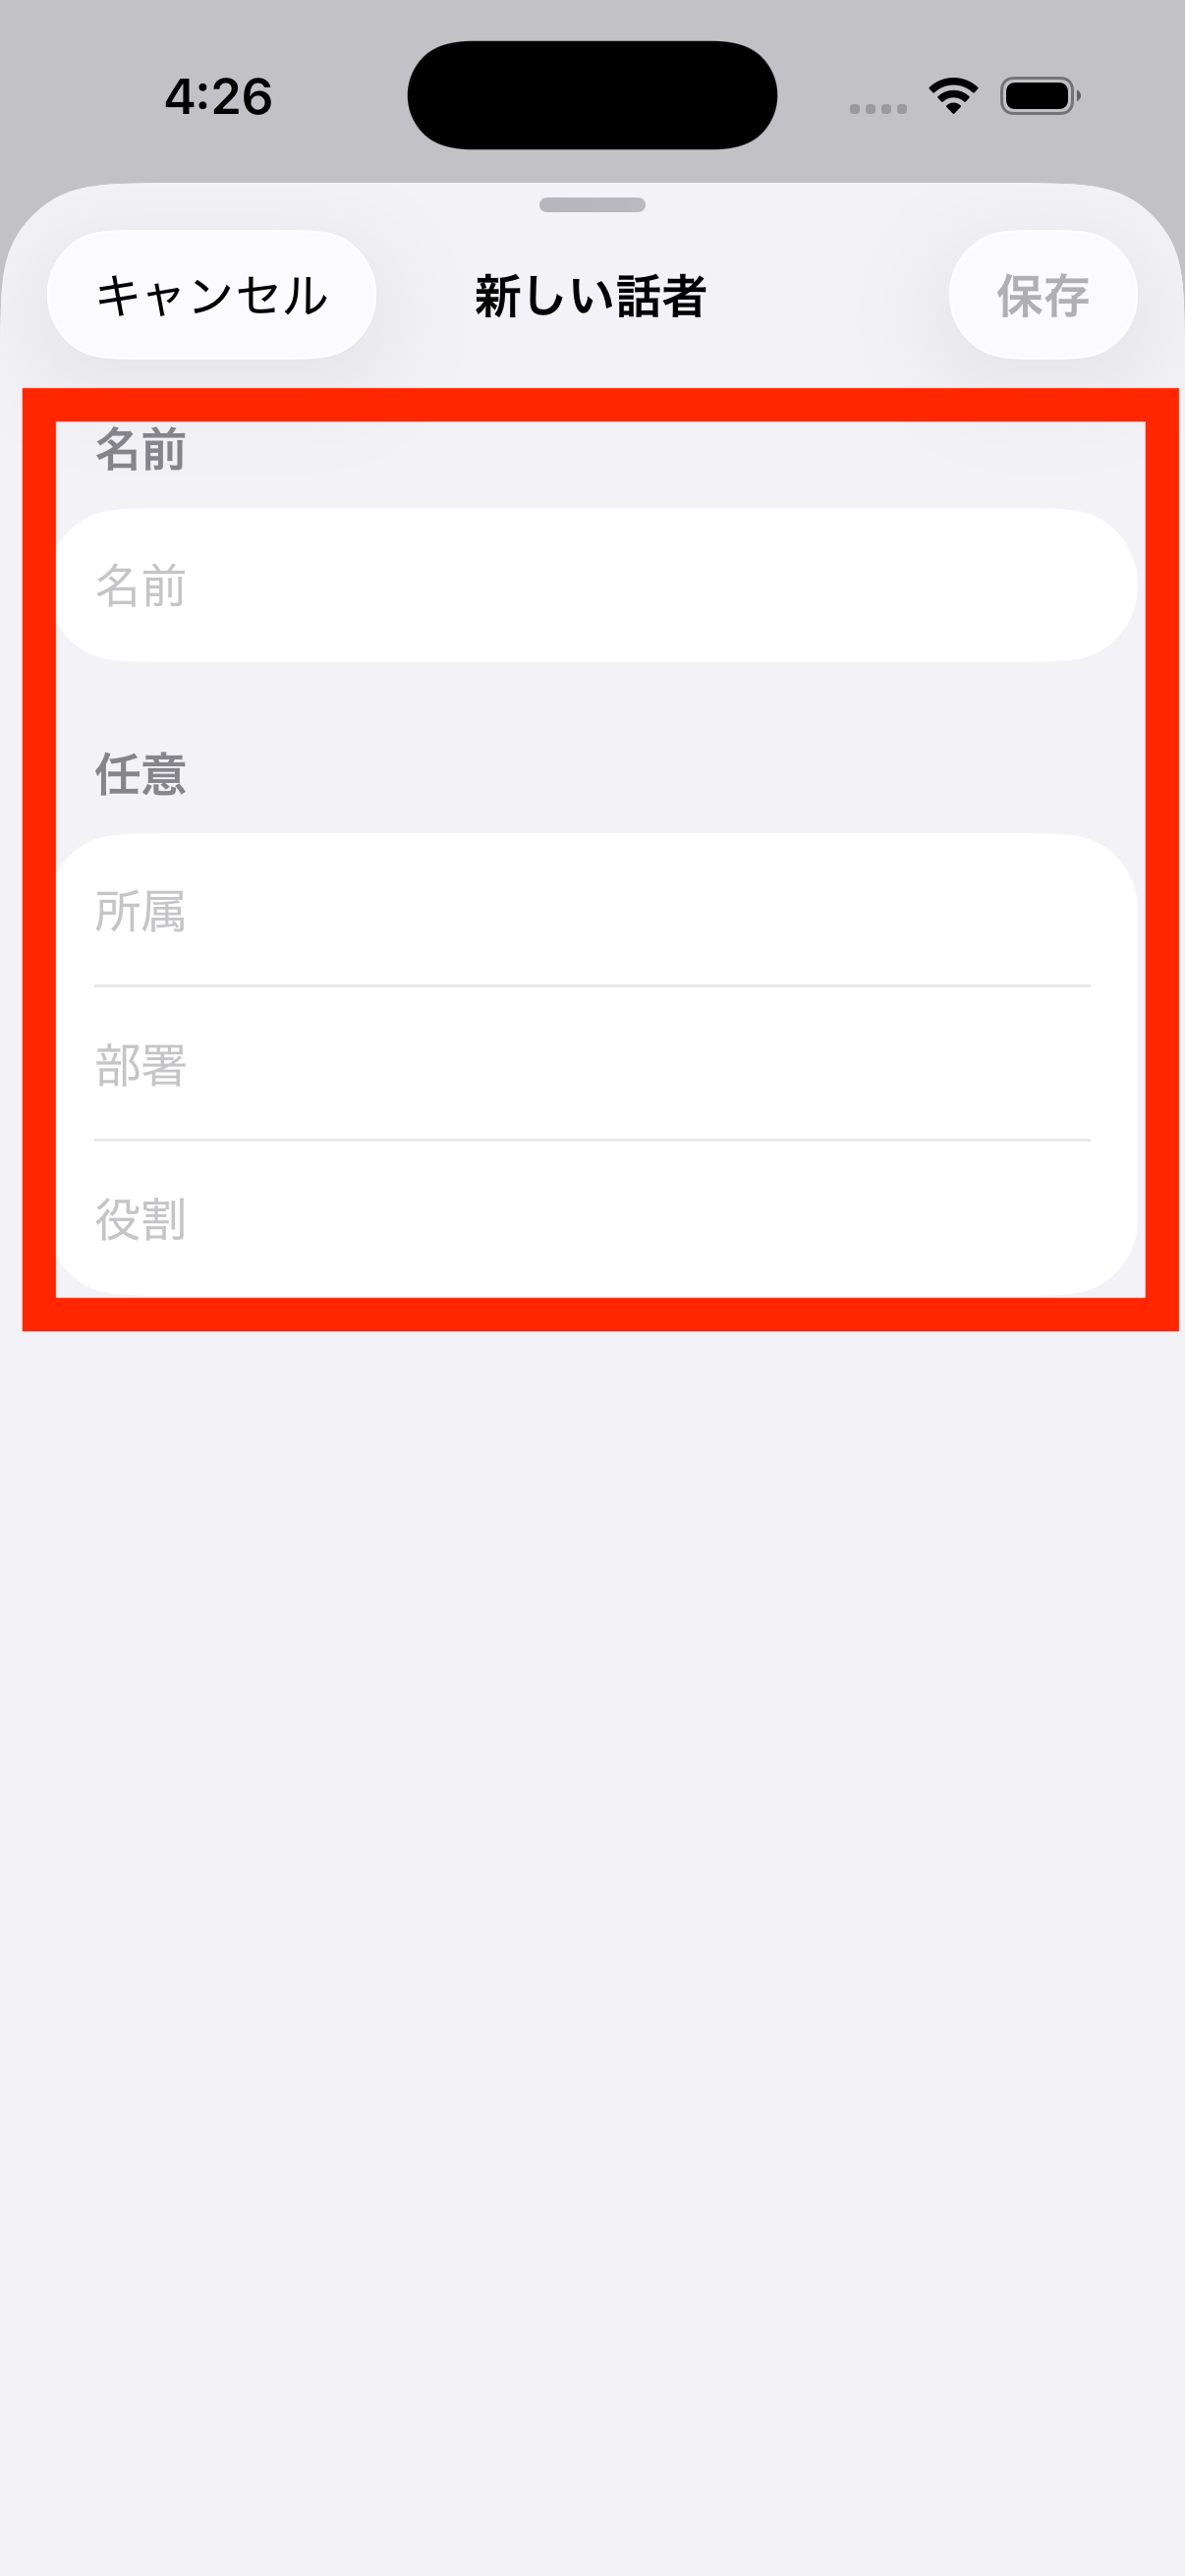
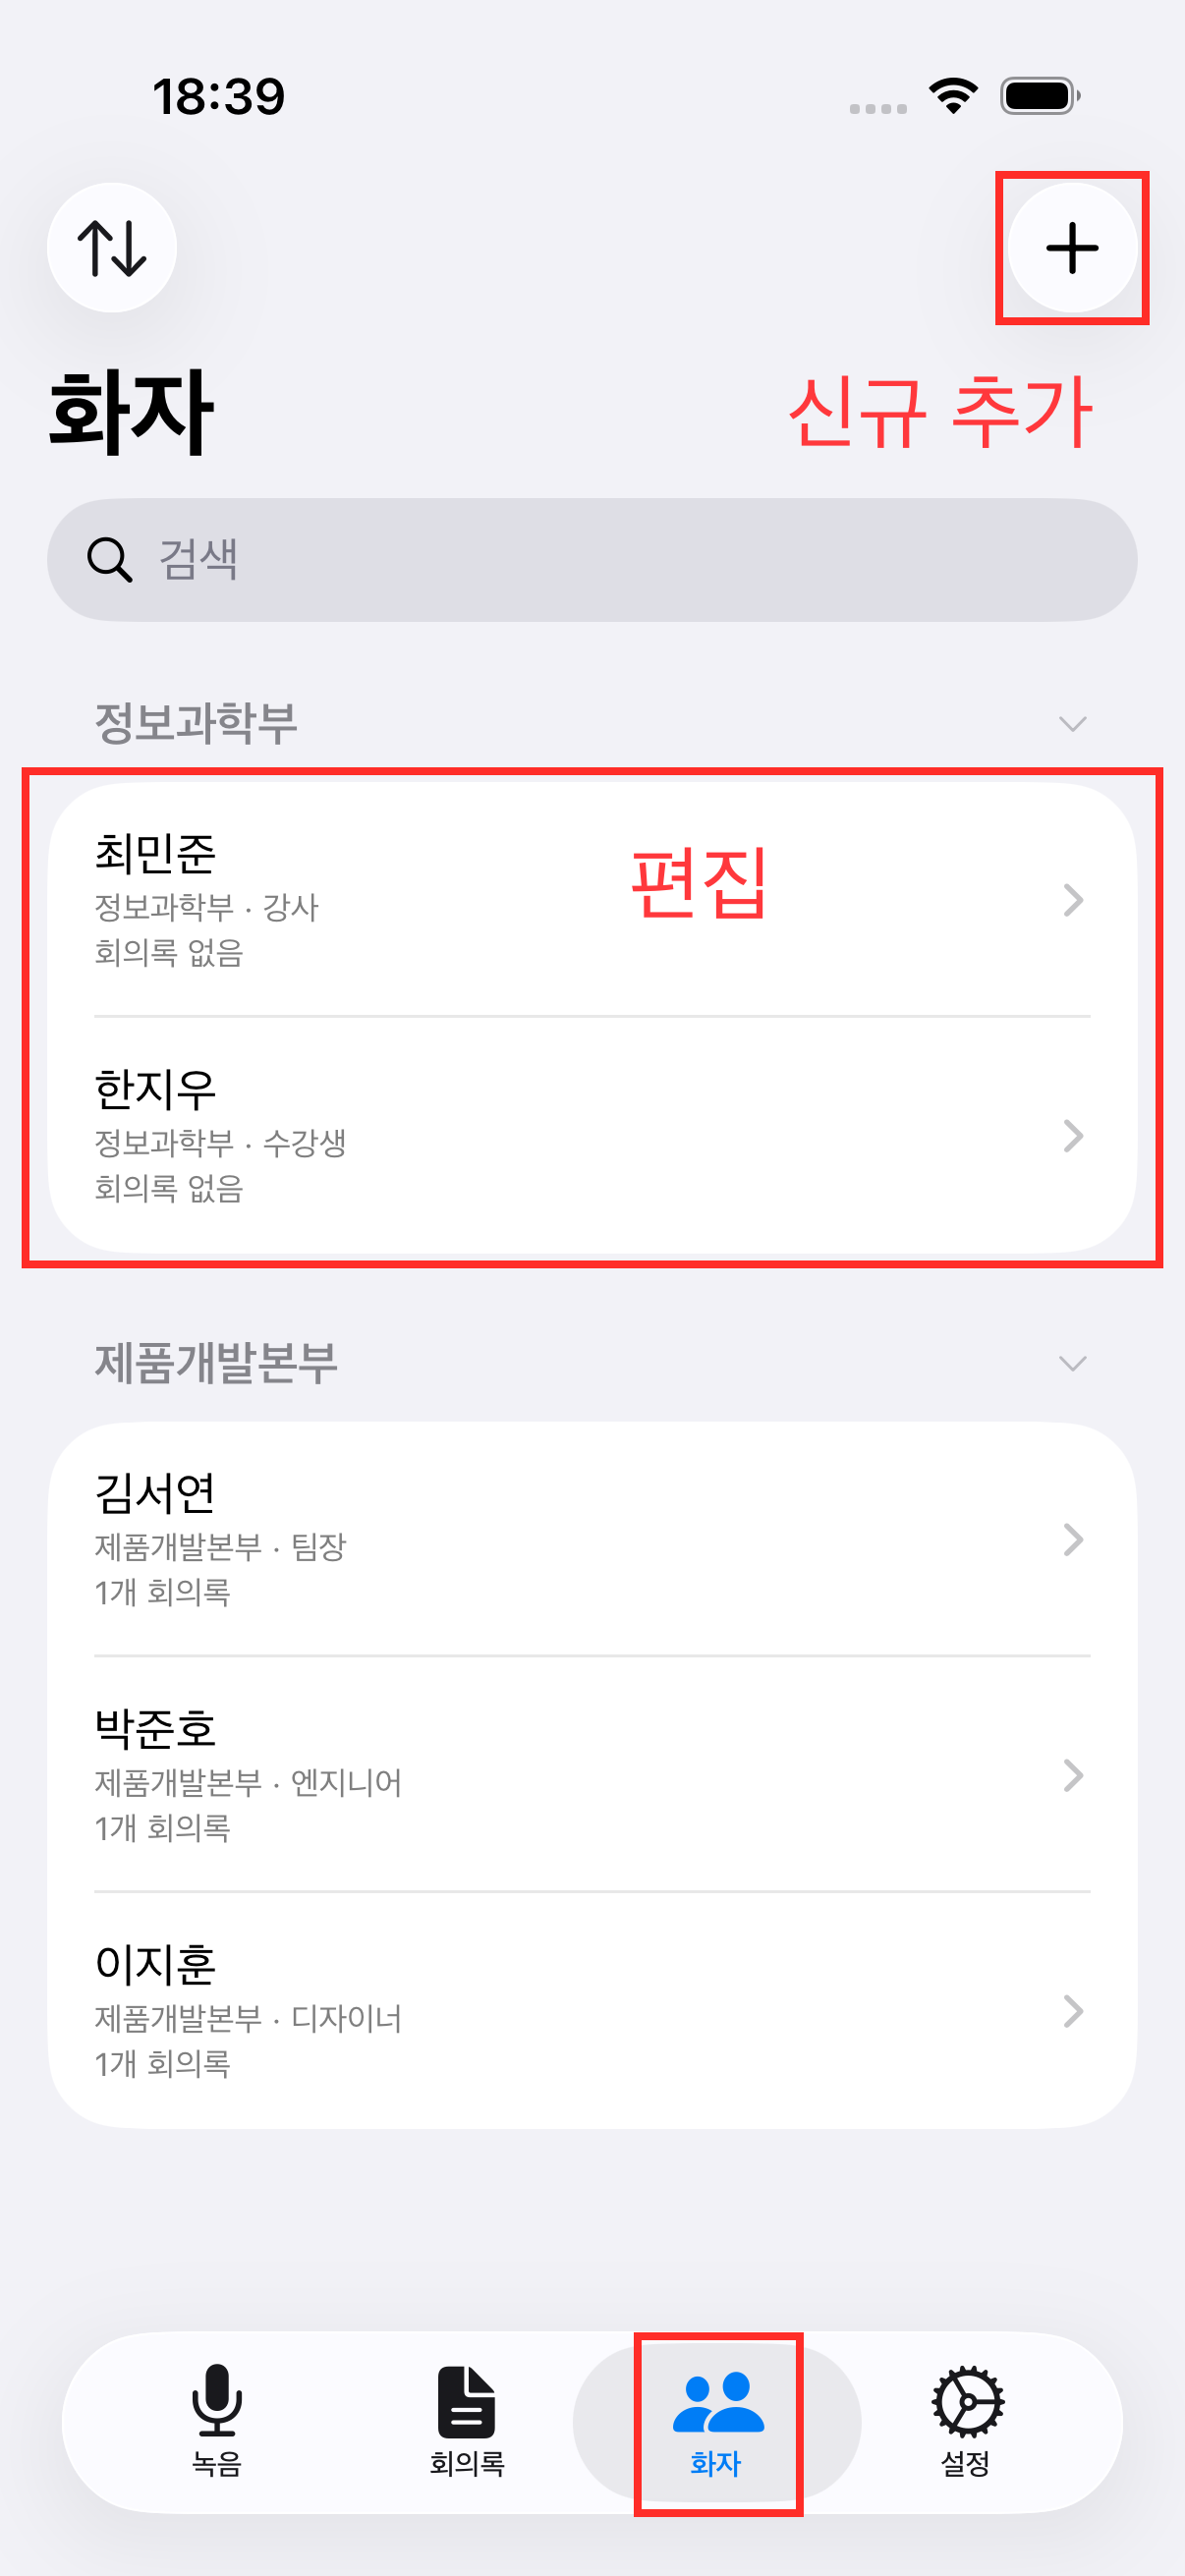
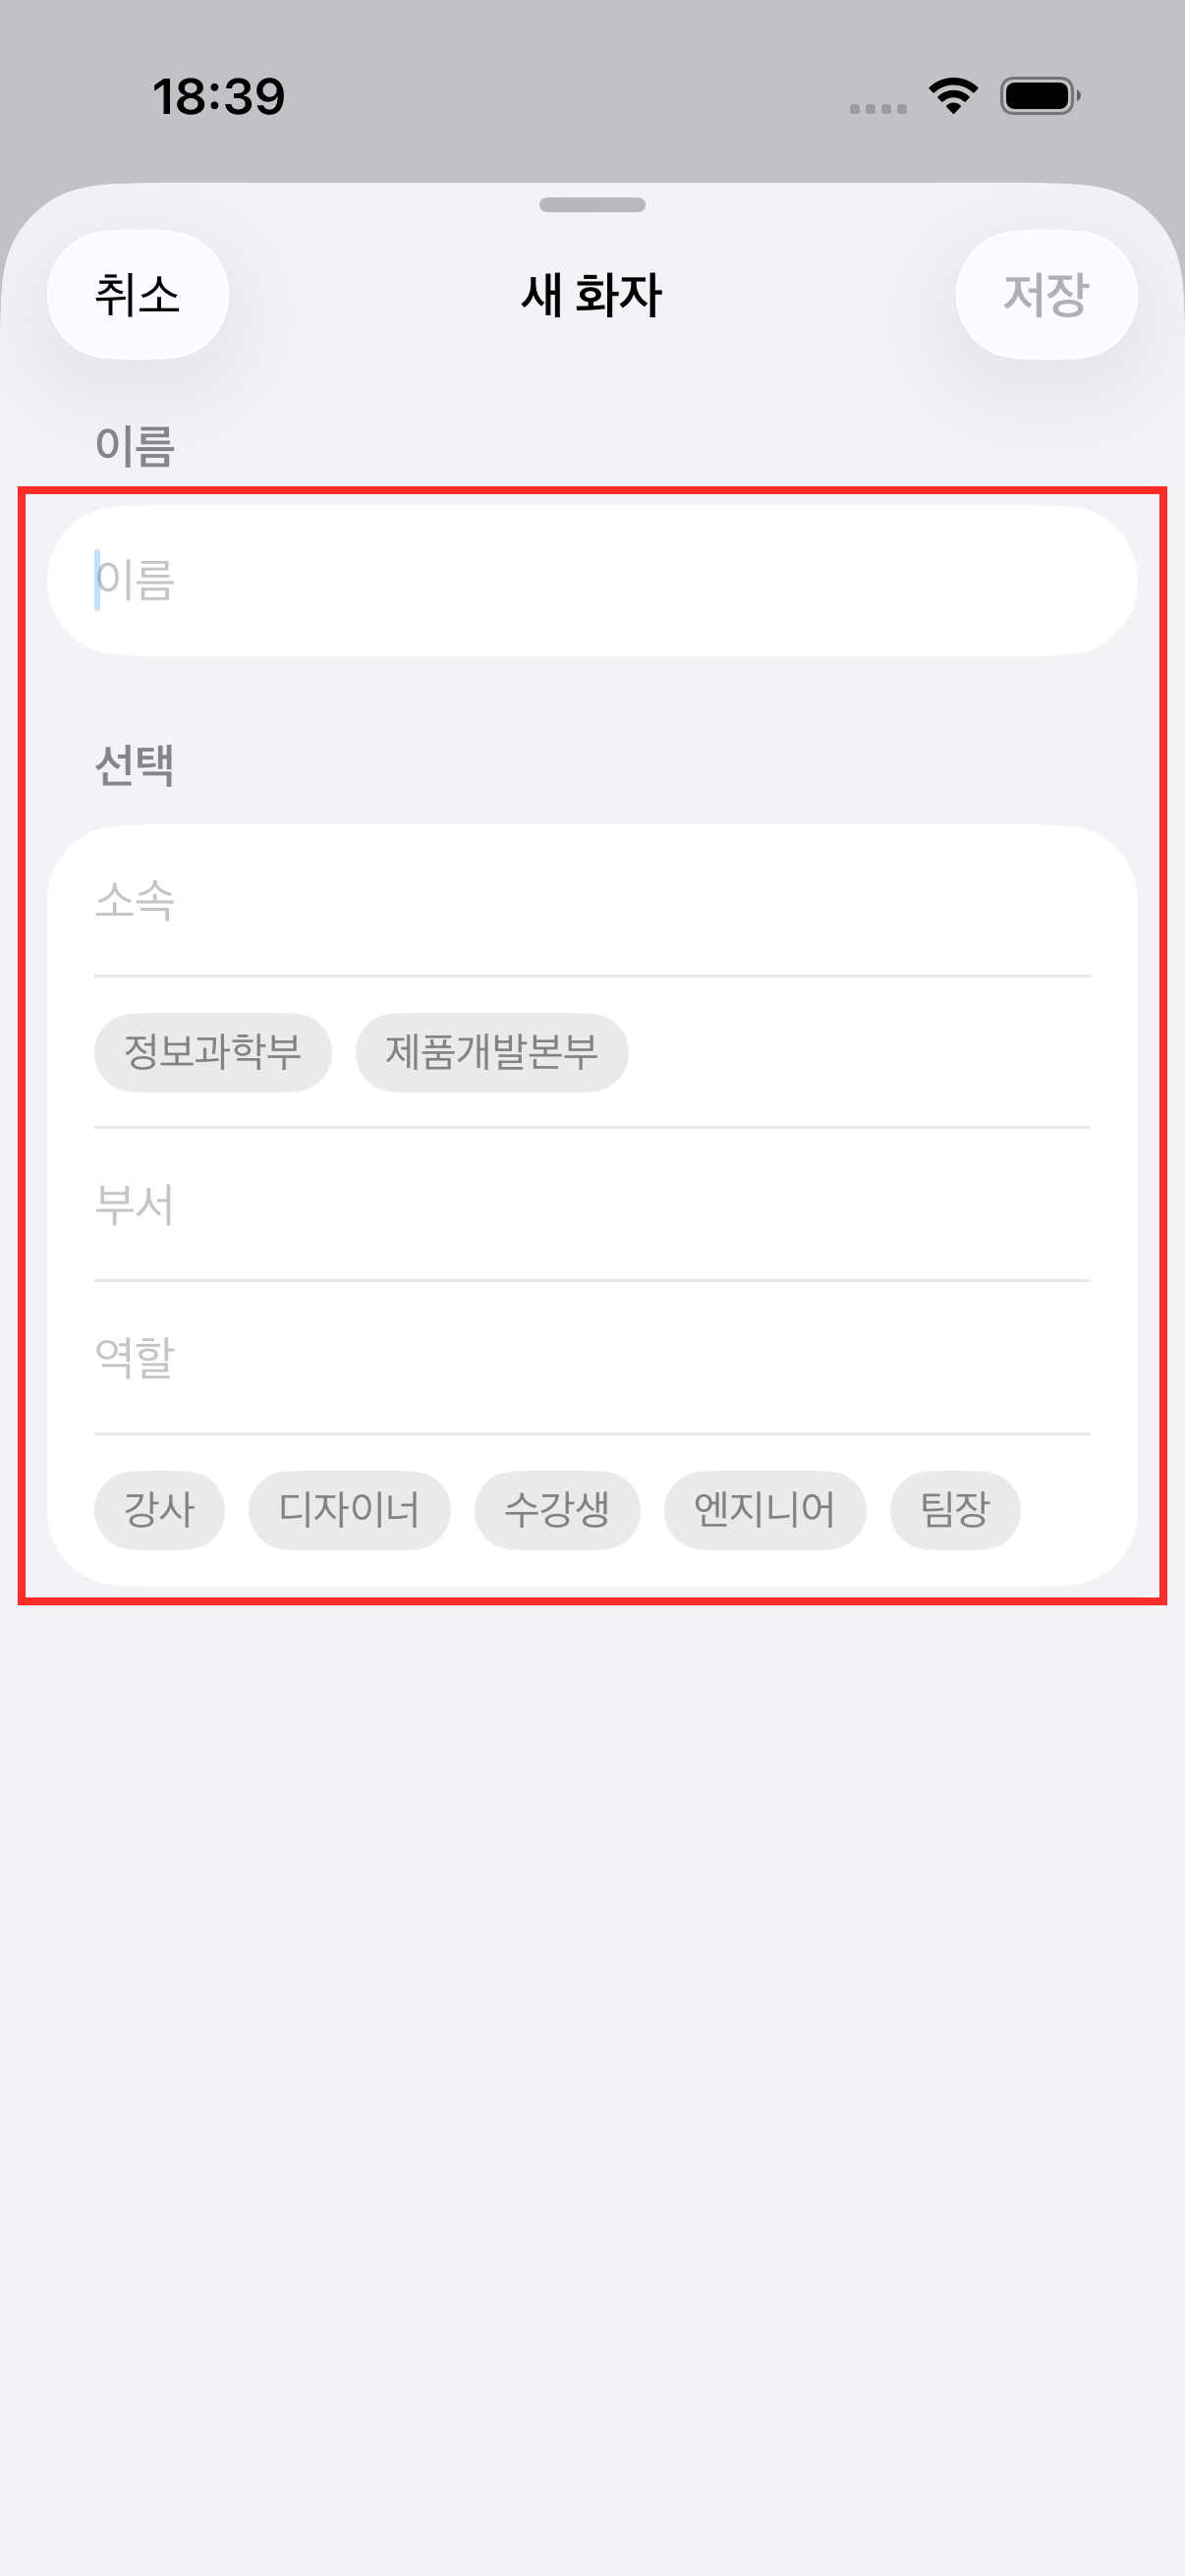
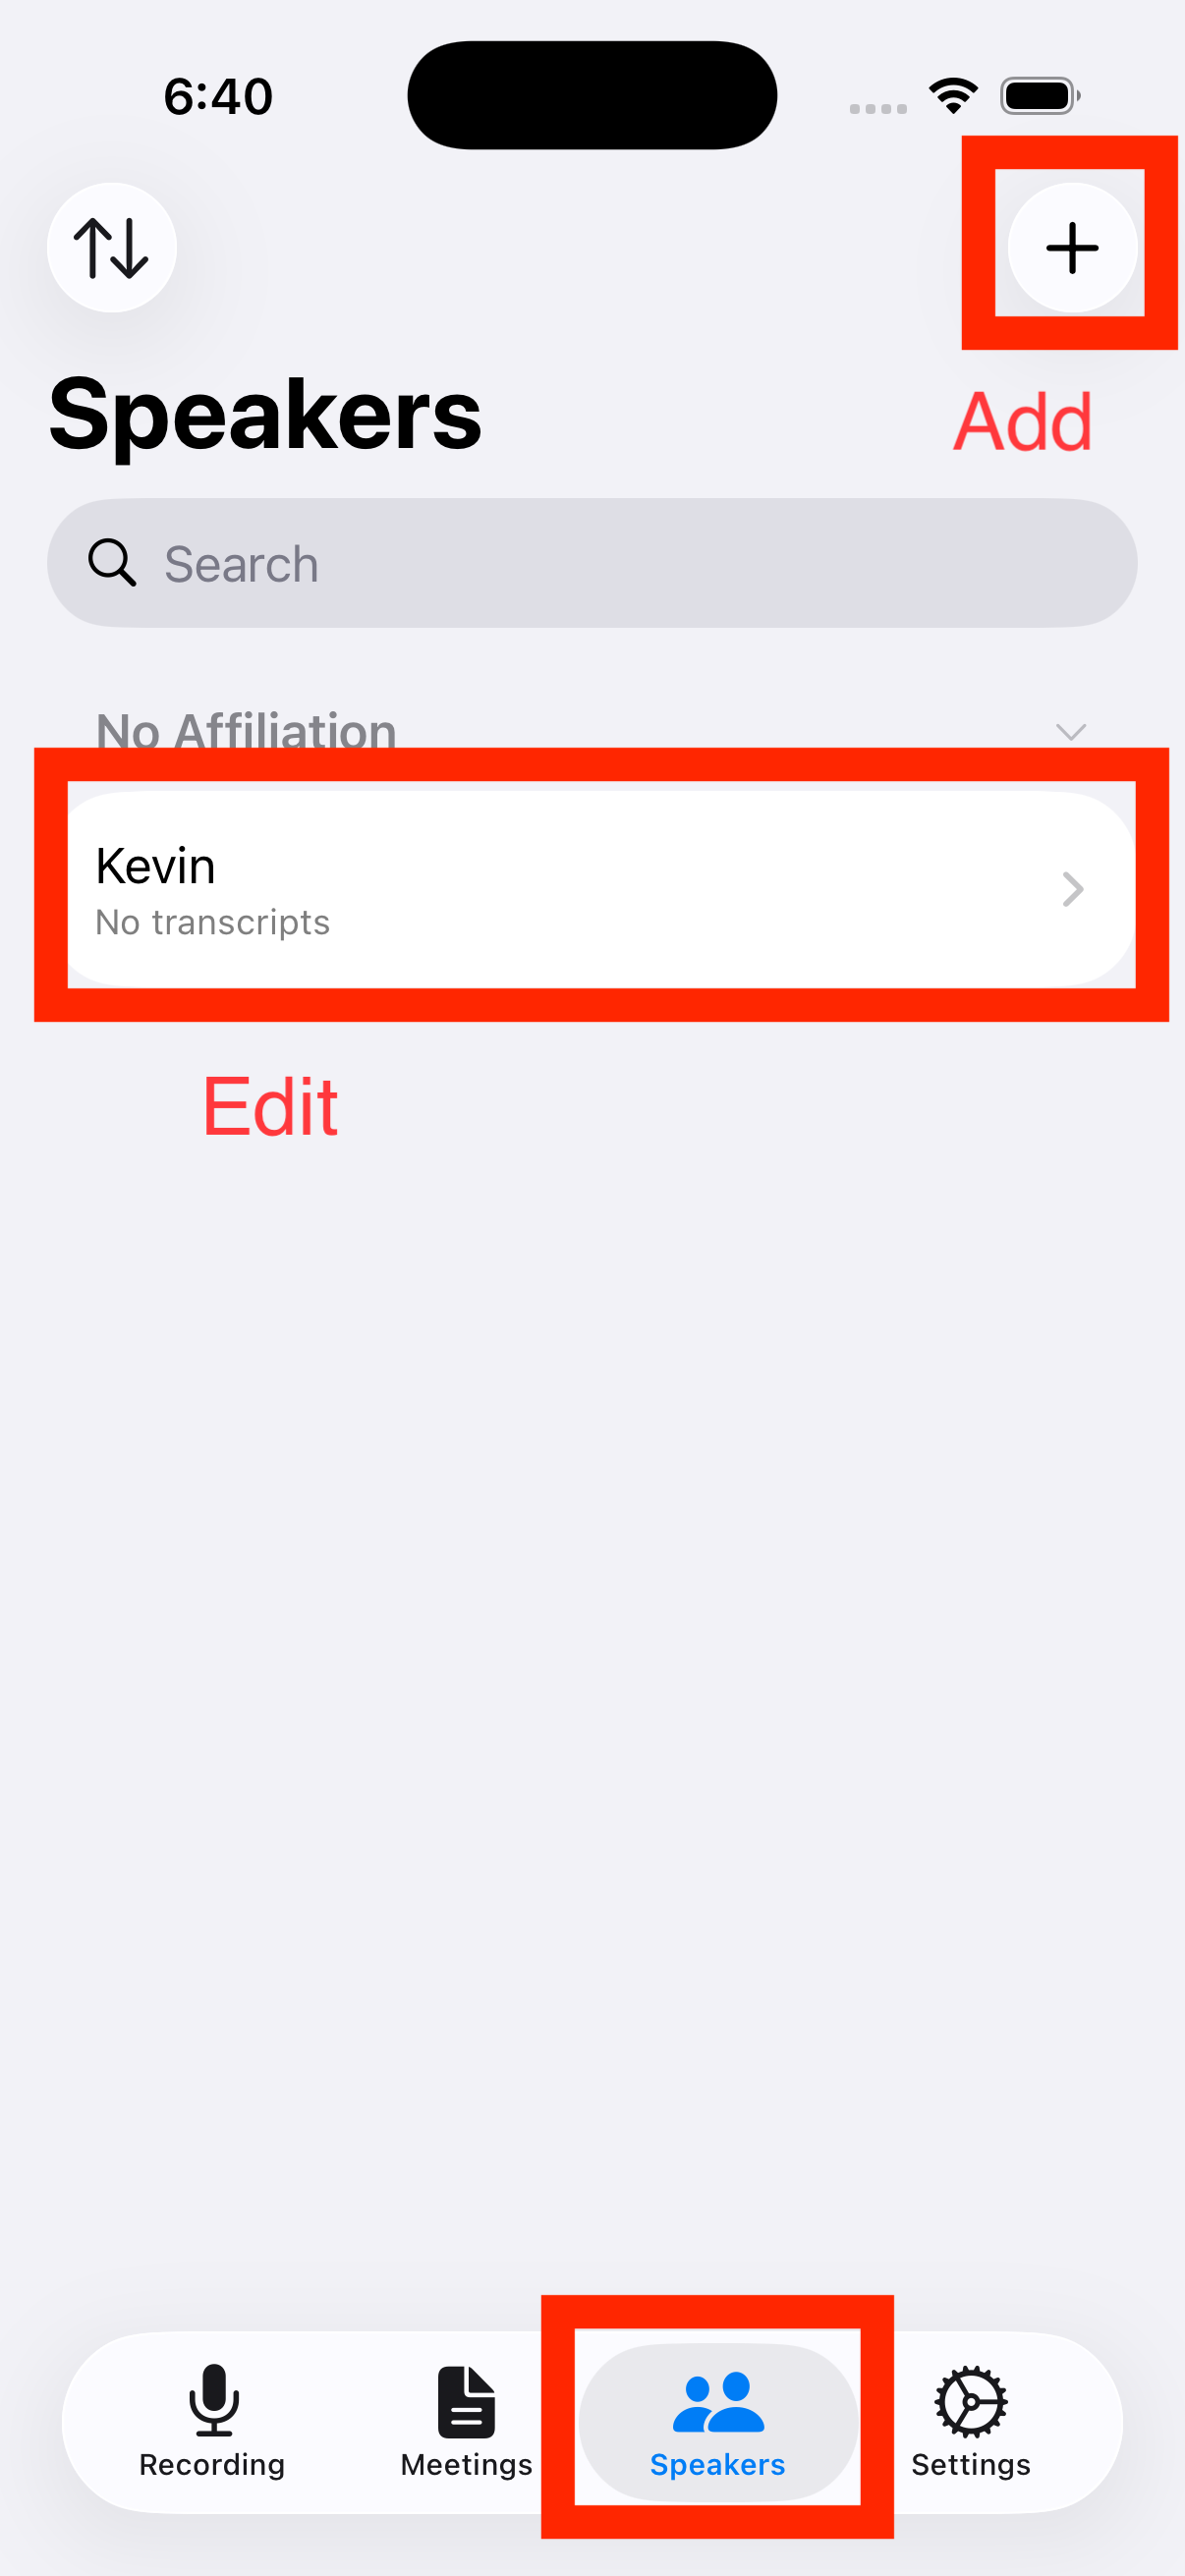
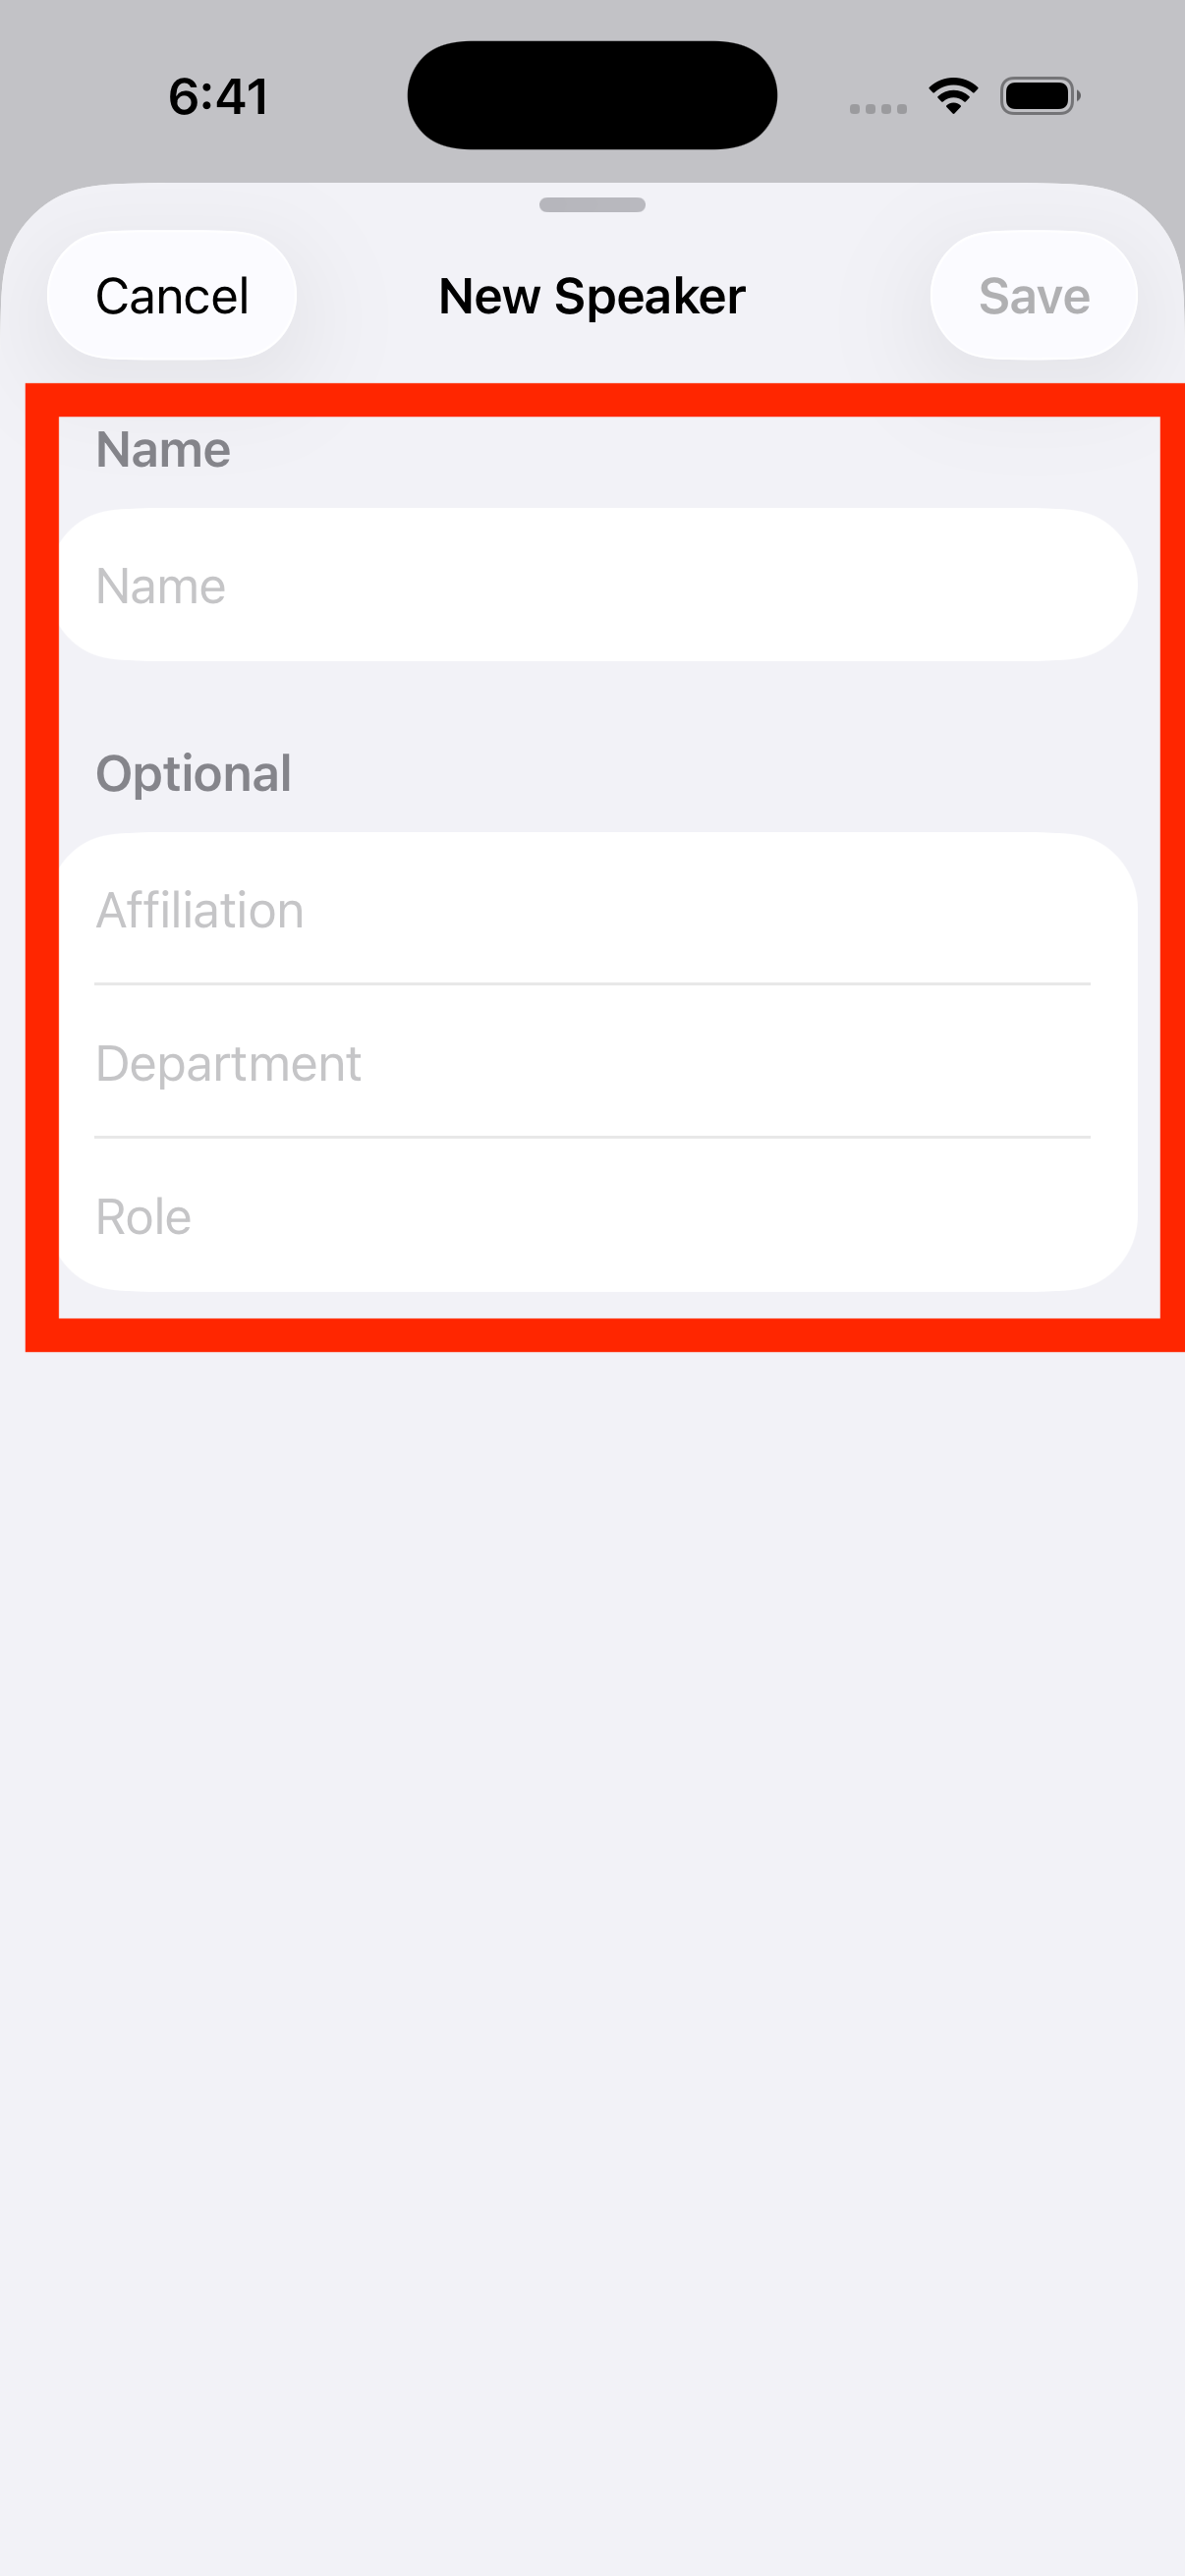
Go to the Speaker tab to edit a person's name, affiliation, or title, or to add new people (delete by swiping in the list).
📷 images/speakers-3-en.png
📷 images/speakers-3-1-en.png
📖 Dictionary Correction
Register jargon, internal terms, or proper nouns that are prone to mis-transcription, and they'll be corrected automatically after transcription completes. Japanese terms match by reading/pronunciation similarity (e.g. "経企室" for "経営企画室"), English terms match by phoneme (pronunciation) similarity (e.g. "DBX" for "Databricks") — each is managed as a separate list.
1
Turn it on and download the model
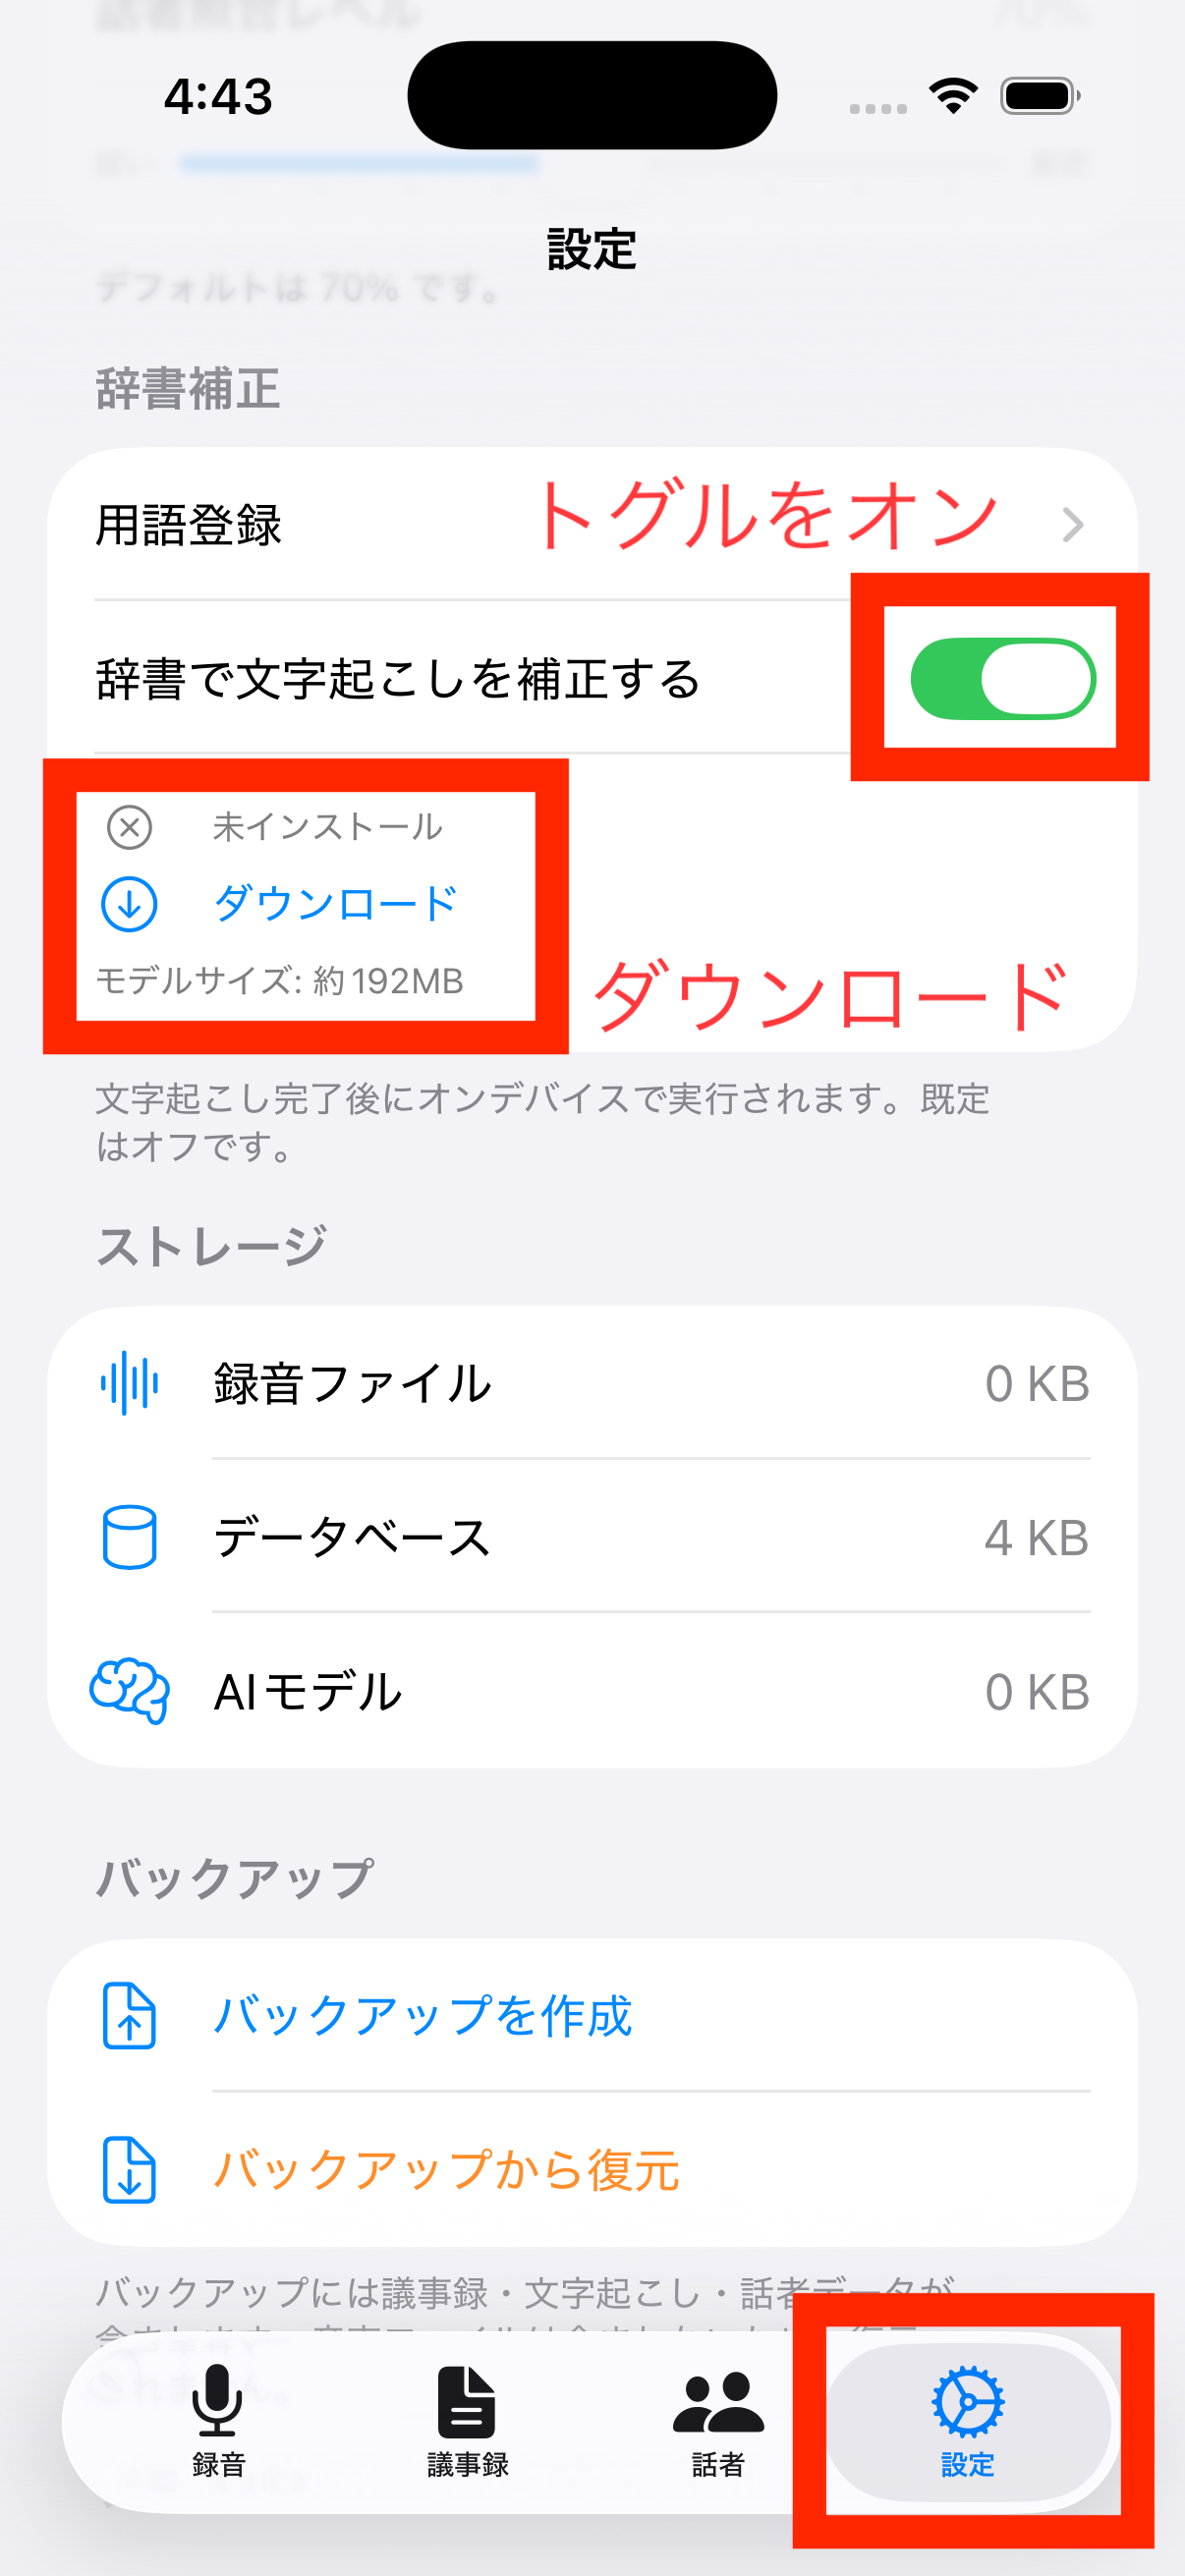
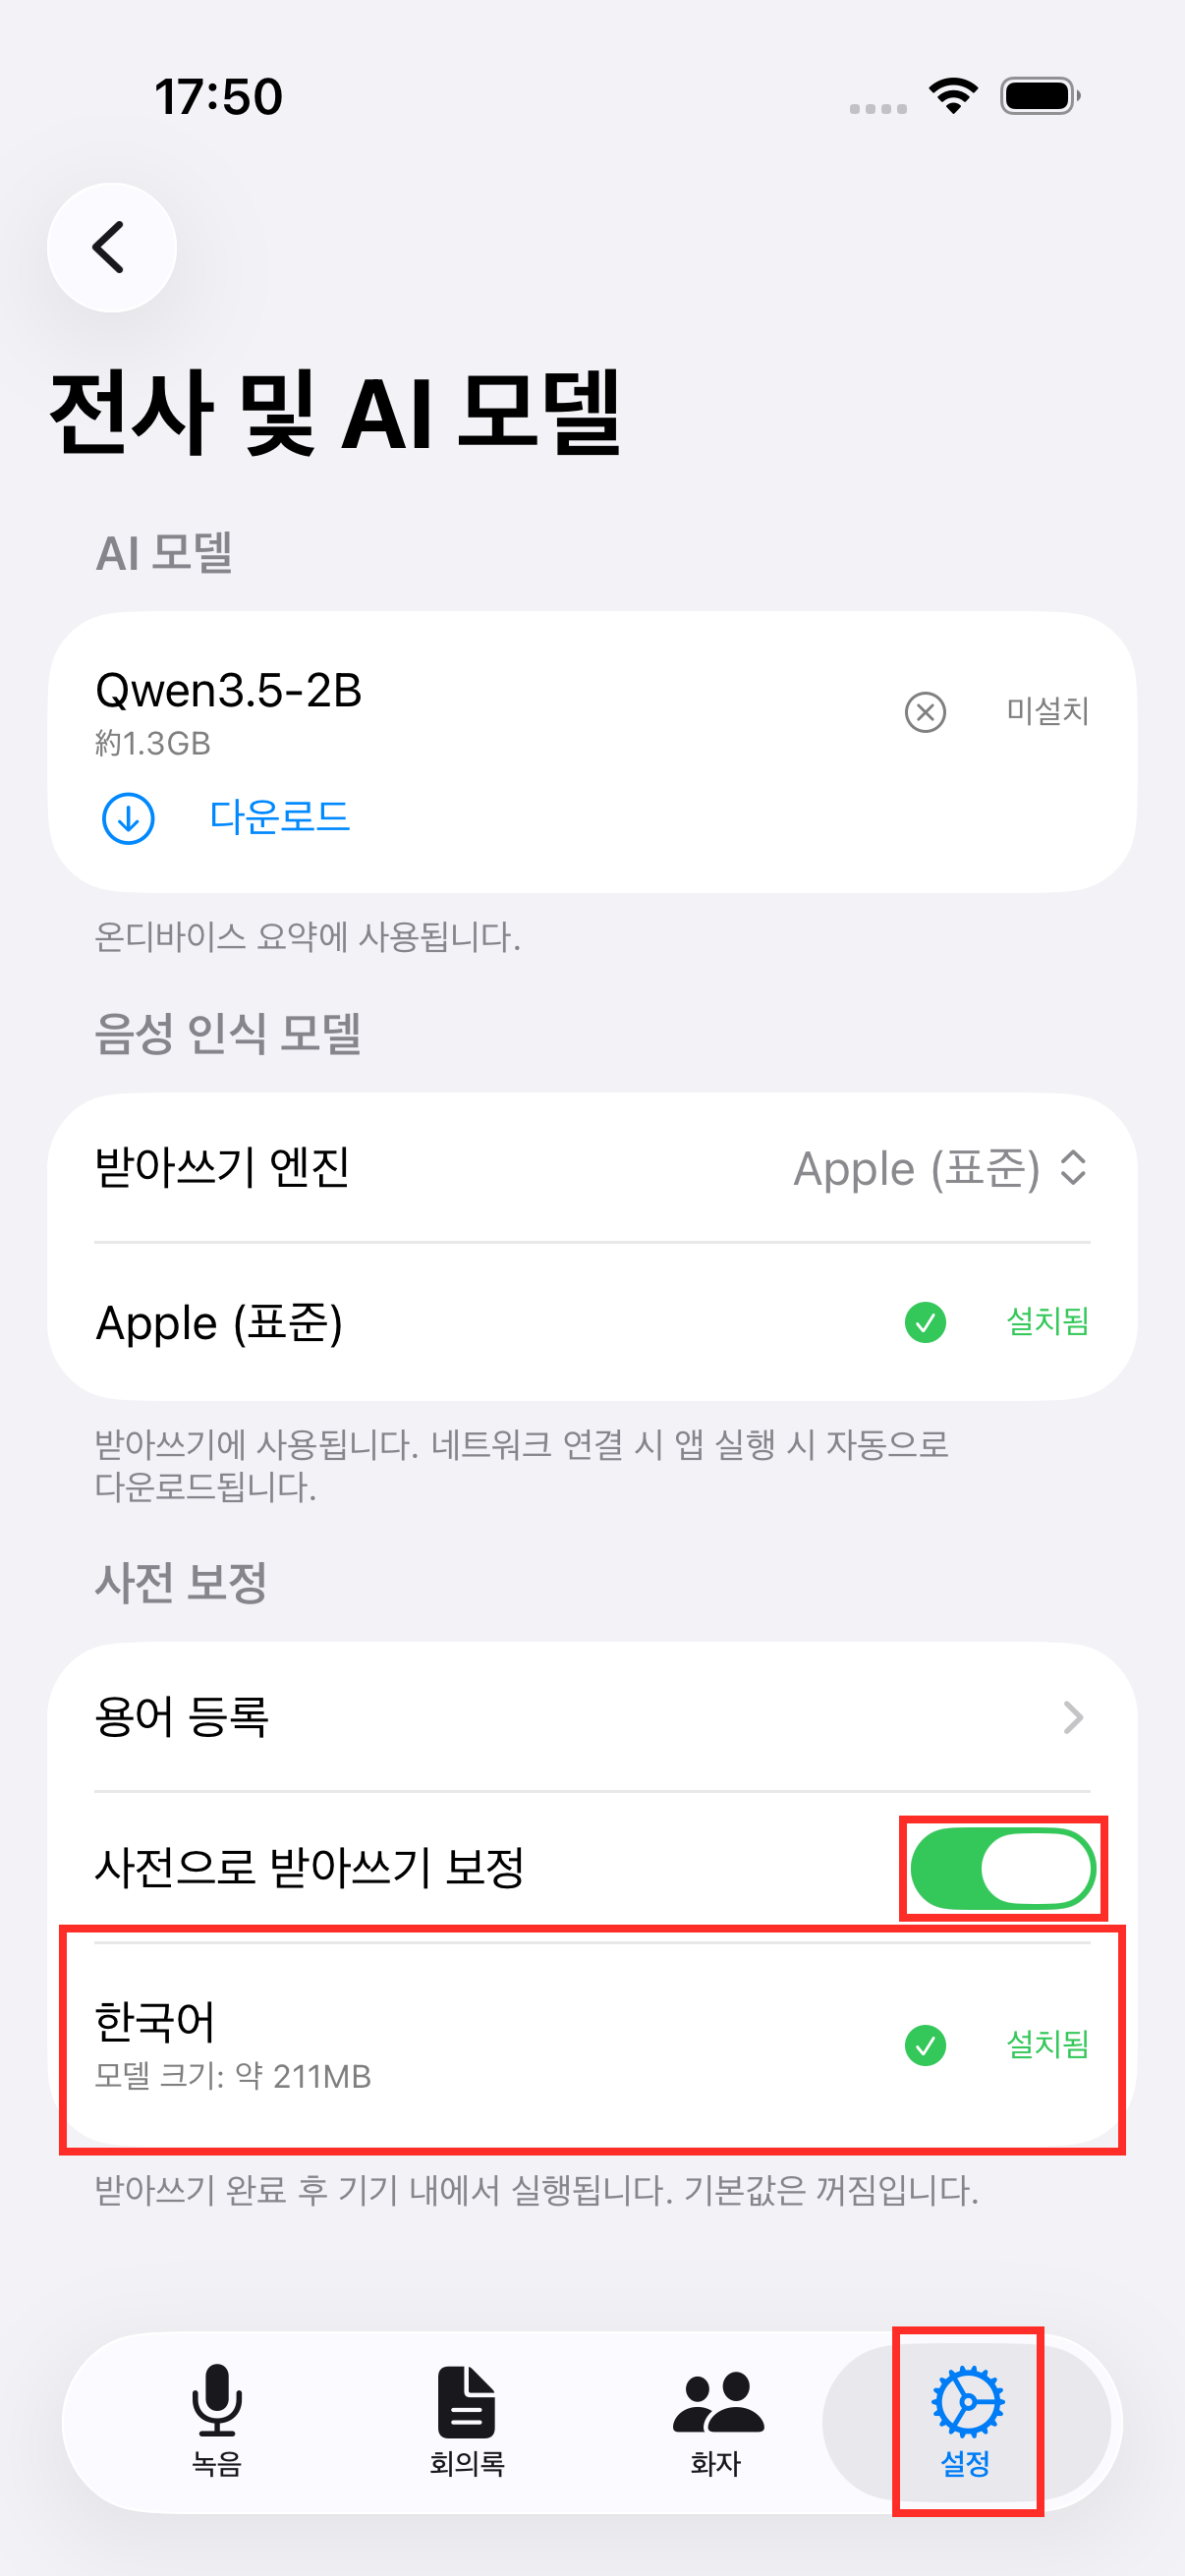
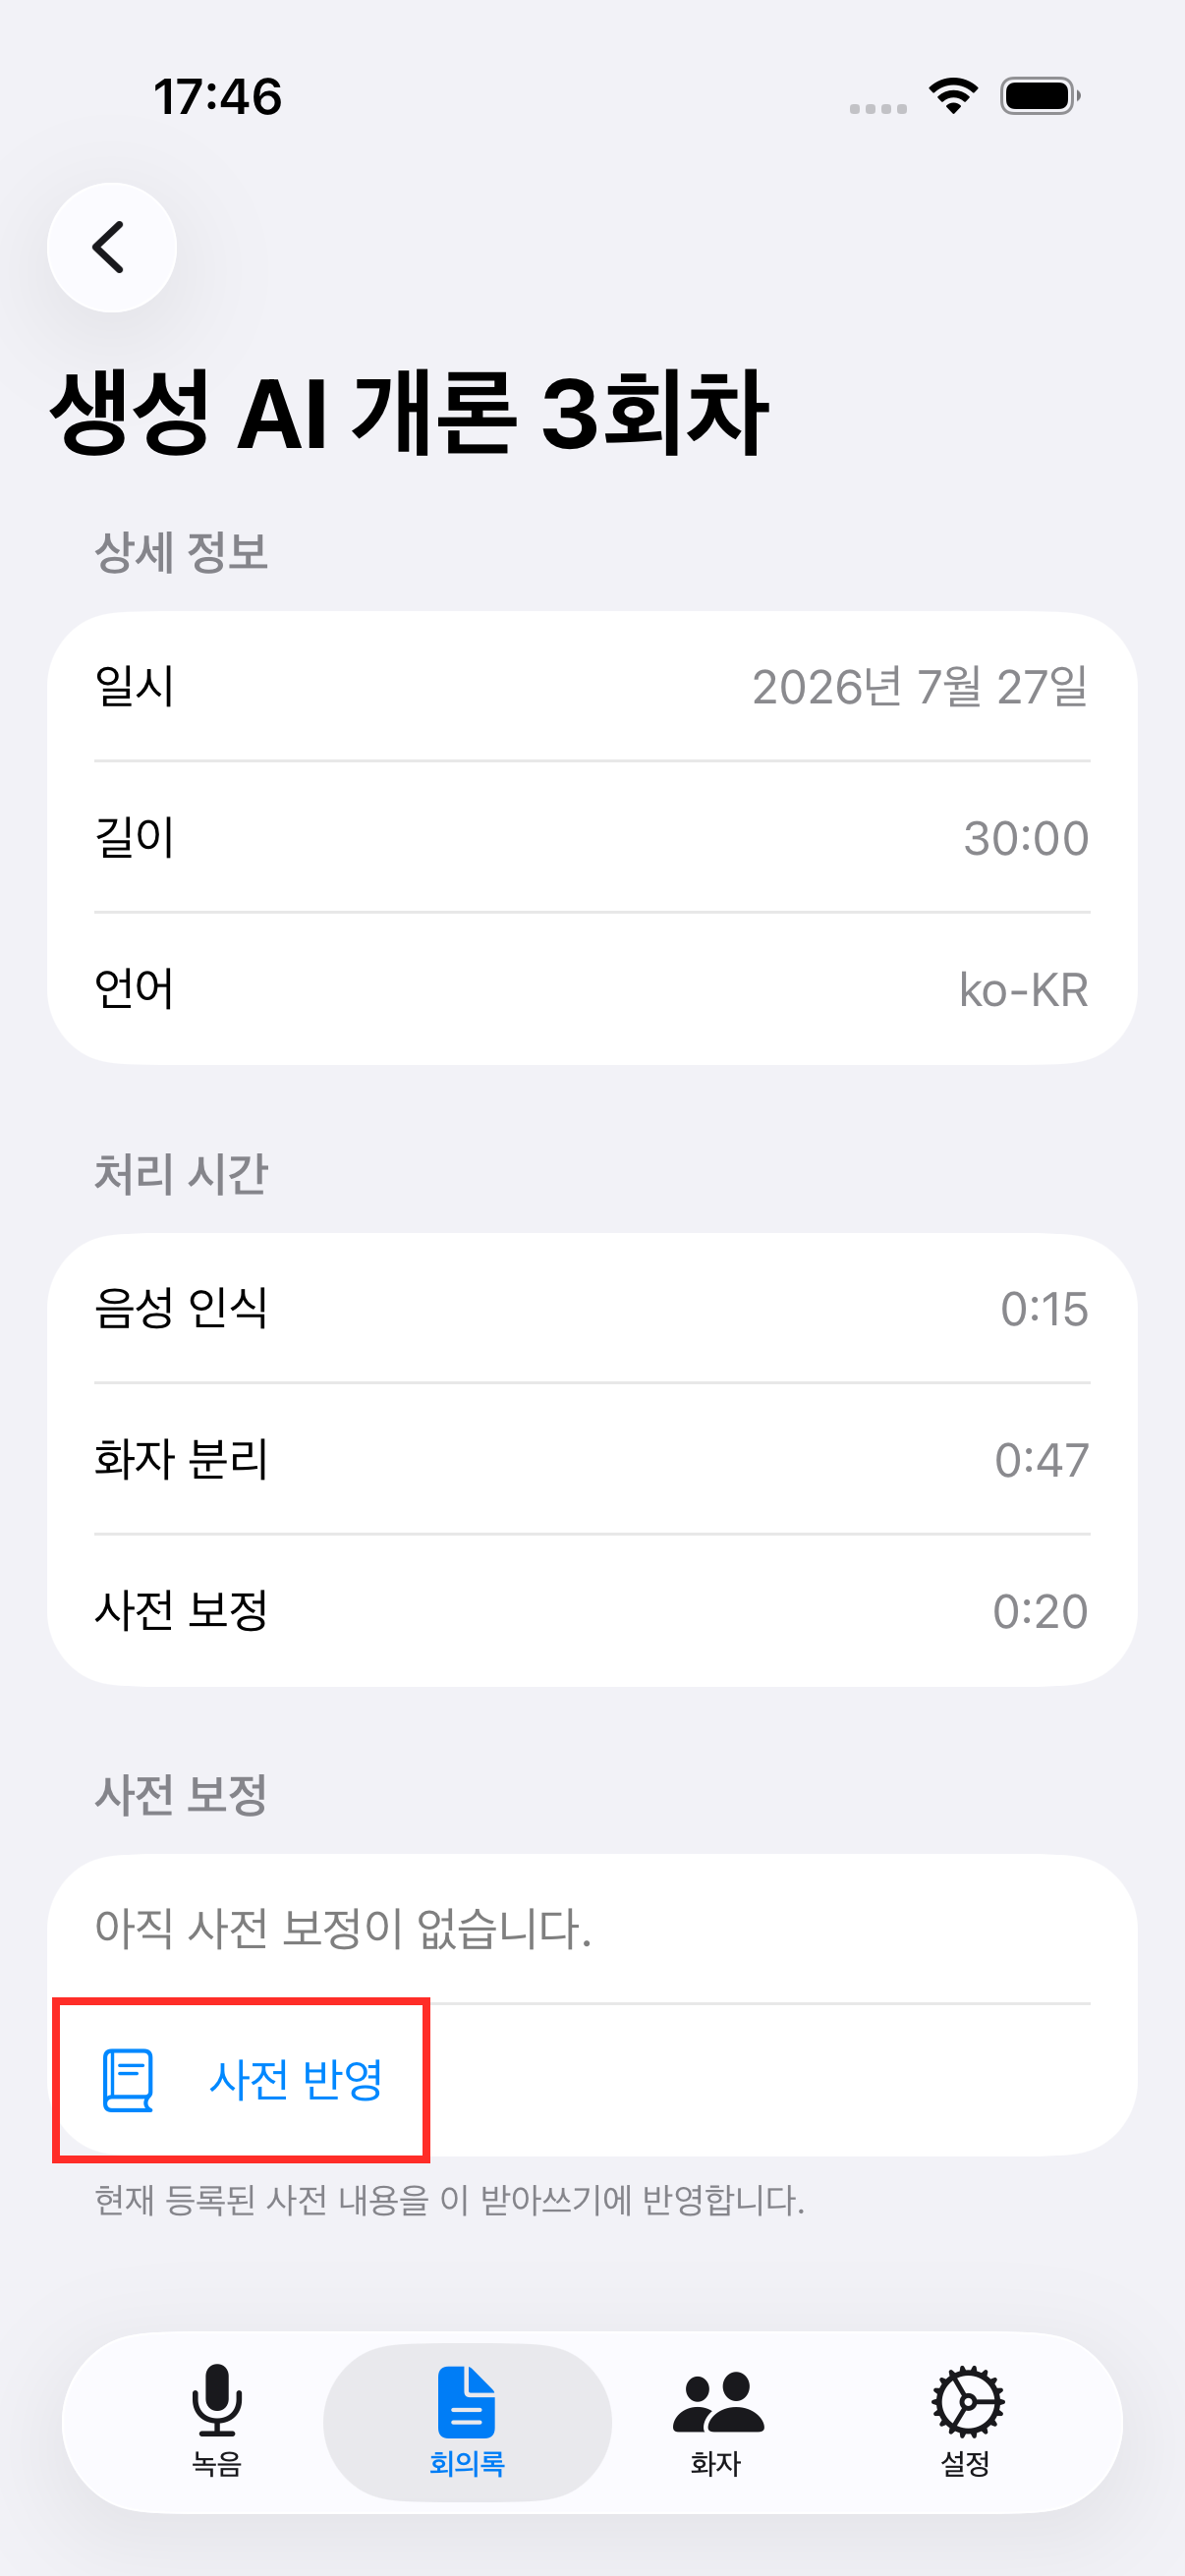
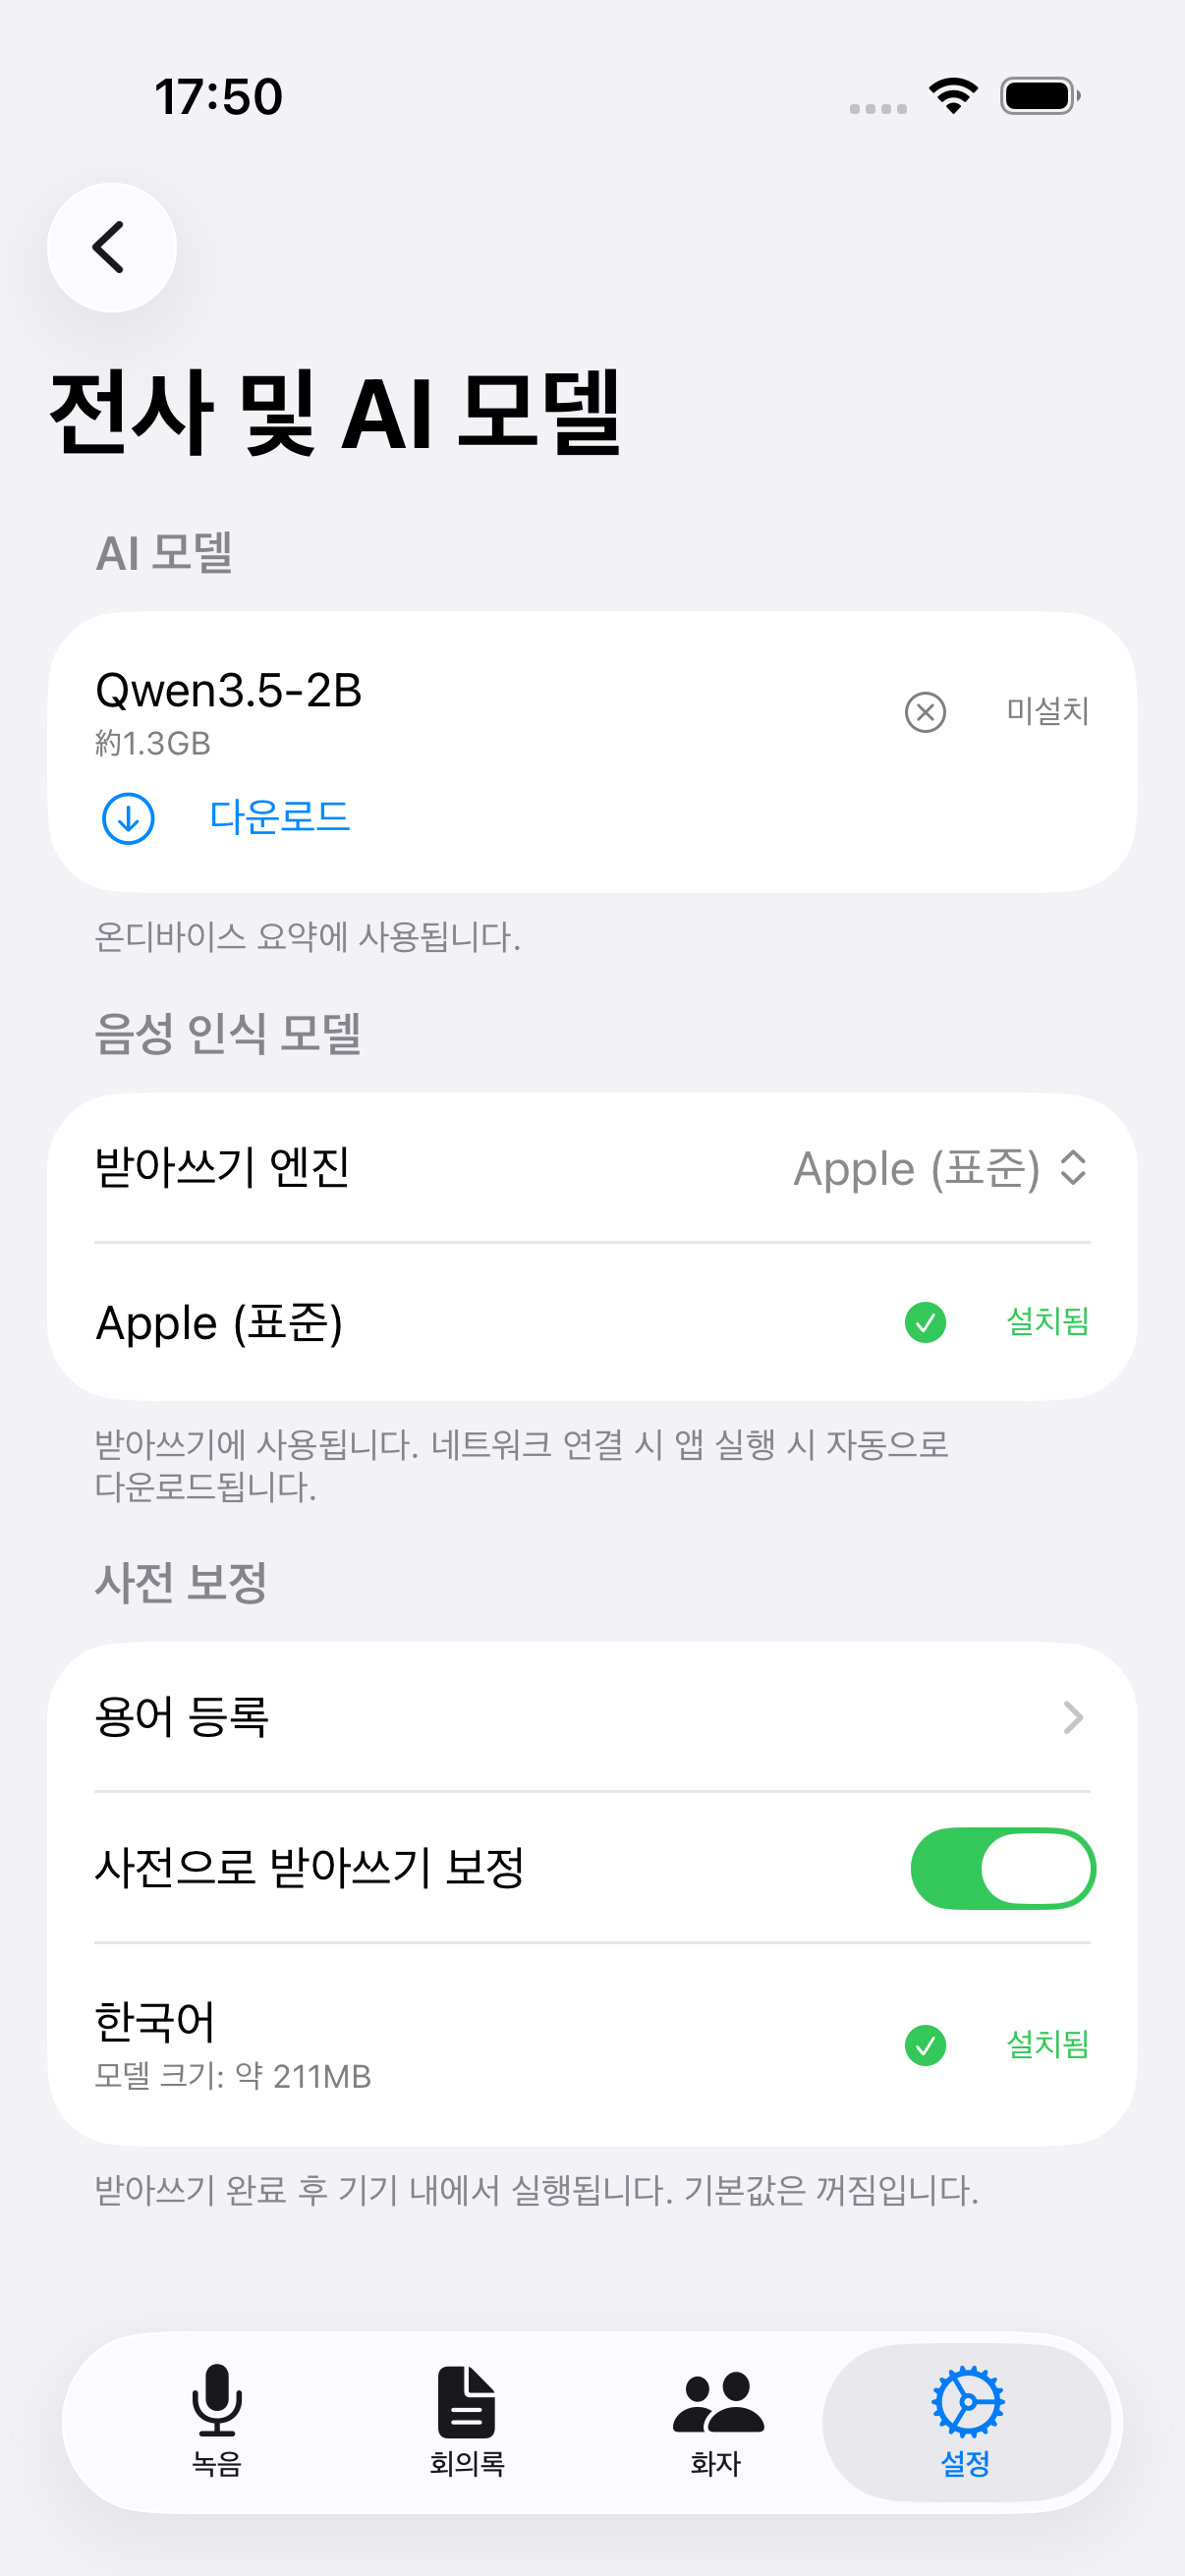
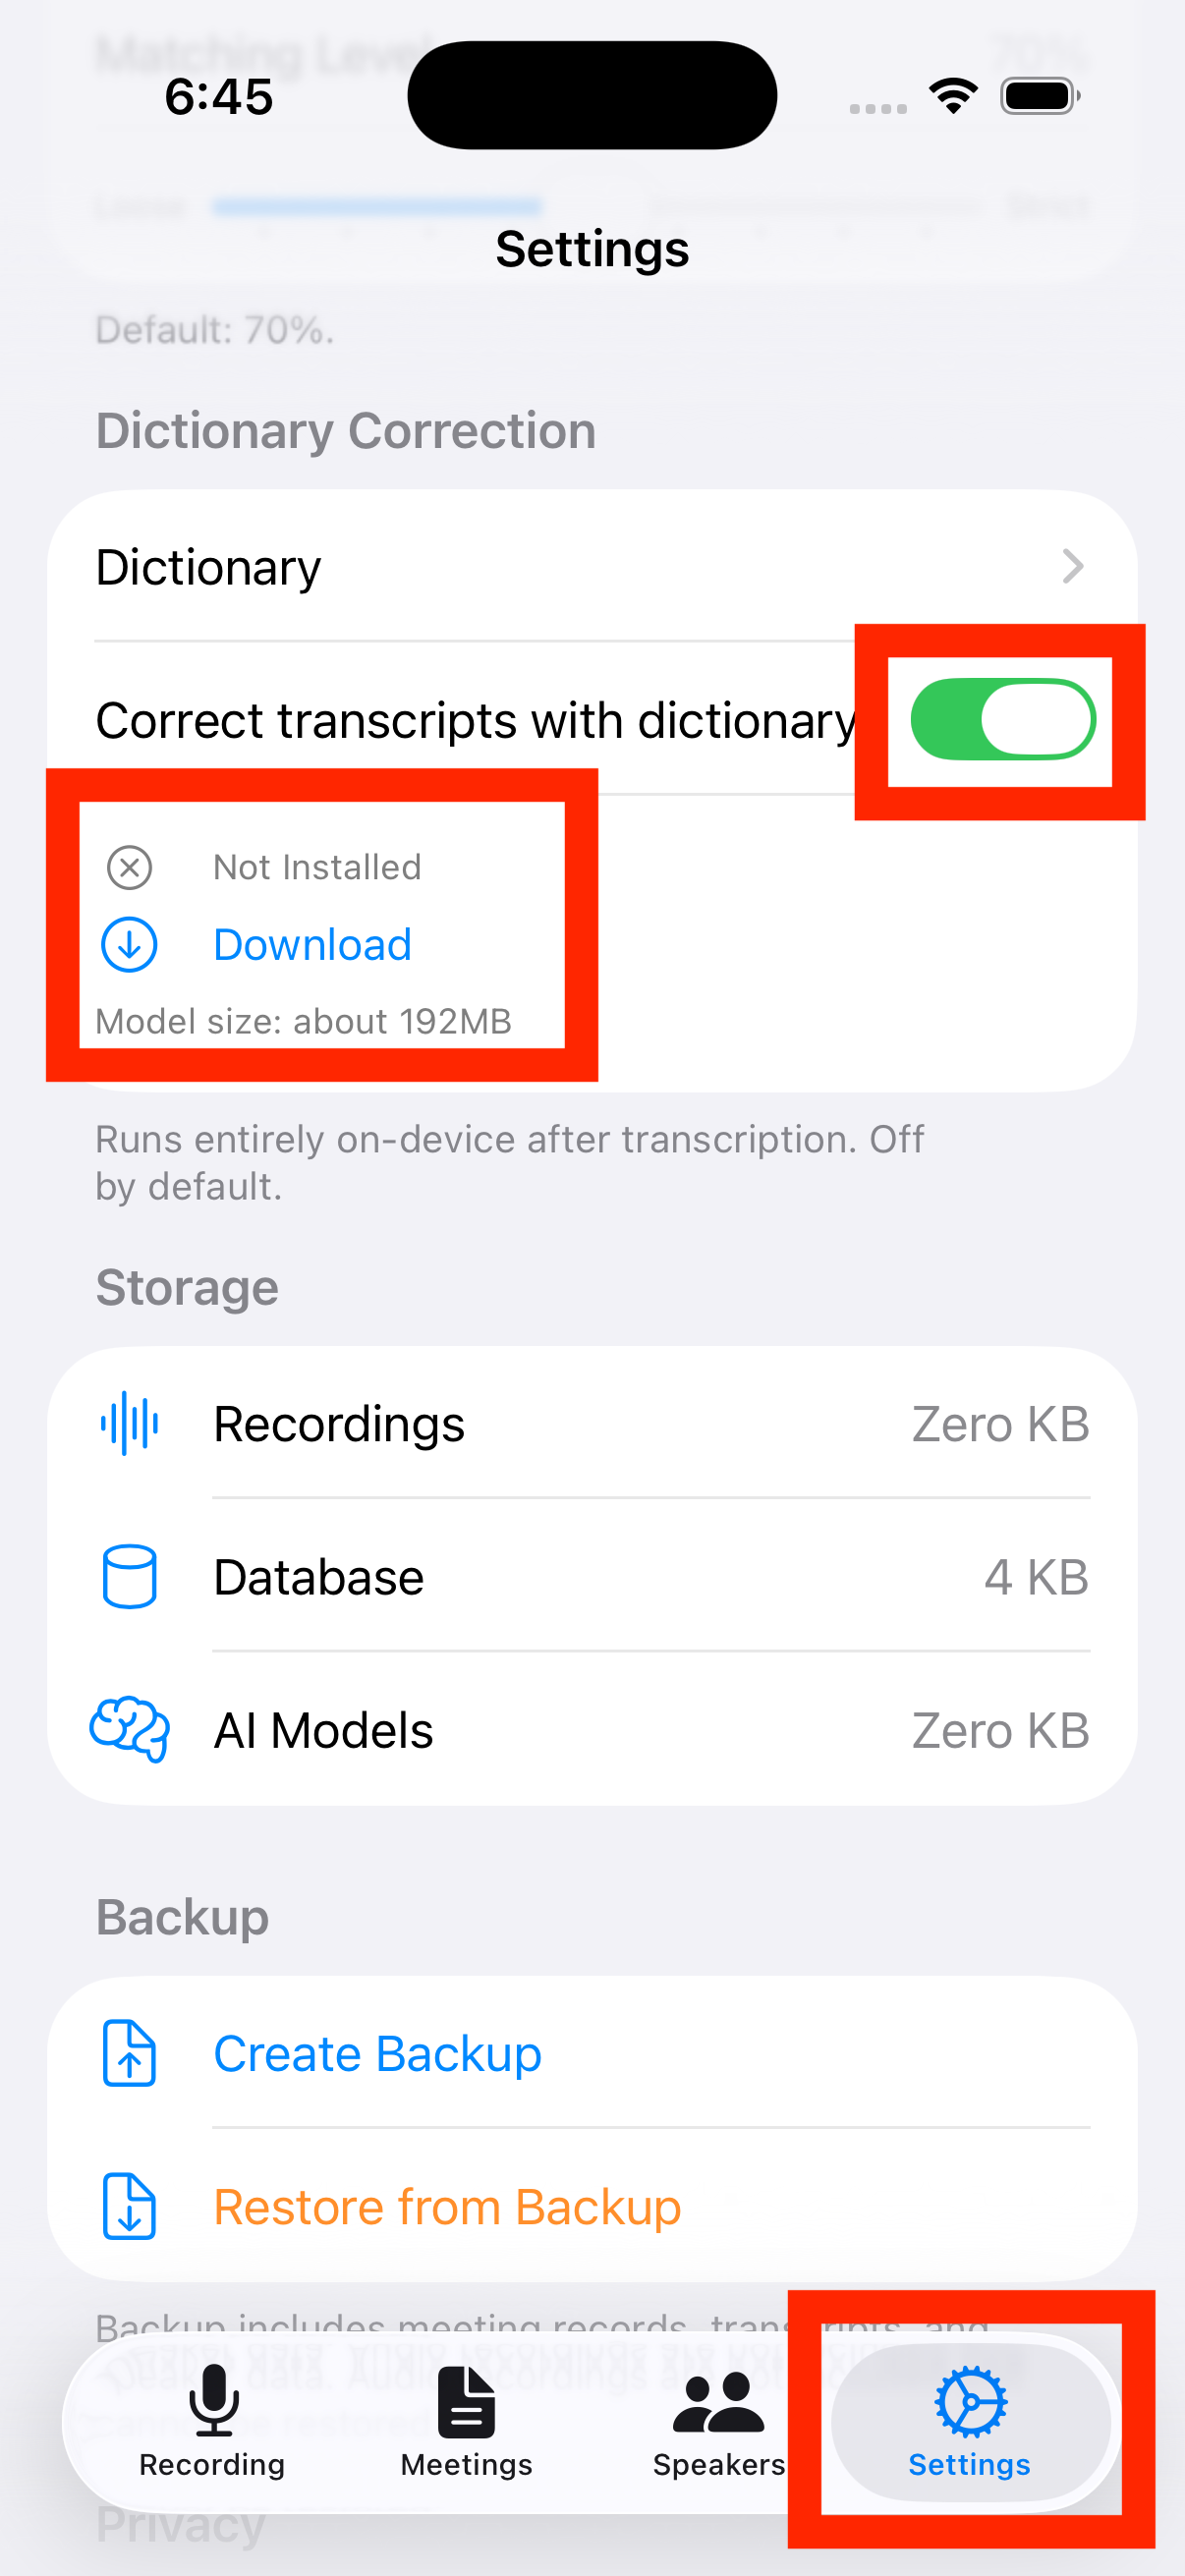
Turn on "Correct transcripts using dictionary" under Settings > Transcription & AI Models, in the "Dictionary Correction" section (off by default). Turning it on reveals the model download UI — download it the first time.
📷 images/dictionary-1-en.png
2
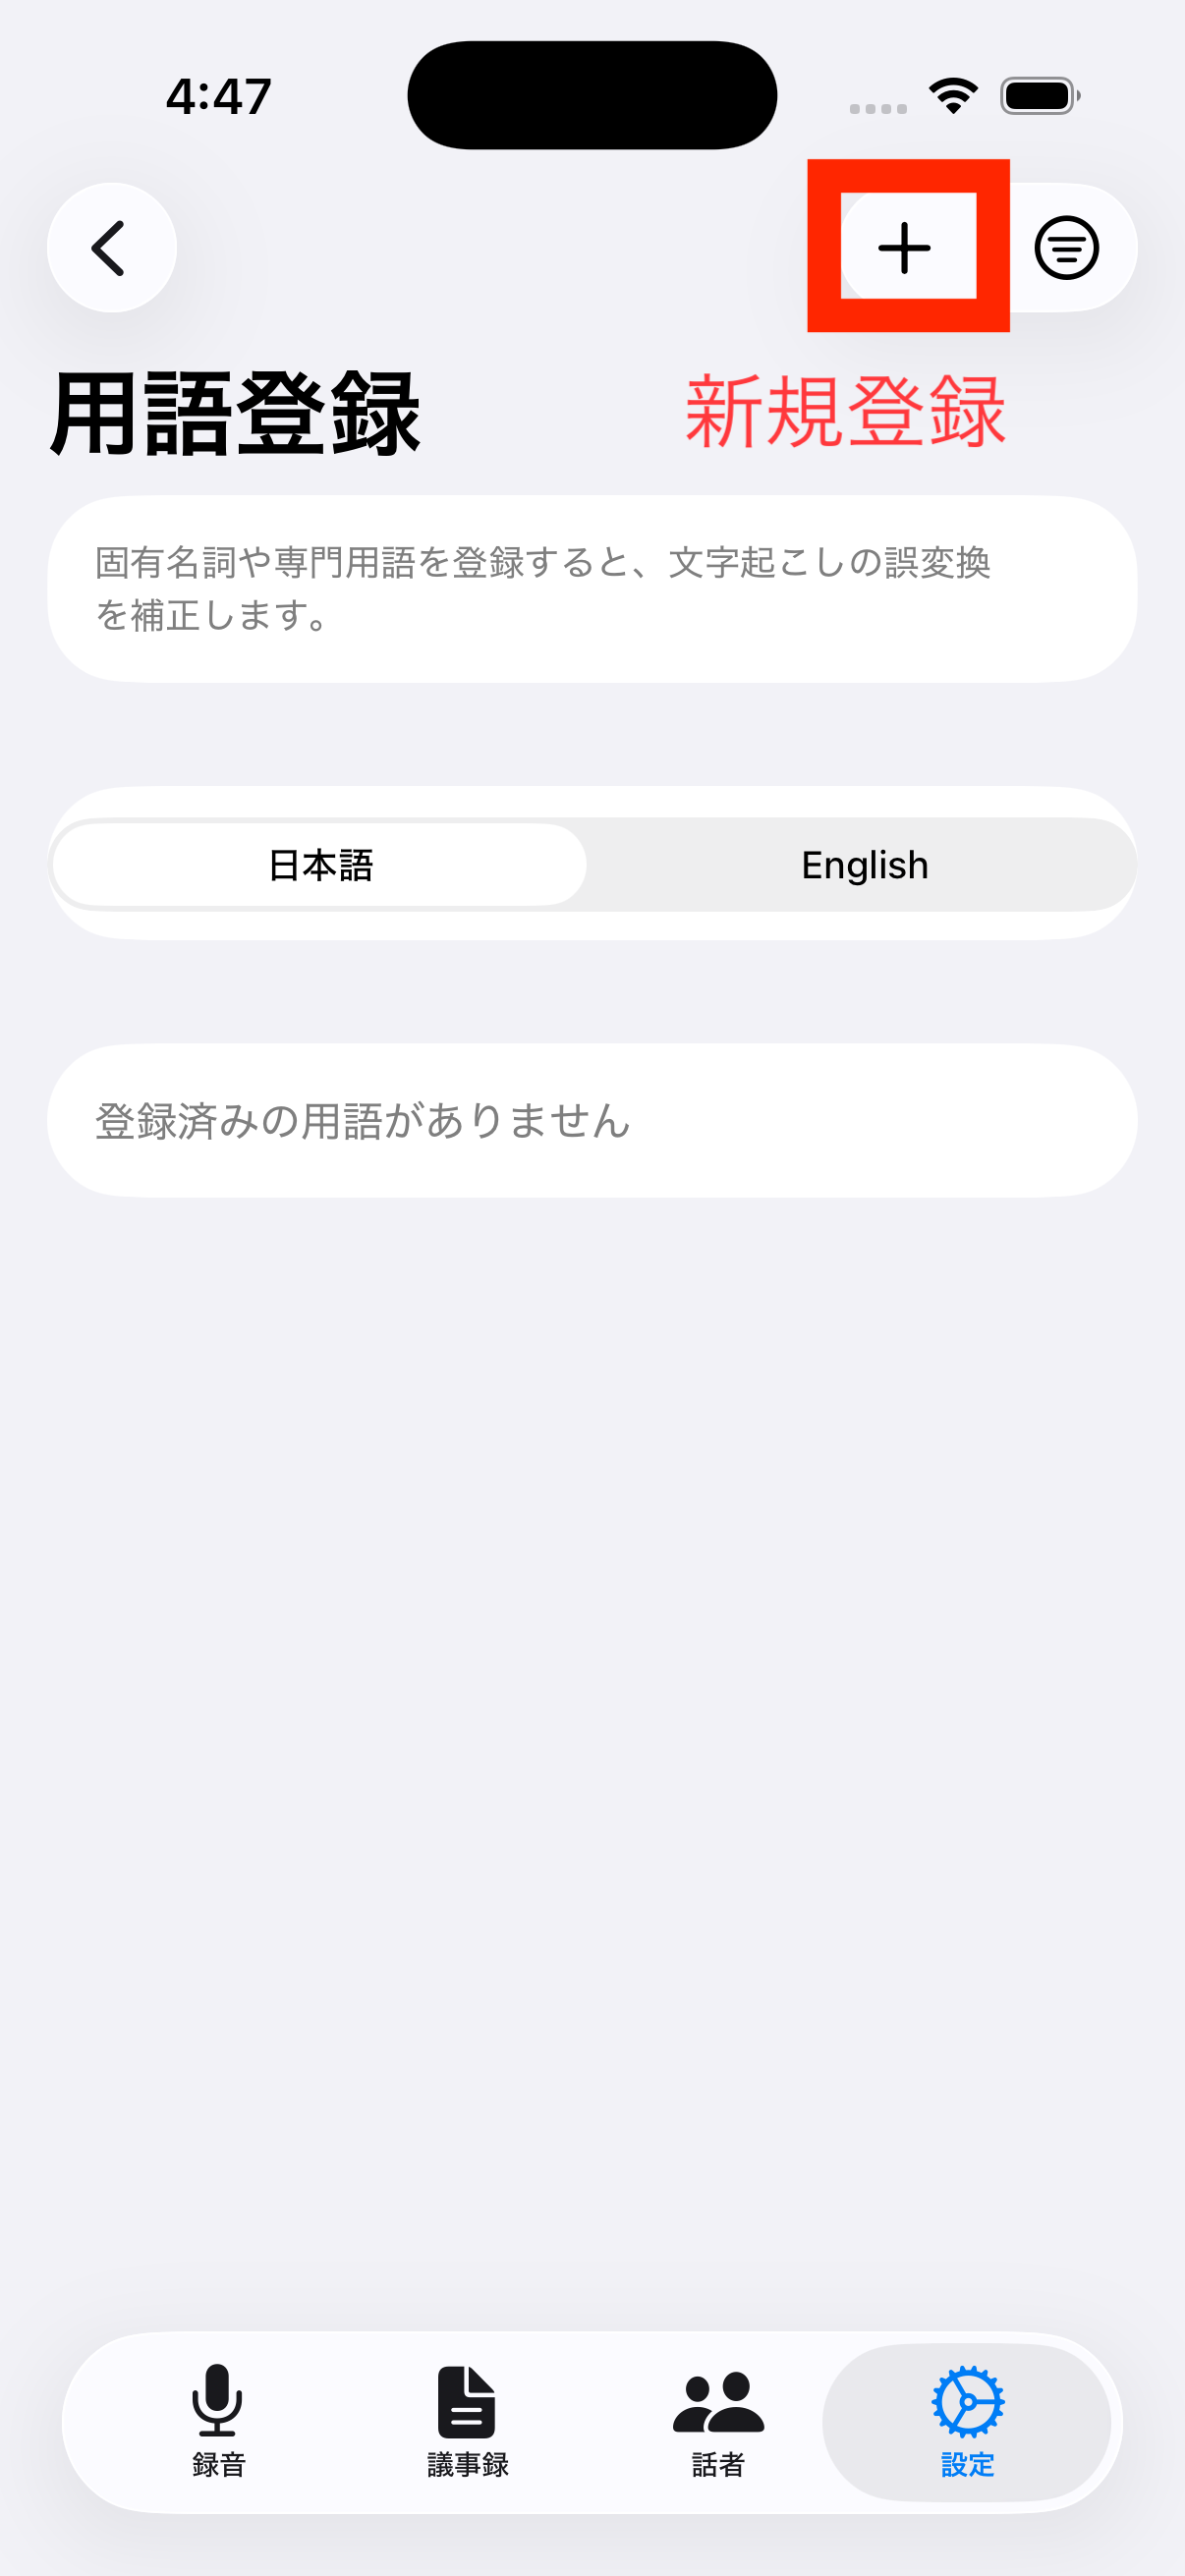
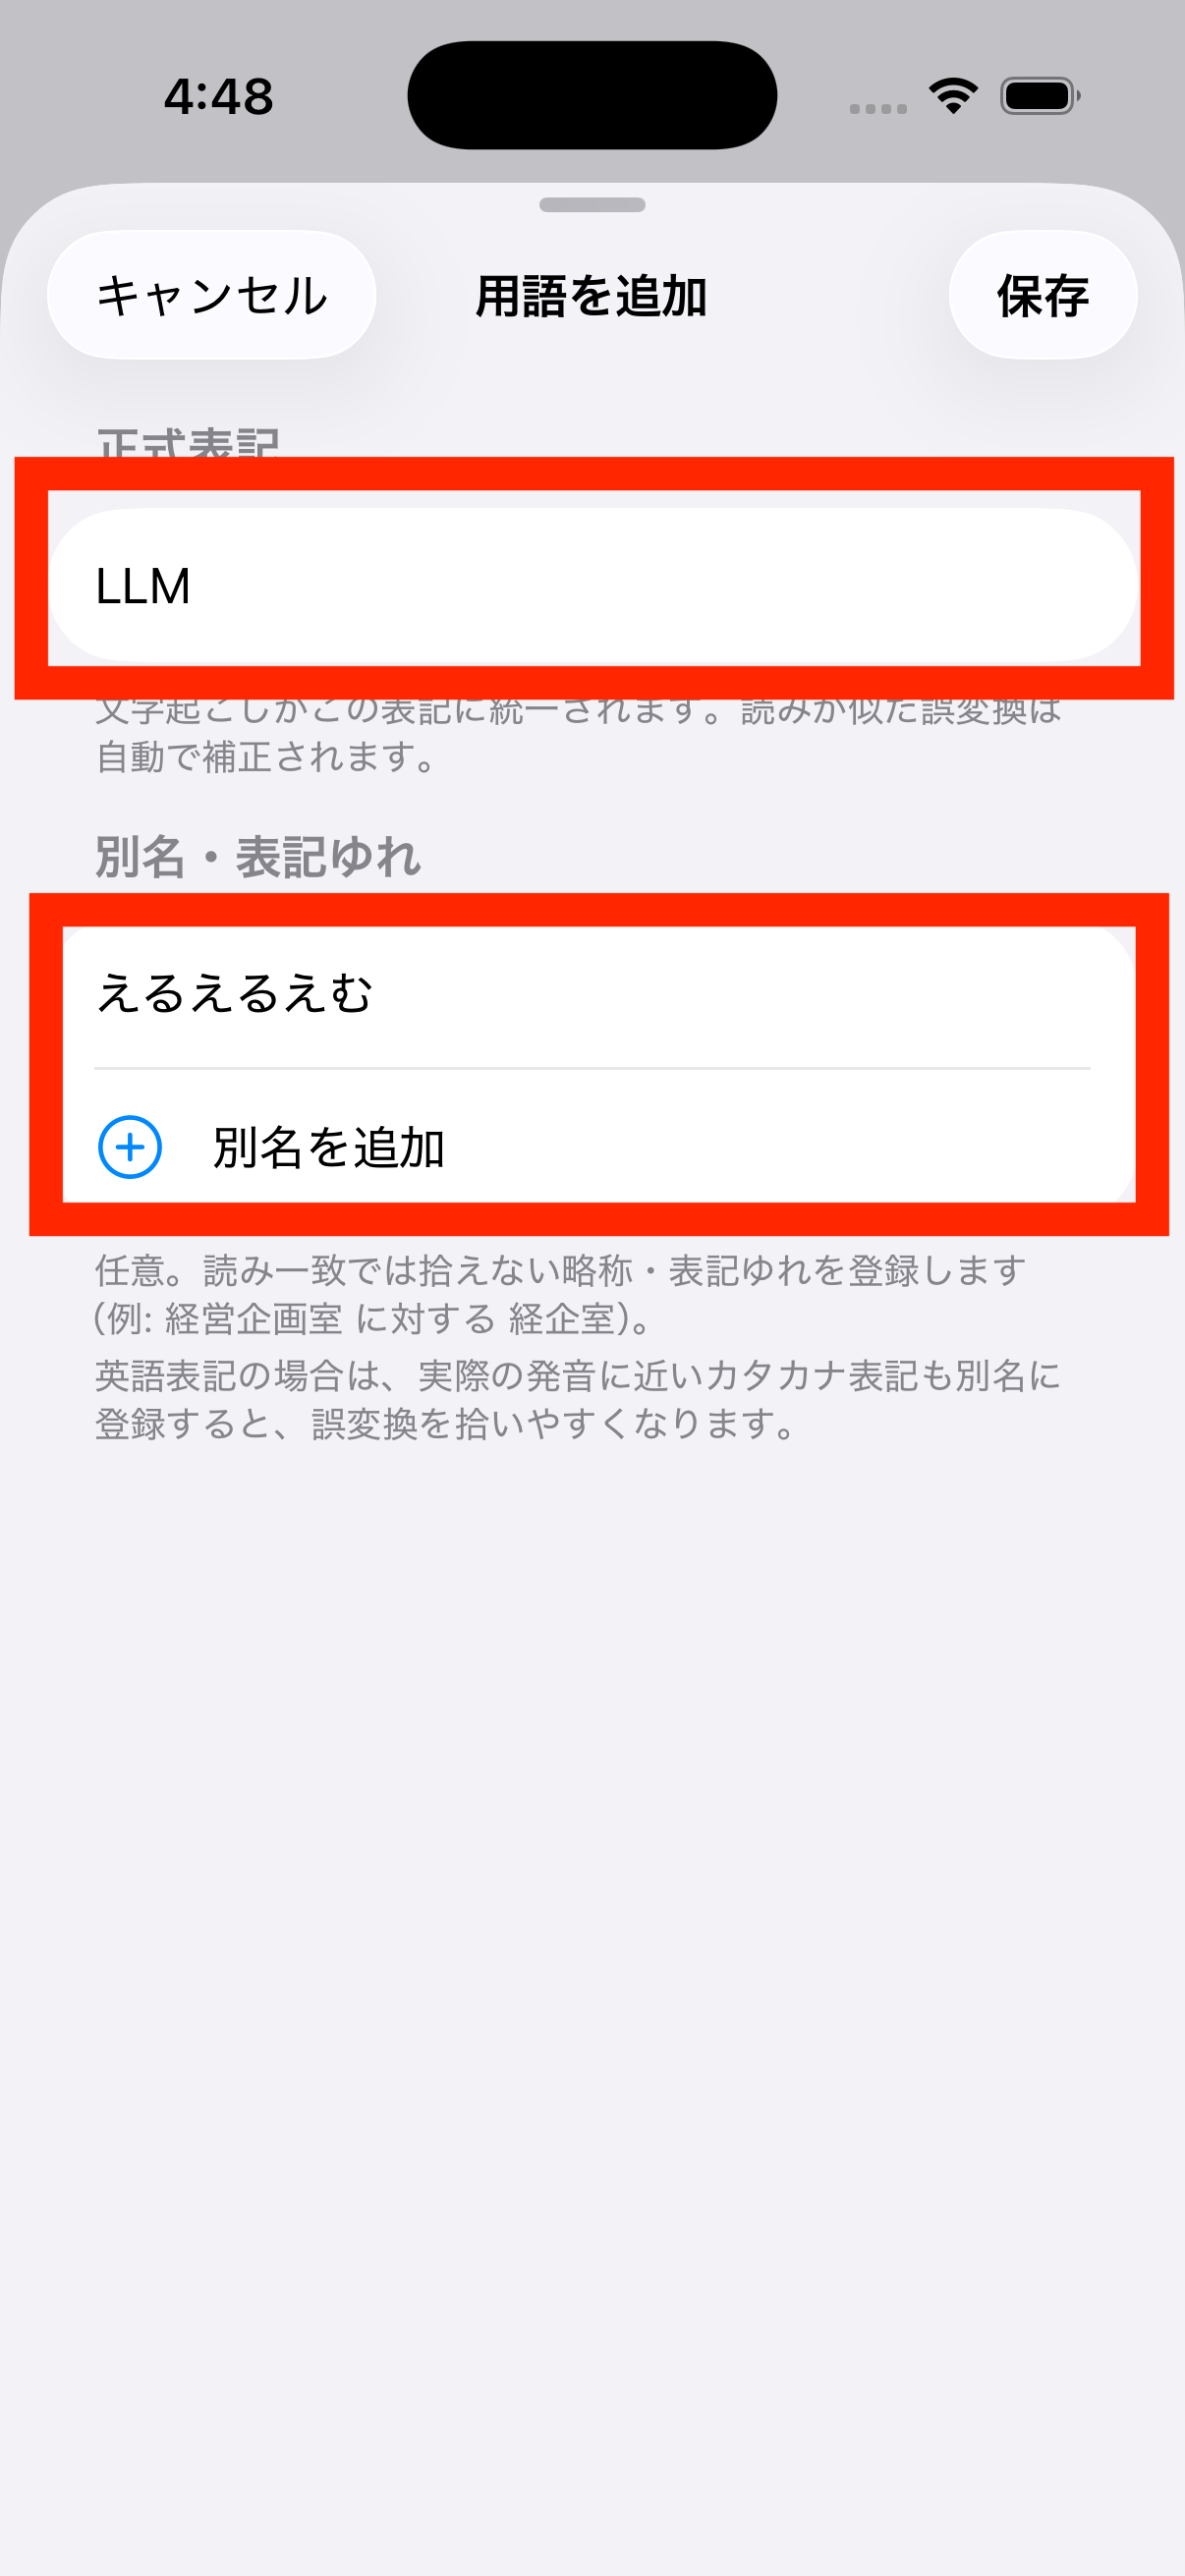
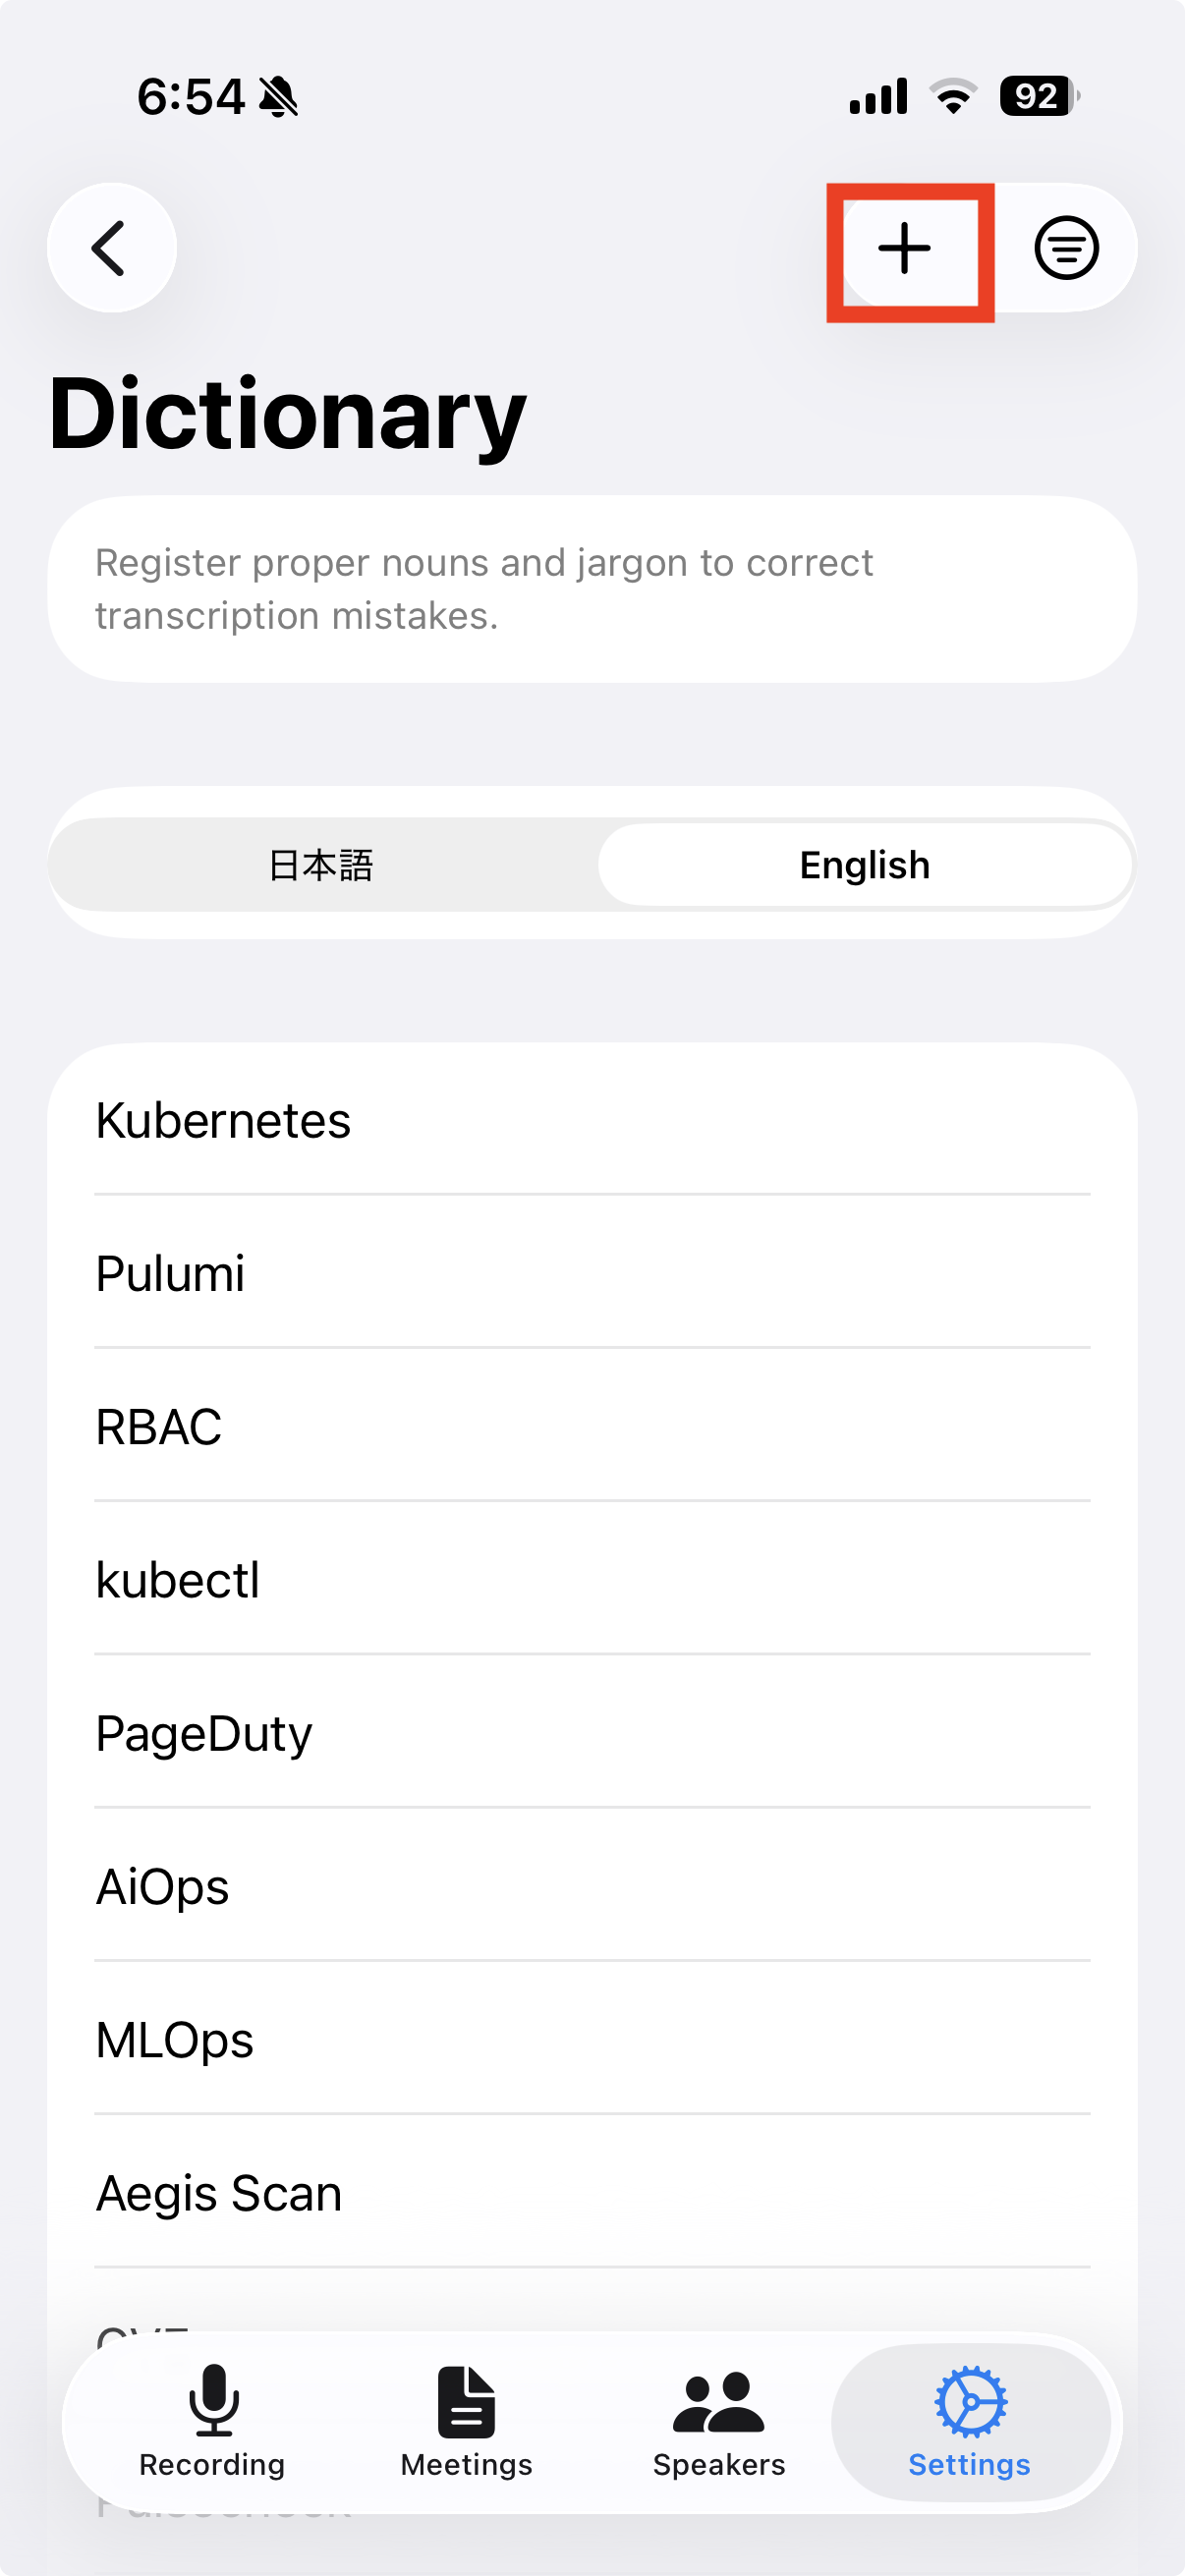
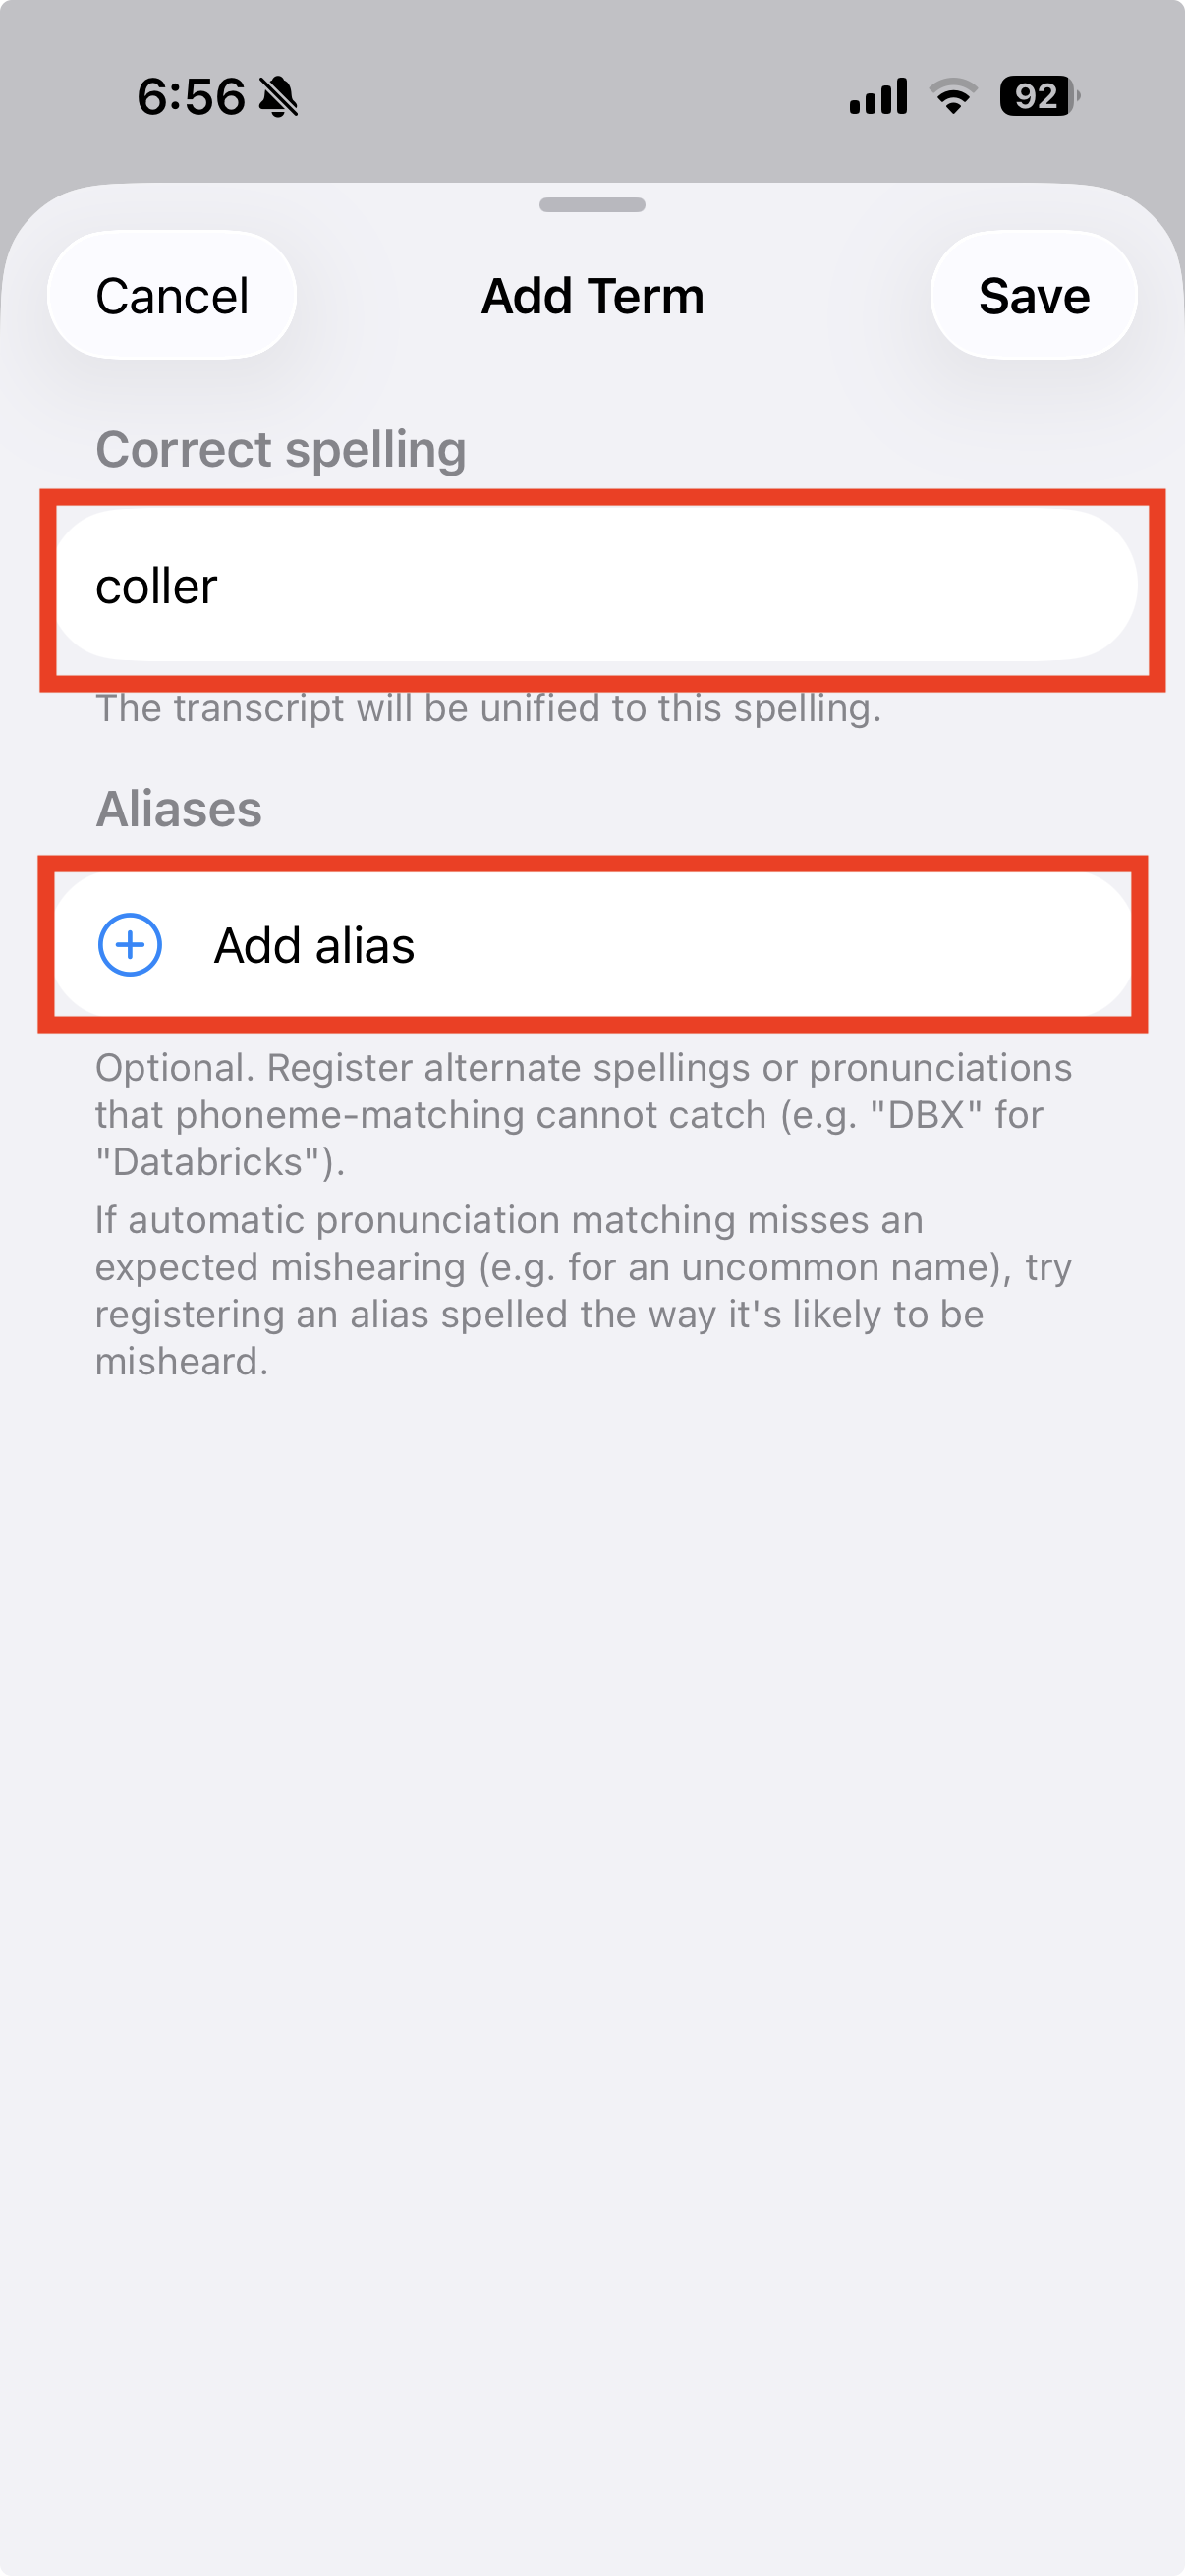
Register terms
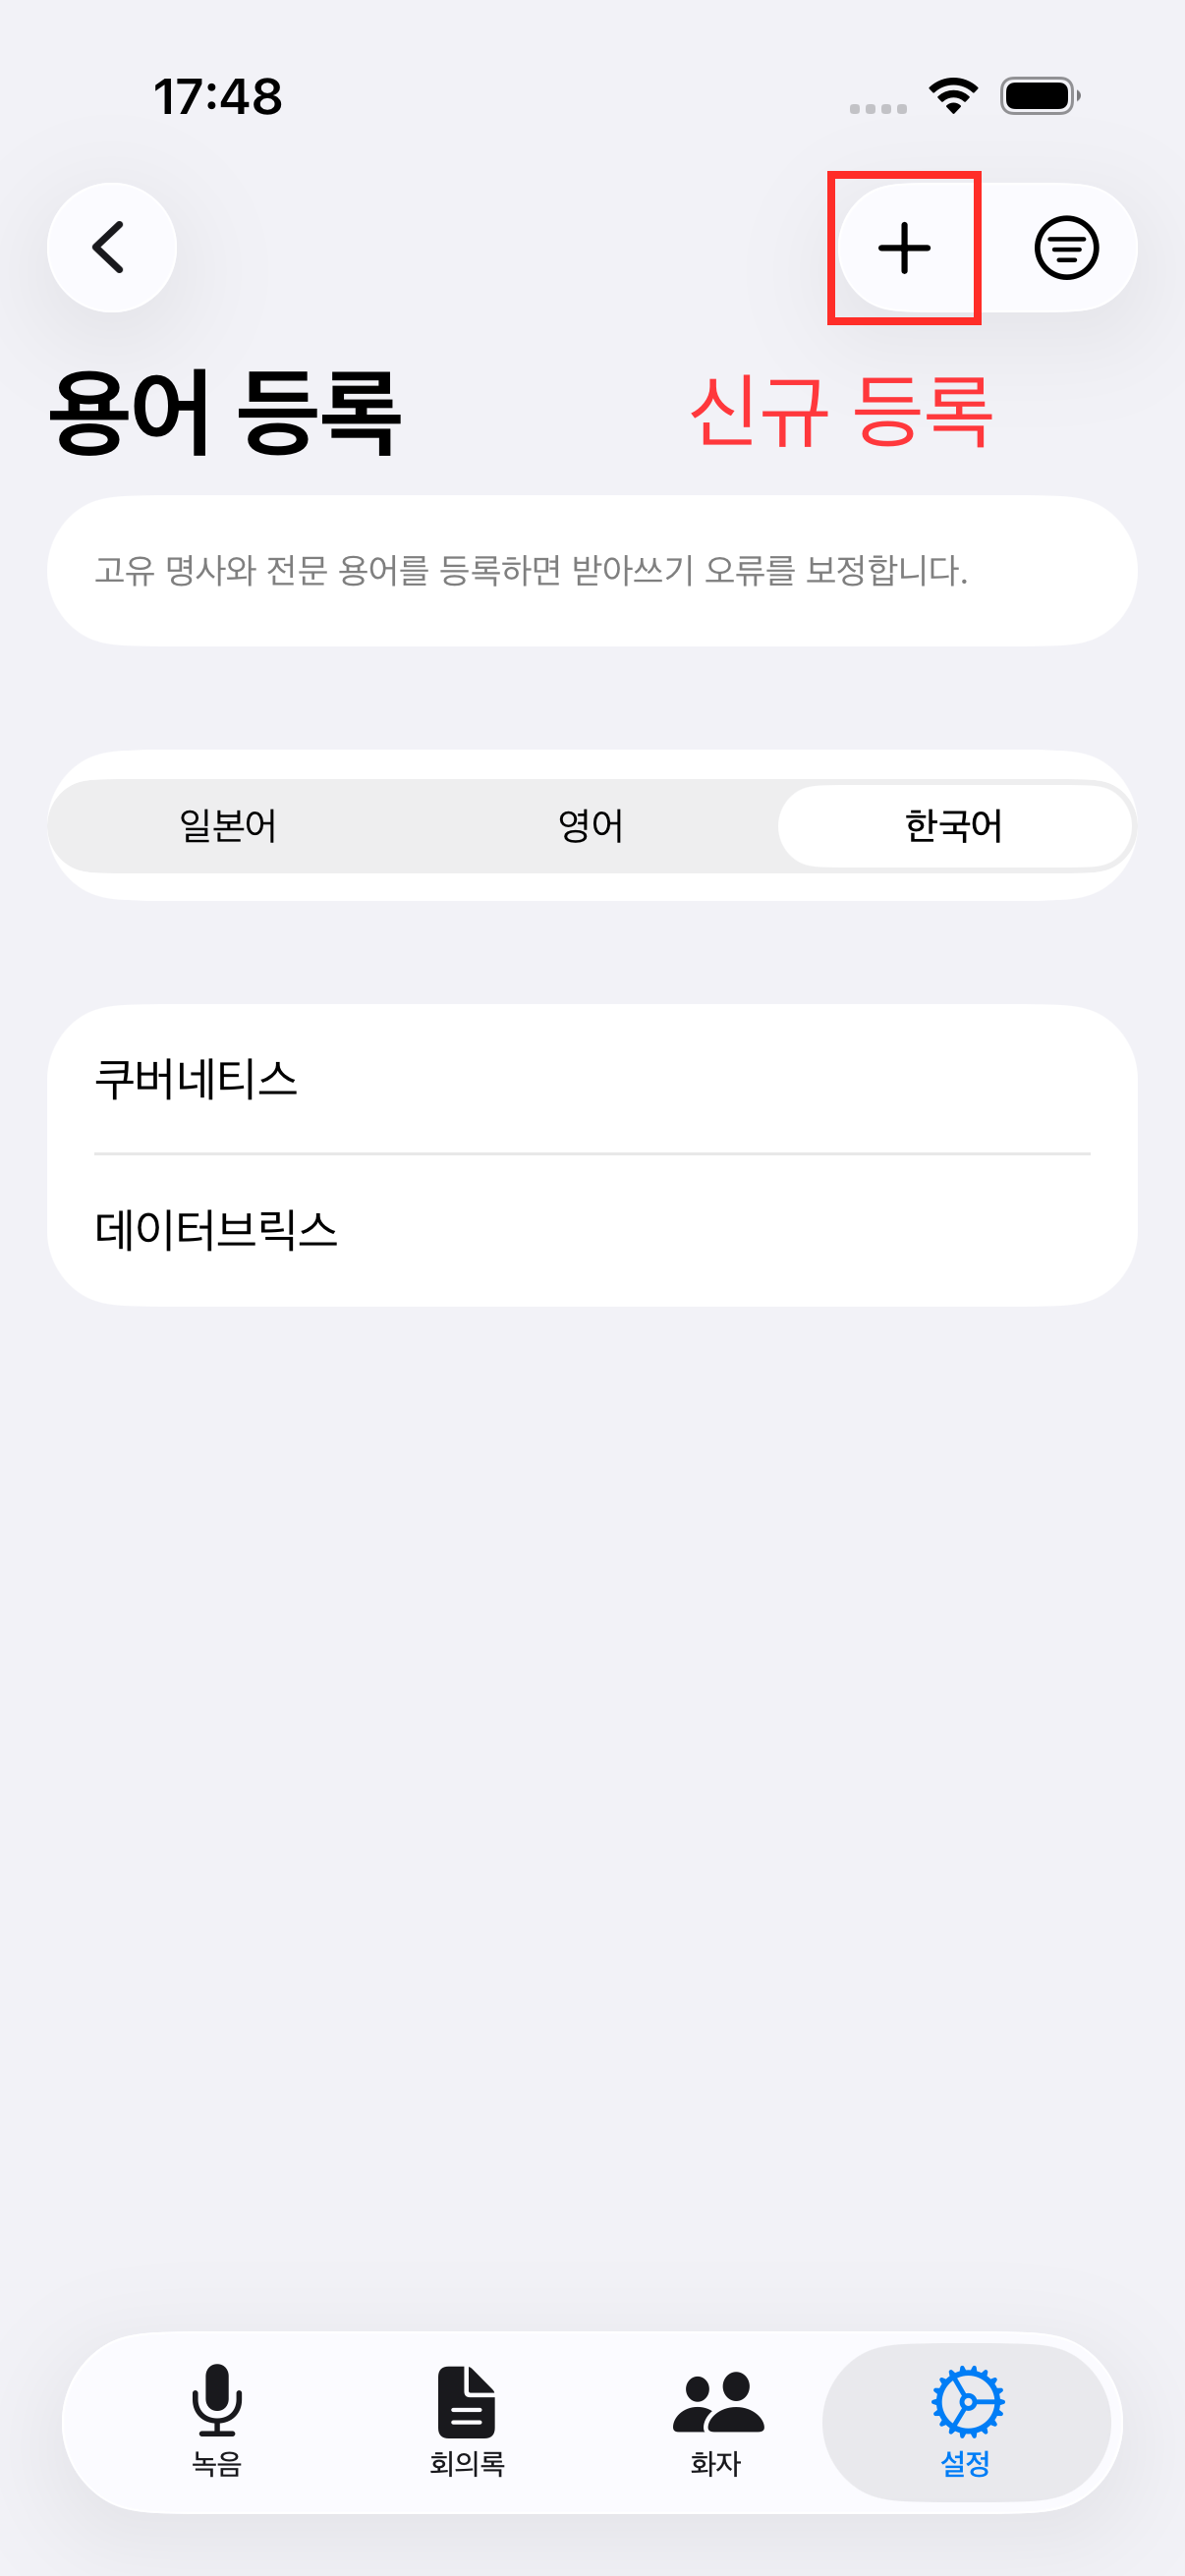
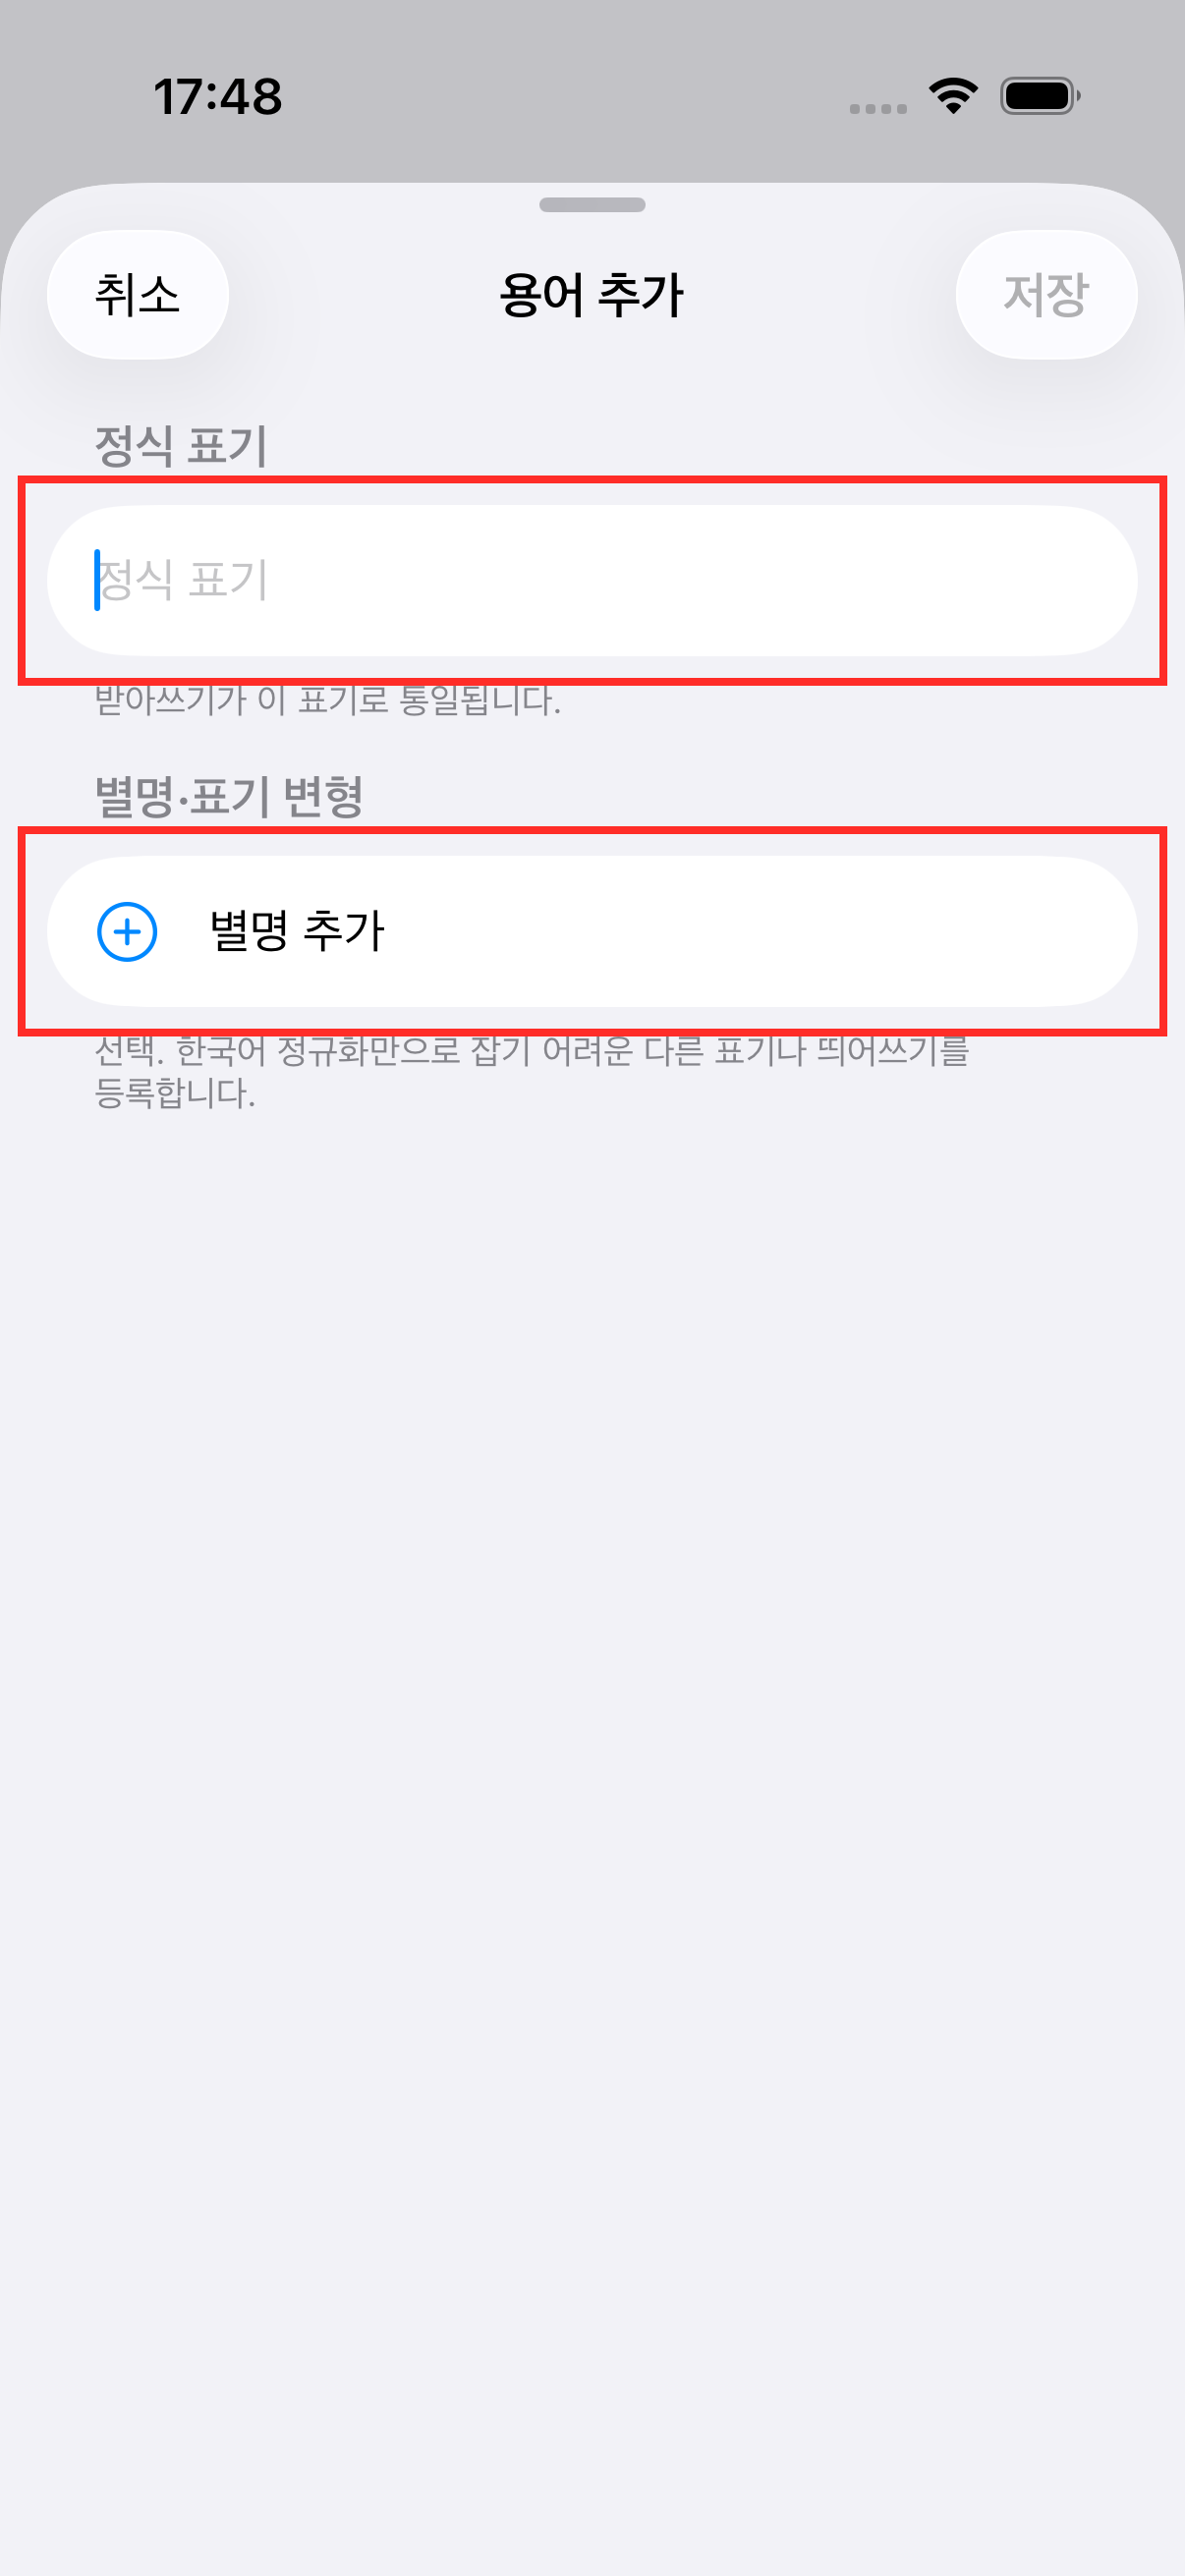
From "Manage Terms" in the same section, add a canonical spelling (required) plus optional aliases/abbreviations (multiple allowed).
📷 images/dictionary-2-1-en.png
📷 images/dictionary-2-2-en.png
3
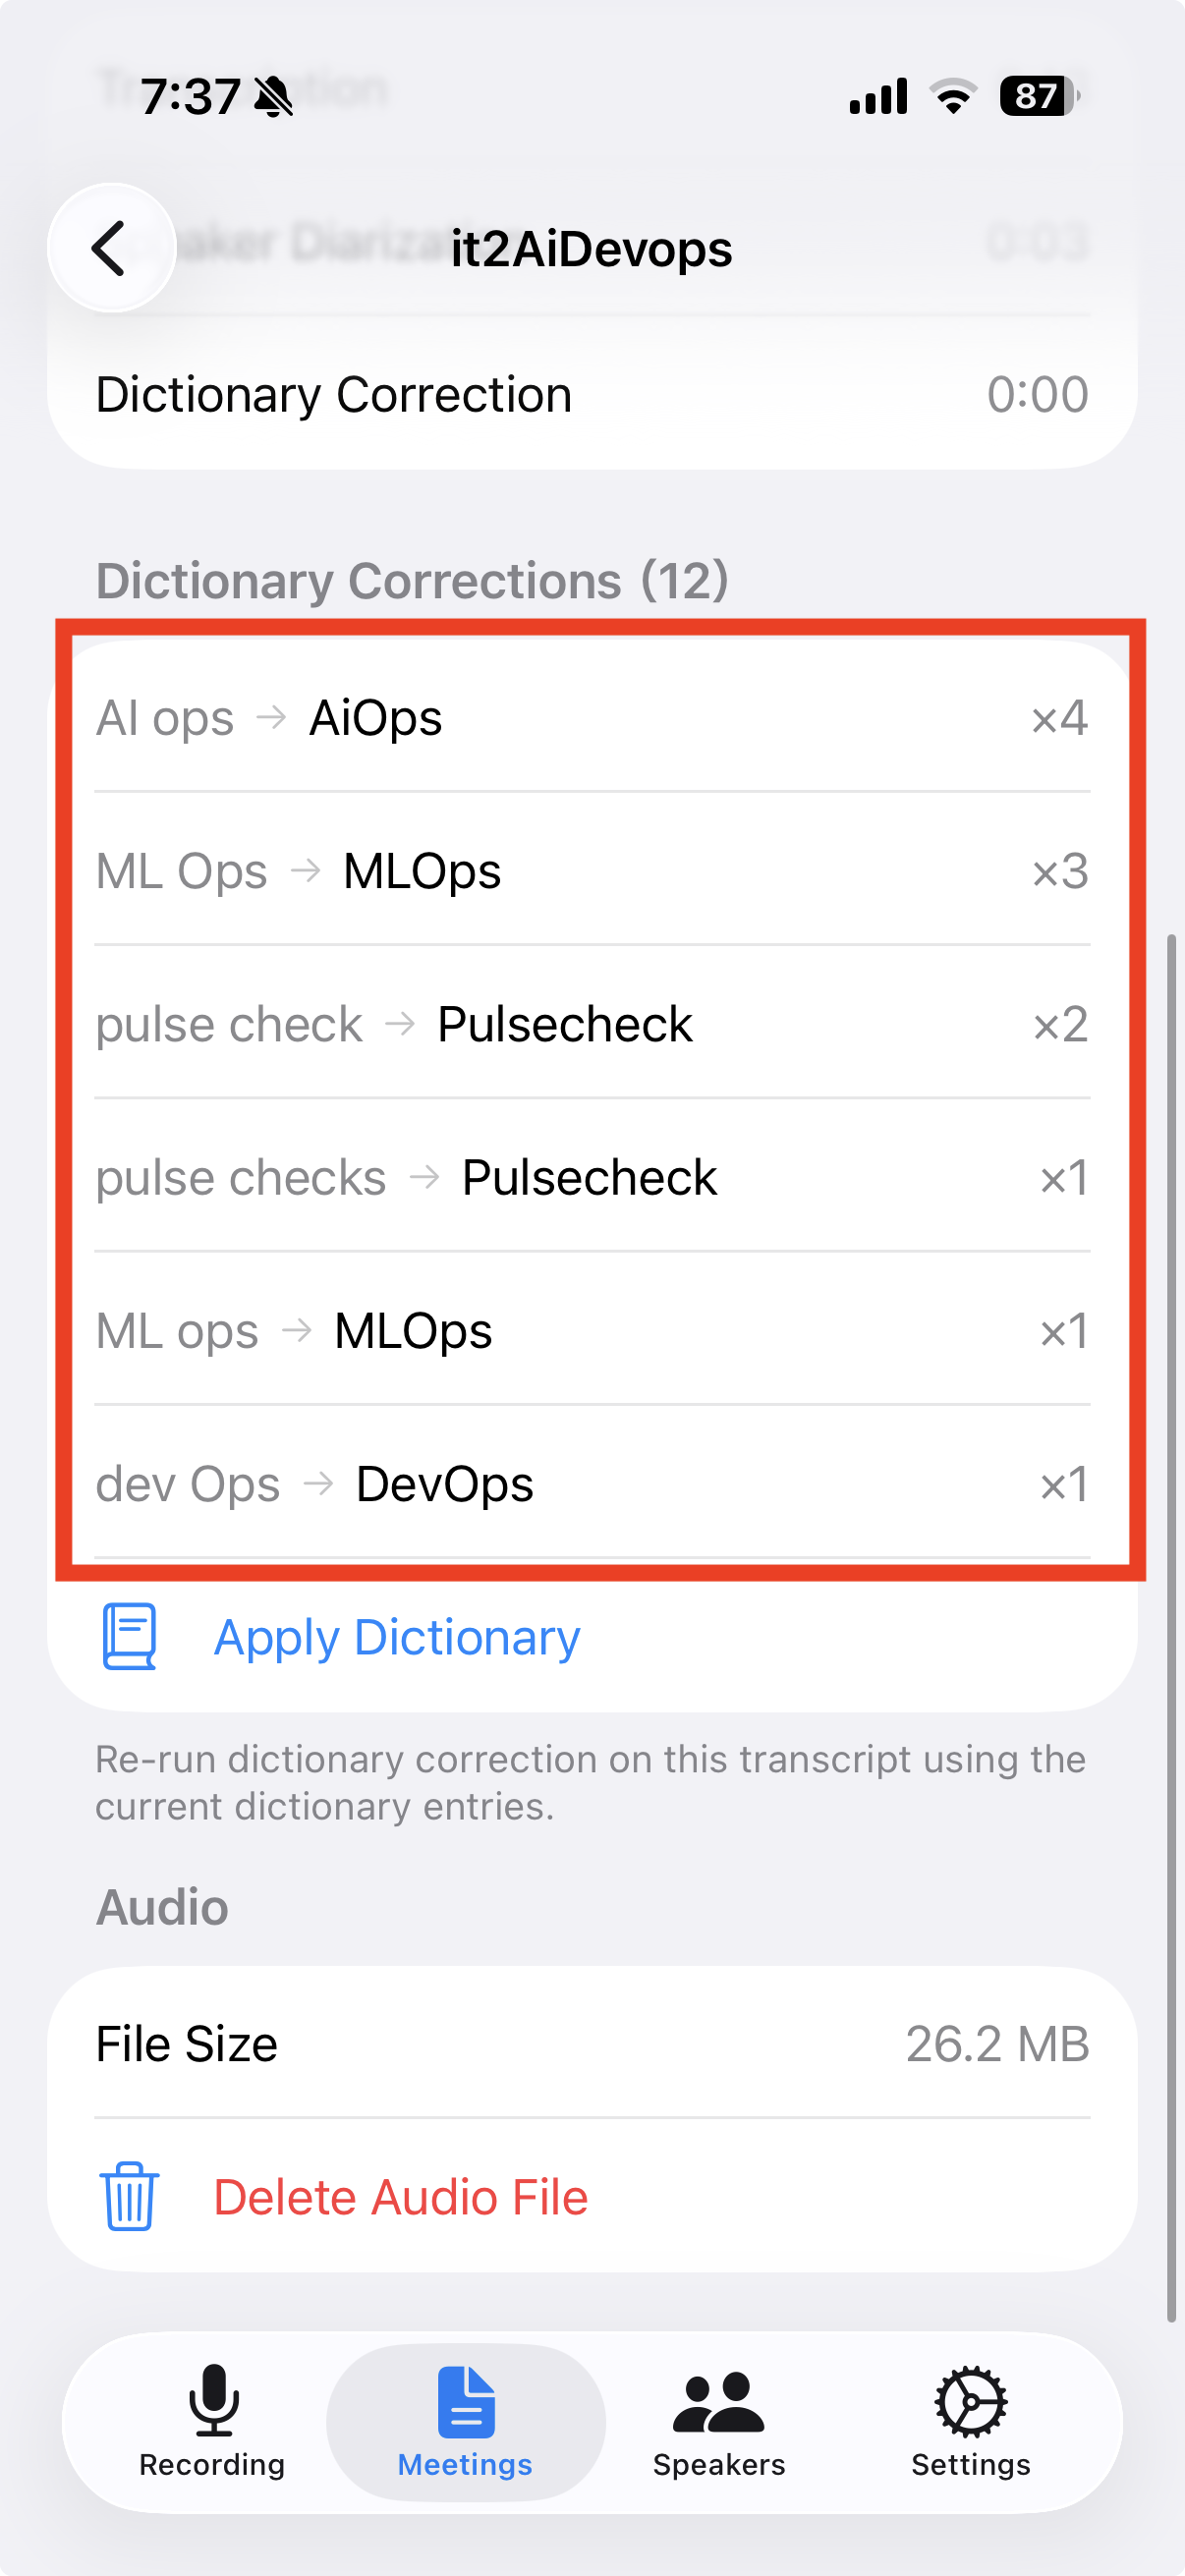
Check which corrections were applied
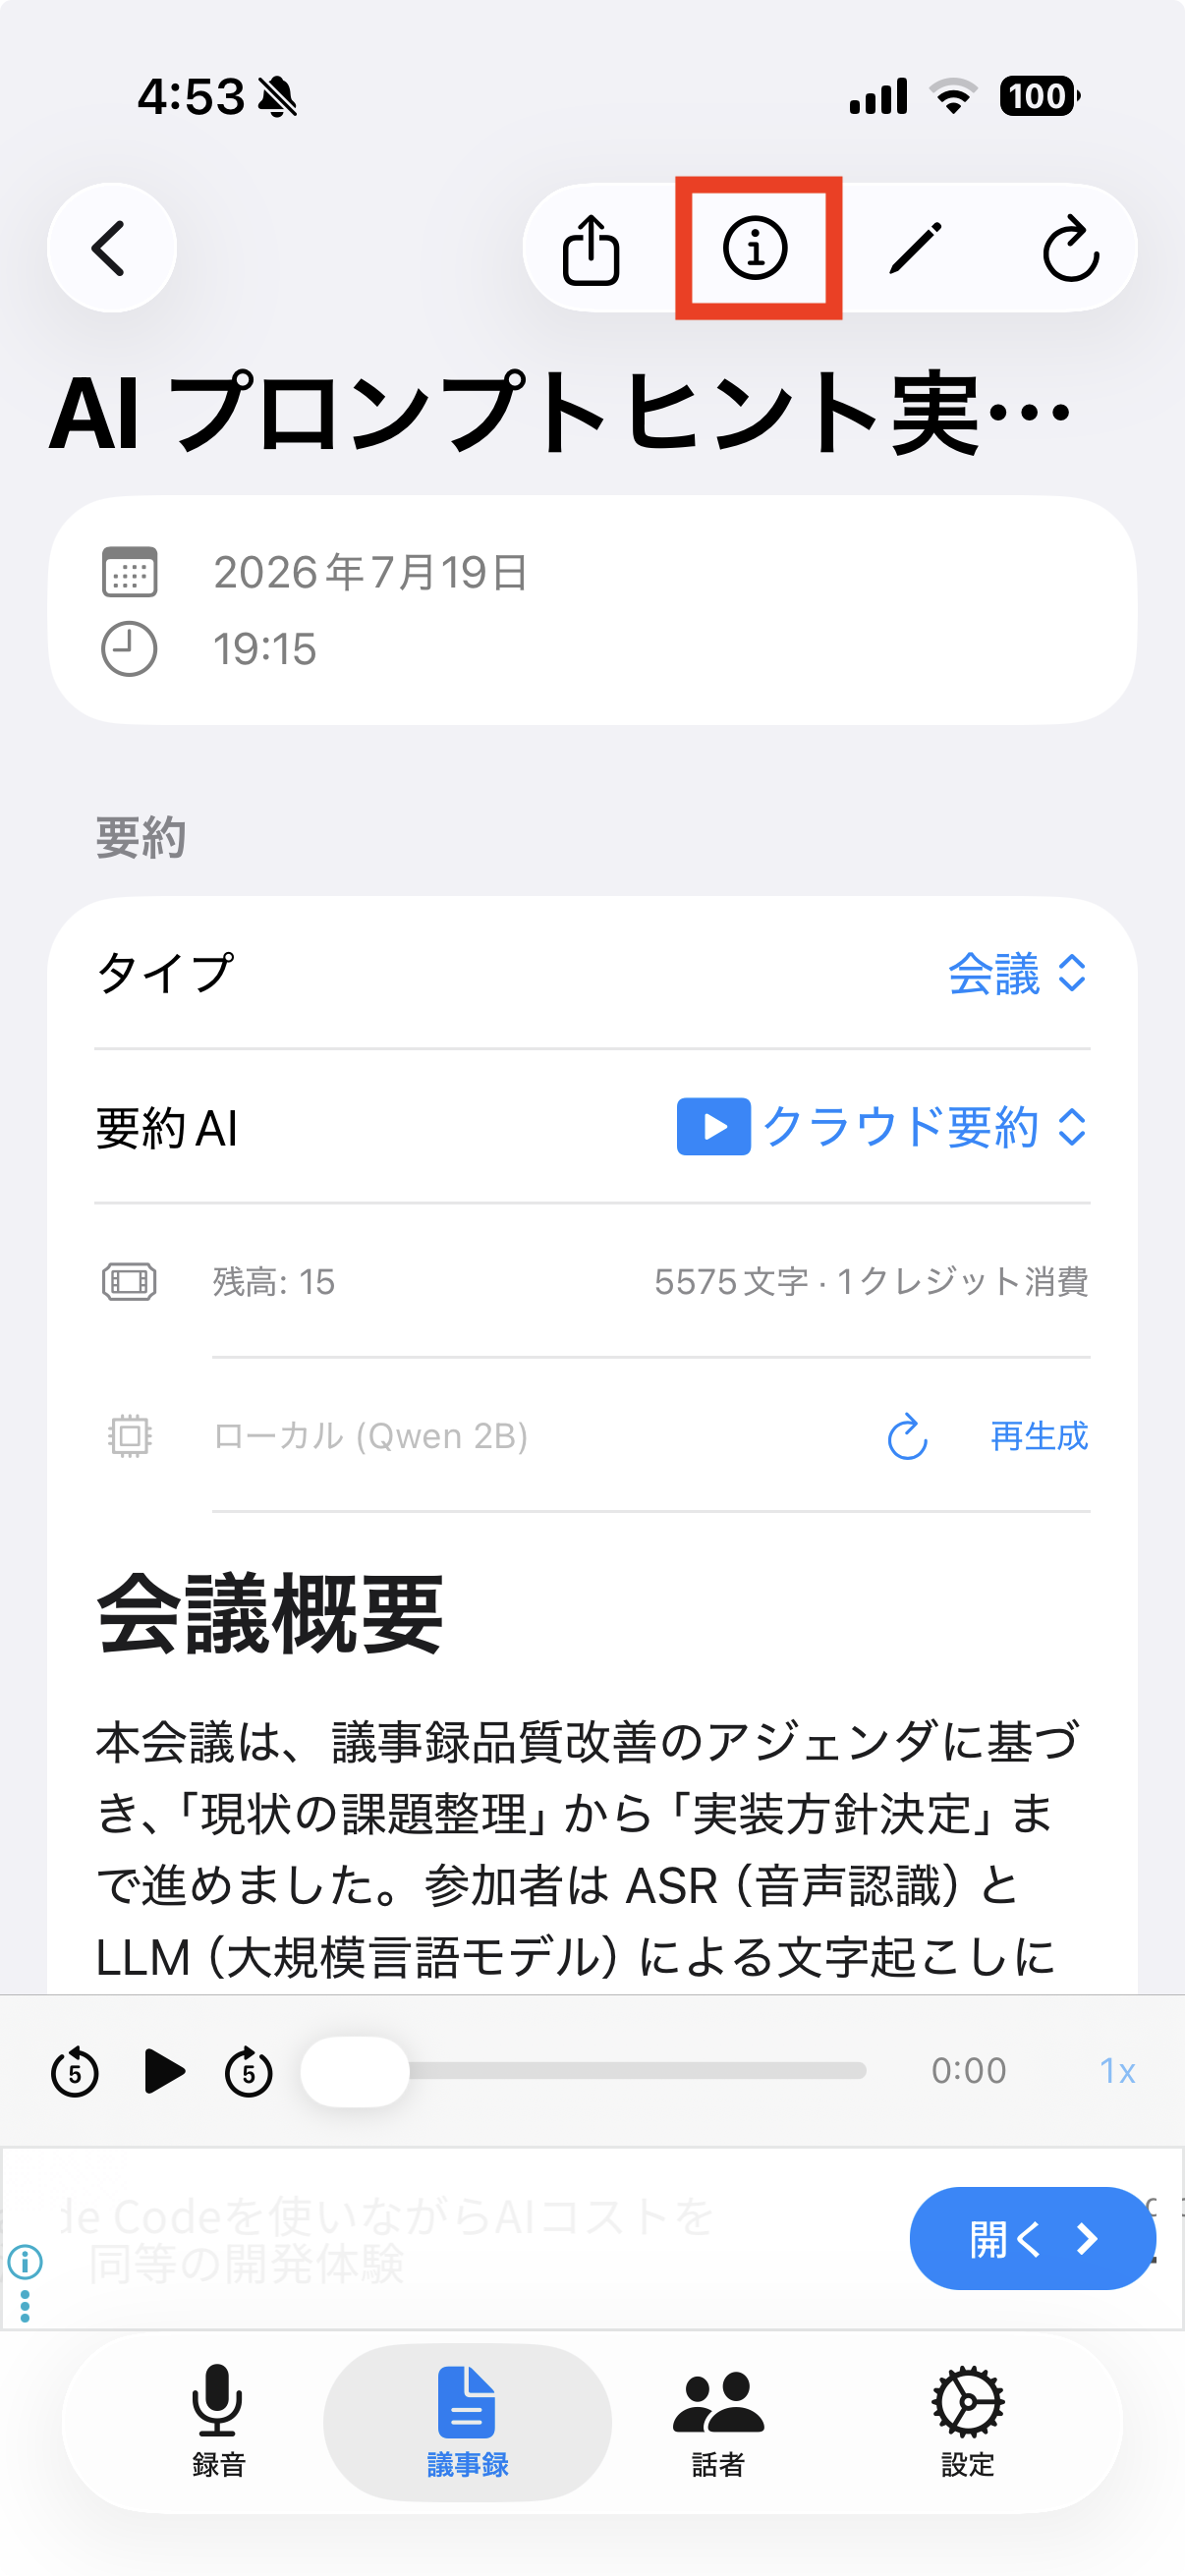
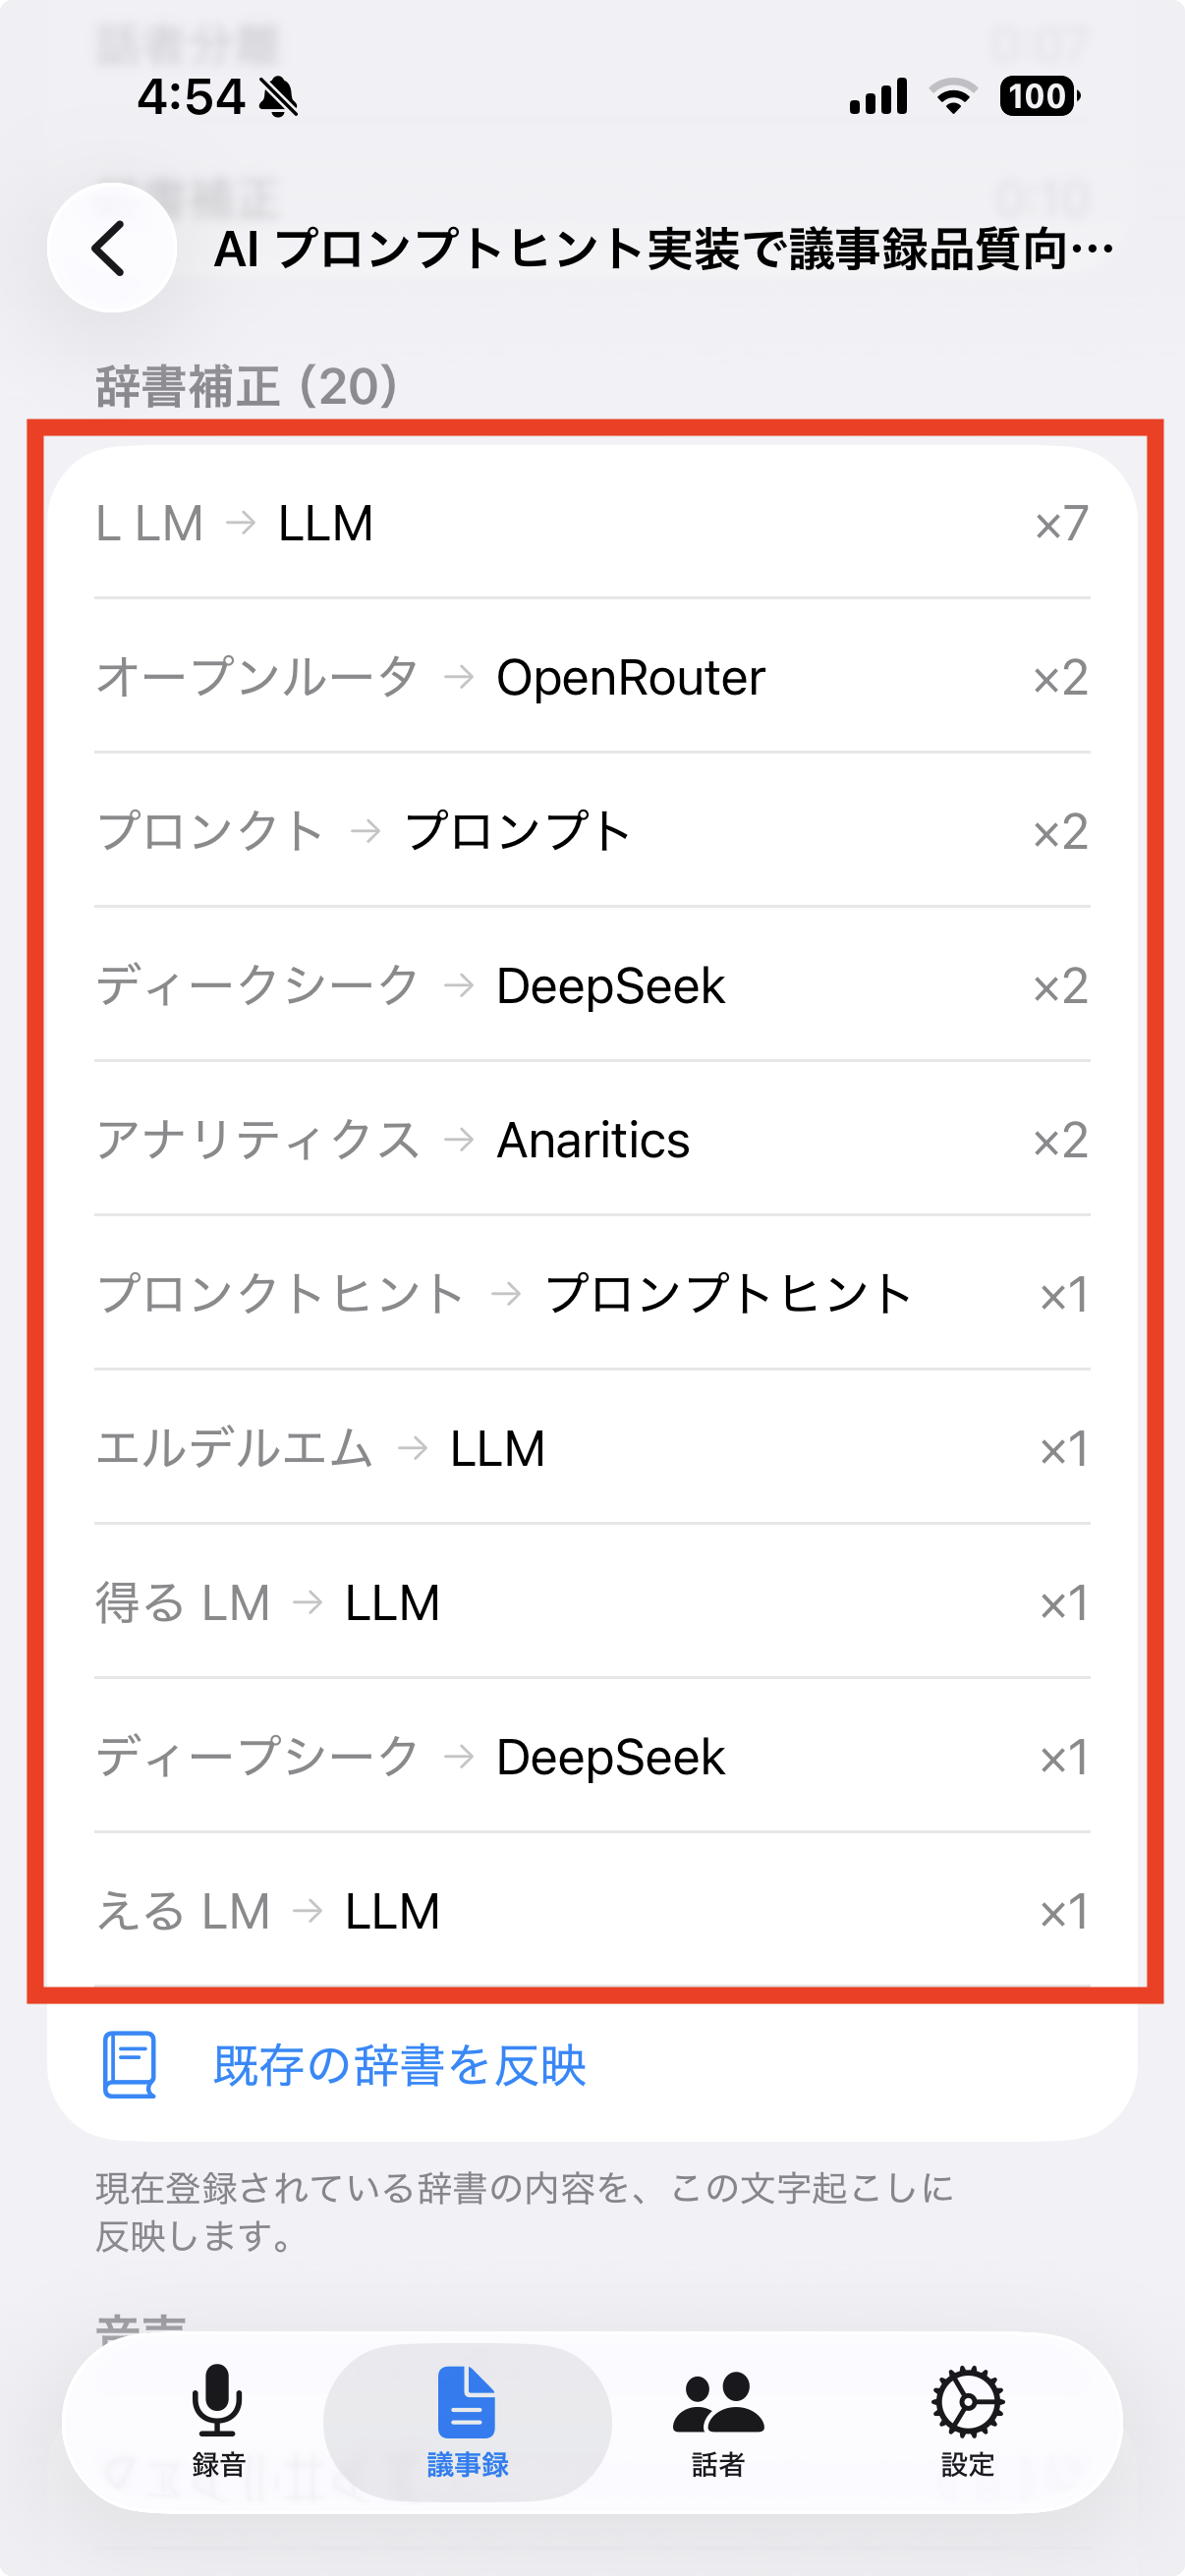
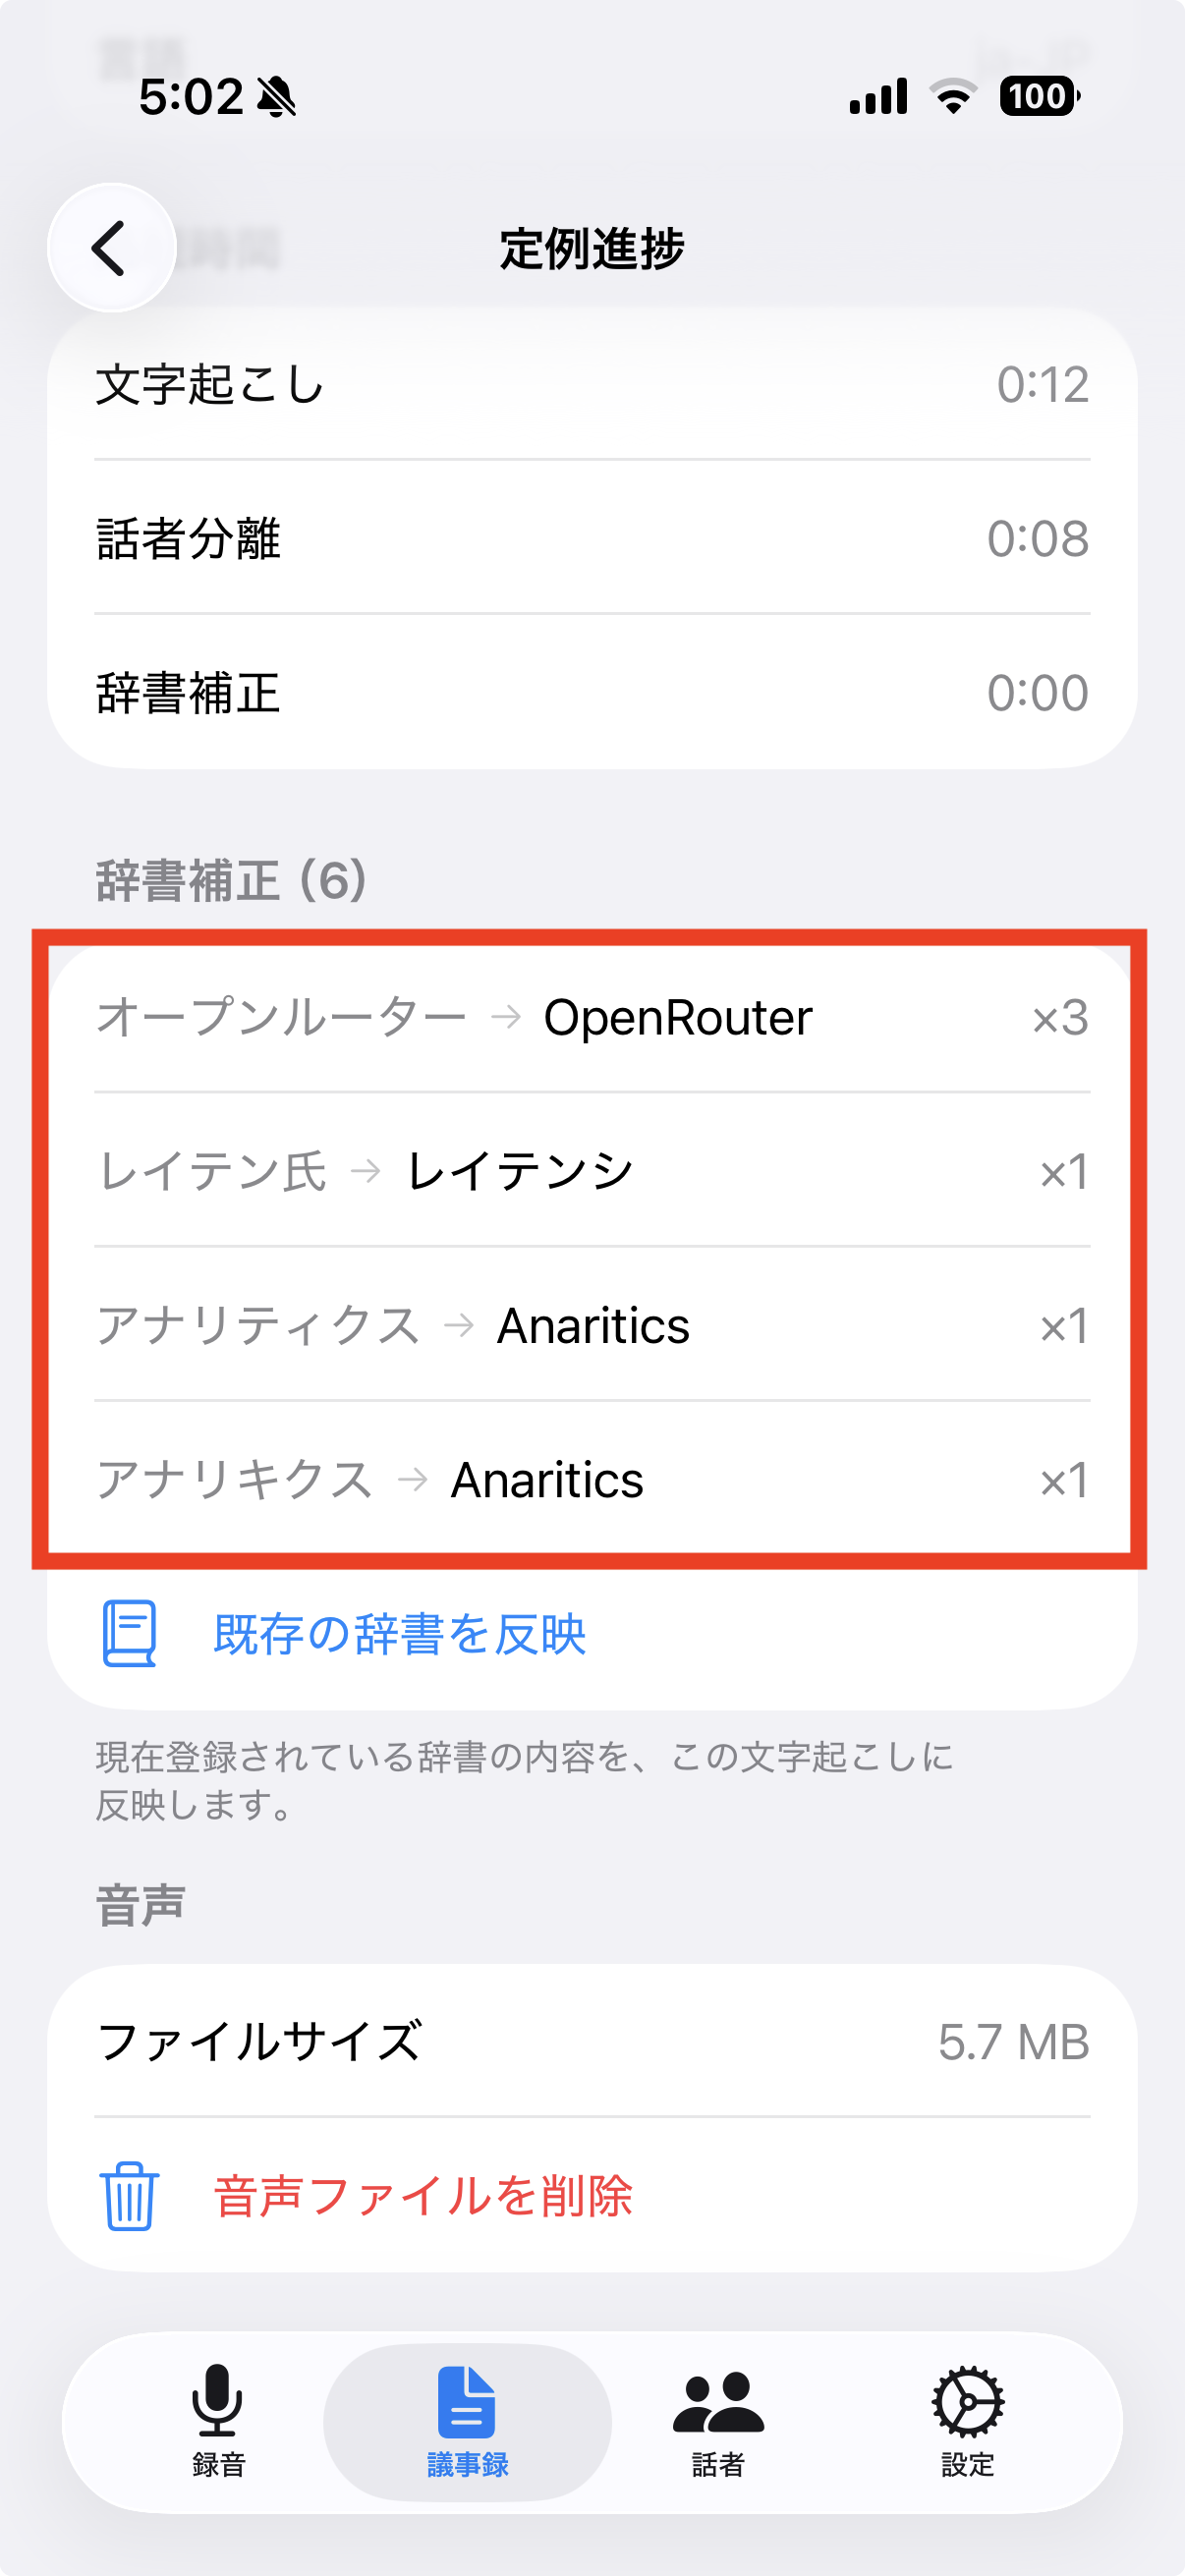
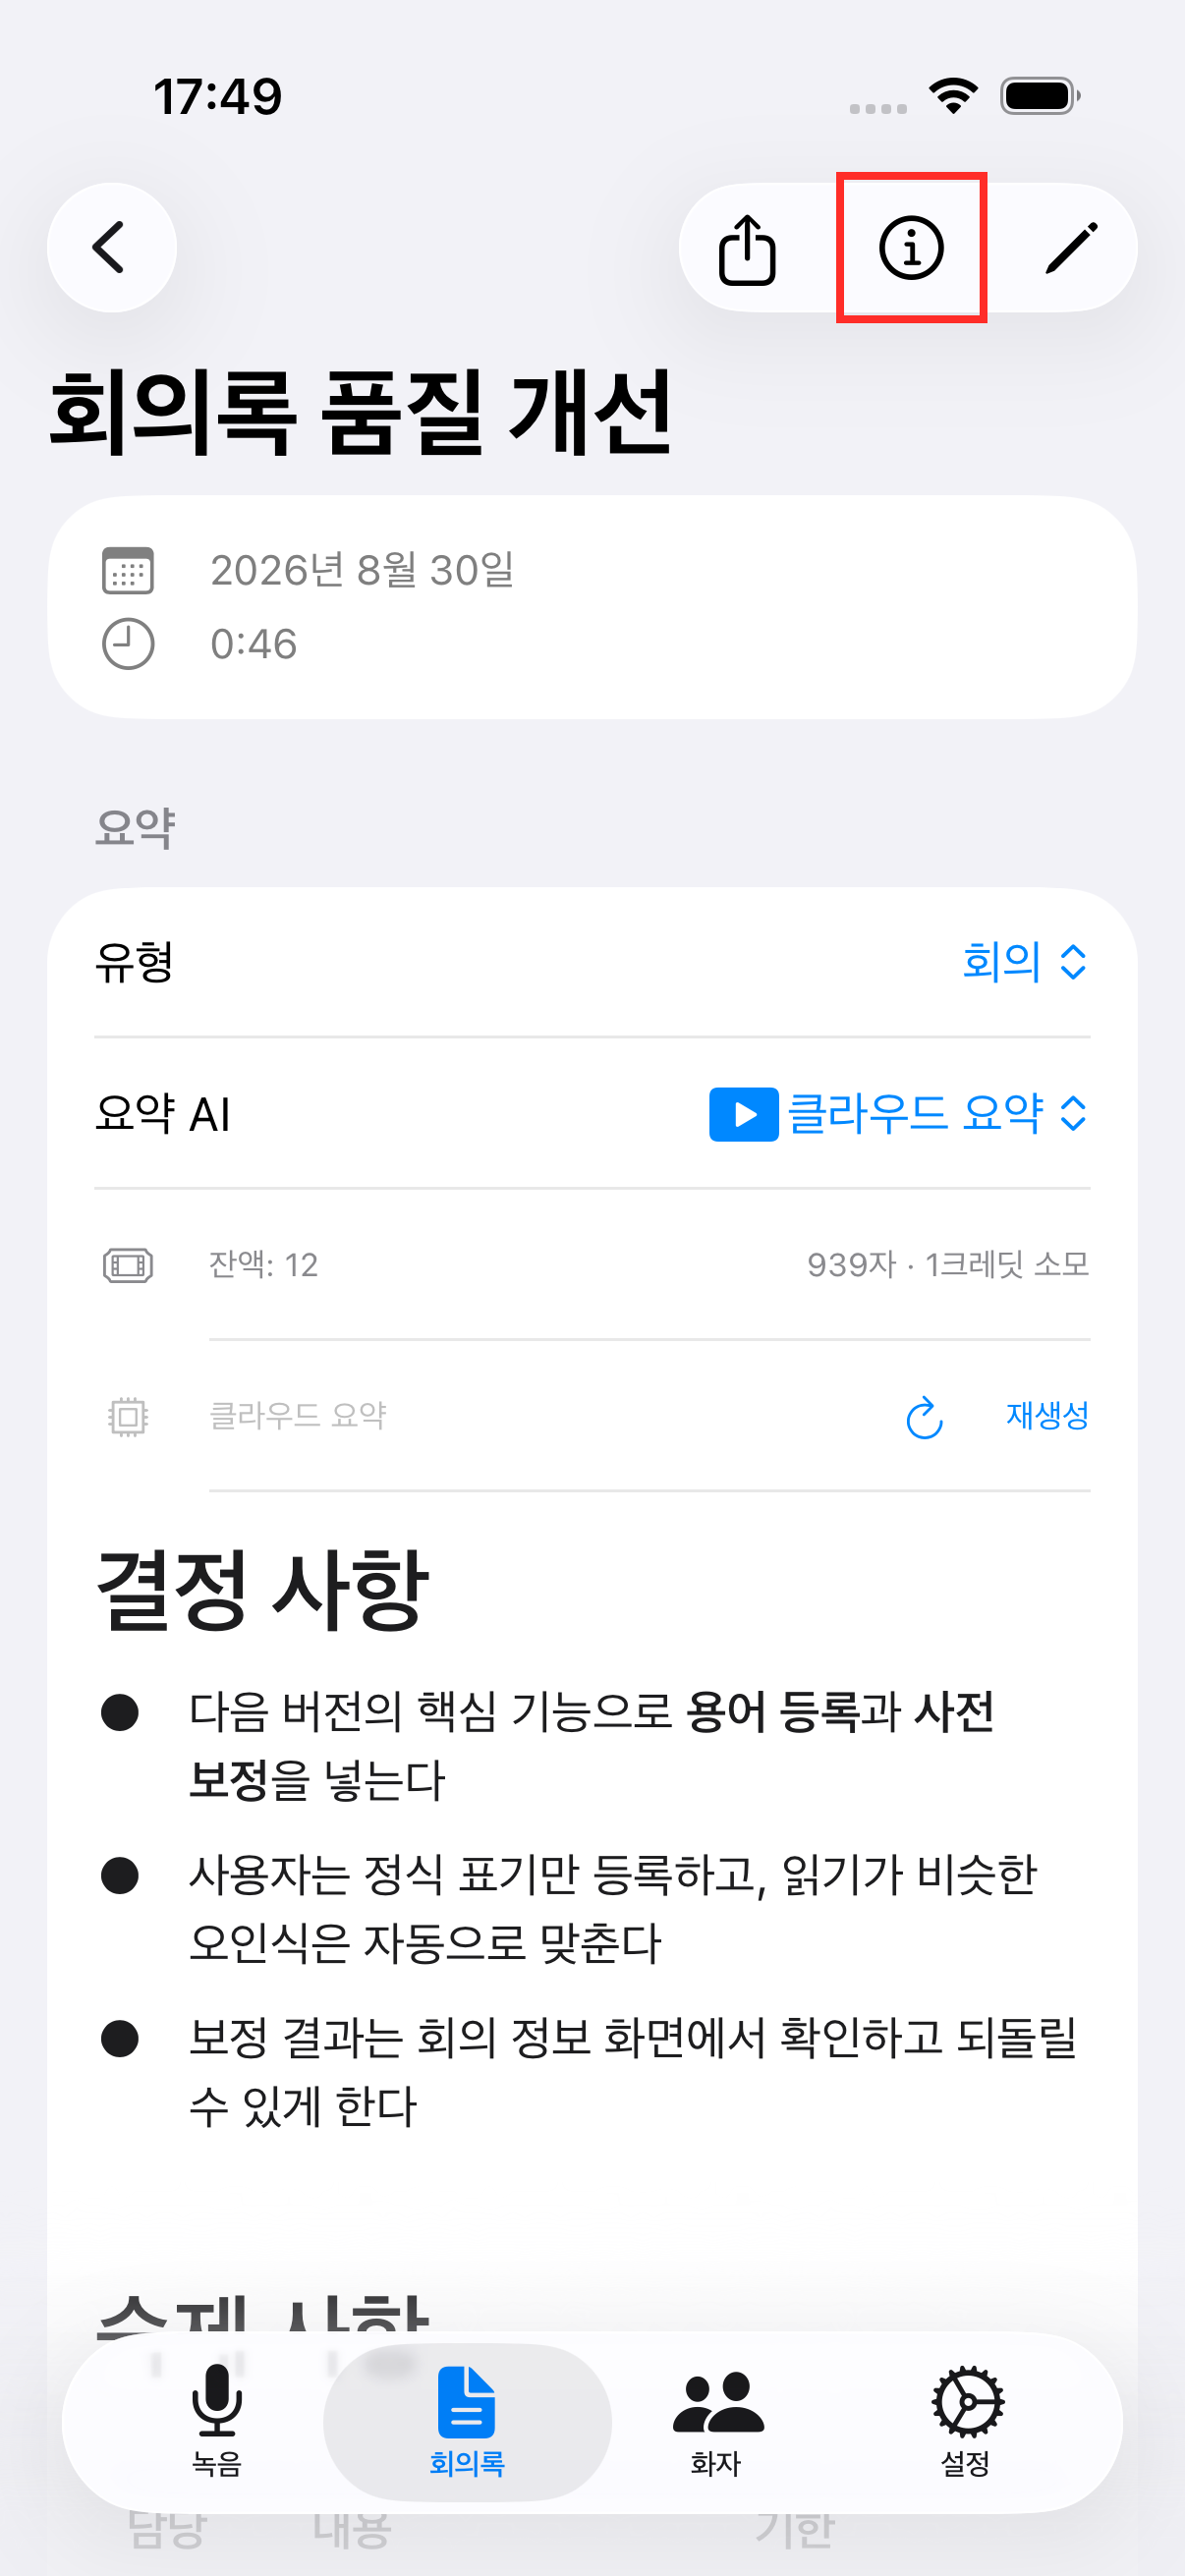
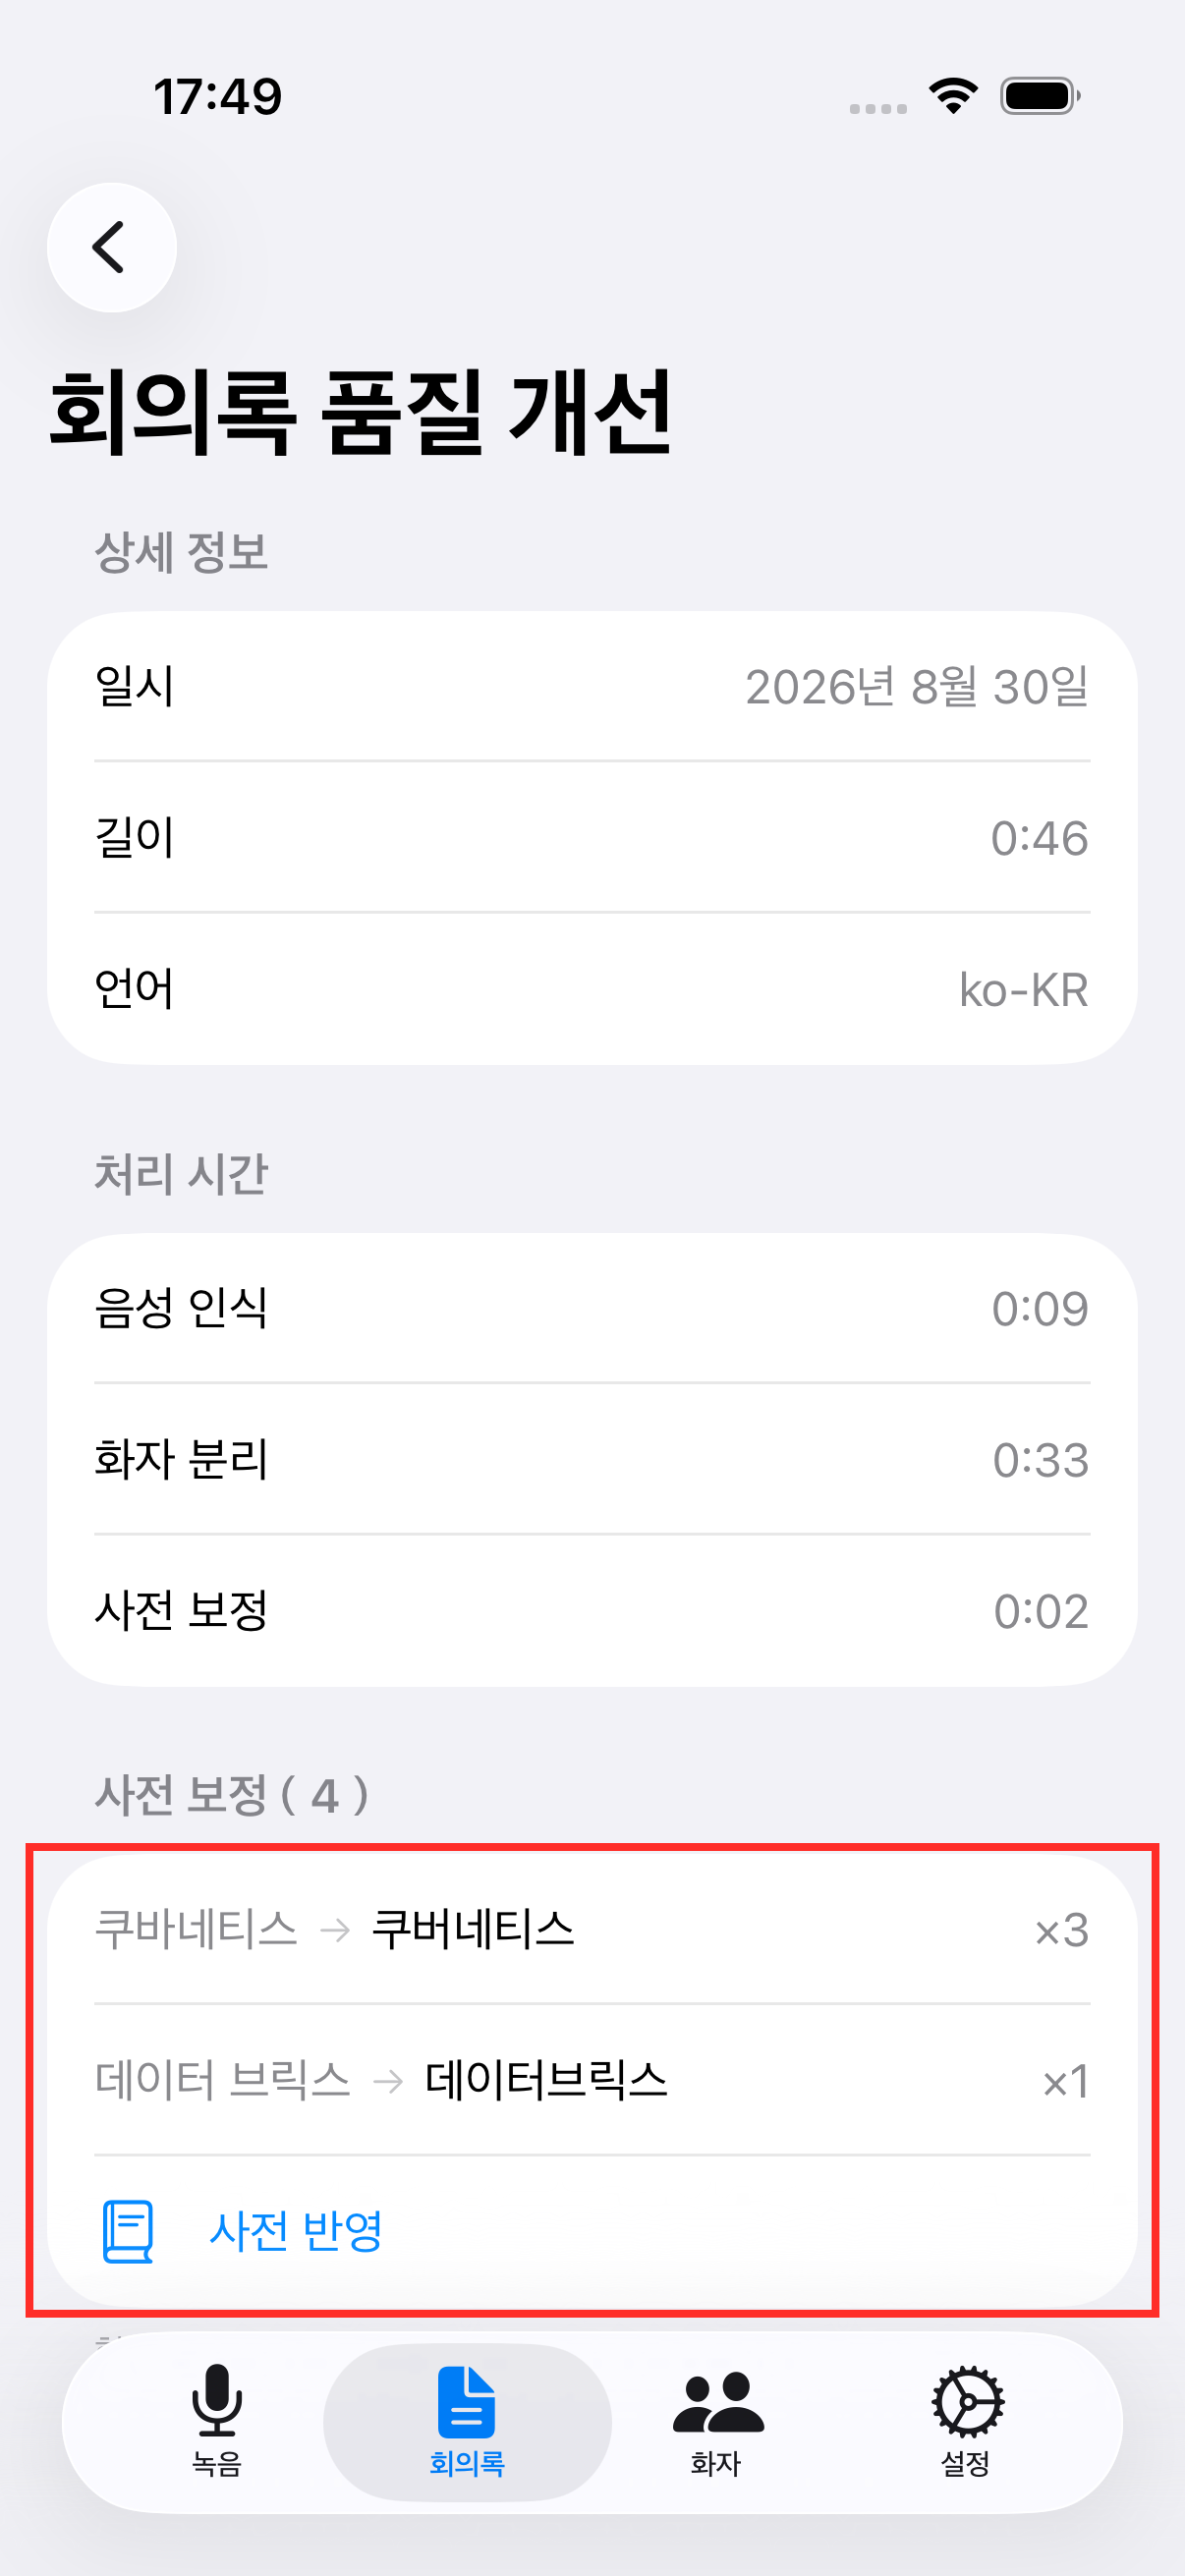
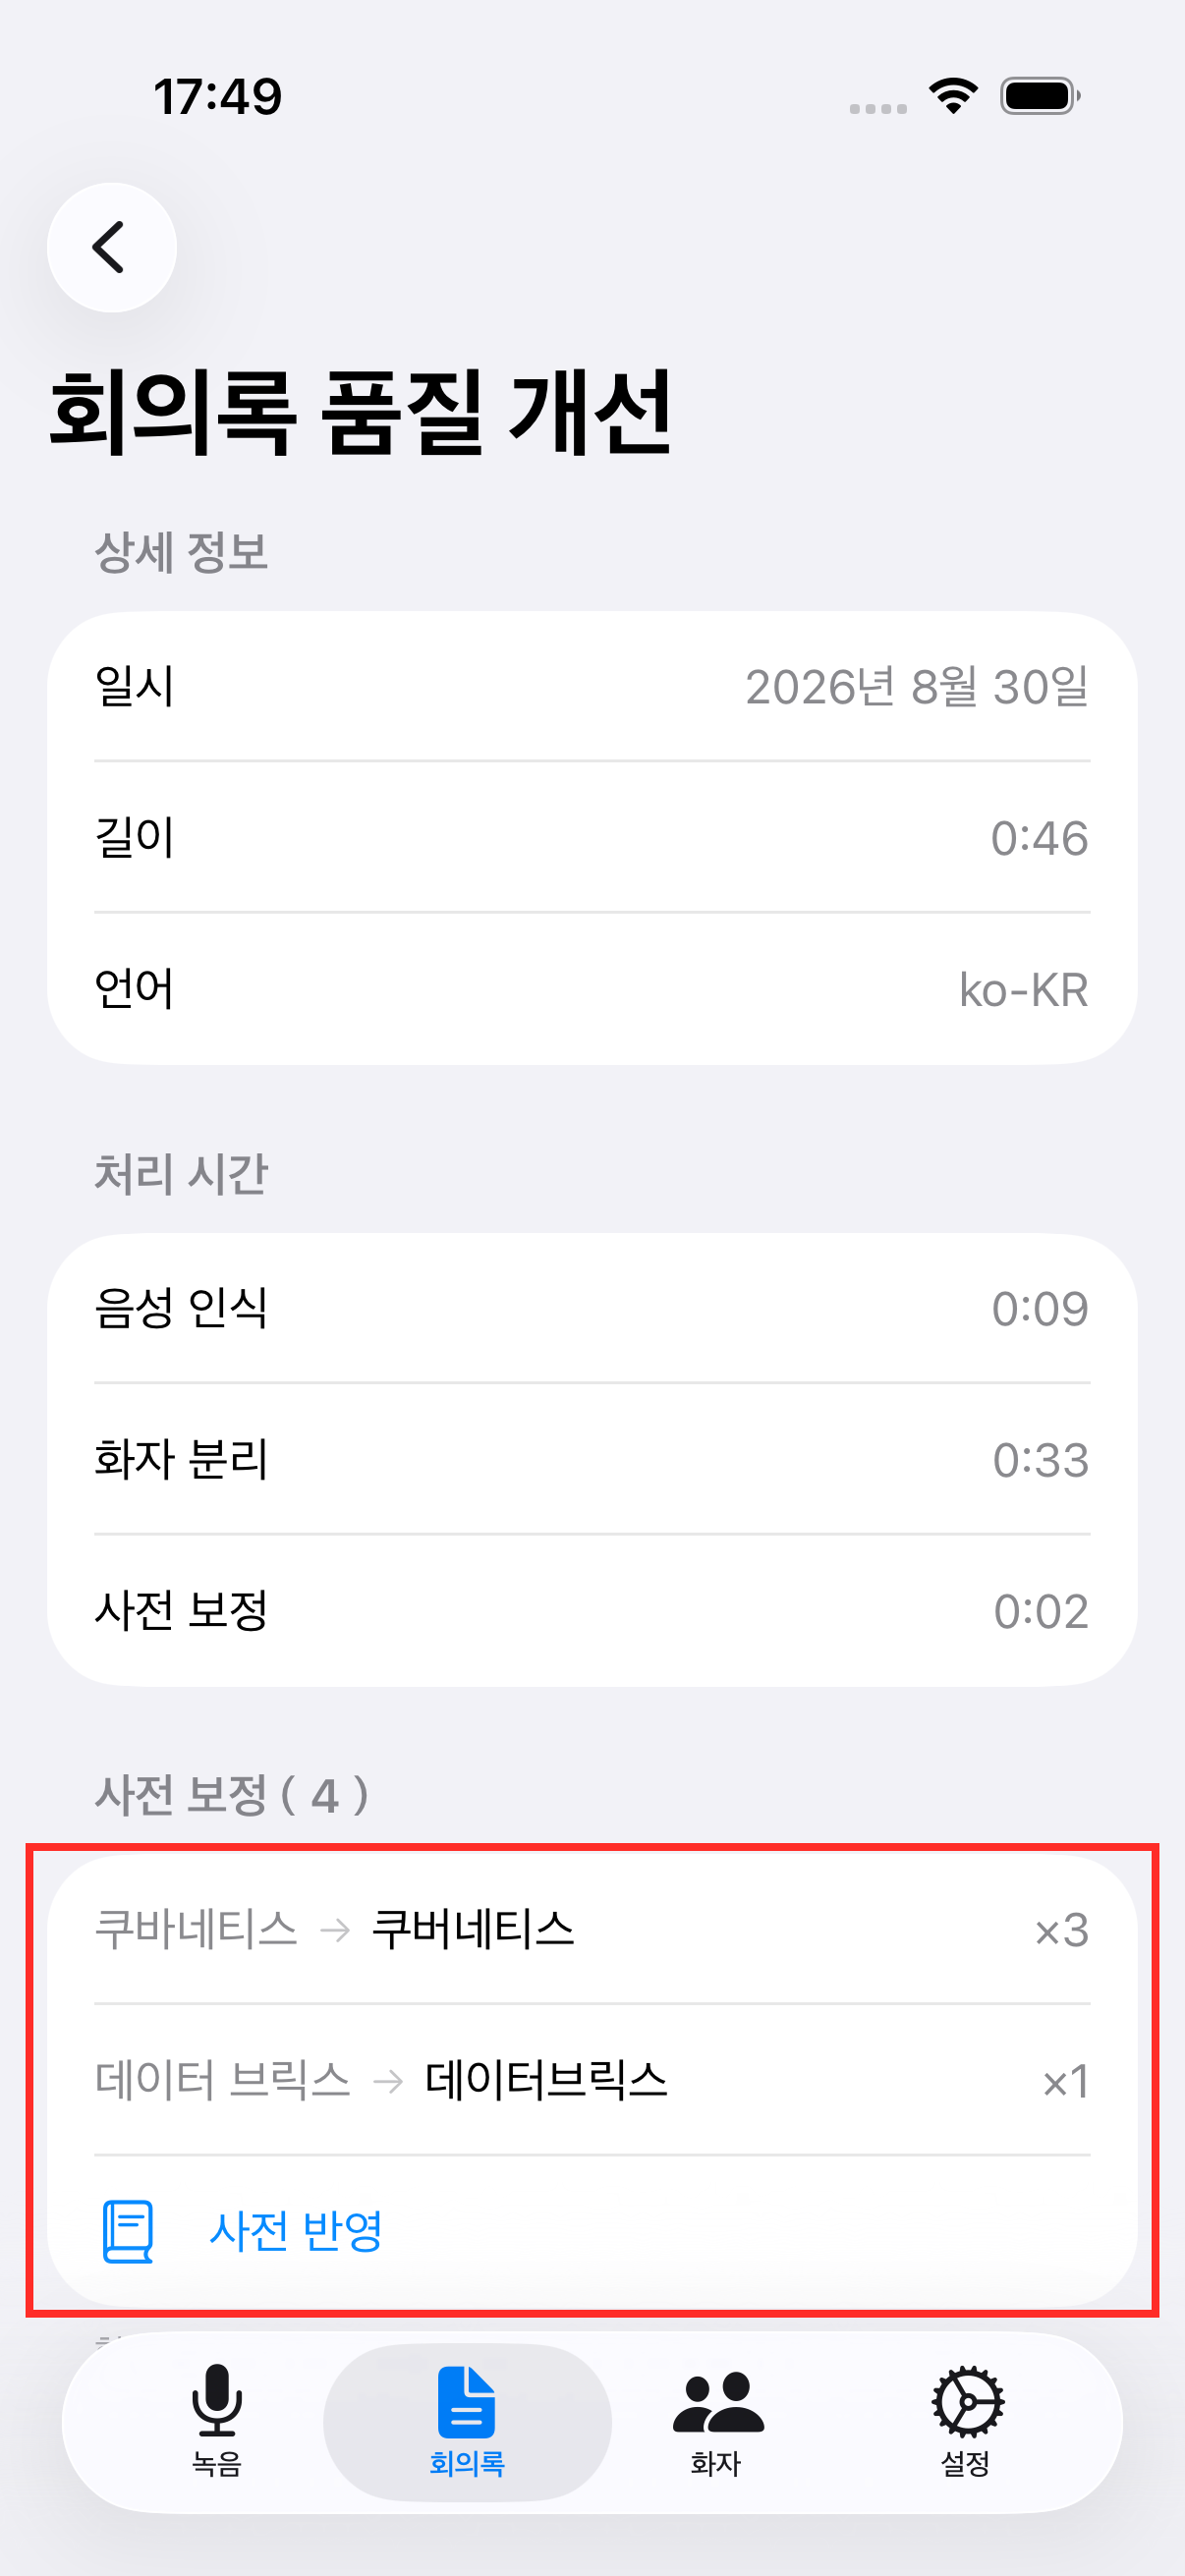
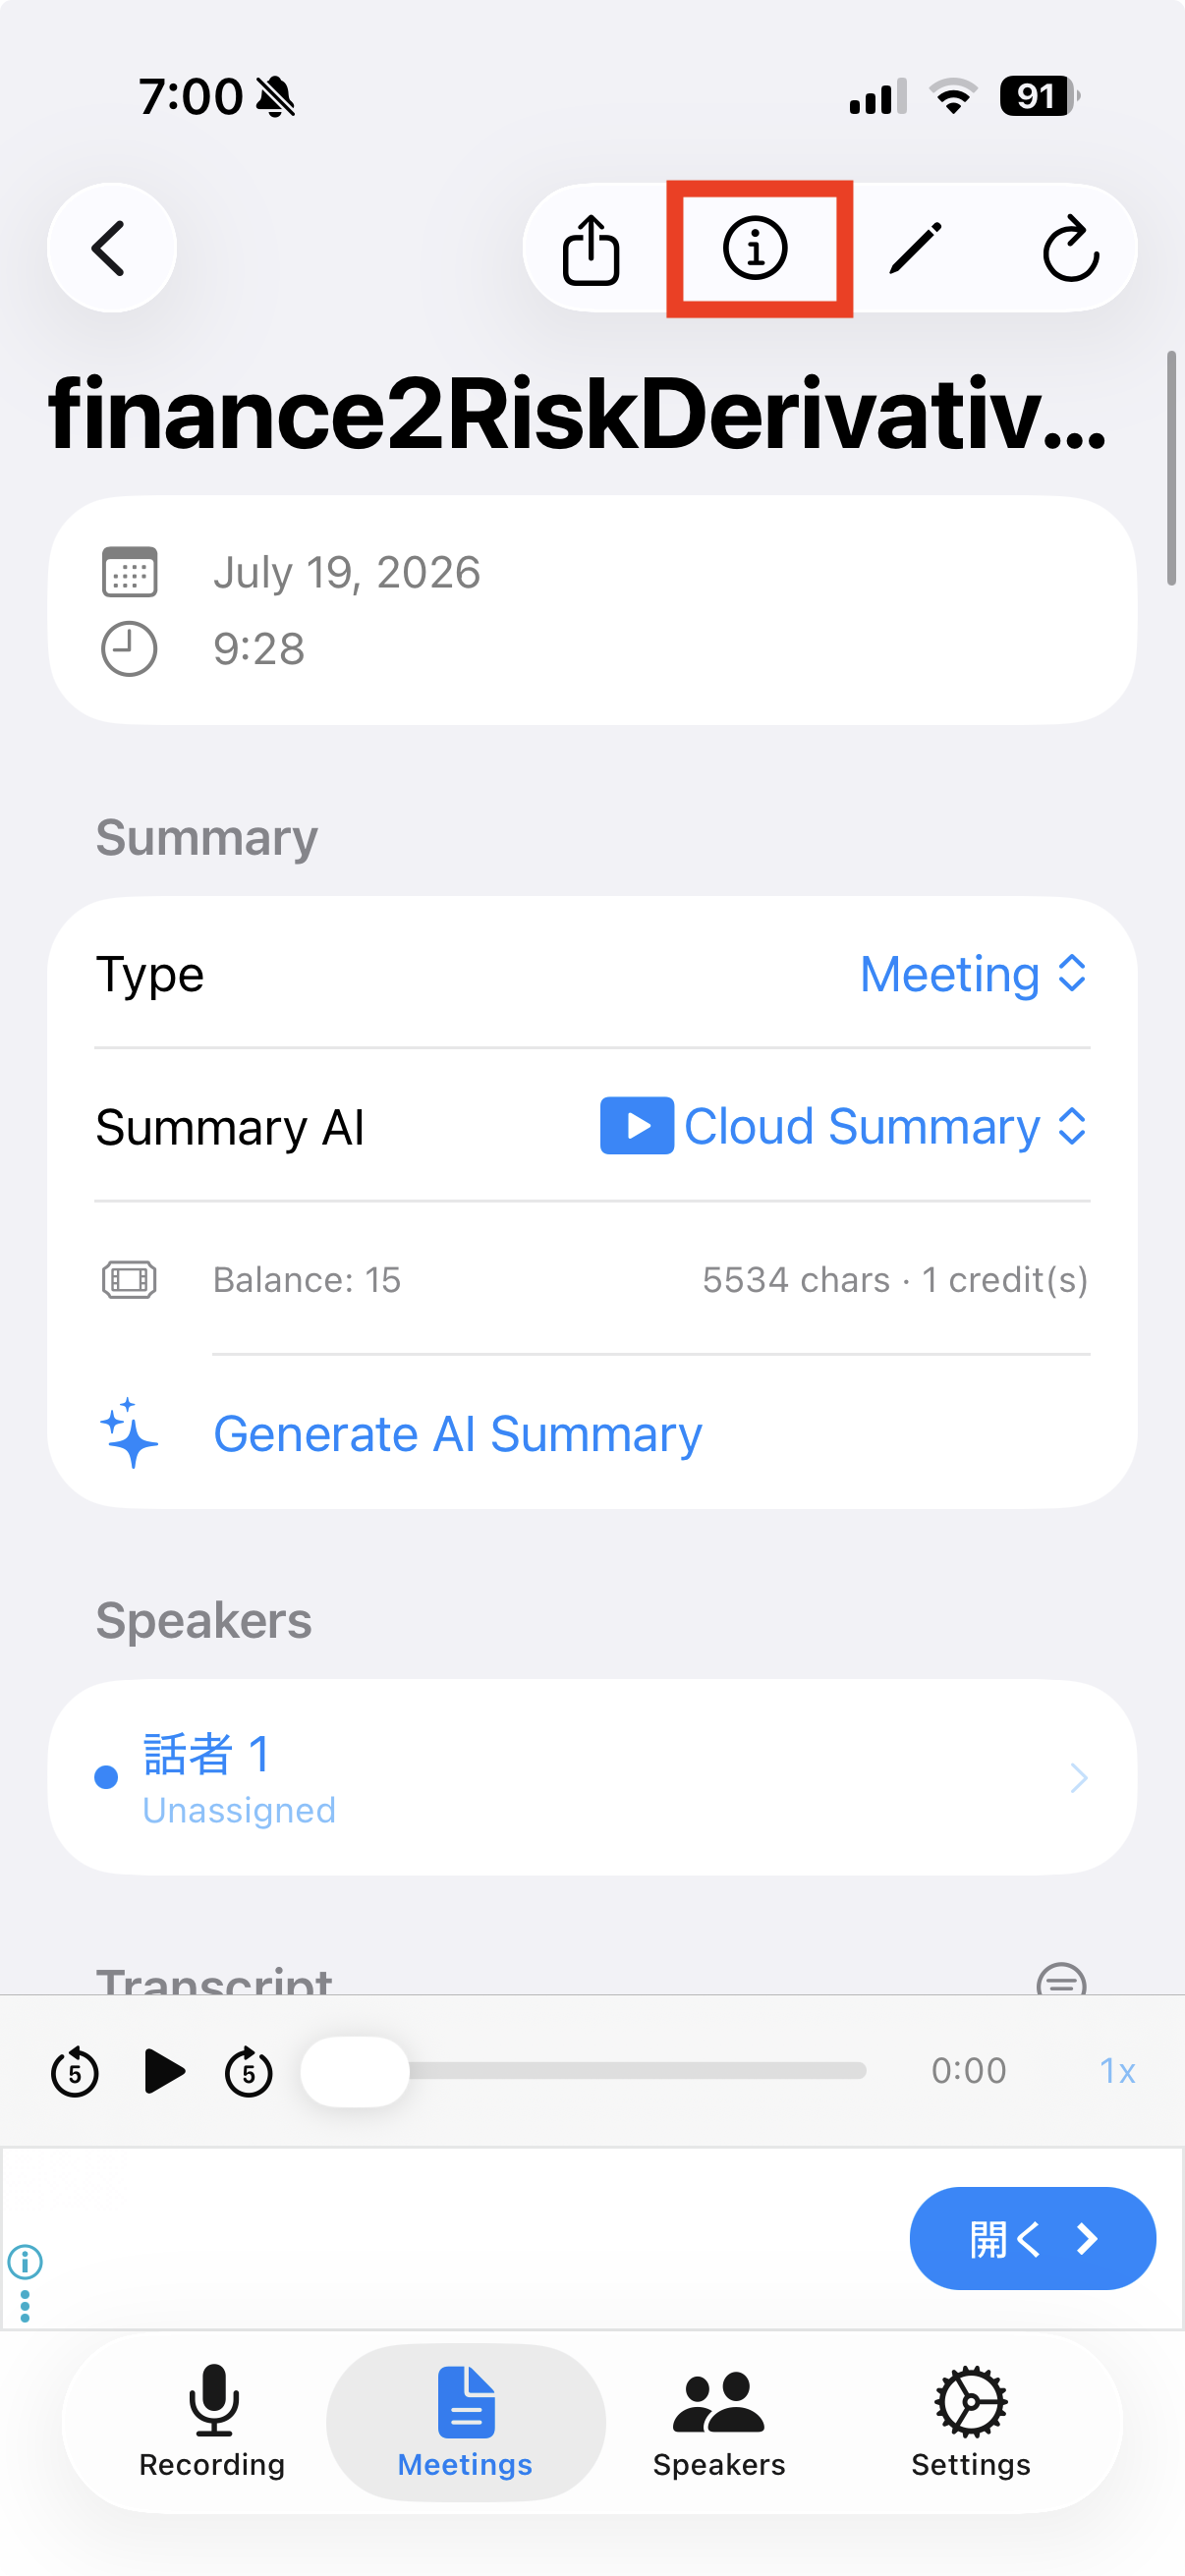
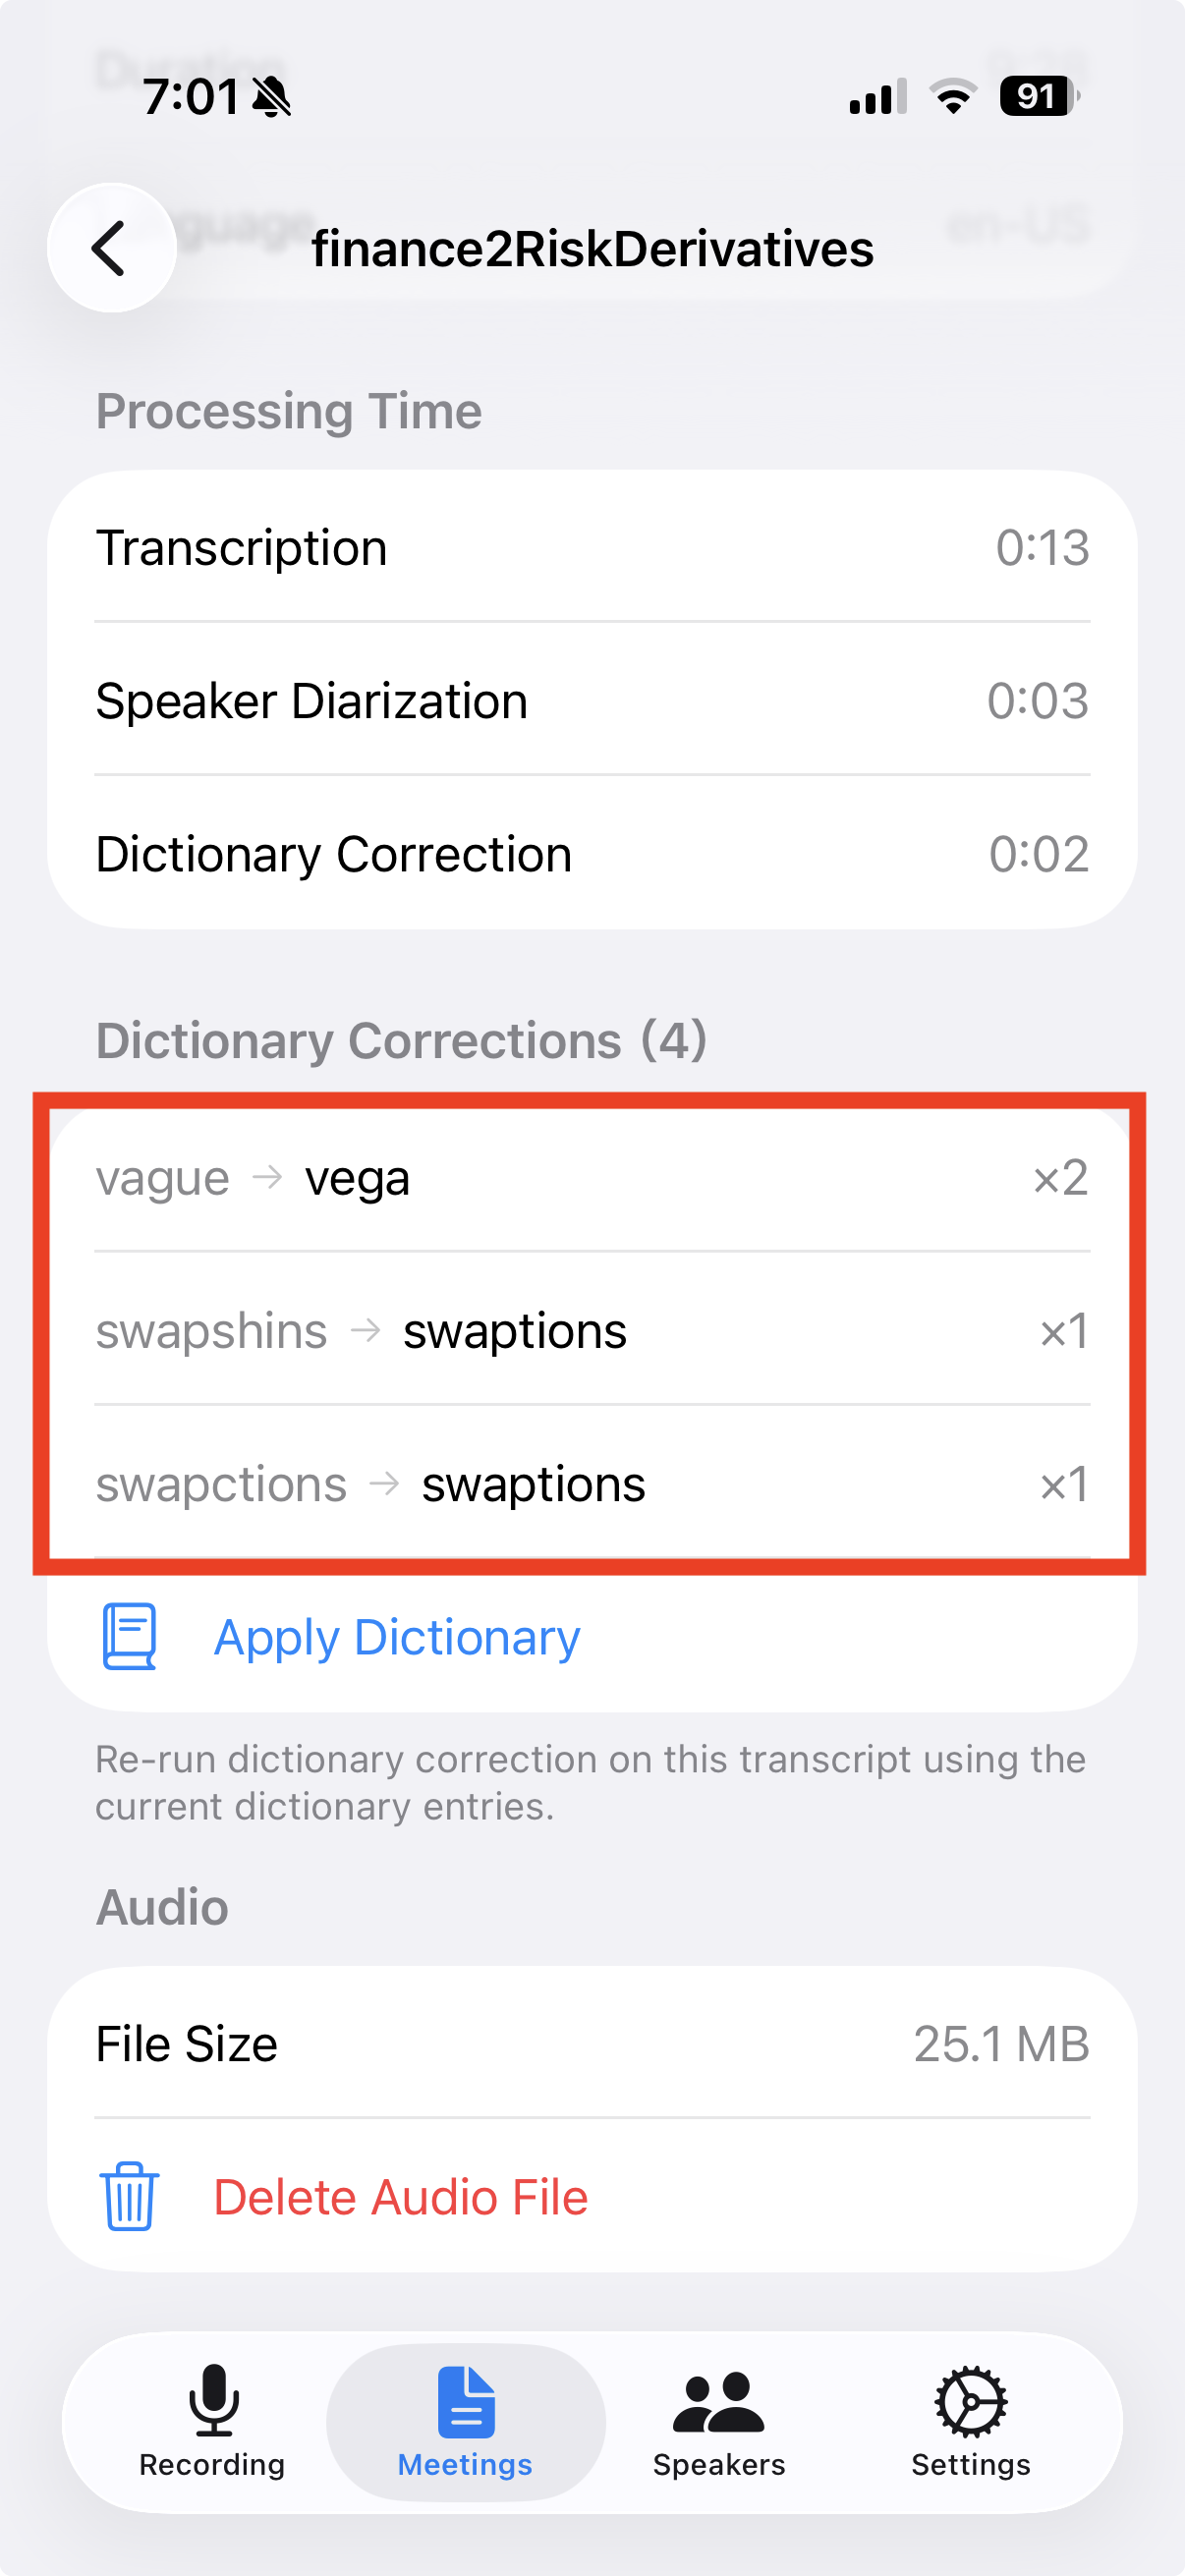
Tap the "i" icon on the meeting detail screen to open Meeting Info — the "Dictionary Correction" section lists each before → after term and how many times it occurred (or "No dictionary corrections yet" if none).
📷 images/dictionary-3-1-en.png
📷 images/dictionary-3-2-en.png
4
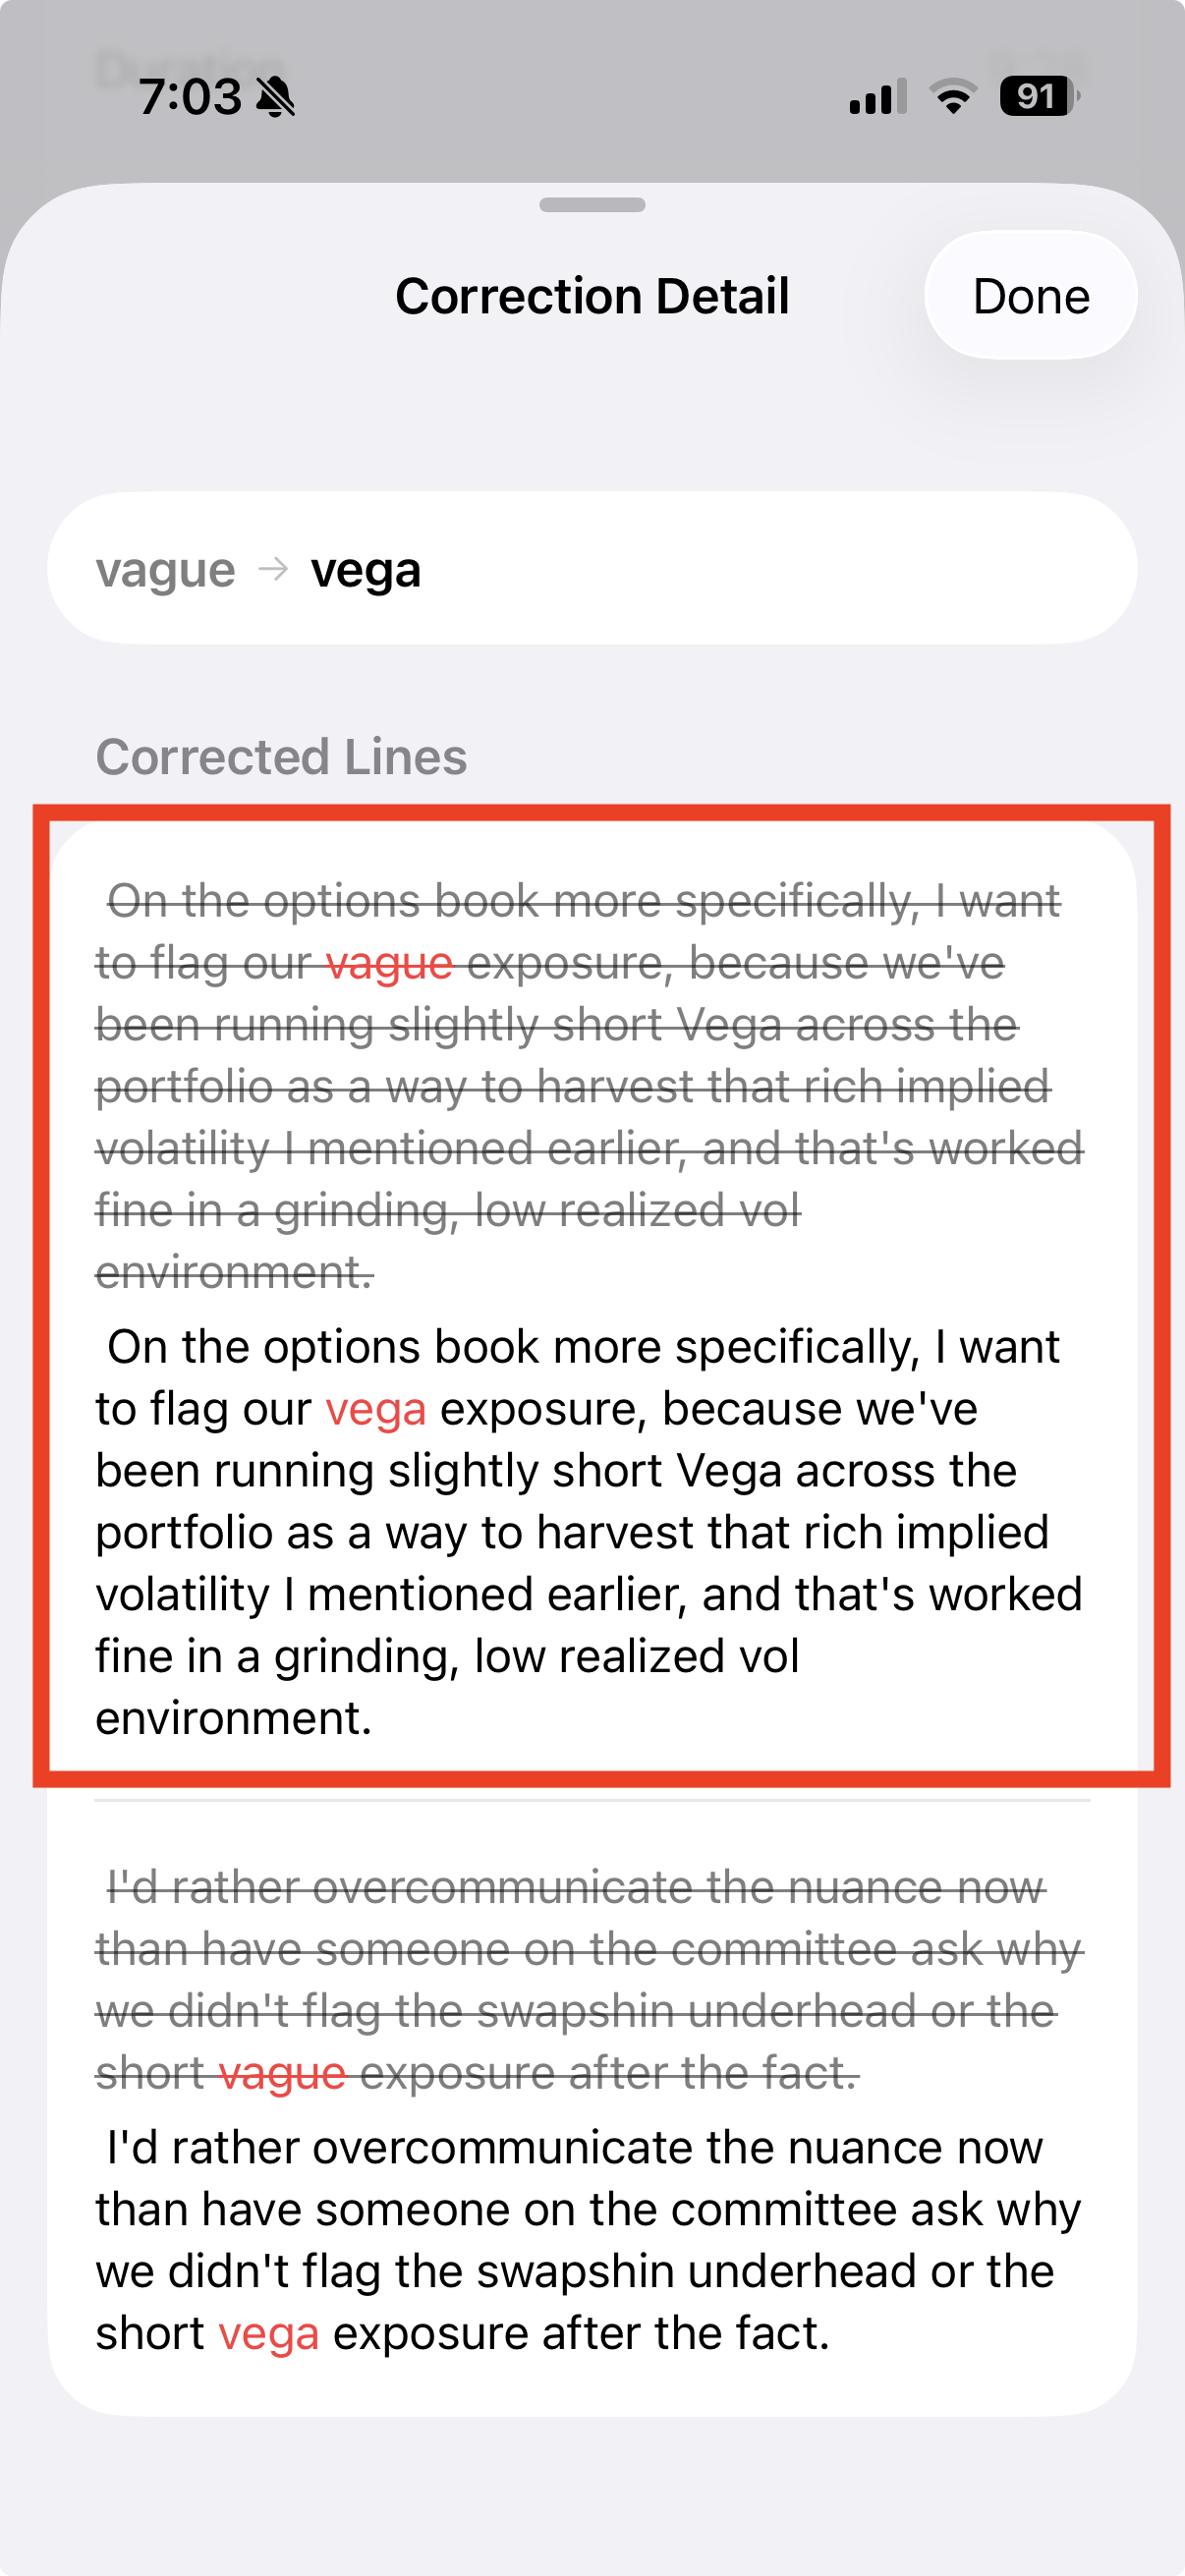
View the details of a correction
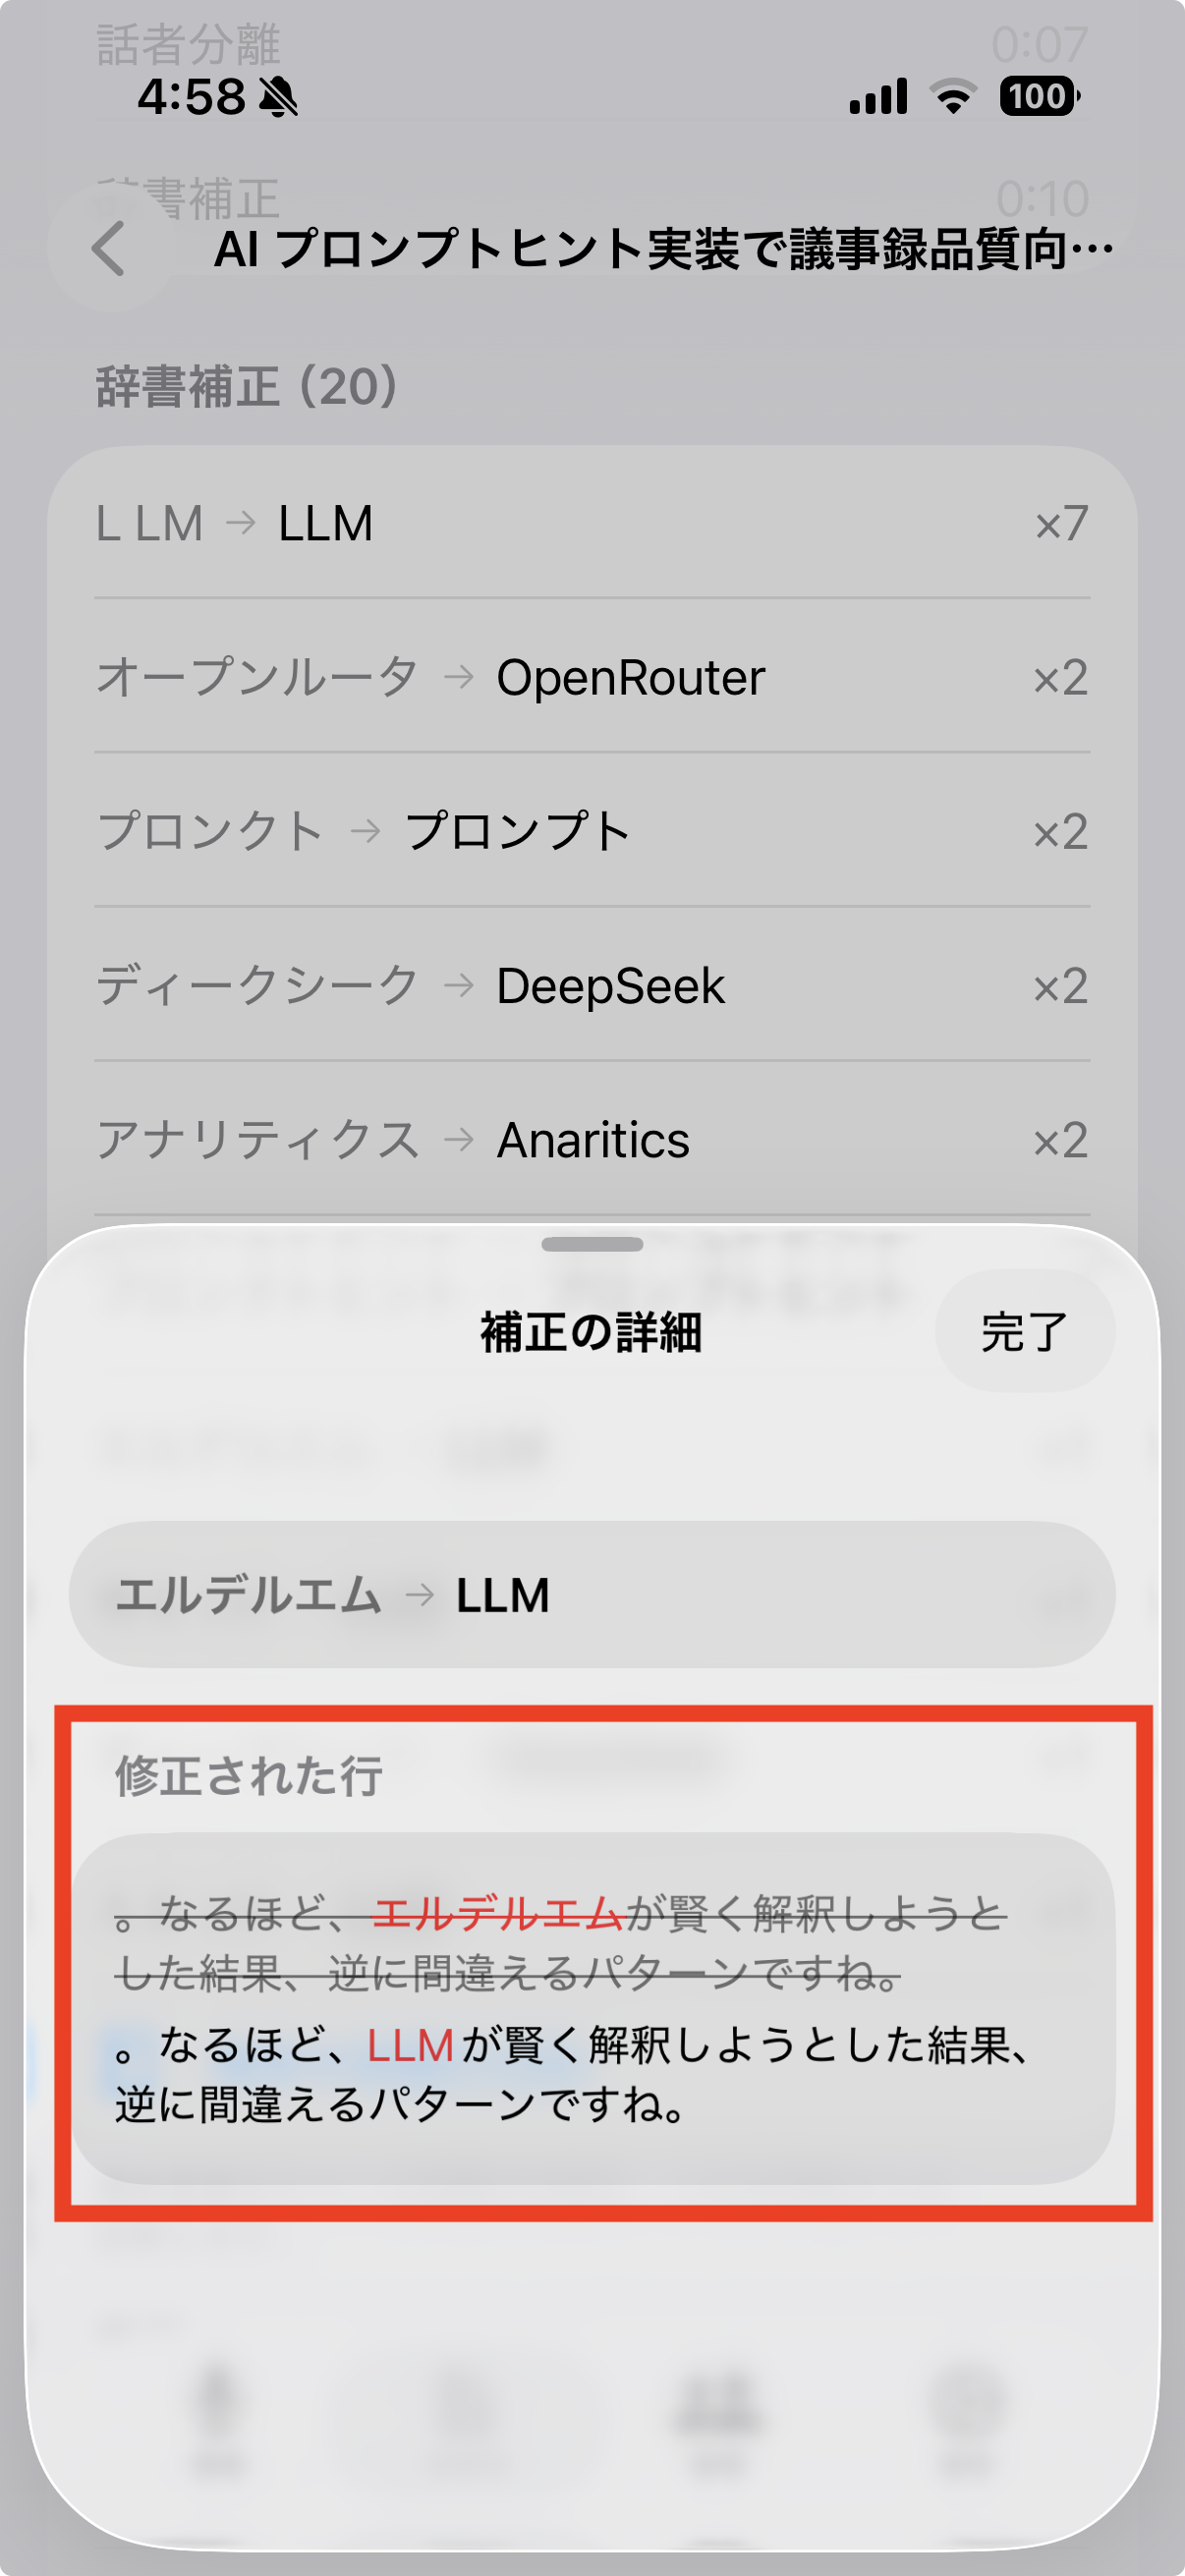
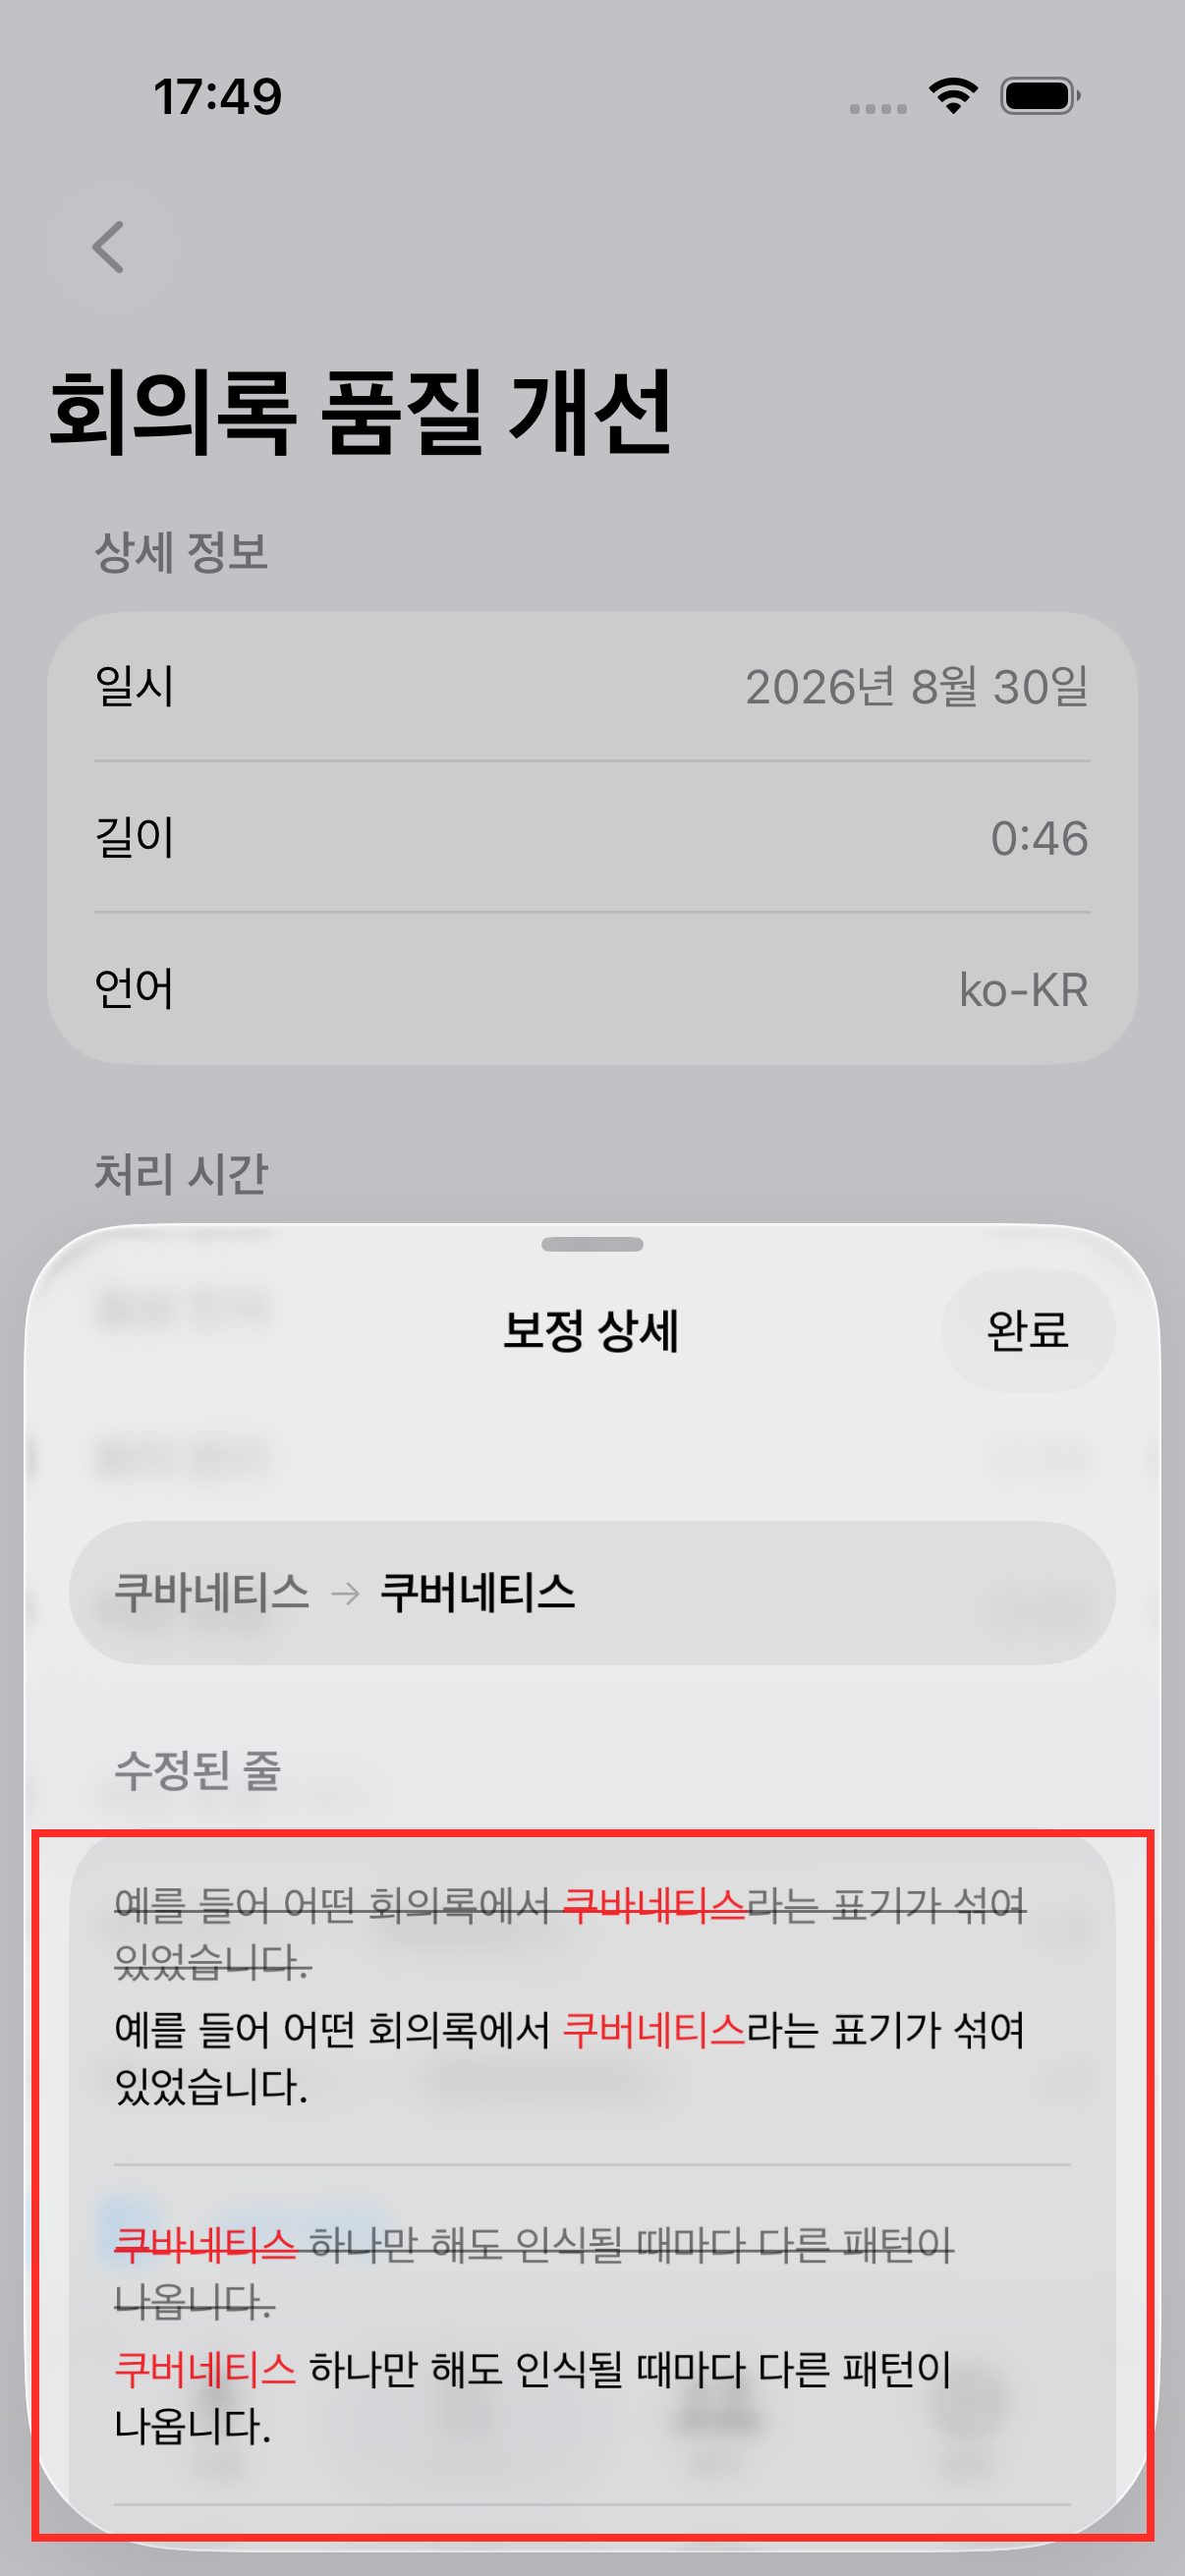
Tap a row in the list to open the "Correction Details" sheet, showing the before/after text for every line the correction was applied to (the matched term is highlighted in red).
📷 images/dictionary-4-en.png
5
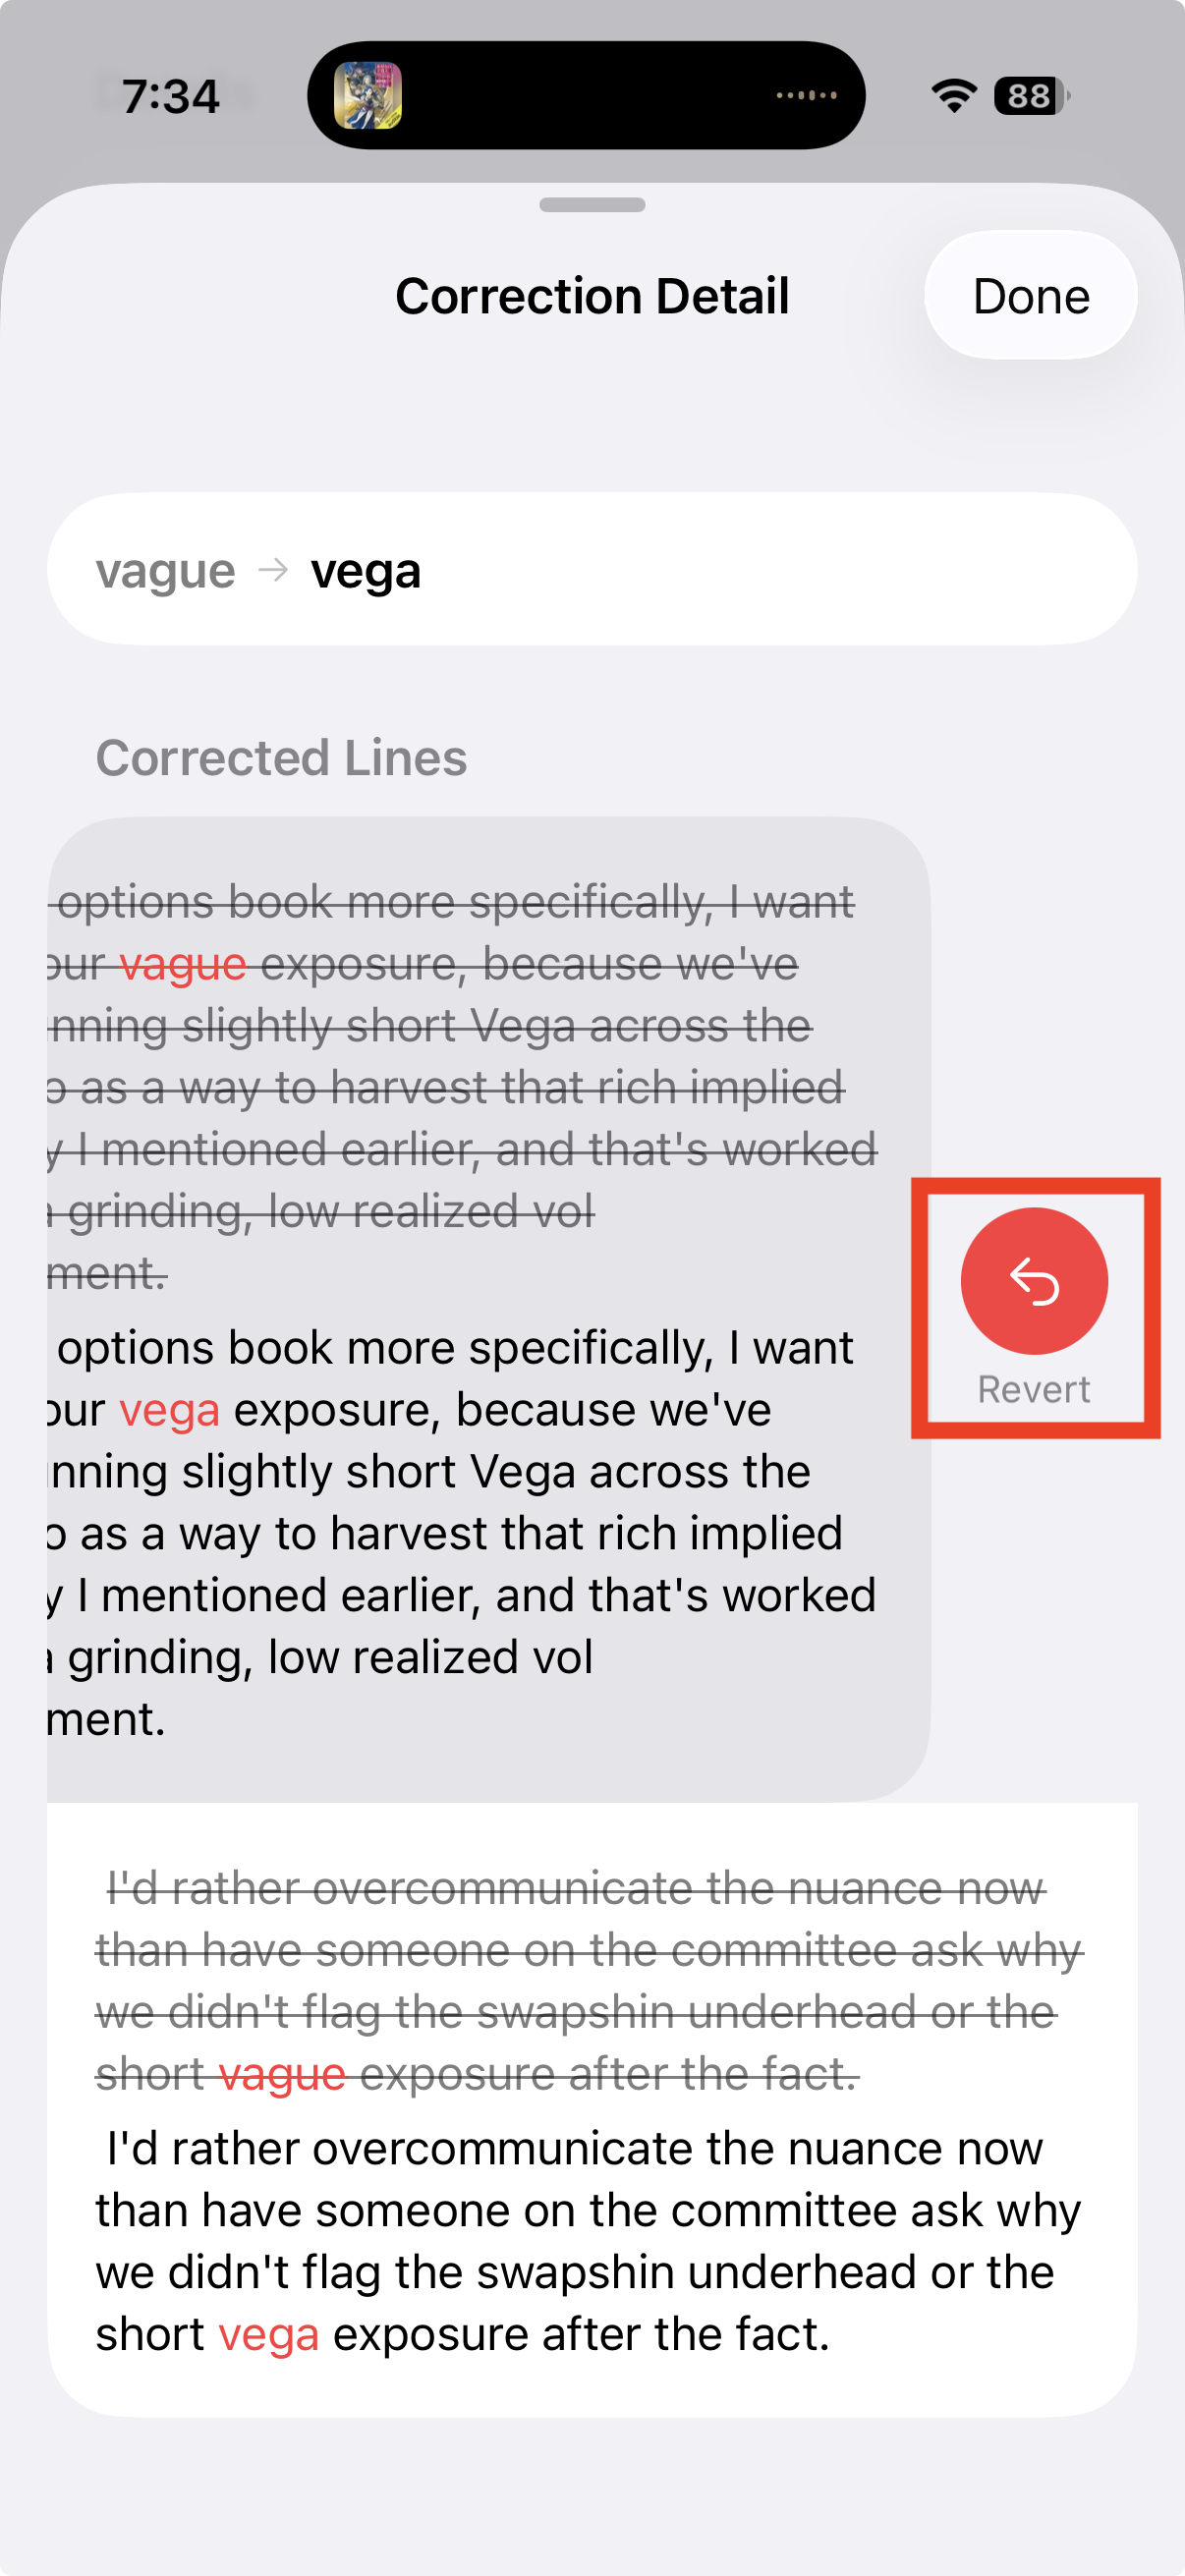
Revert a correction
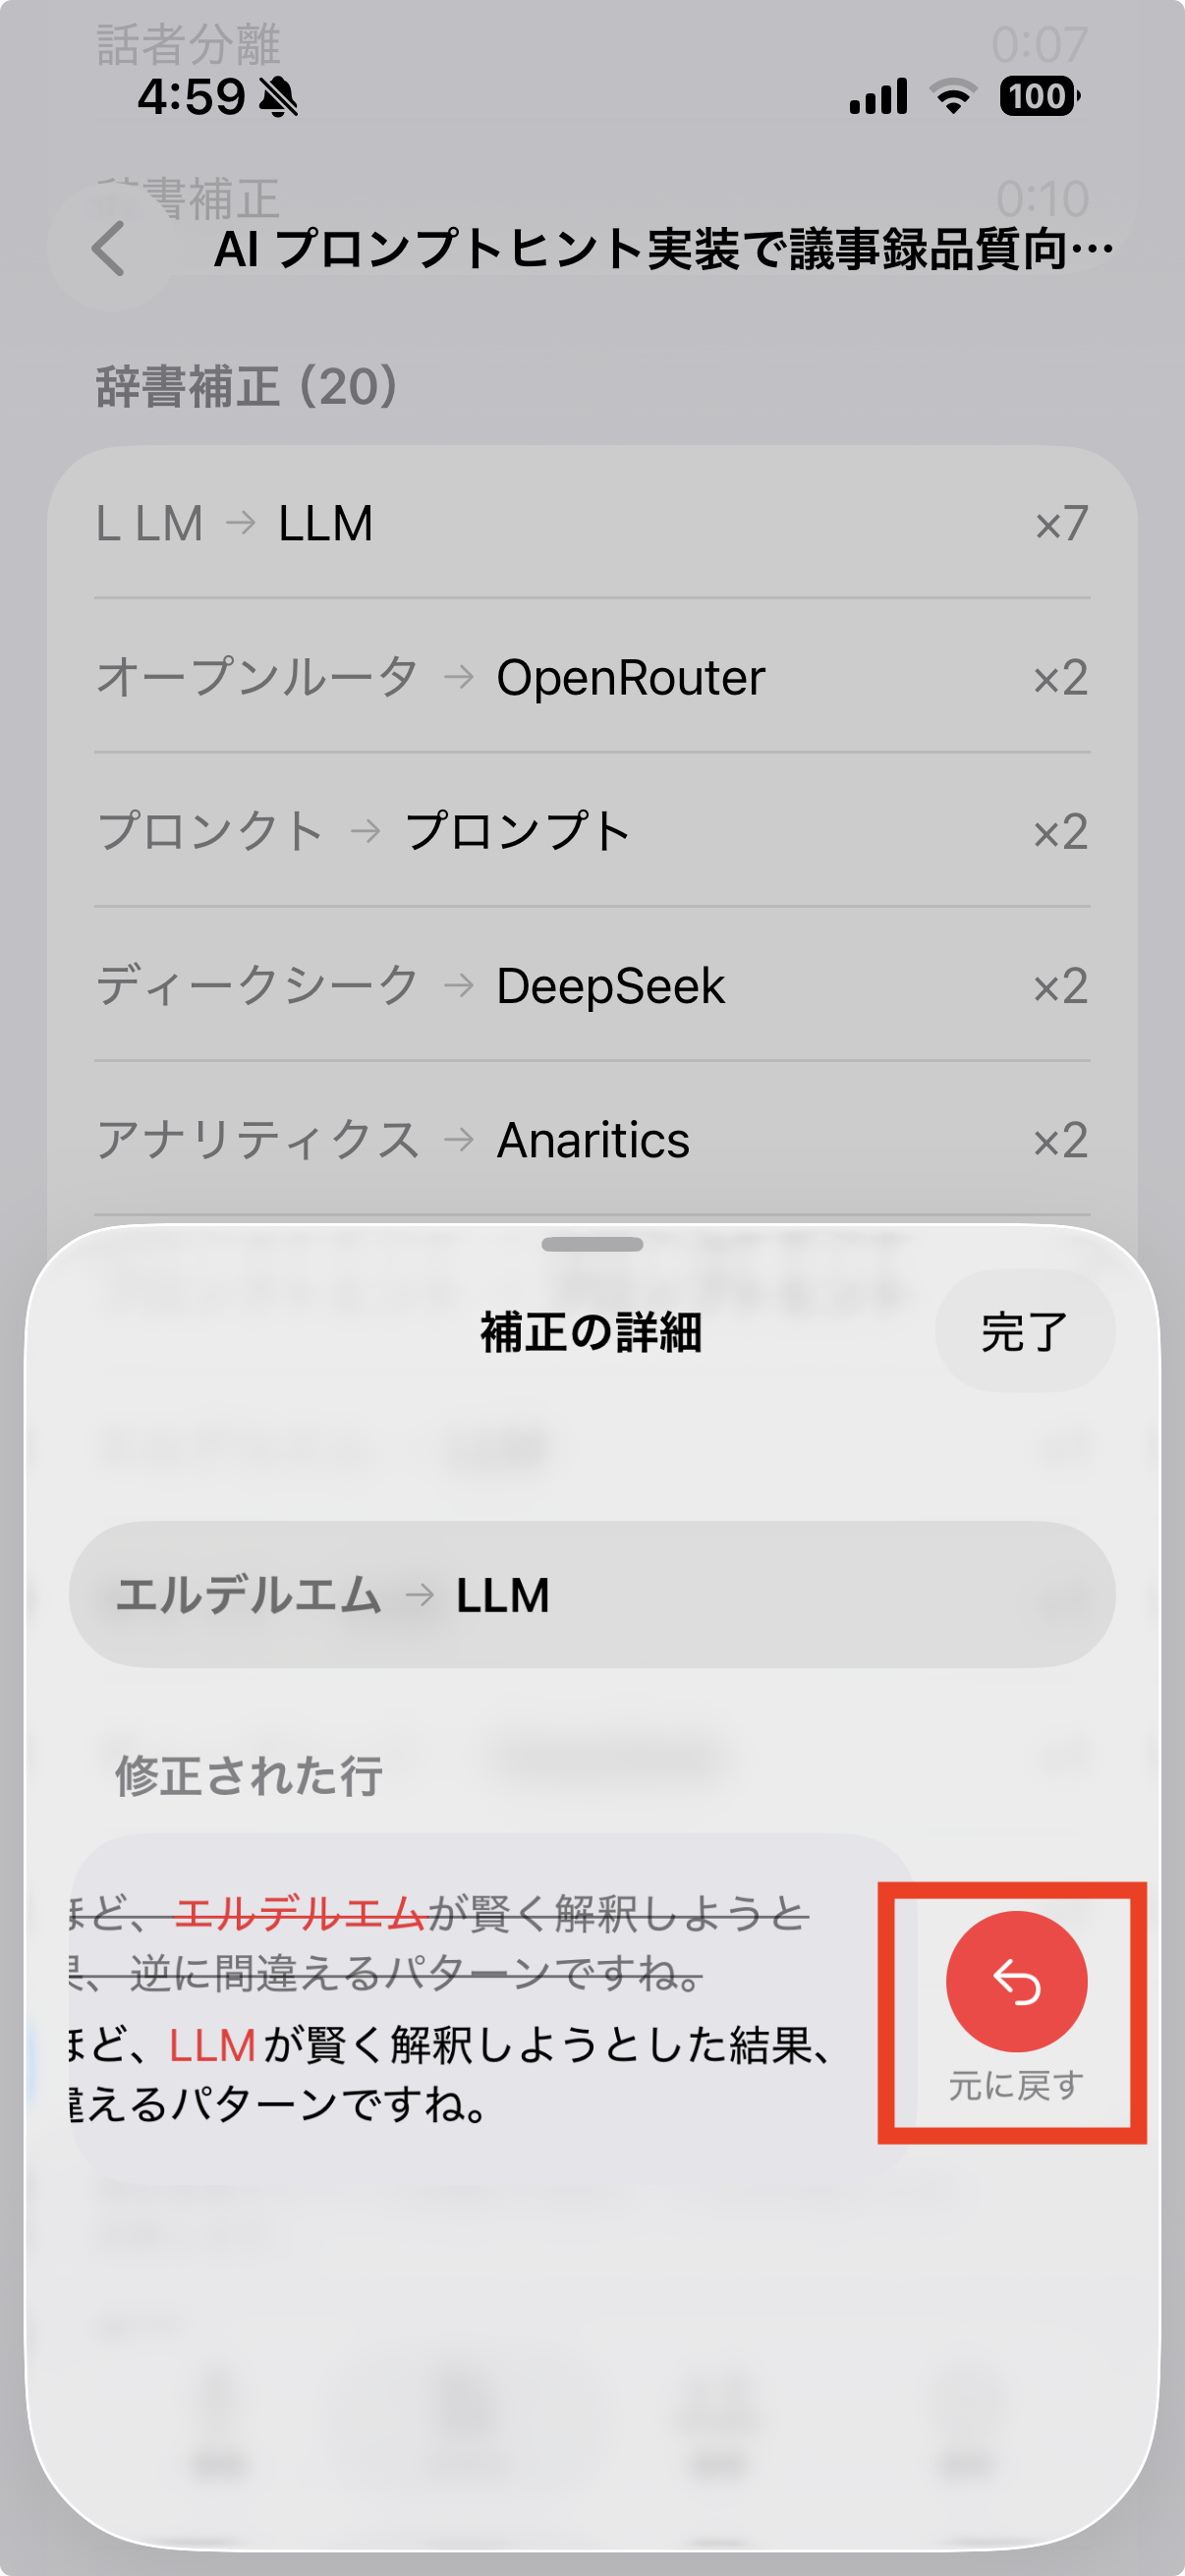
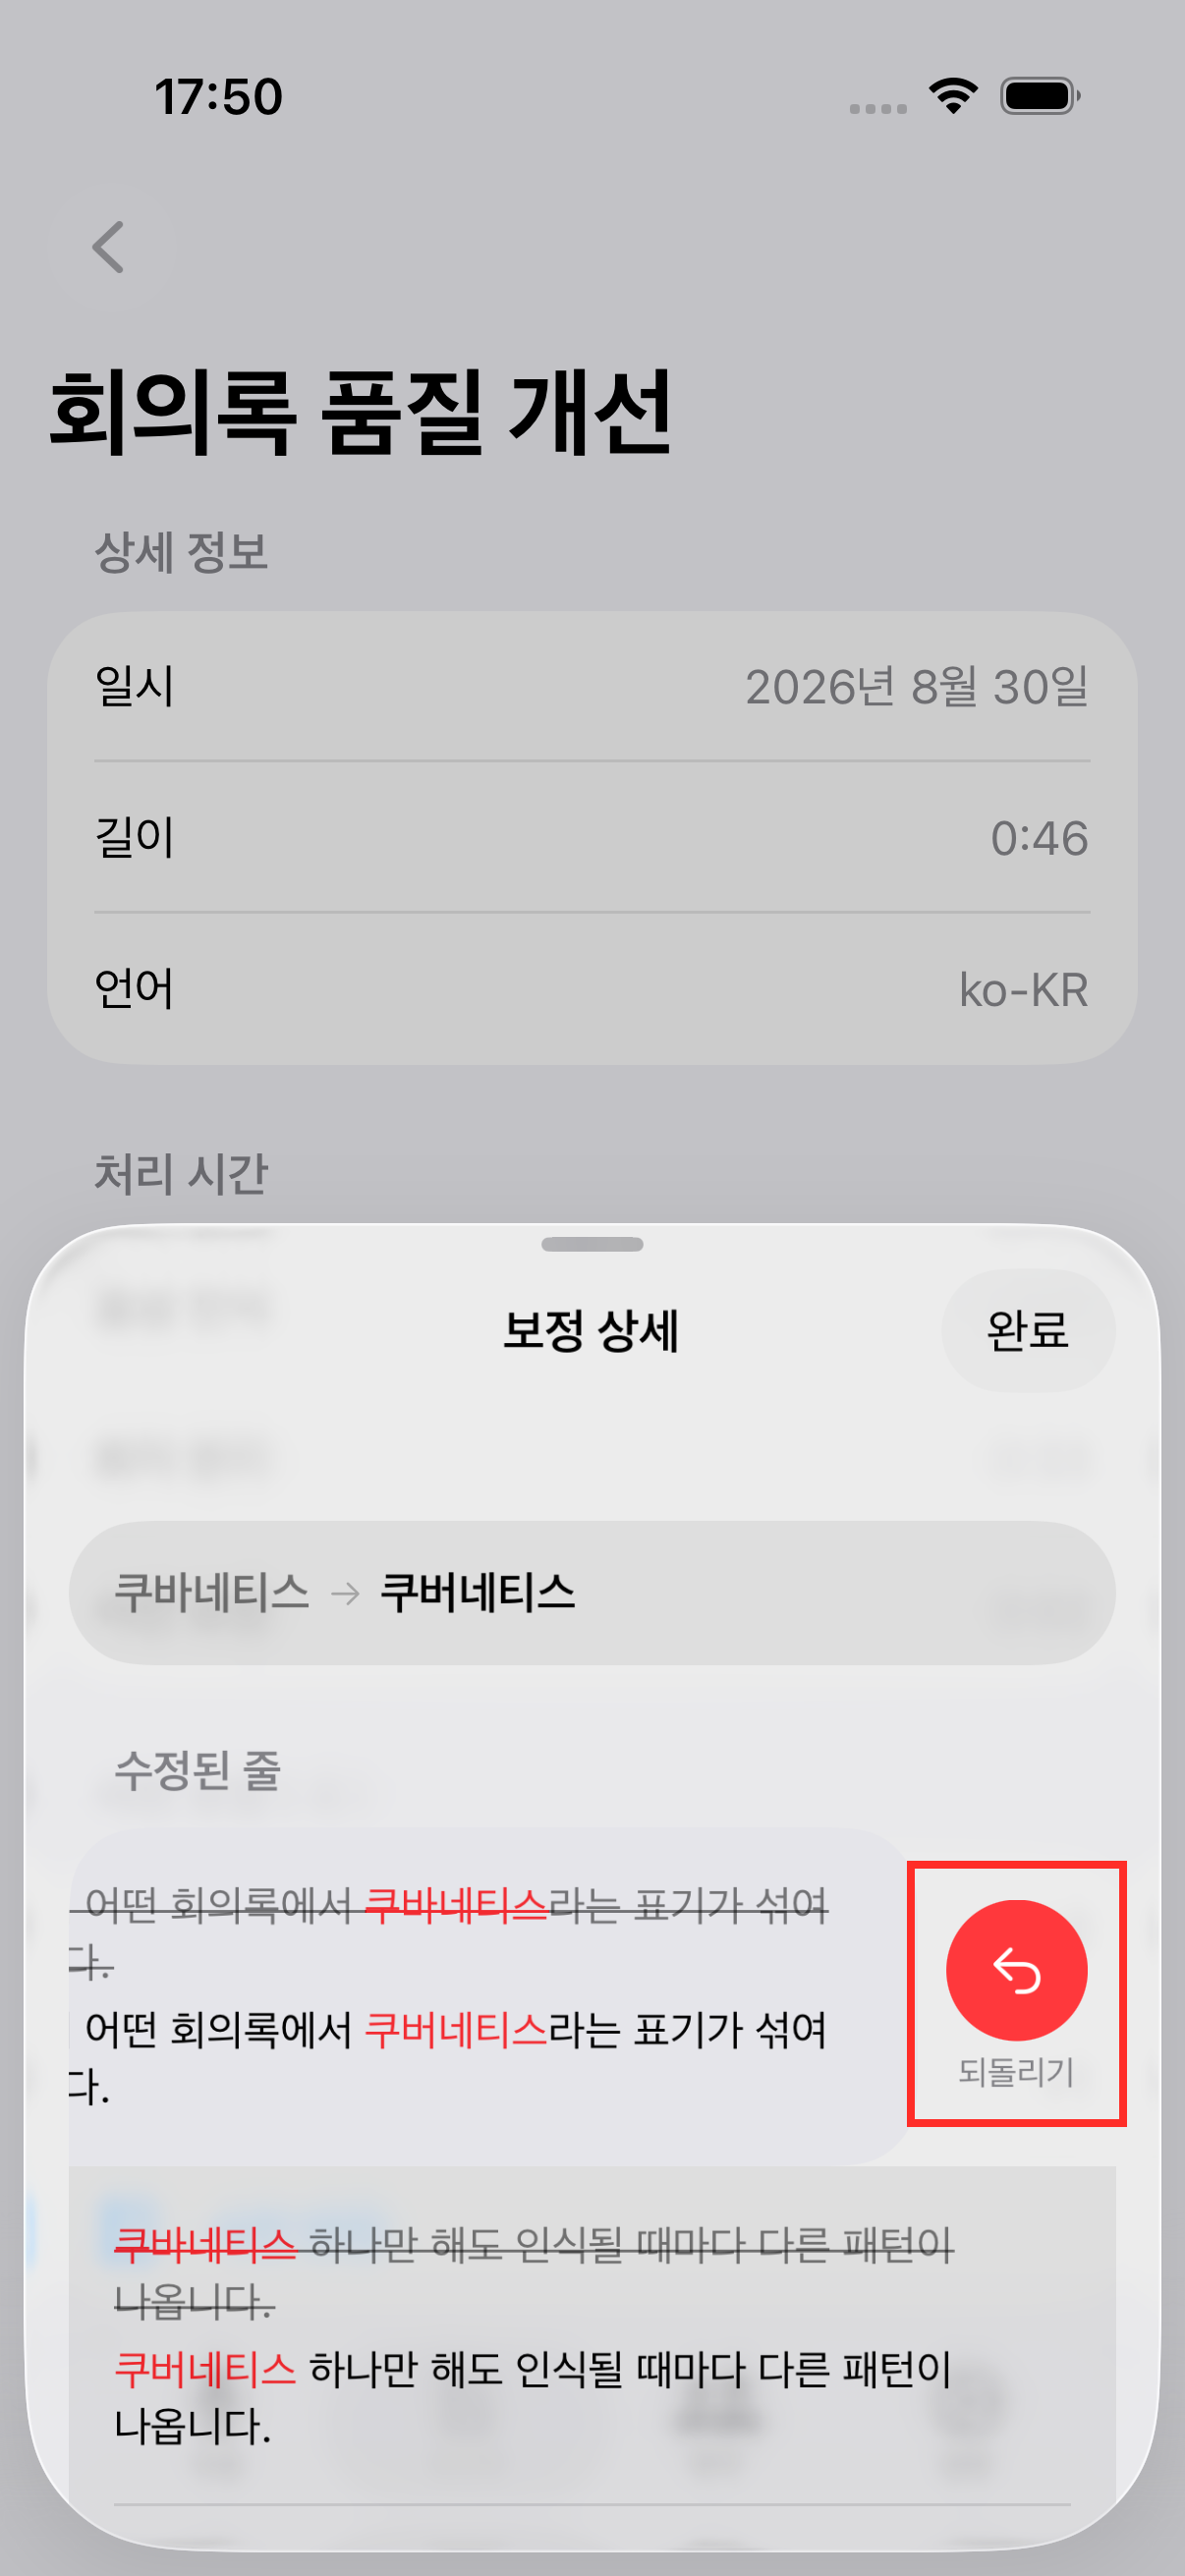
Swipe left on a row in the details sheet to reveal a "Revert" button, which rolls back just that occurrence to its original wording.
📷 images/dictionary-5-en.png
6
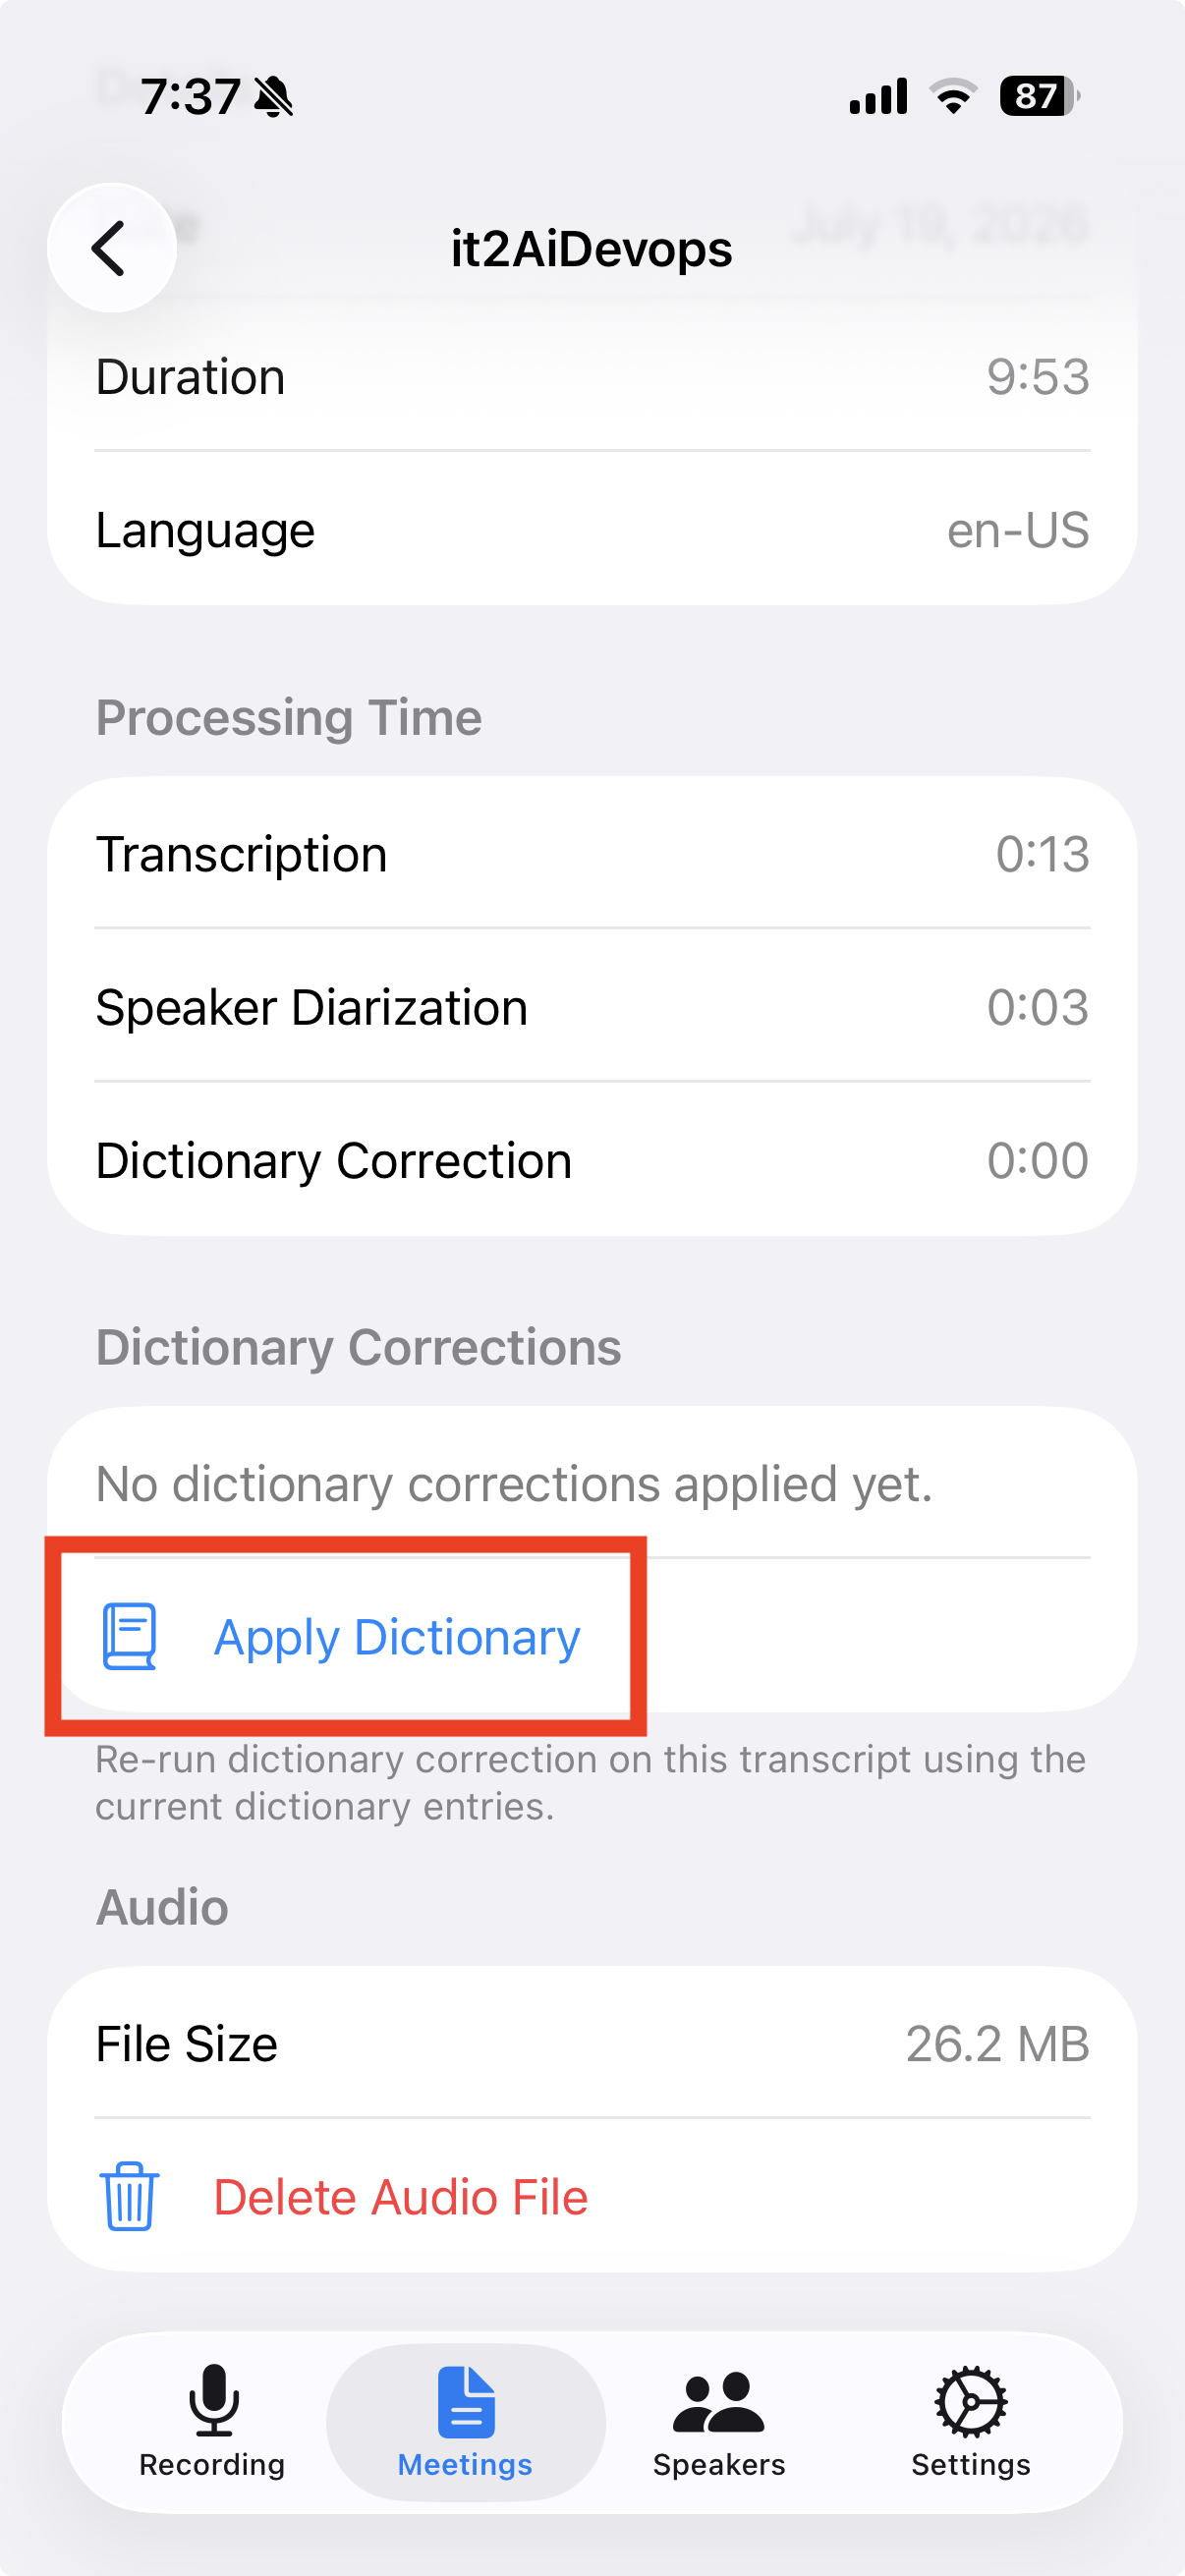
Manually re-apply the dictionary to an existing meeting
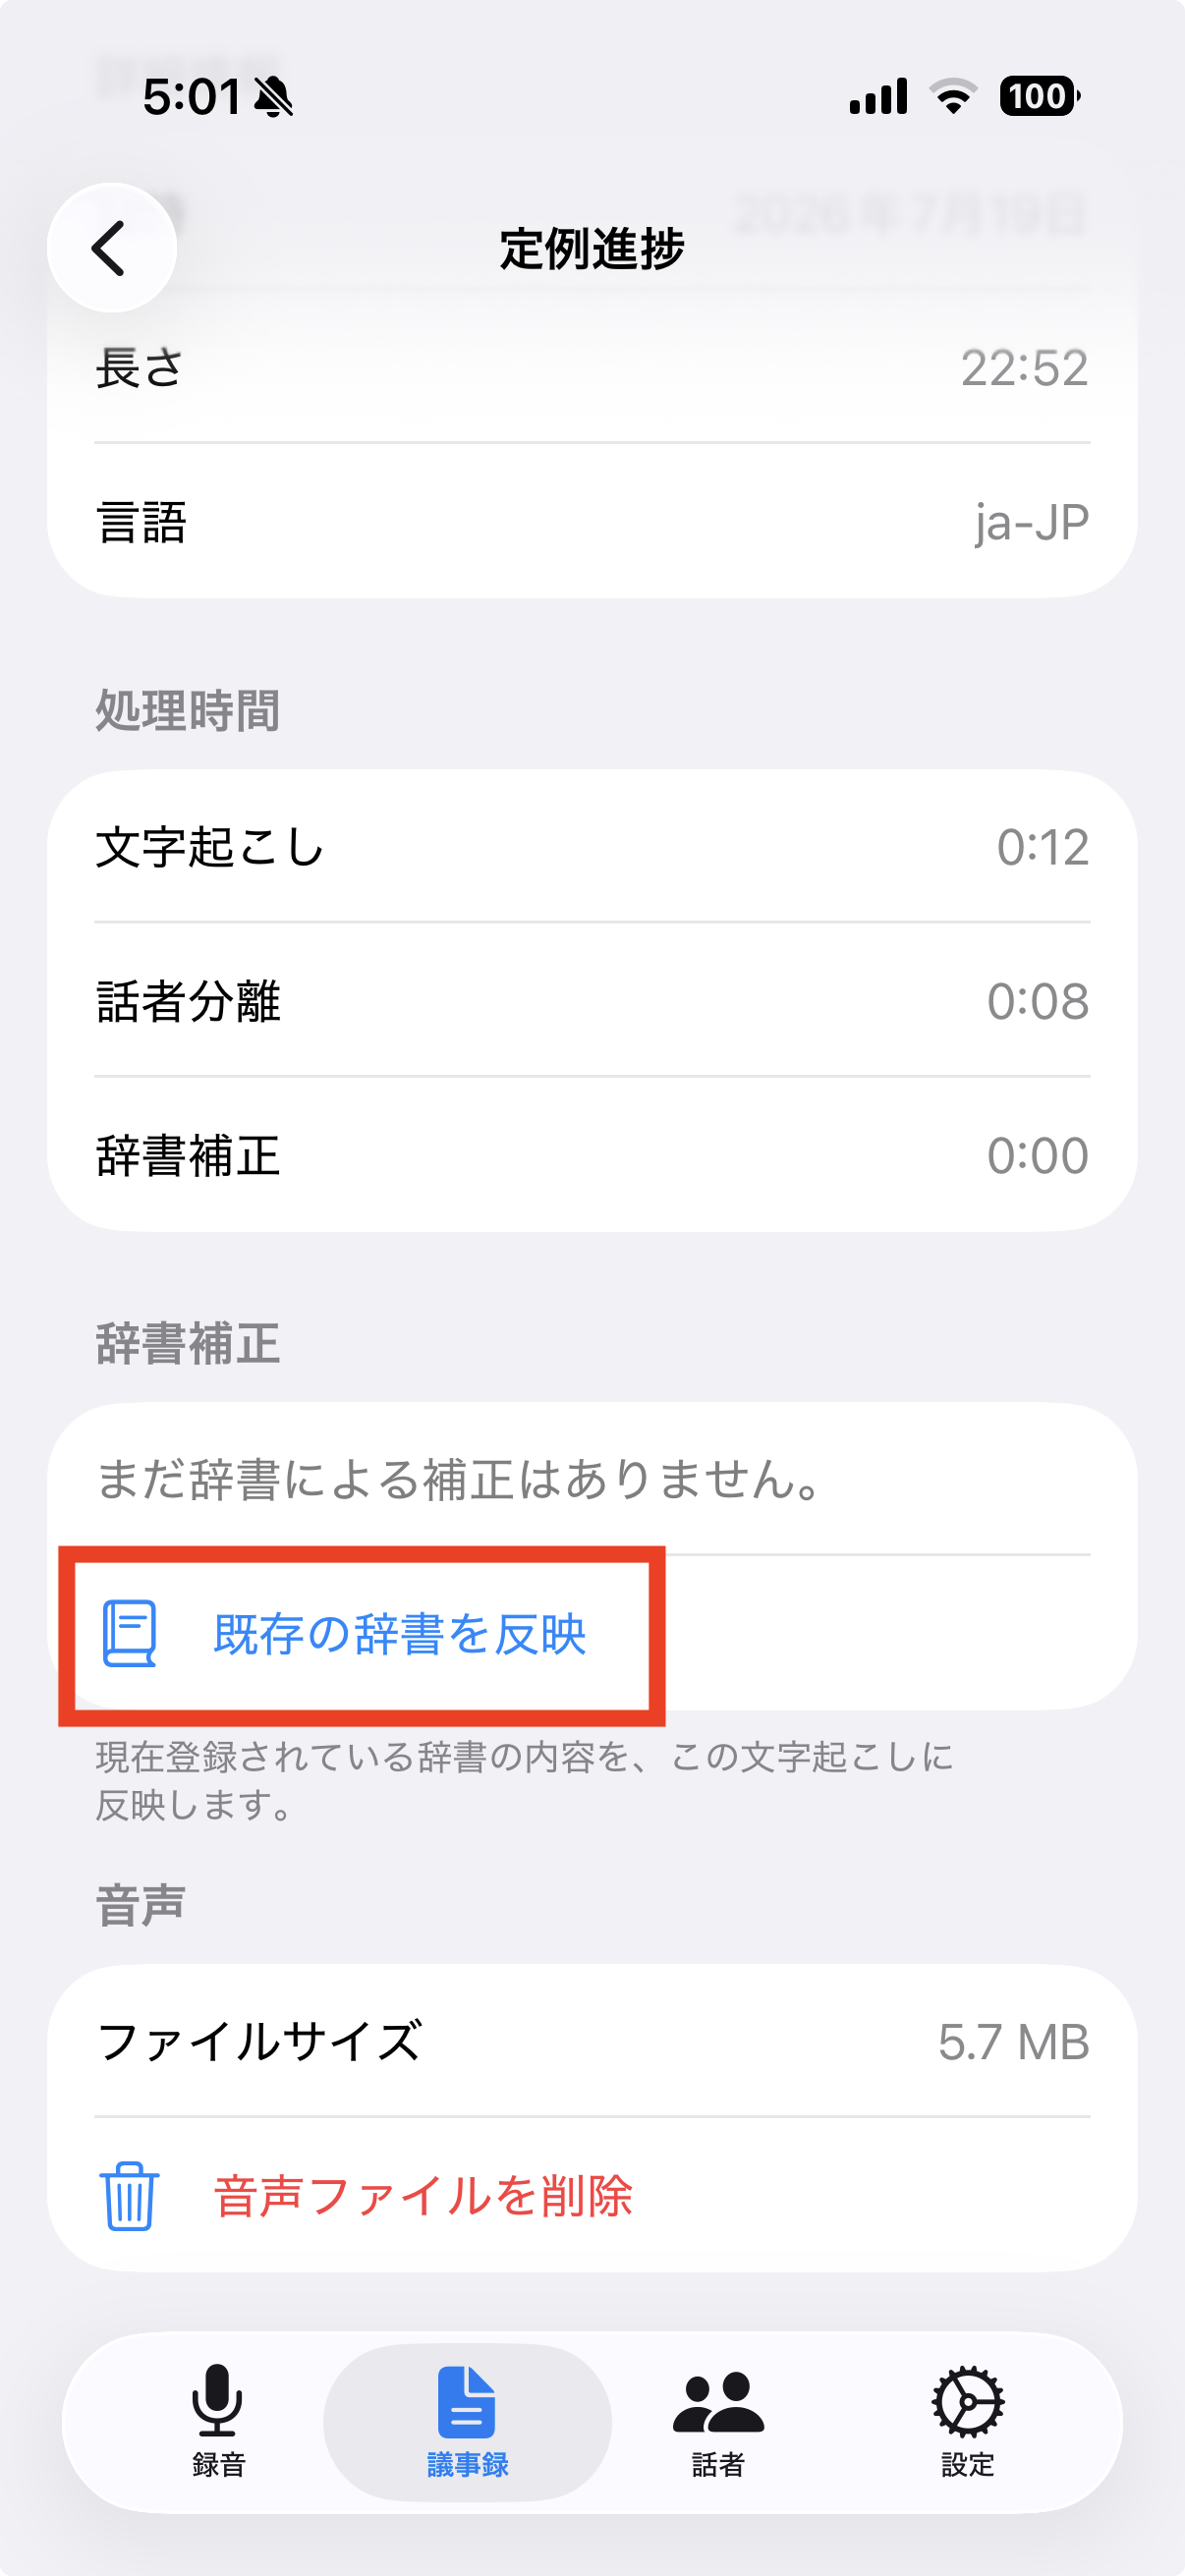
If you add or change terms later, use the "Apply Current Dictionary" button in the Meeting Info dictionary section to re-run correction on a past meeting.
📷 images/dictionary-6-1-en.png
📷 images/dictionary-6-2-en.png
📝 AI Meeting Notes
1
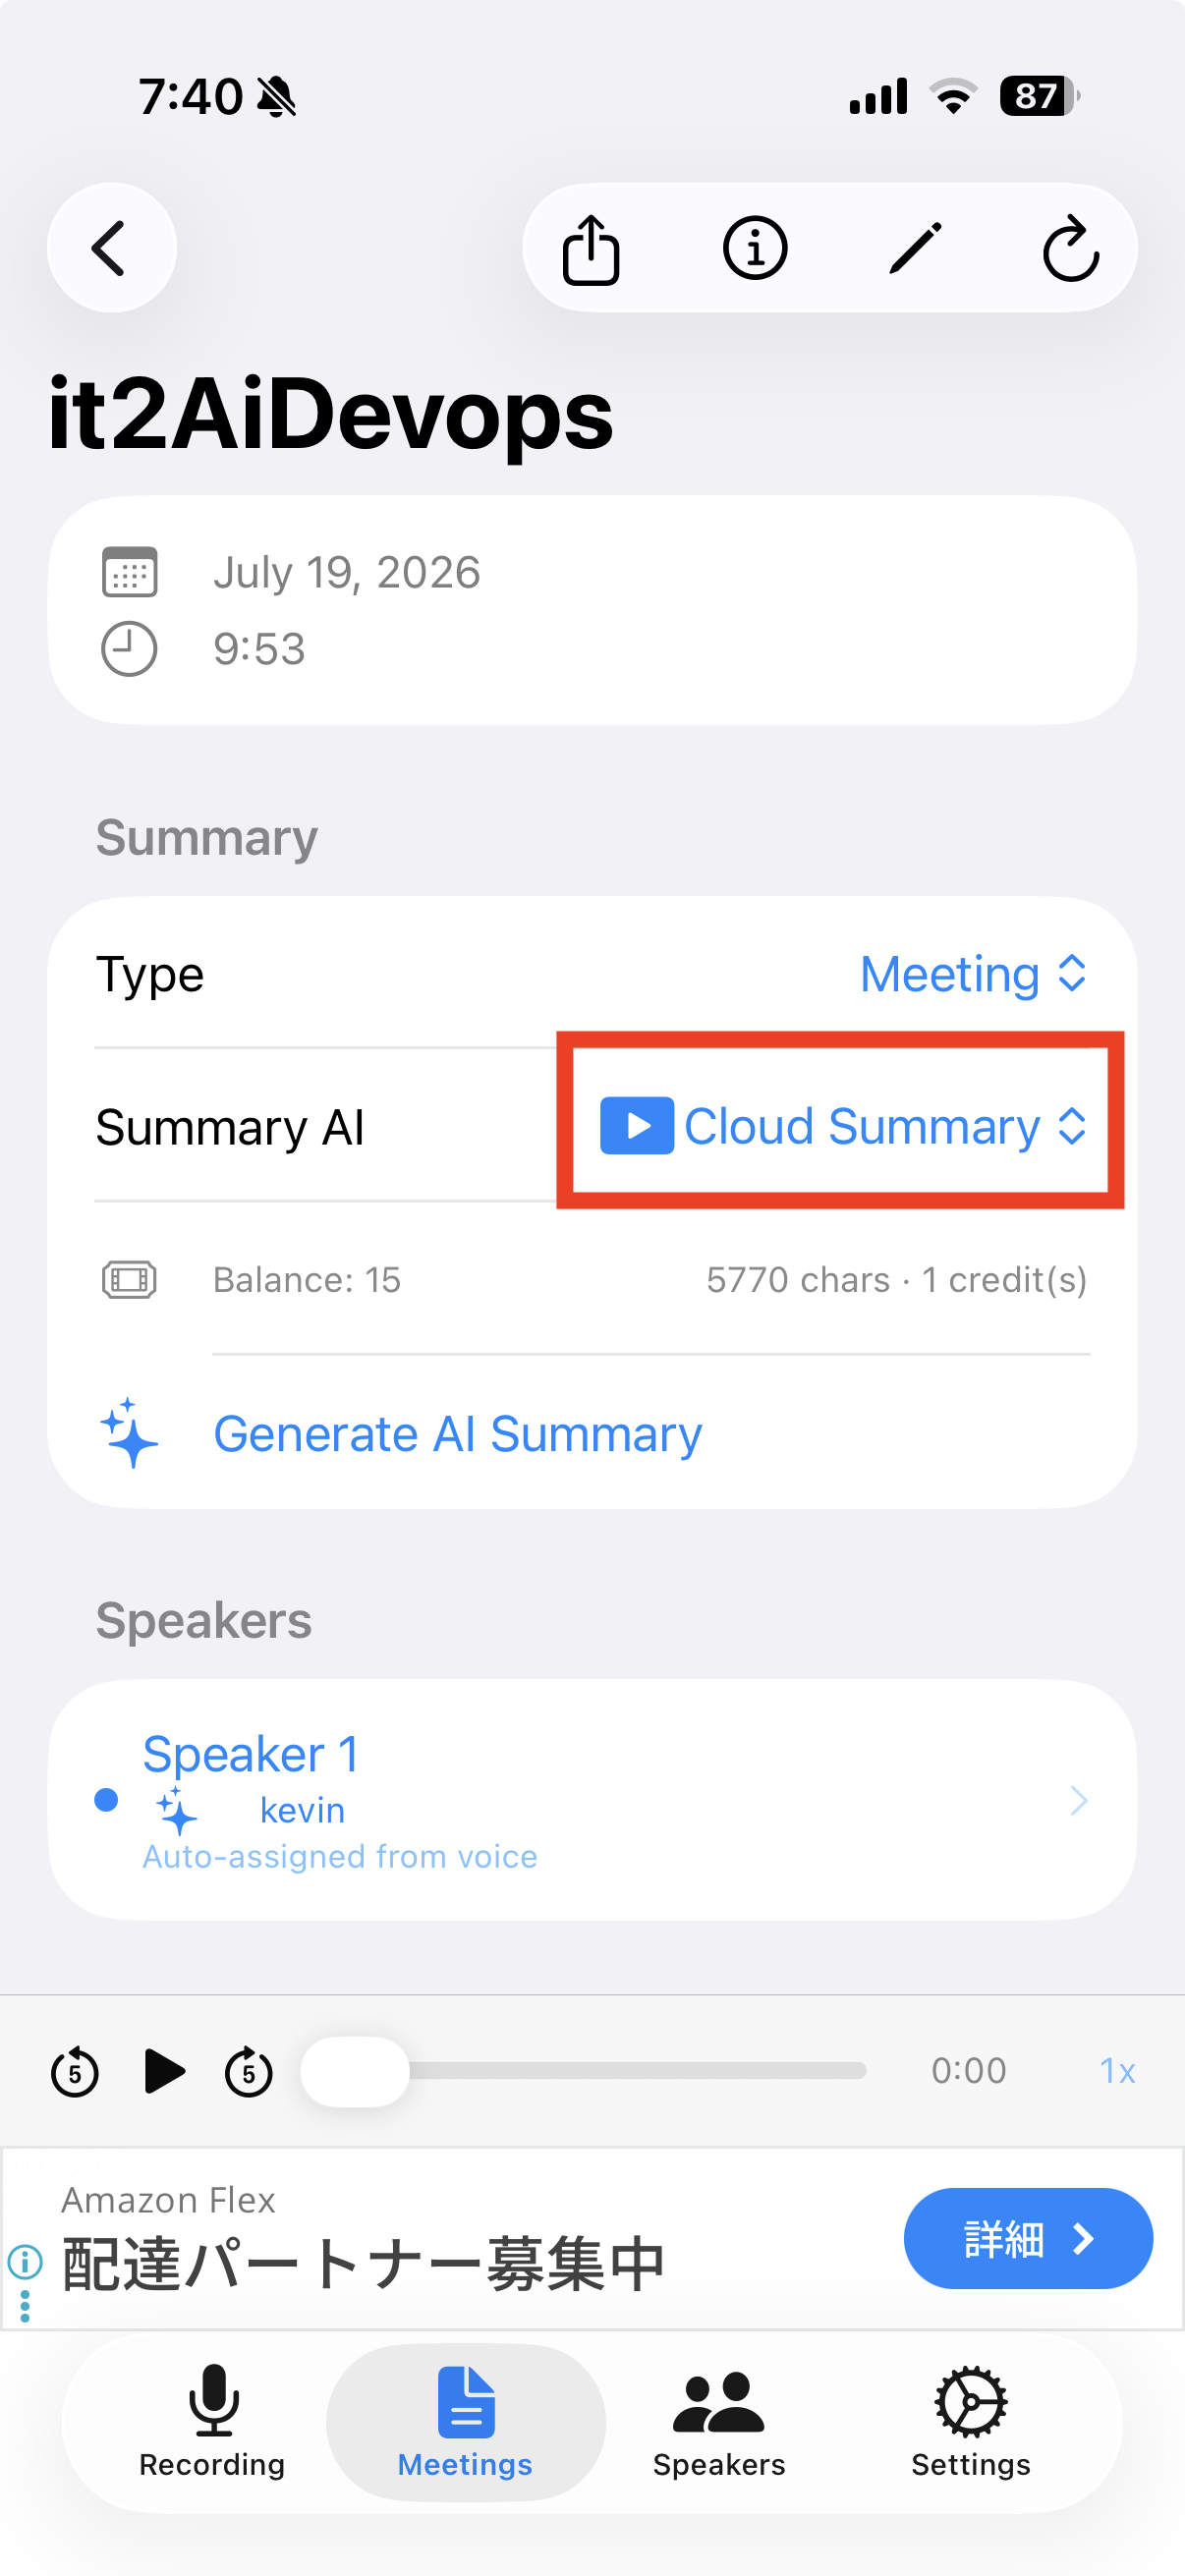
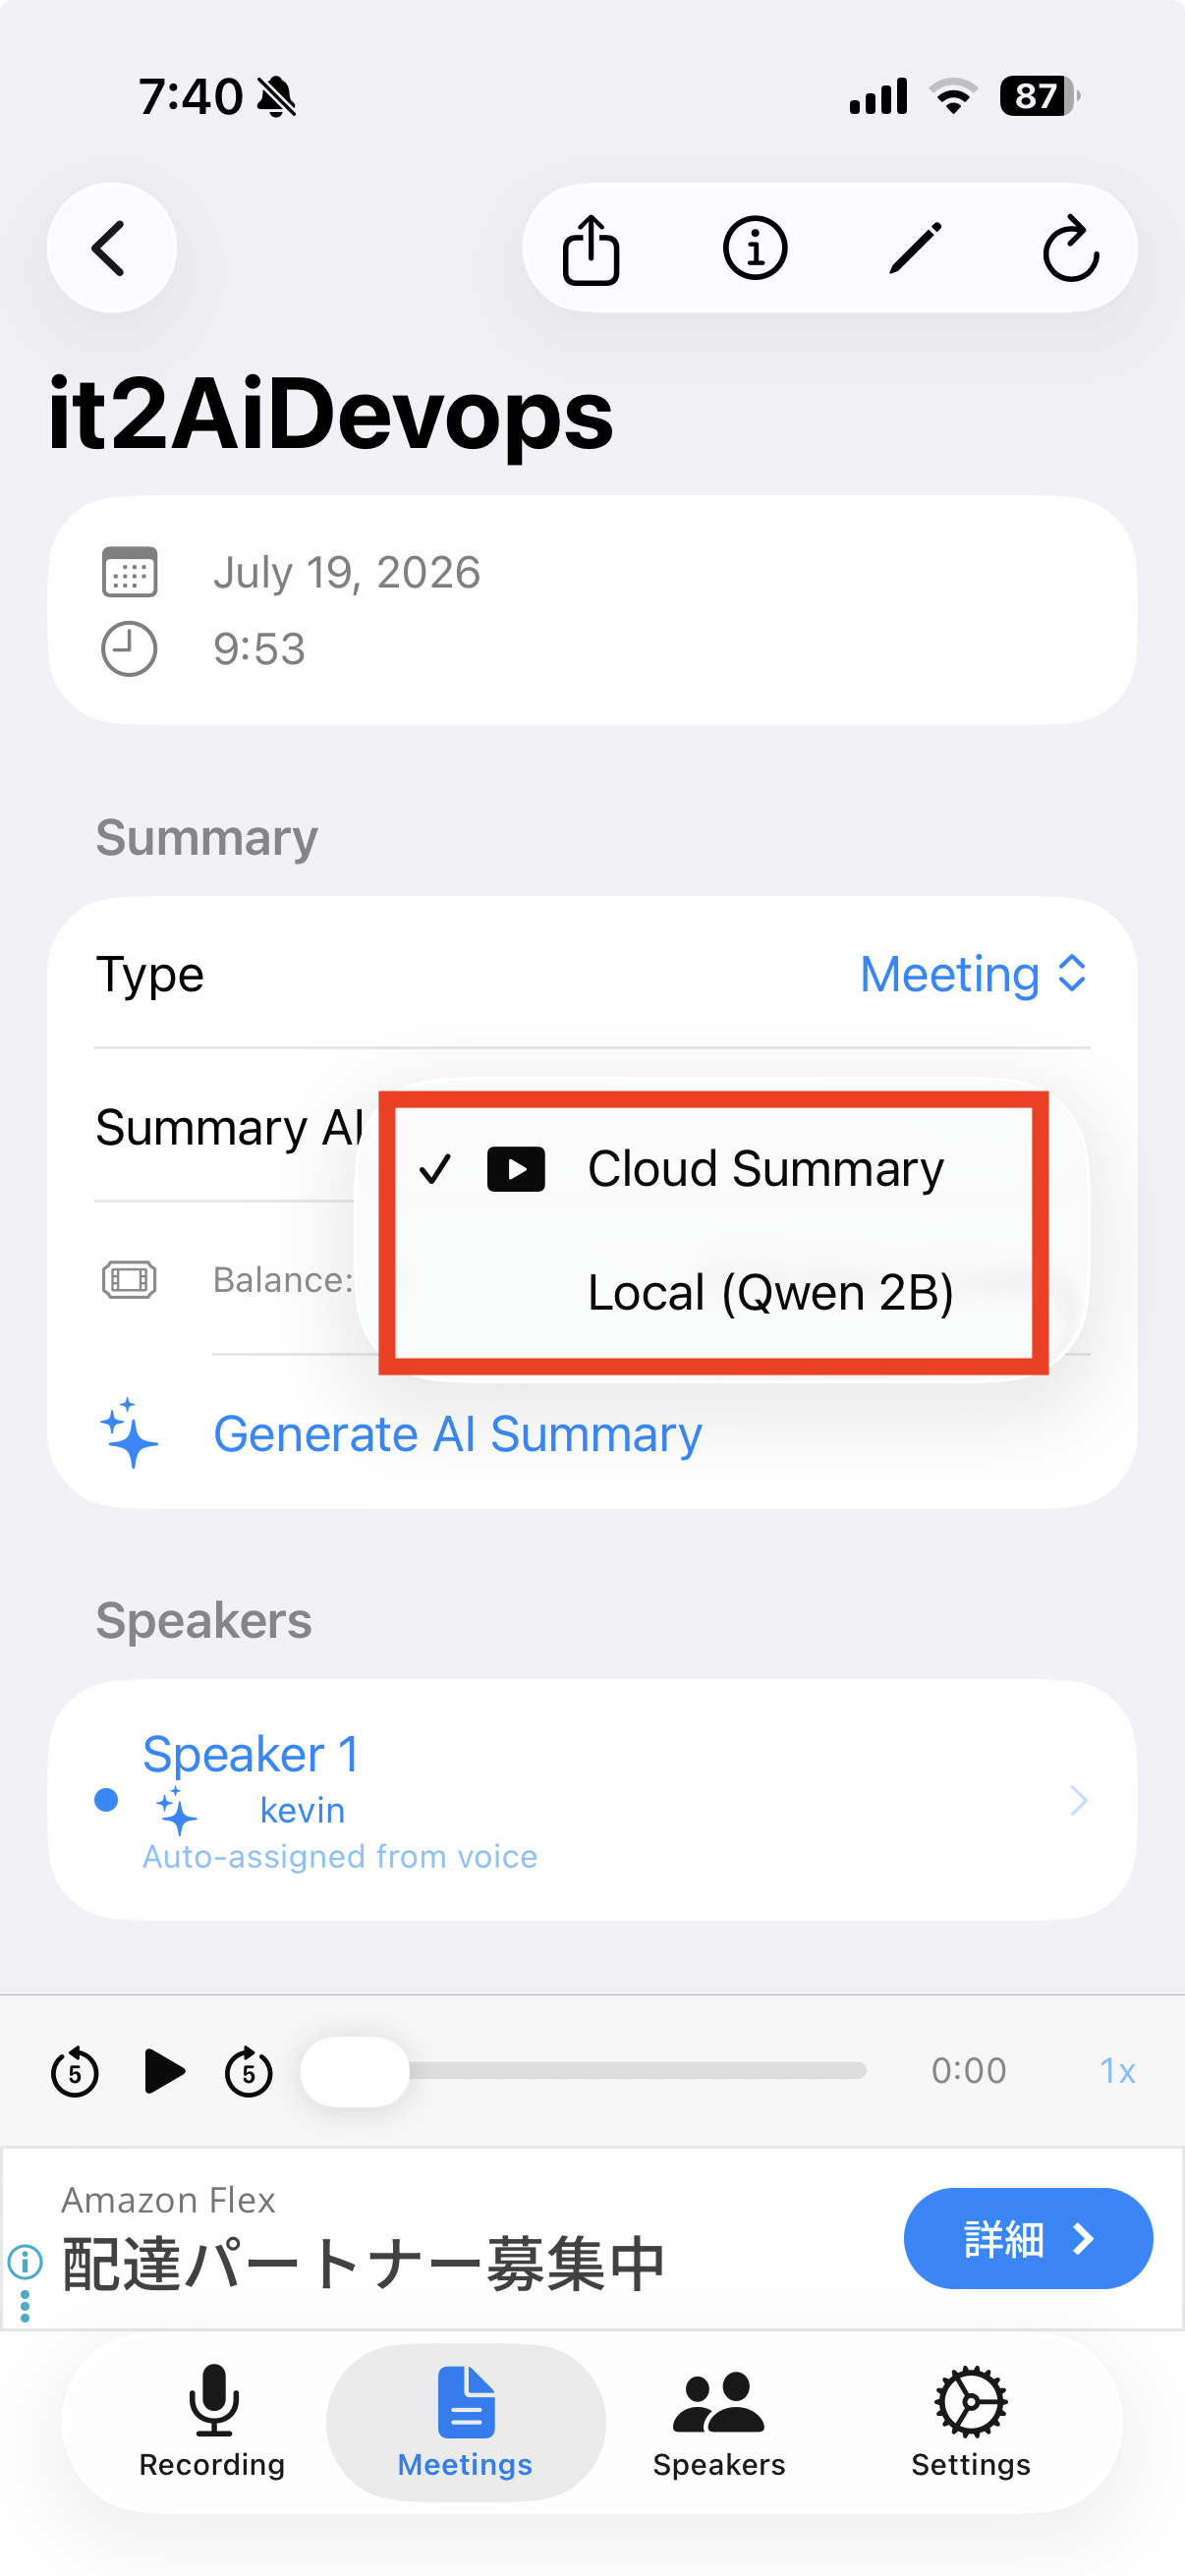
Choose how notes are generated
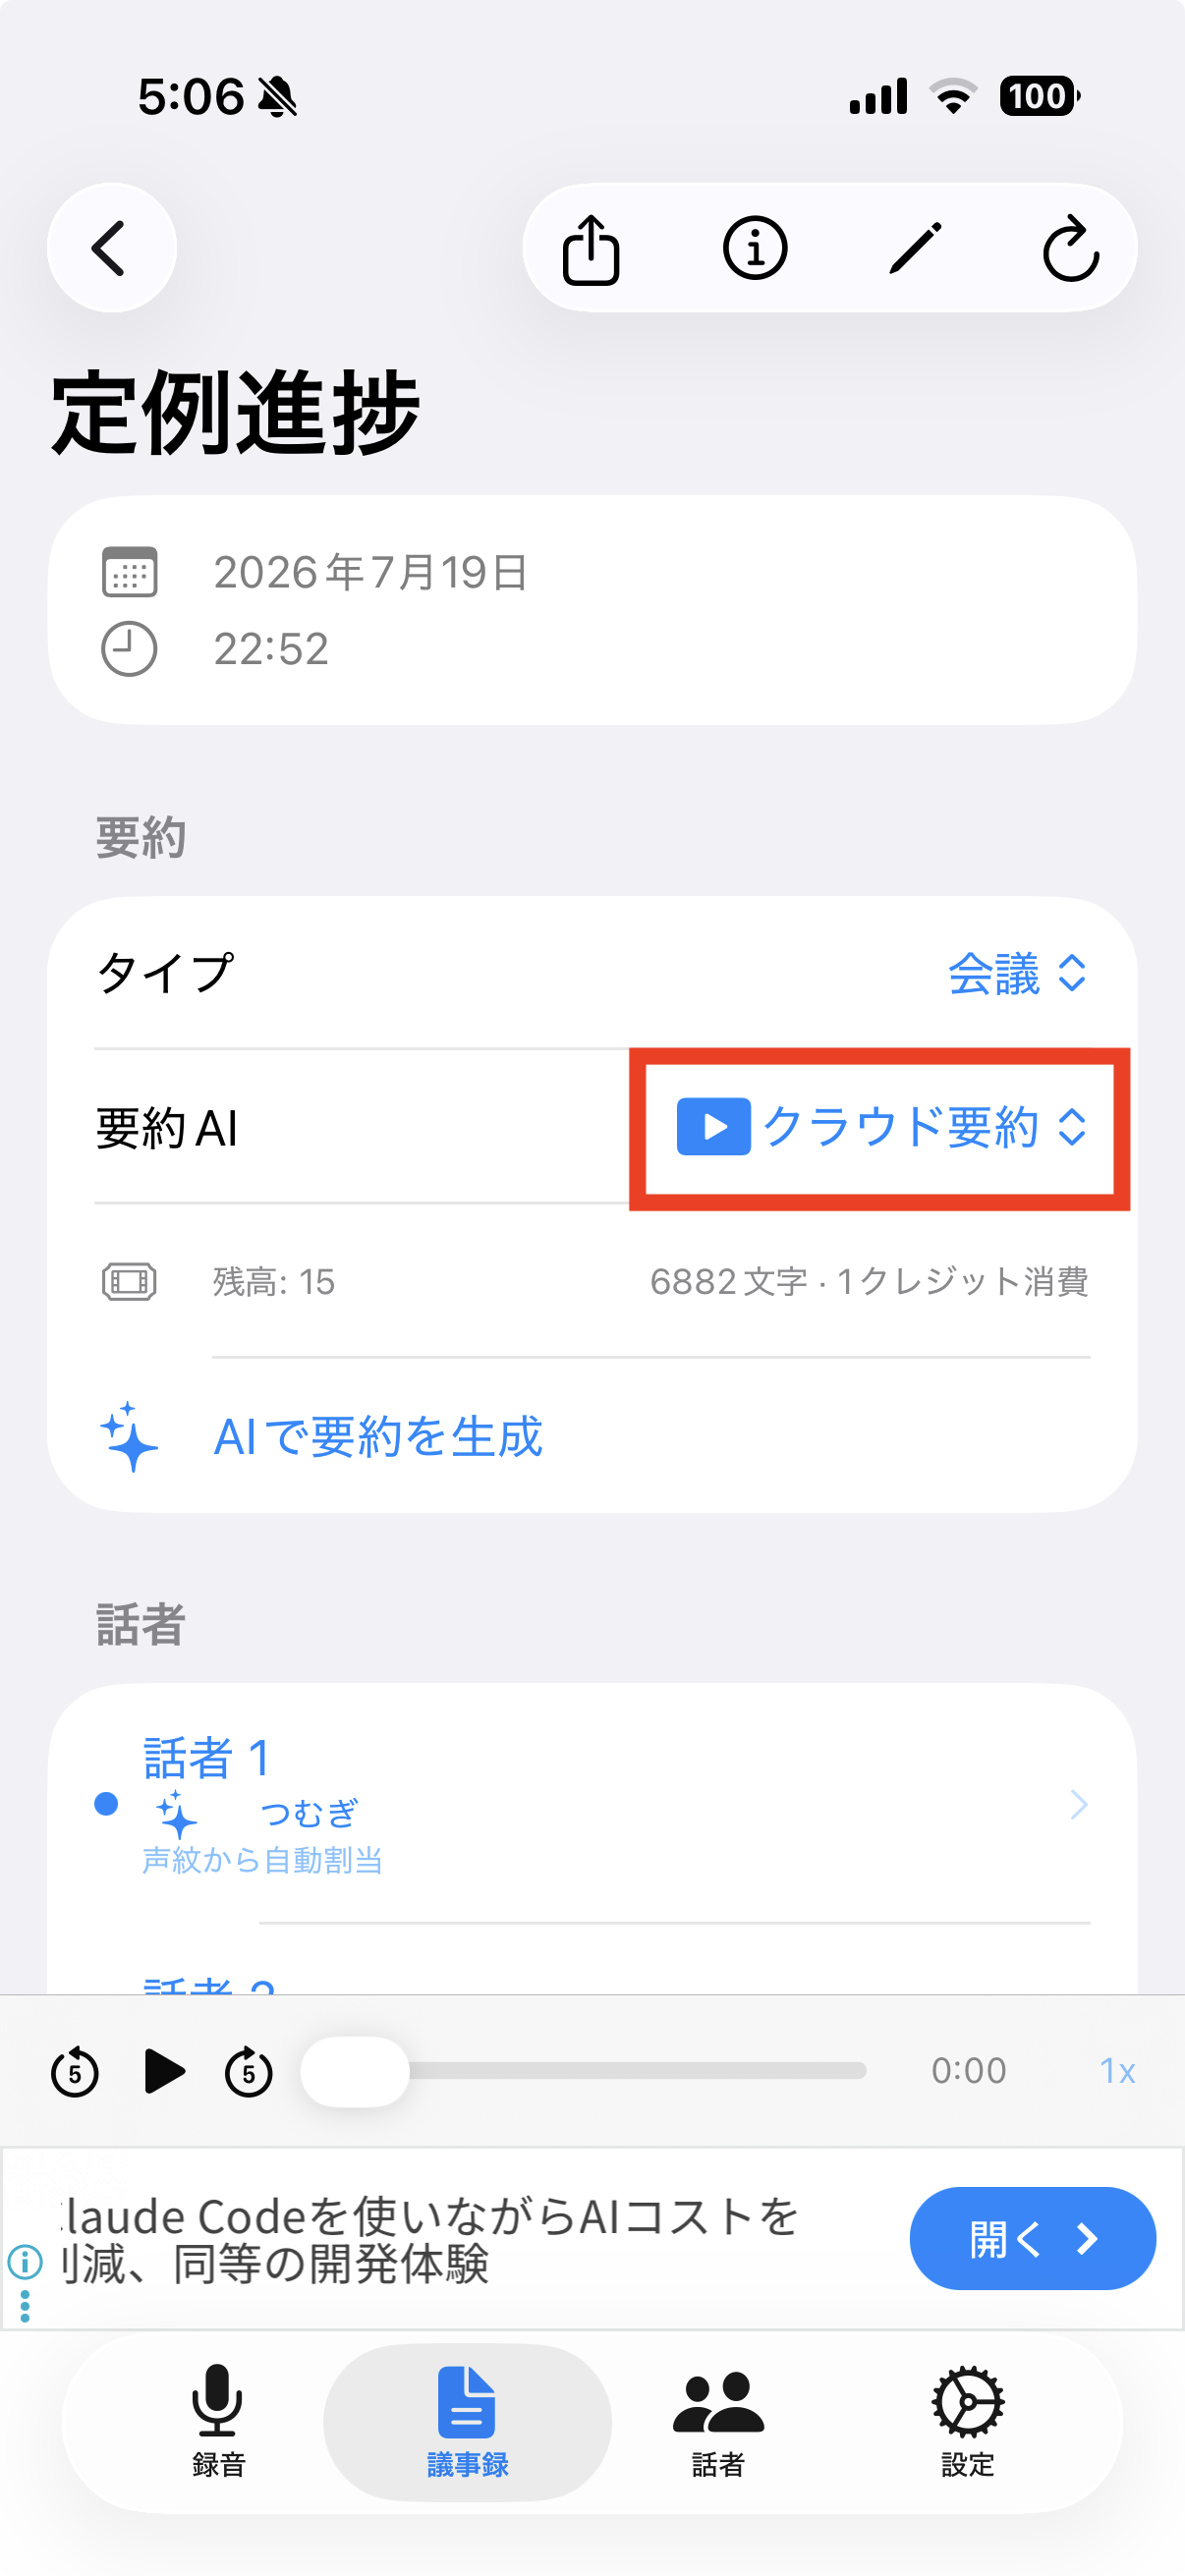
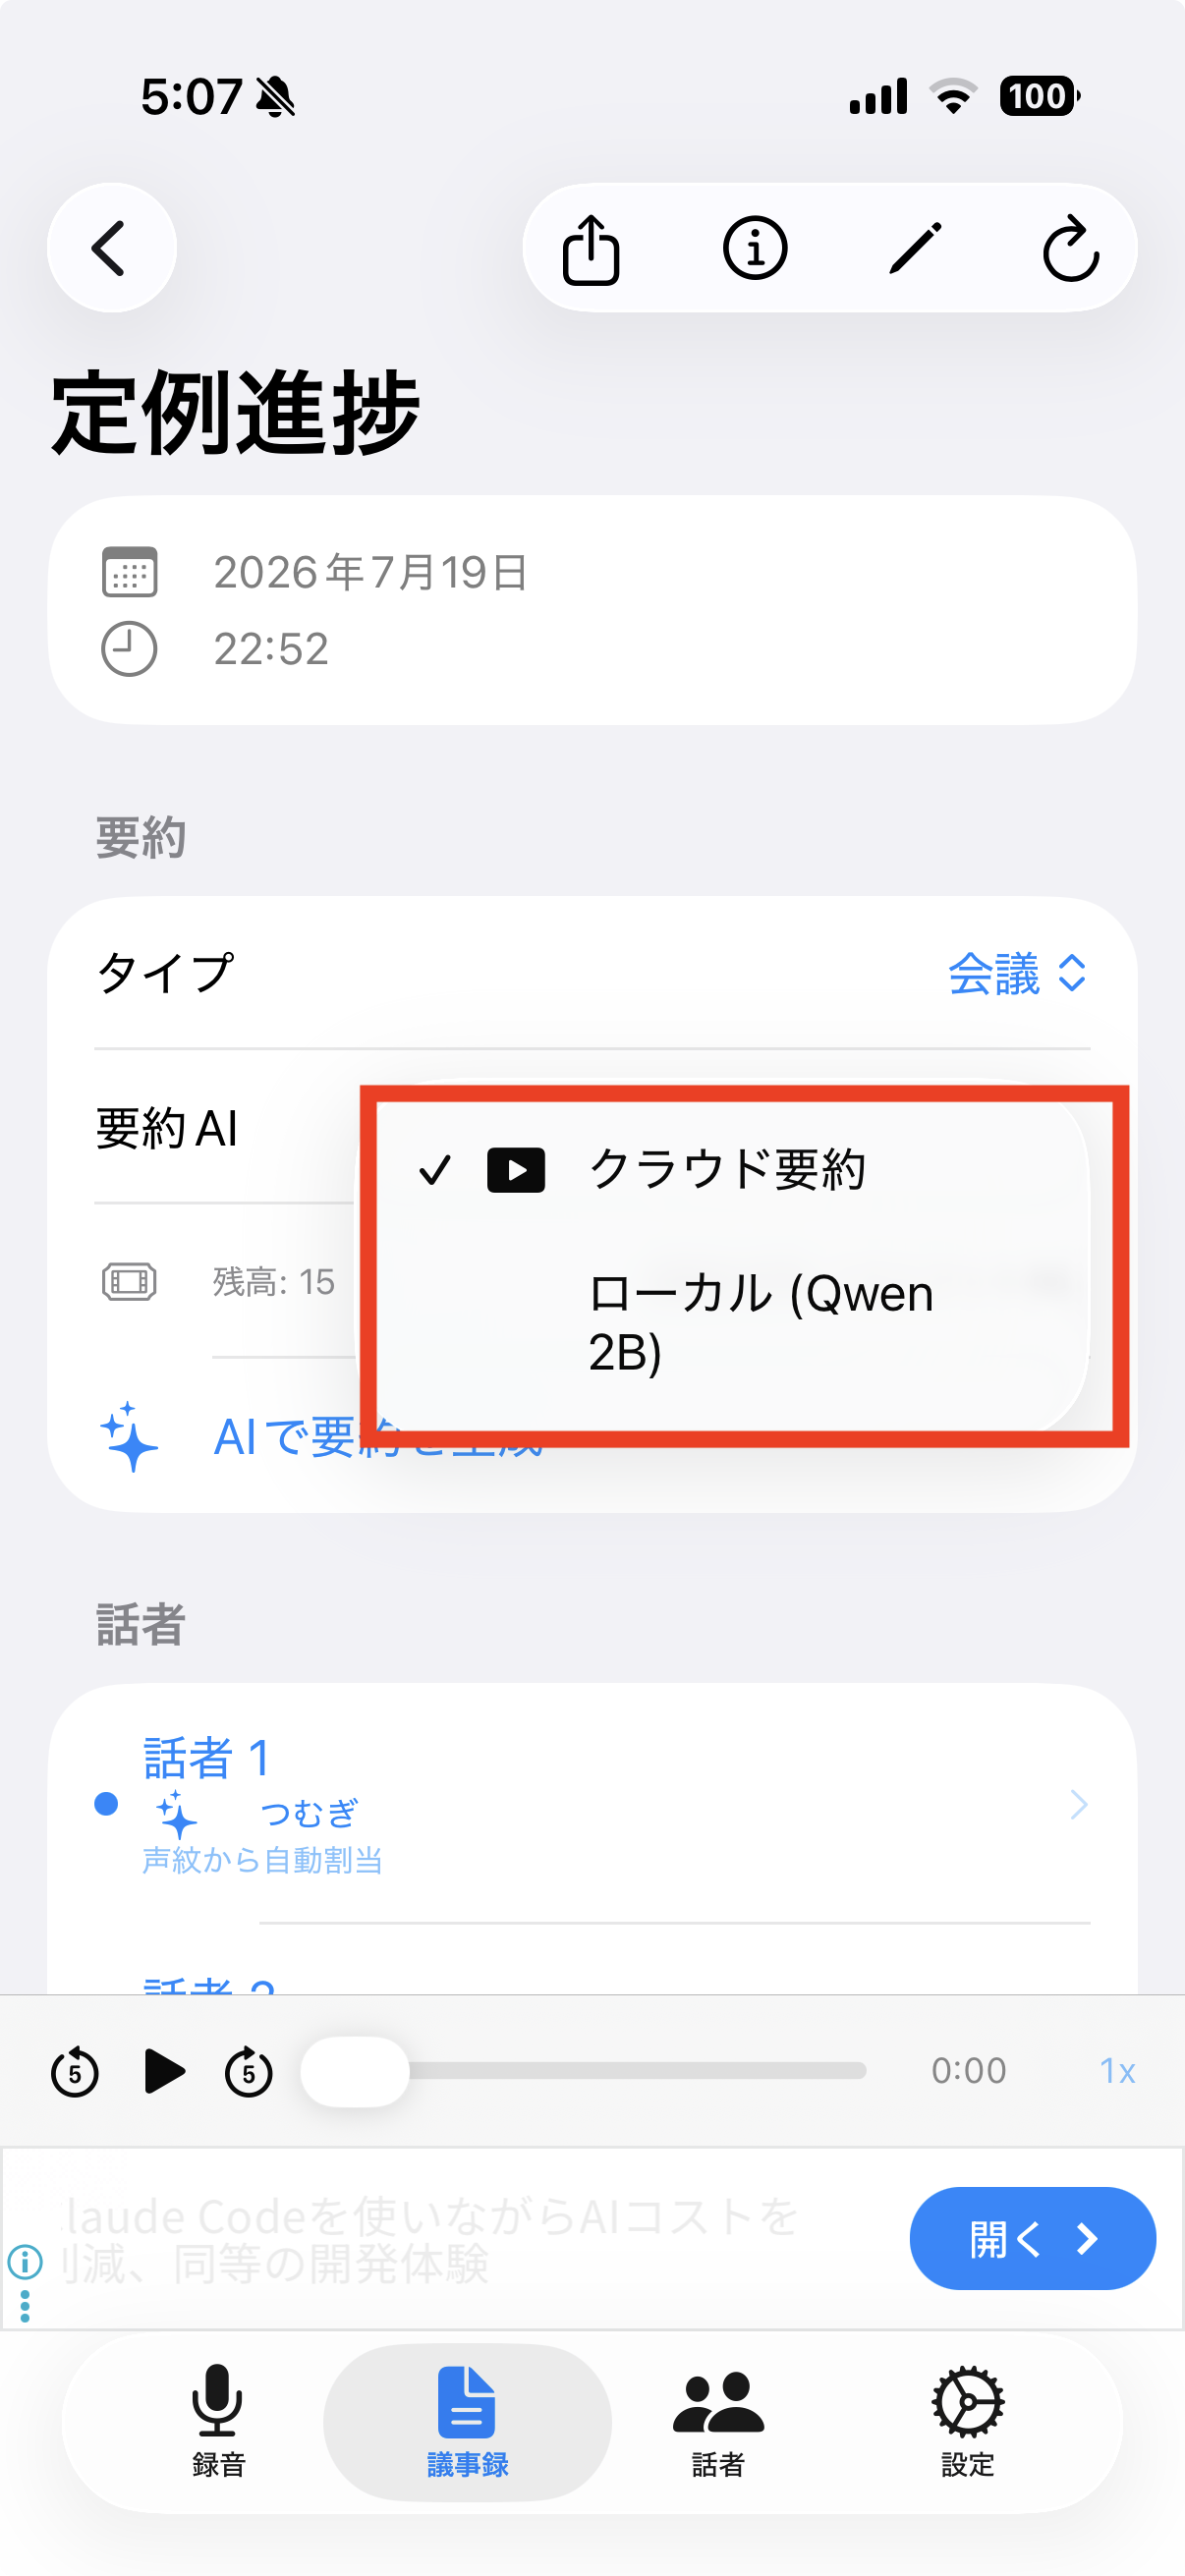
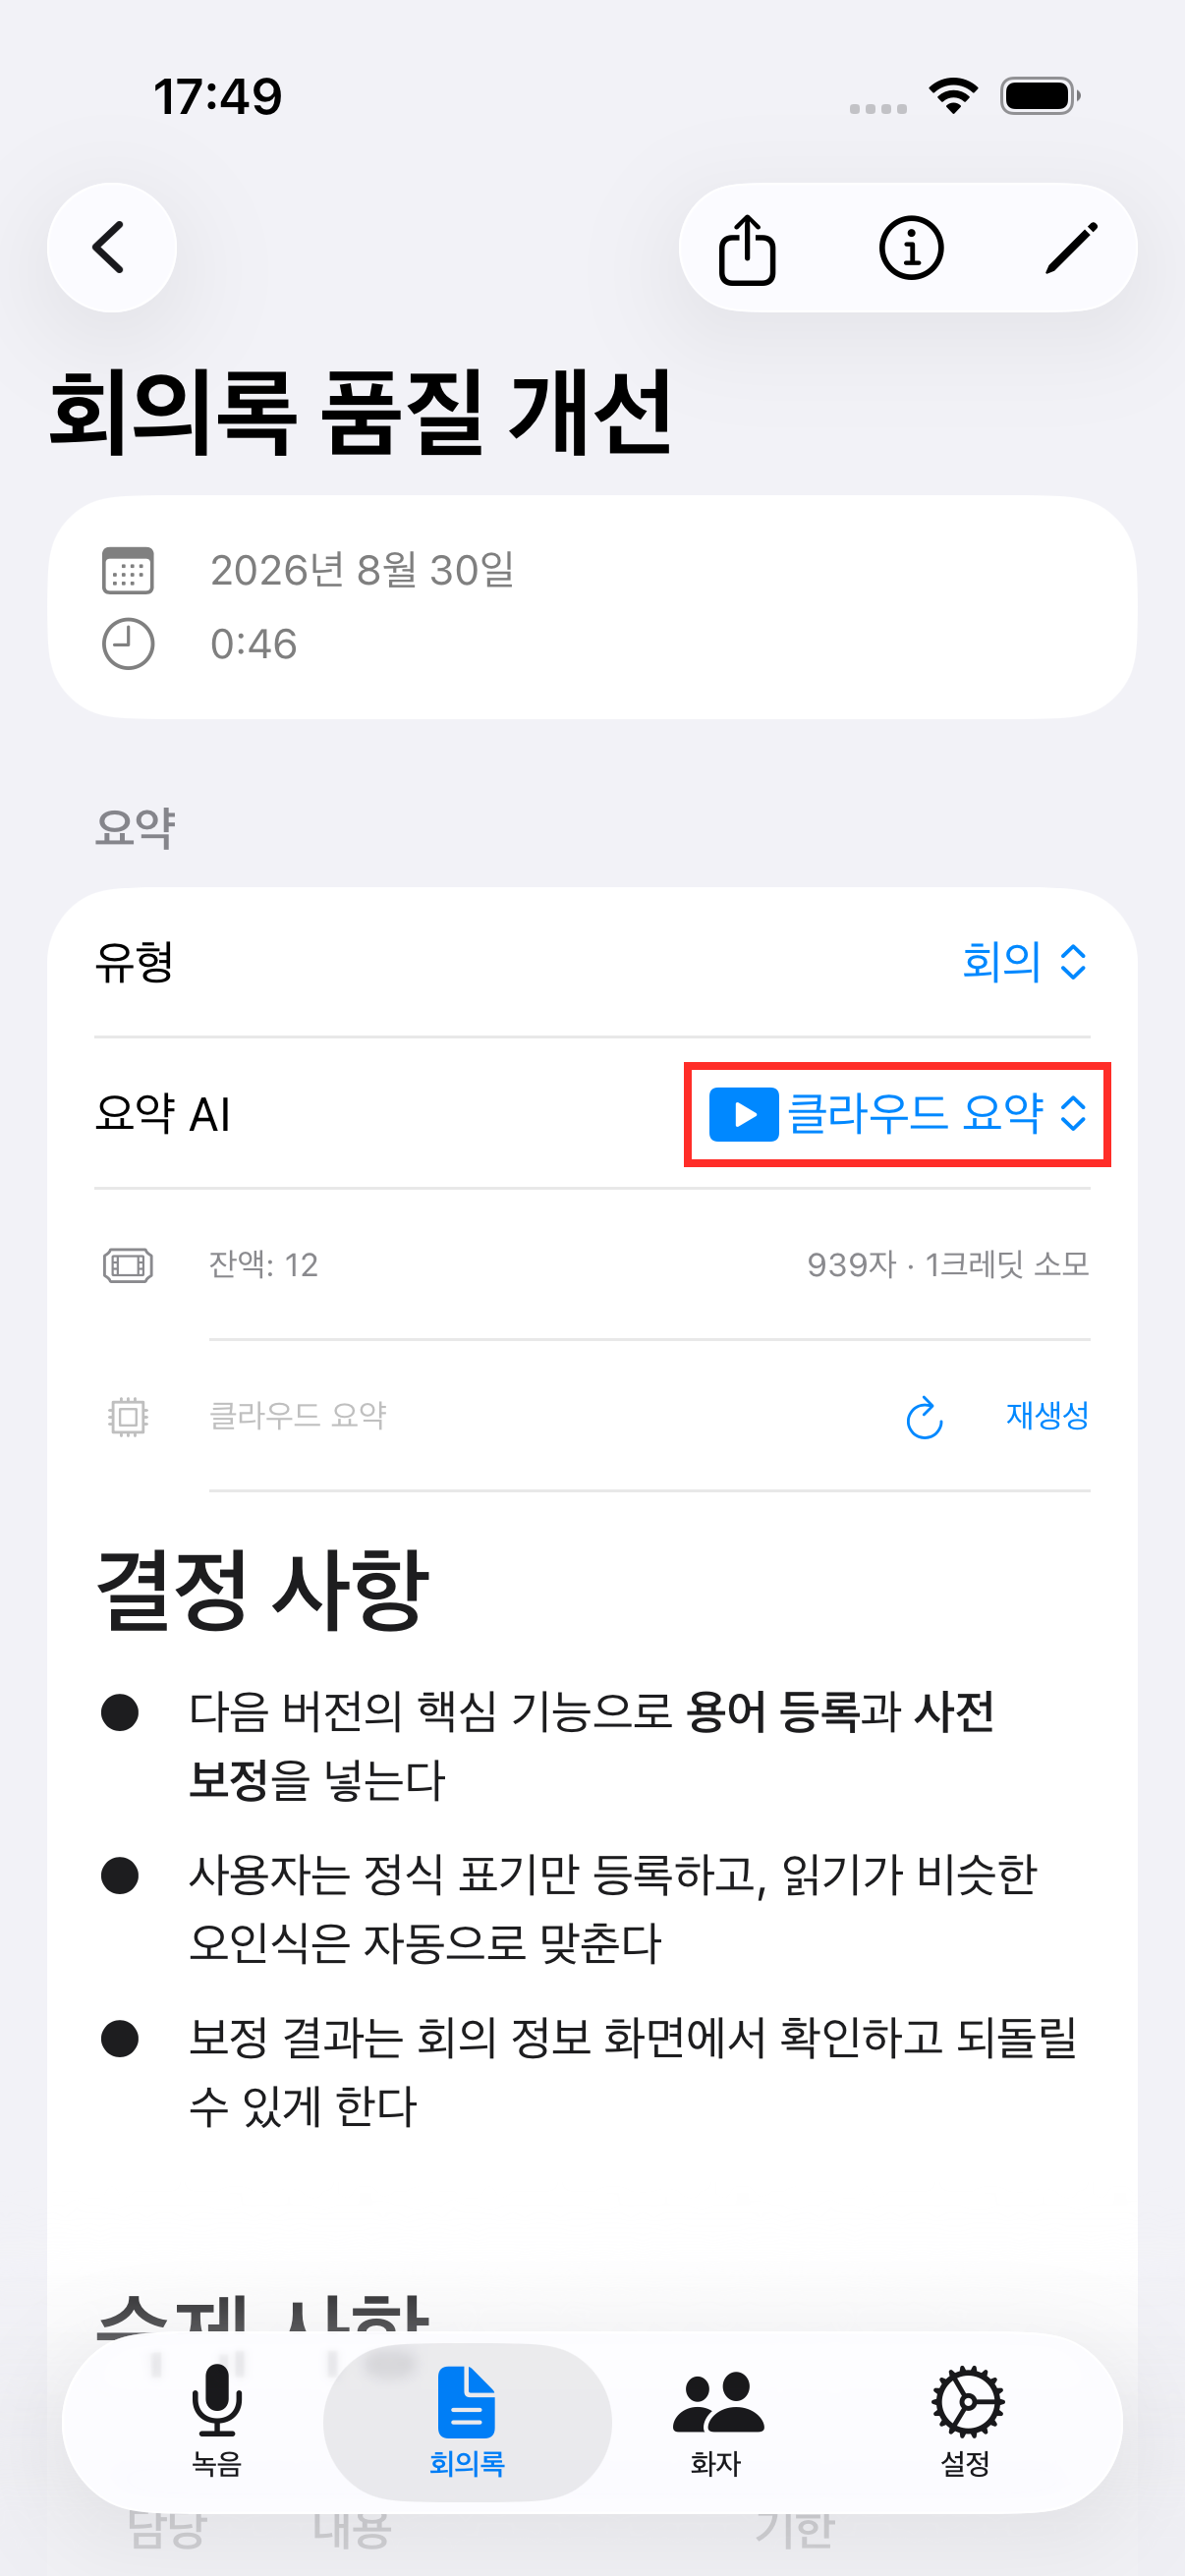
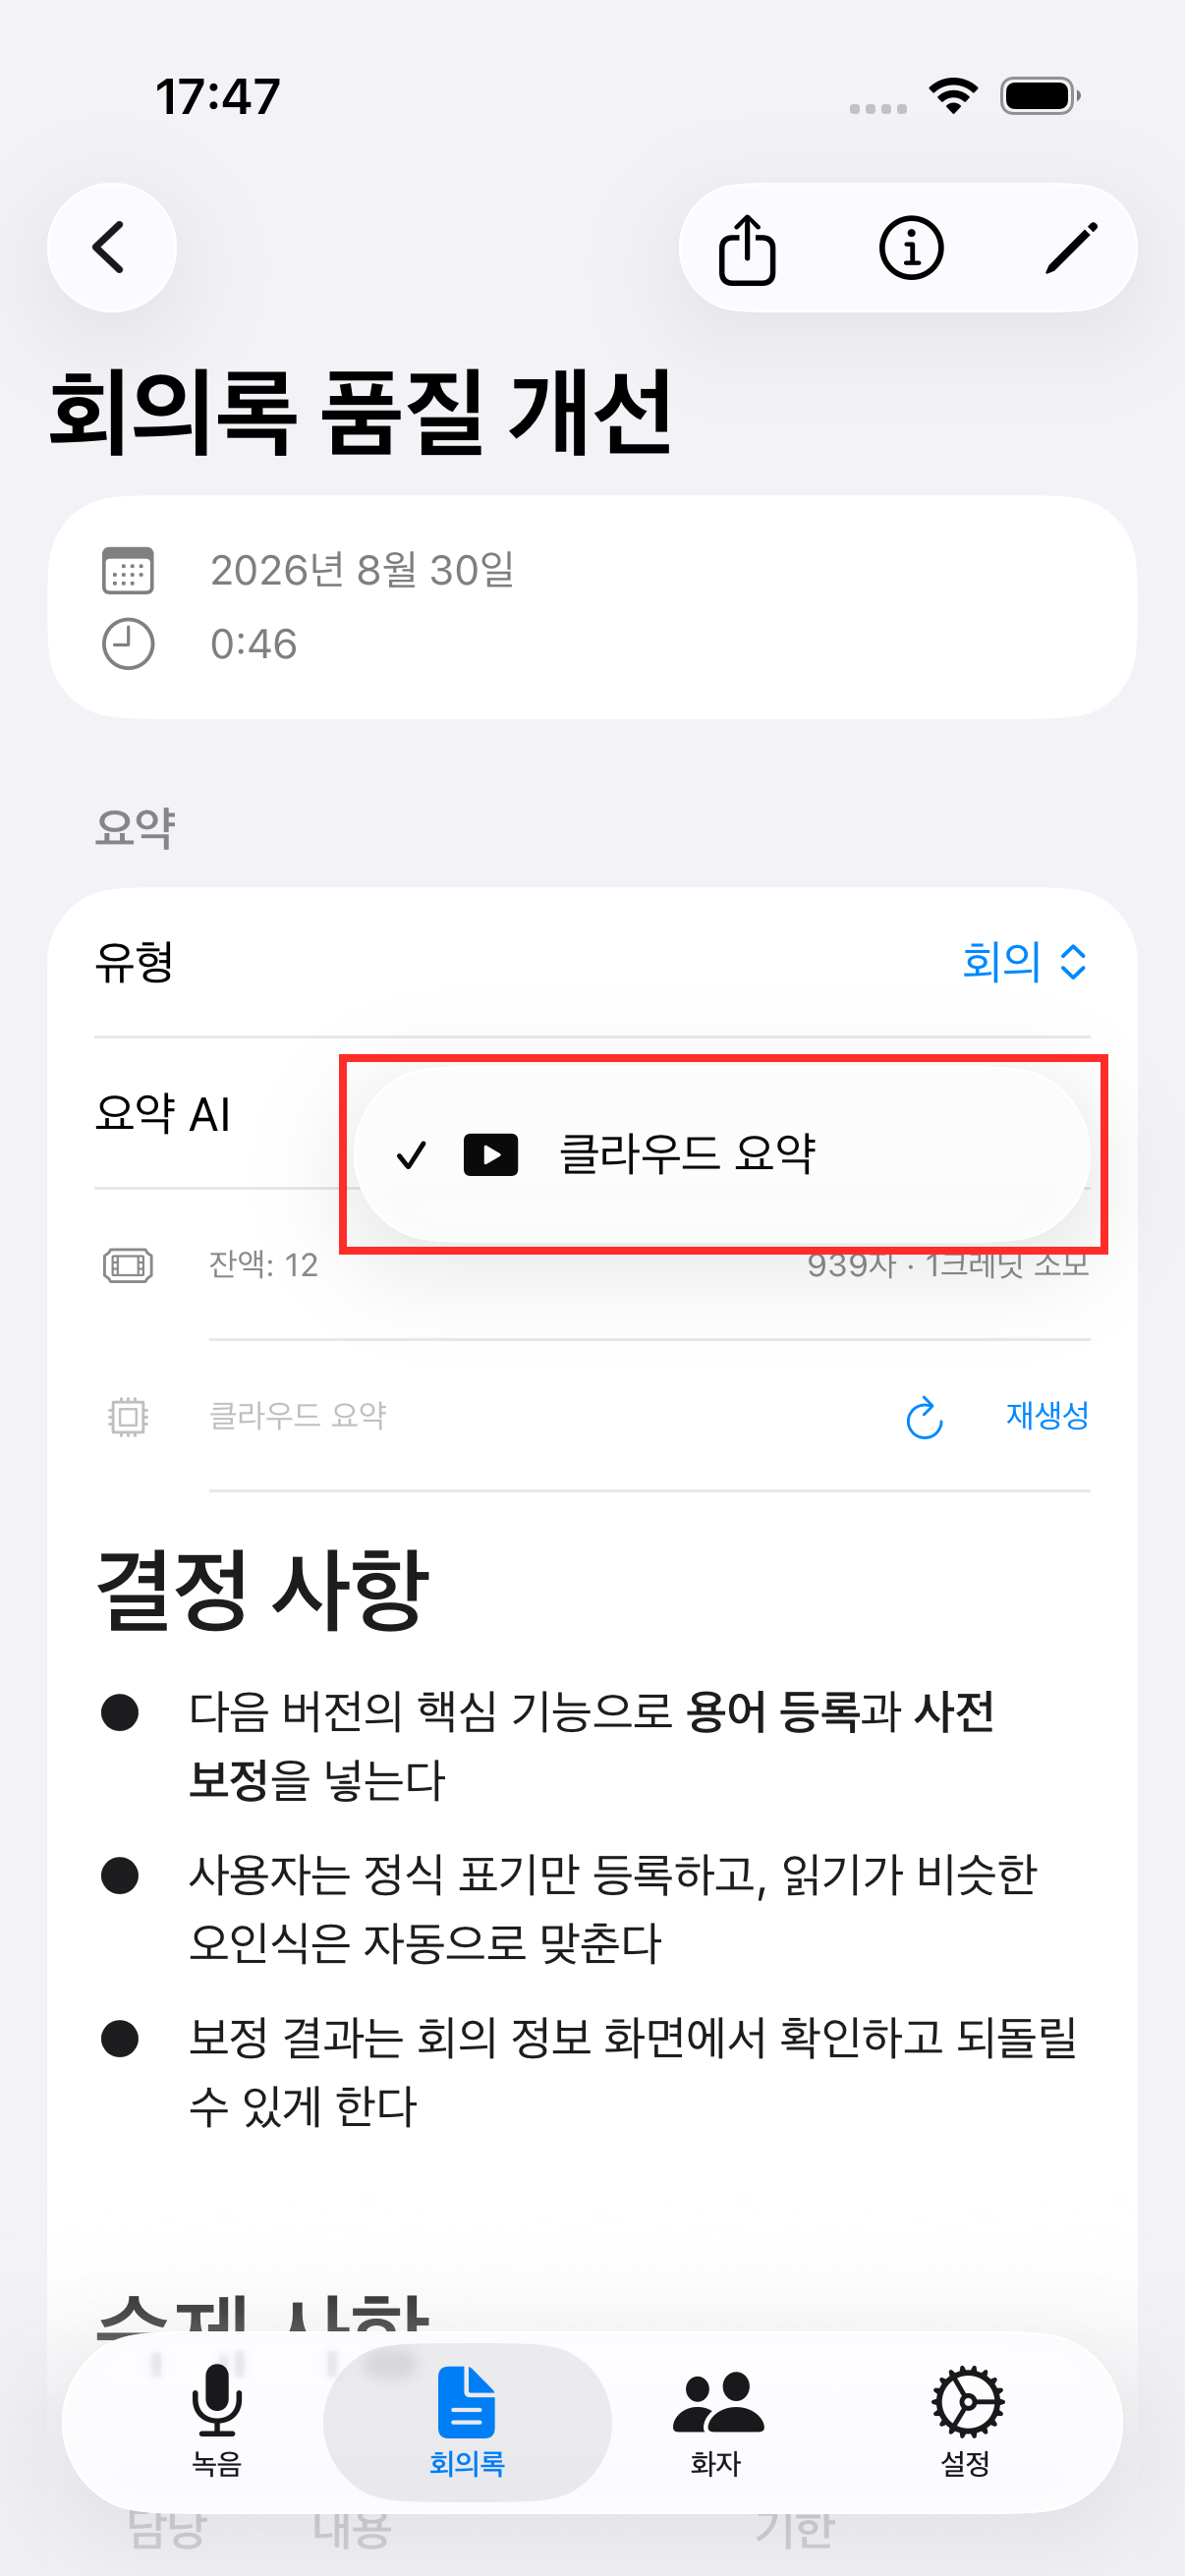
On the meeting detail screen, use the "Summary AI" picker to choose on-device AI (supported devices only) — fully offline, unlimited and free — or Cloud AI — higher quality, consumes credits.
📷 images/ai-notes-1-1-en.png
📷 images/ai-notes-1-2-en.png
2
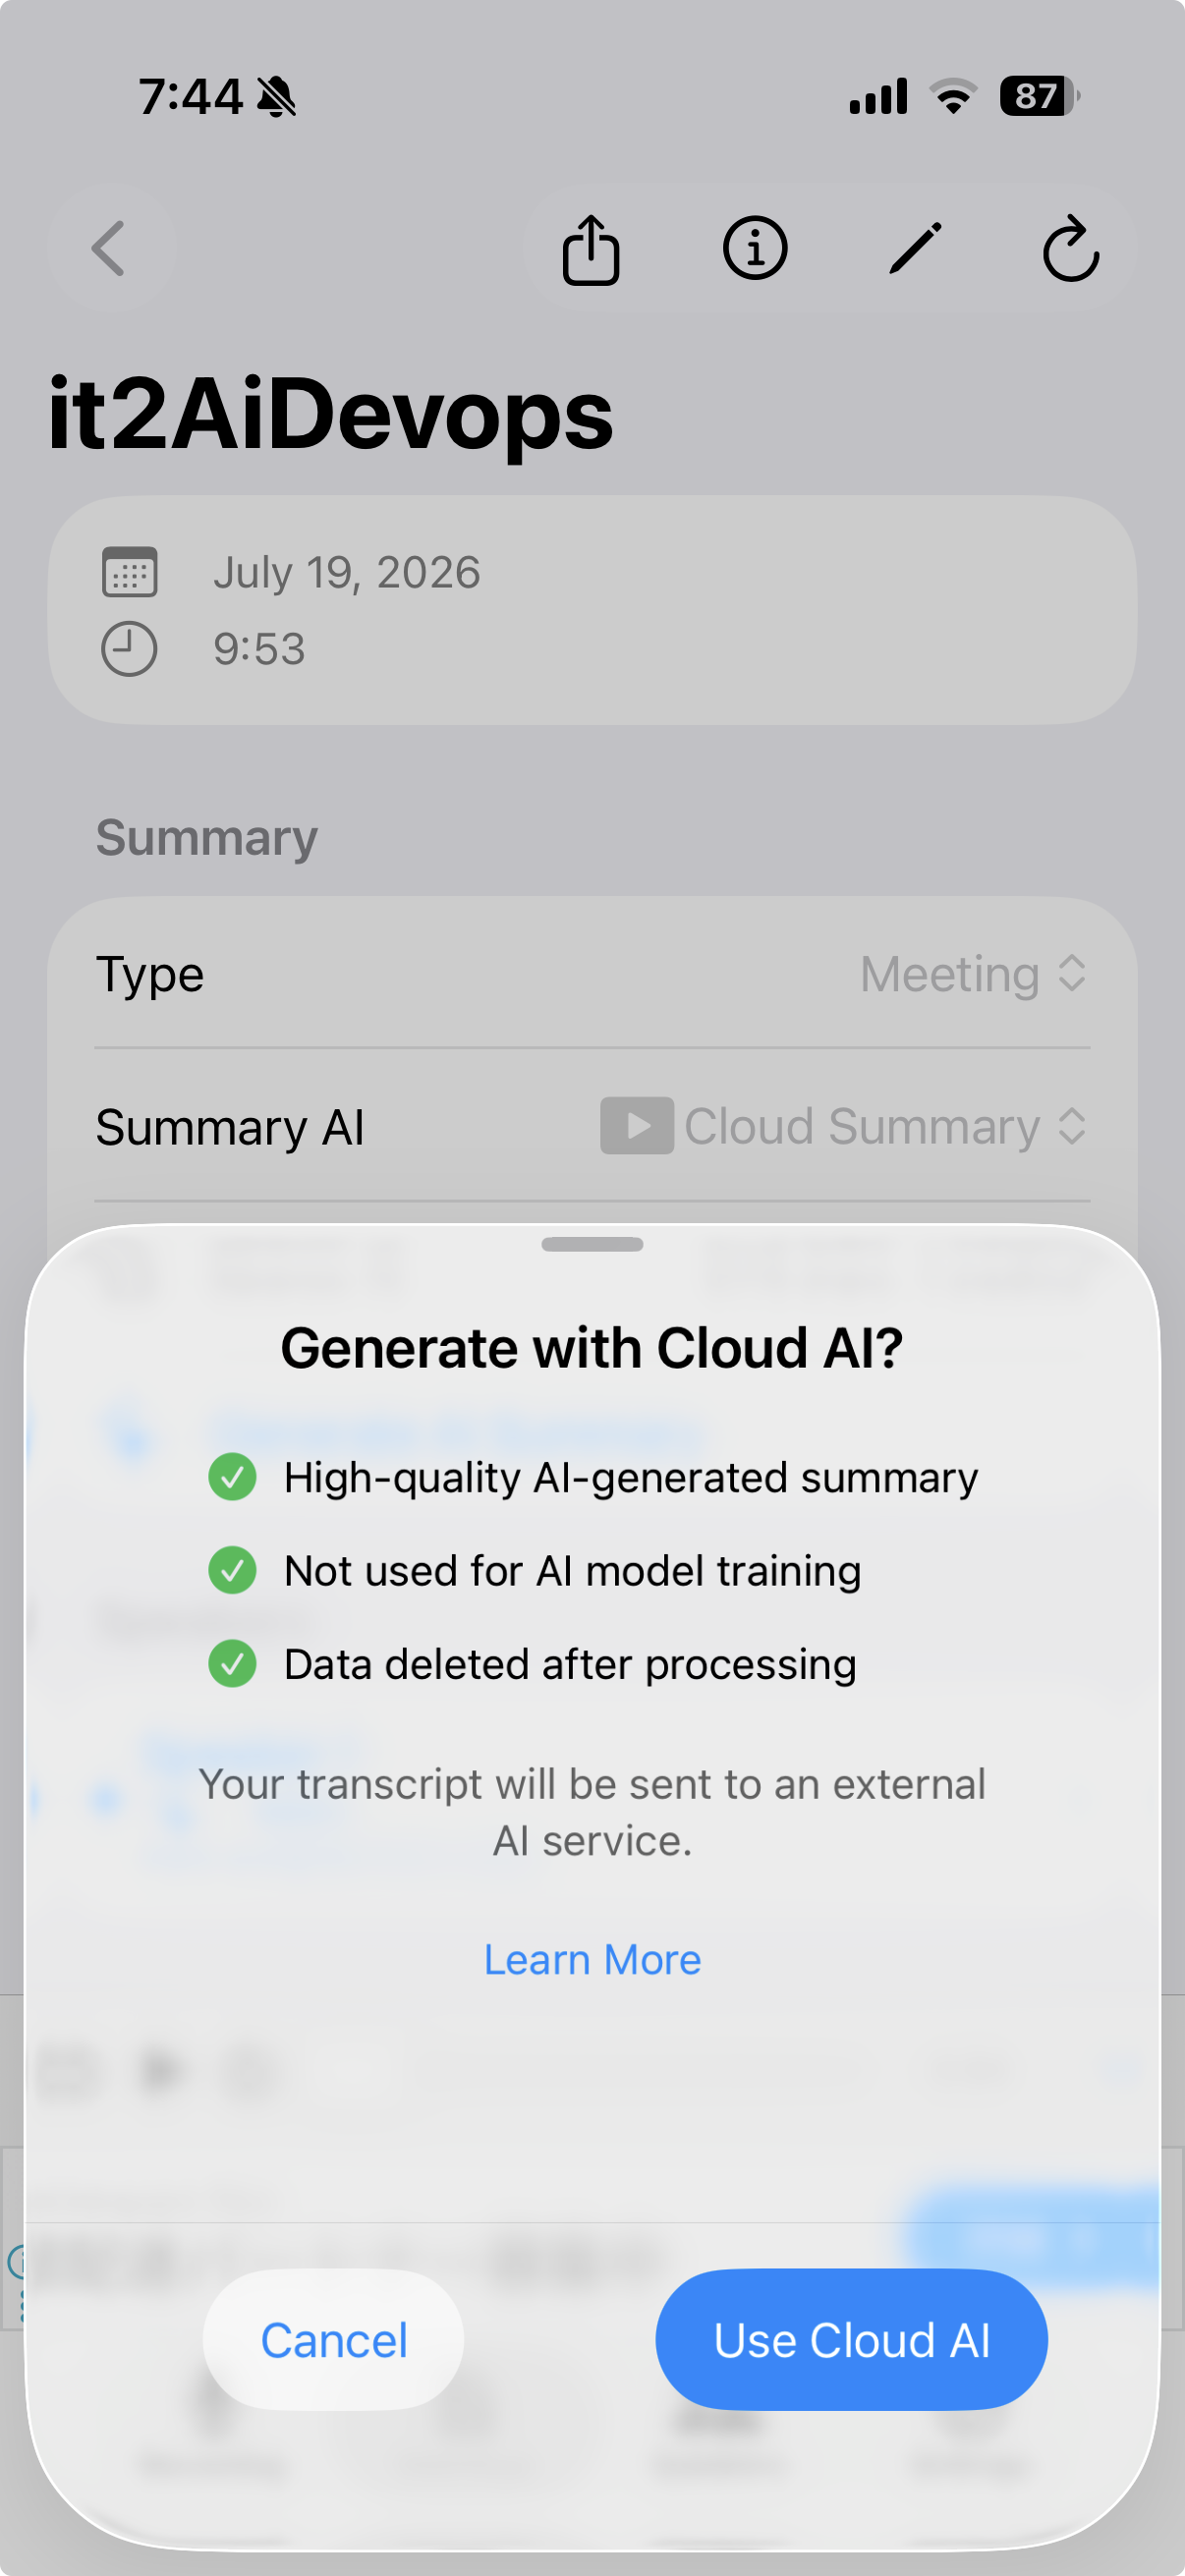
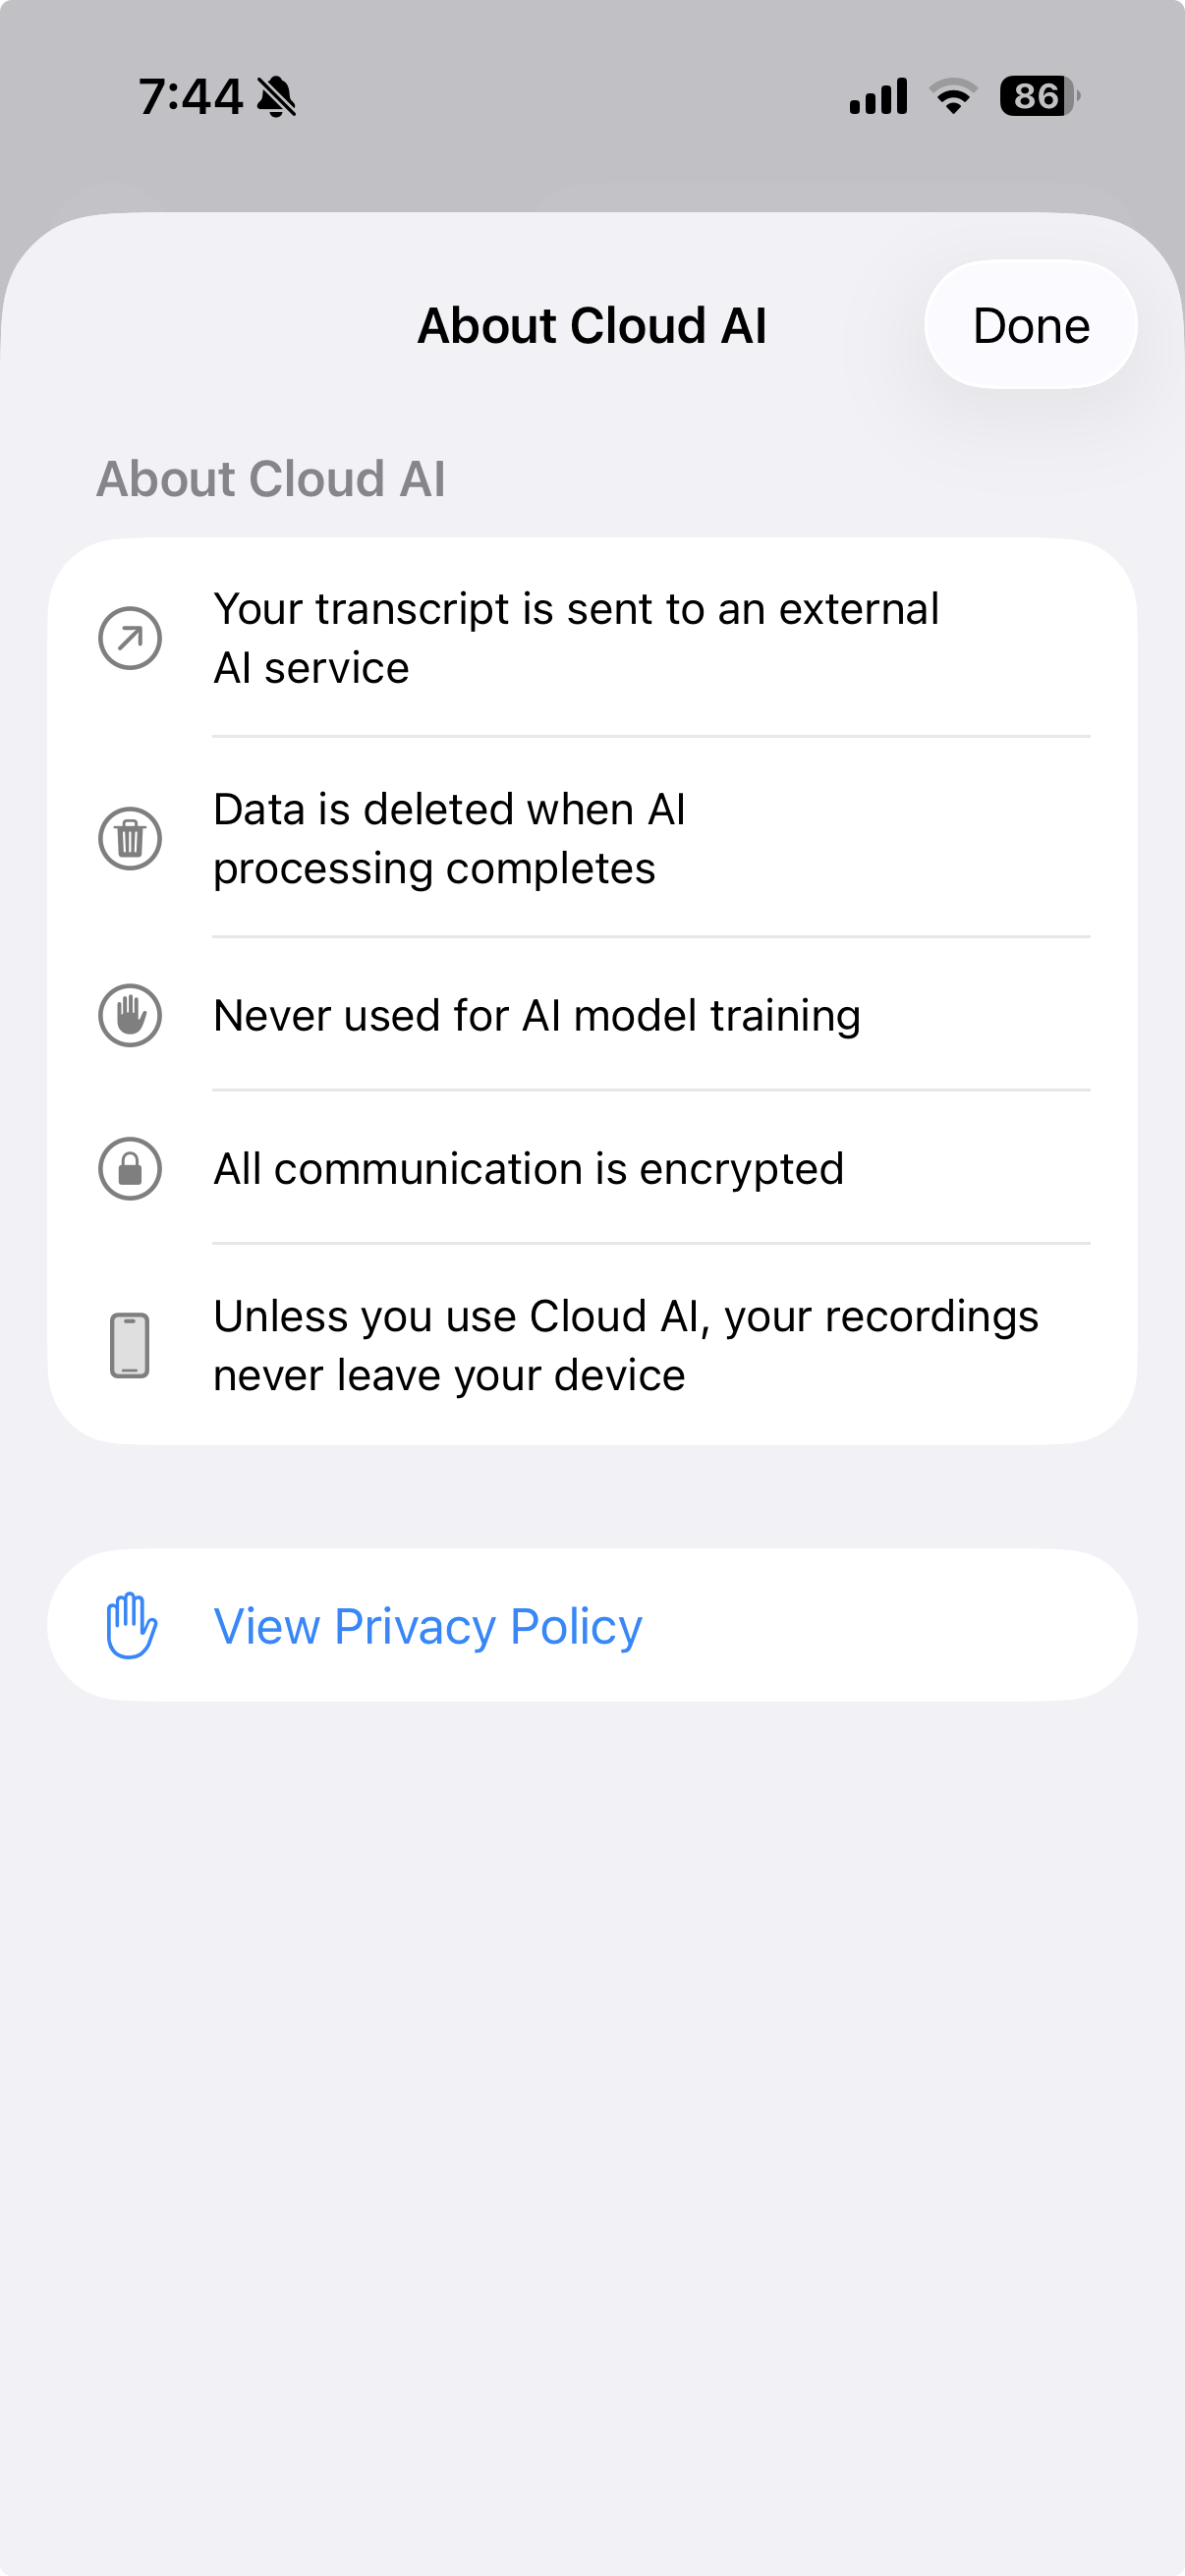
Consent to Cloud AI (first time only)
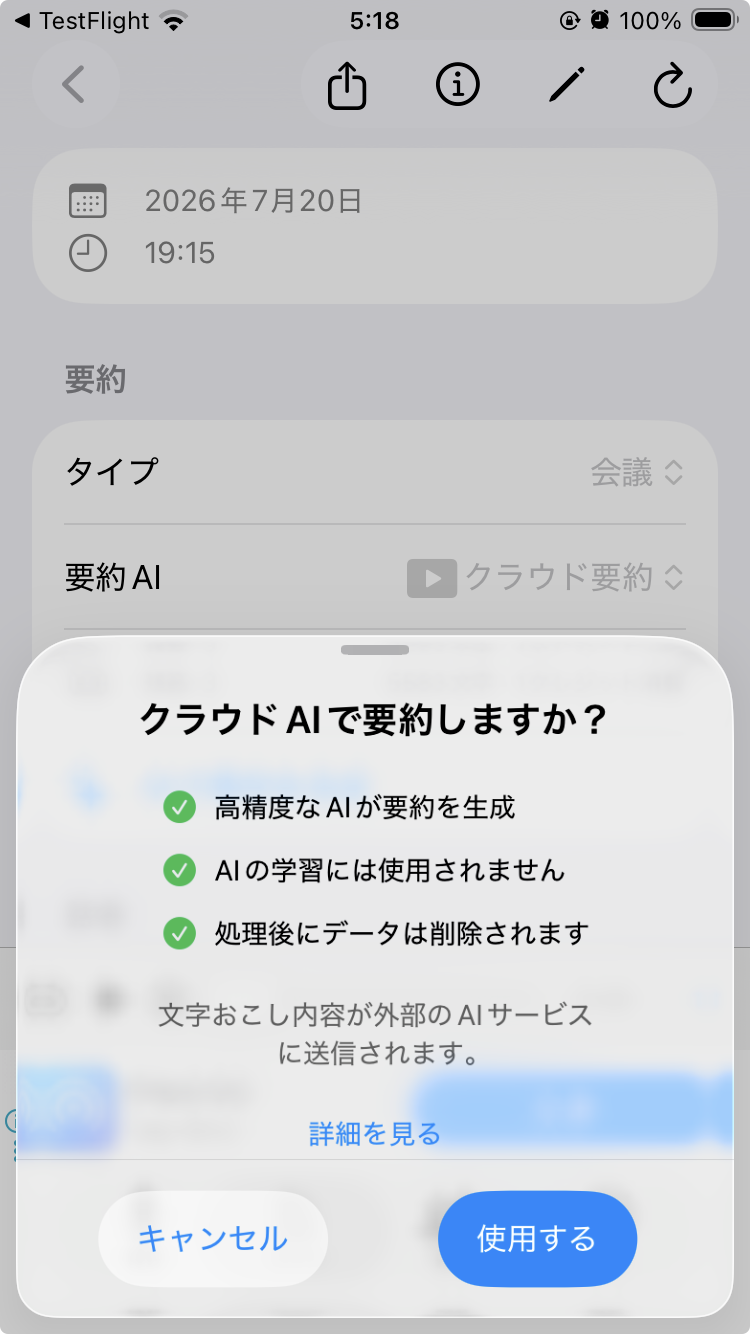
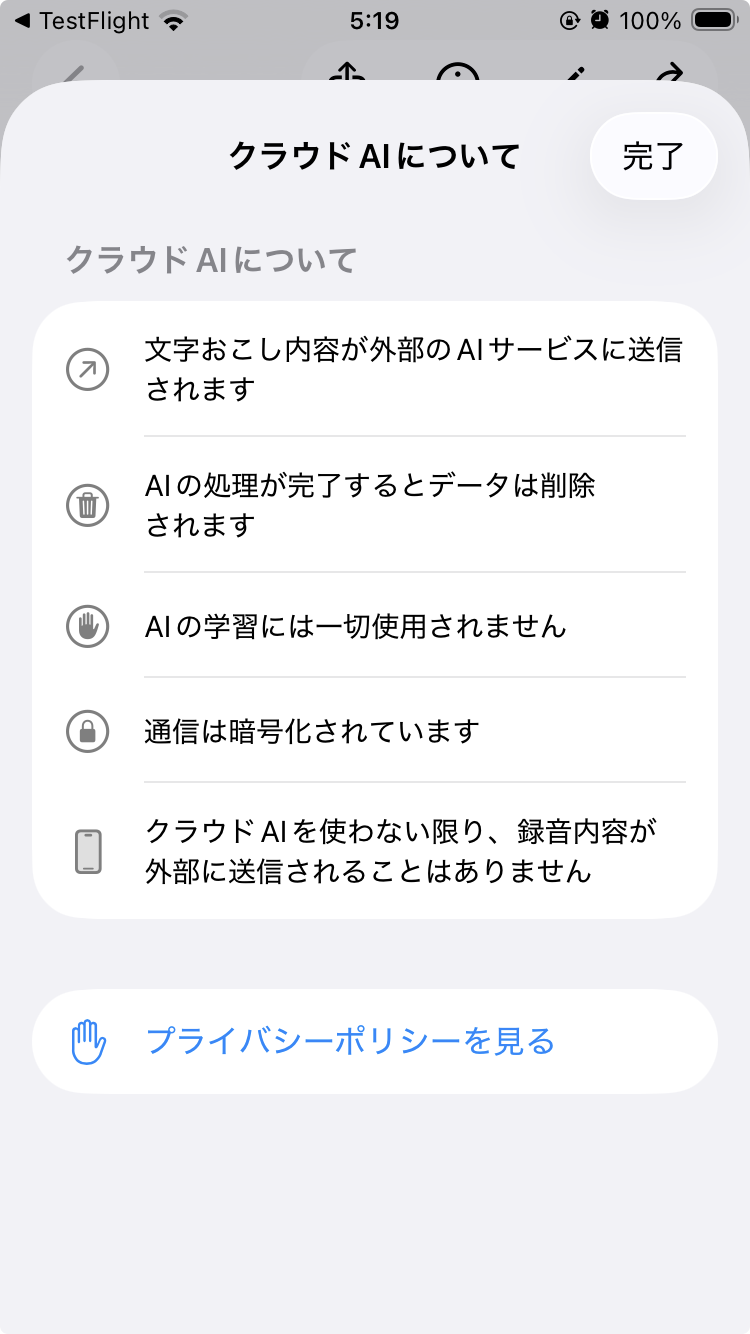
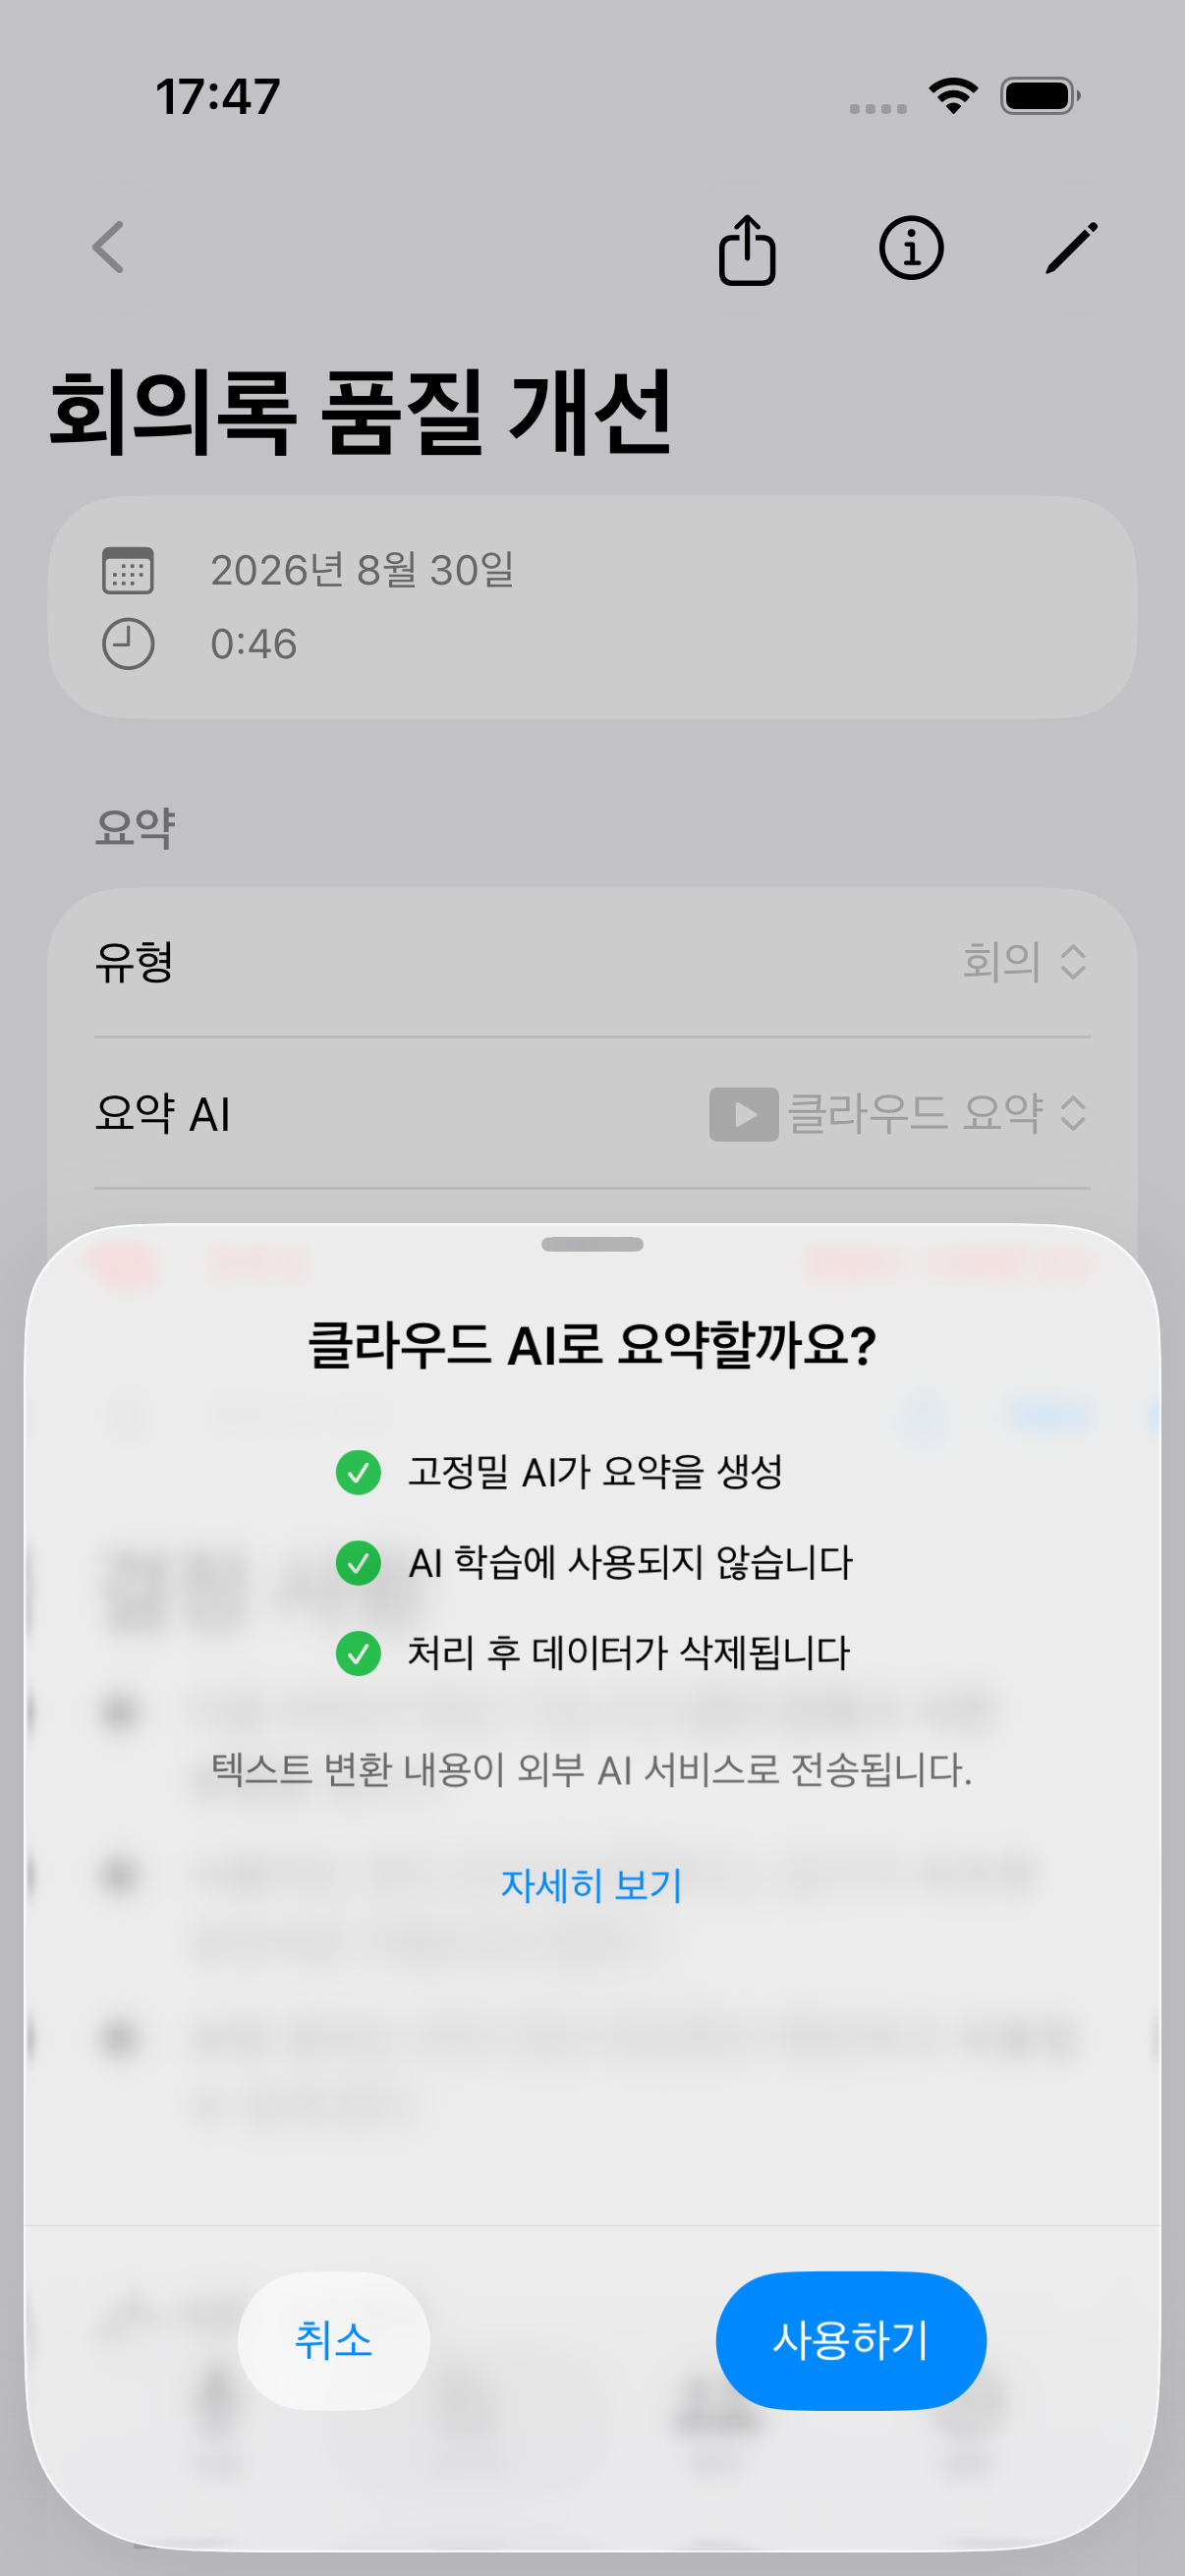
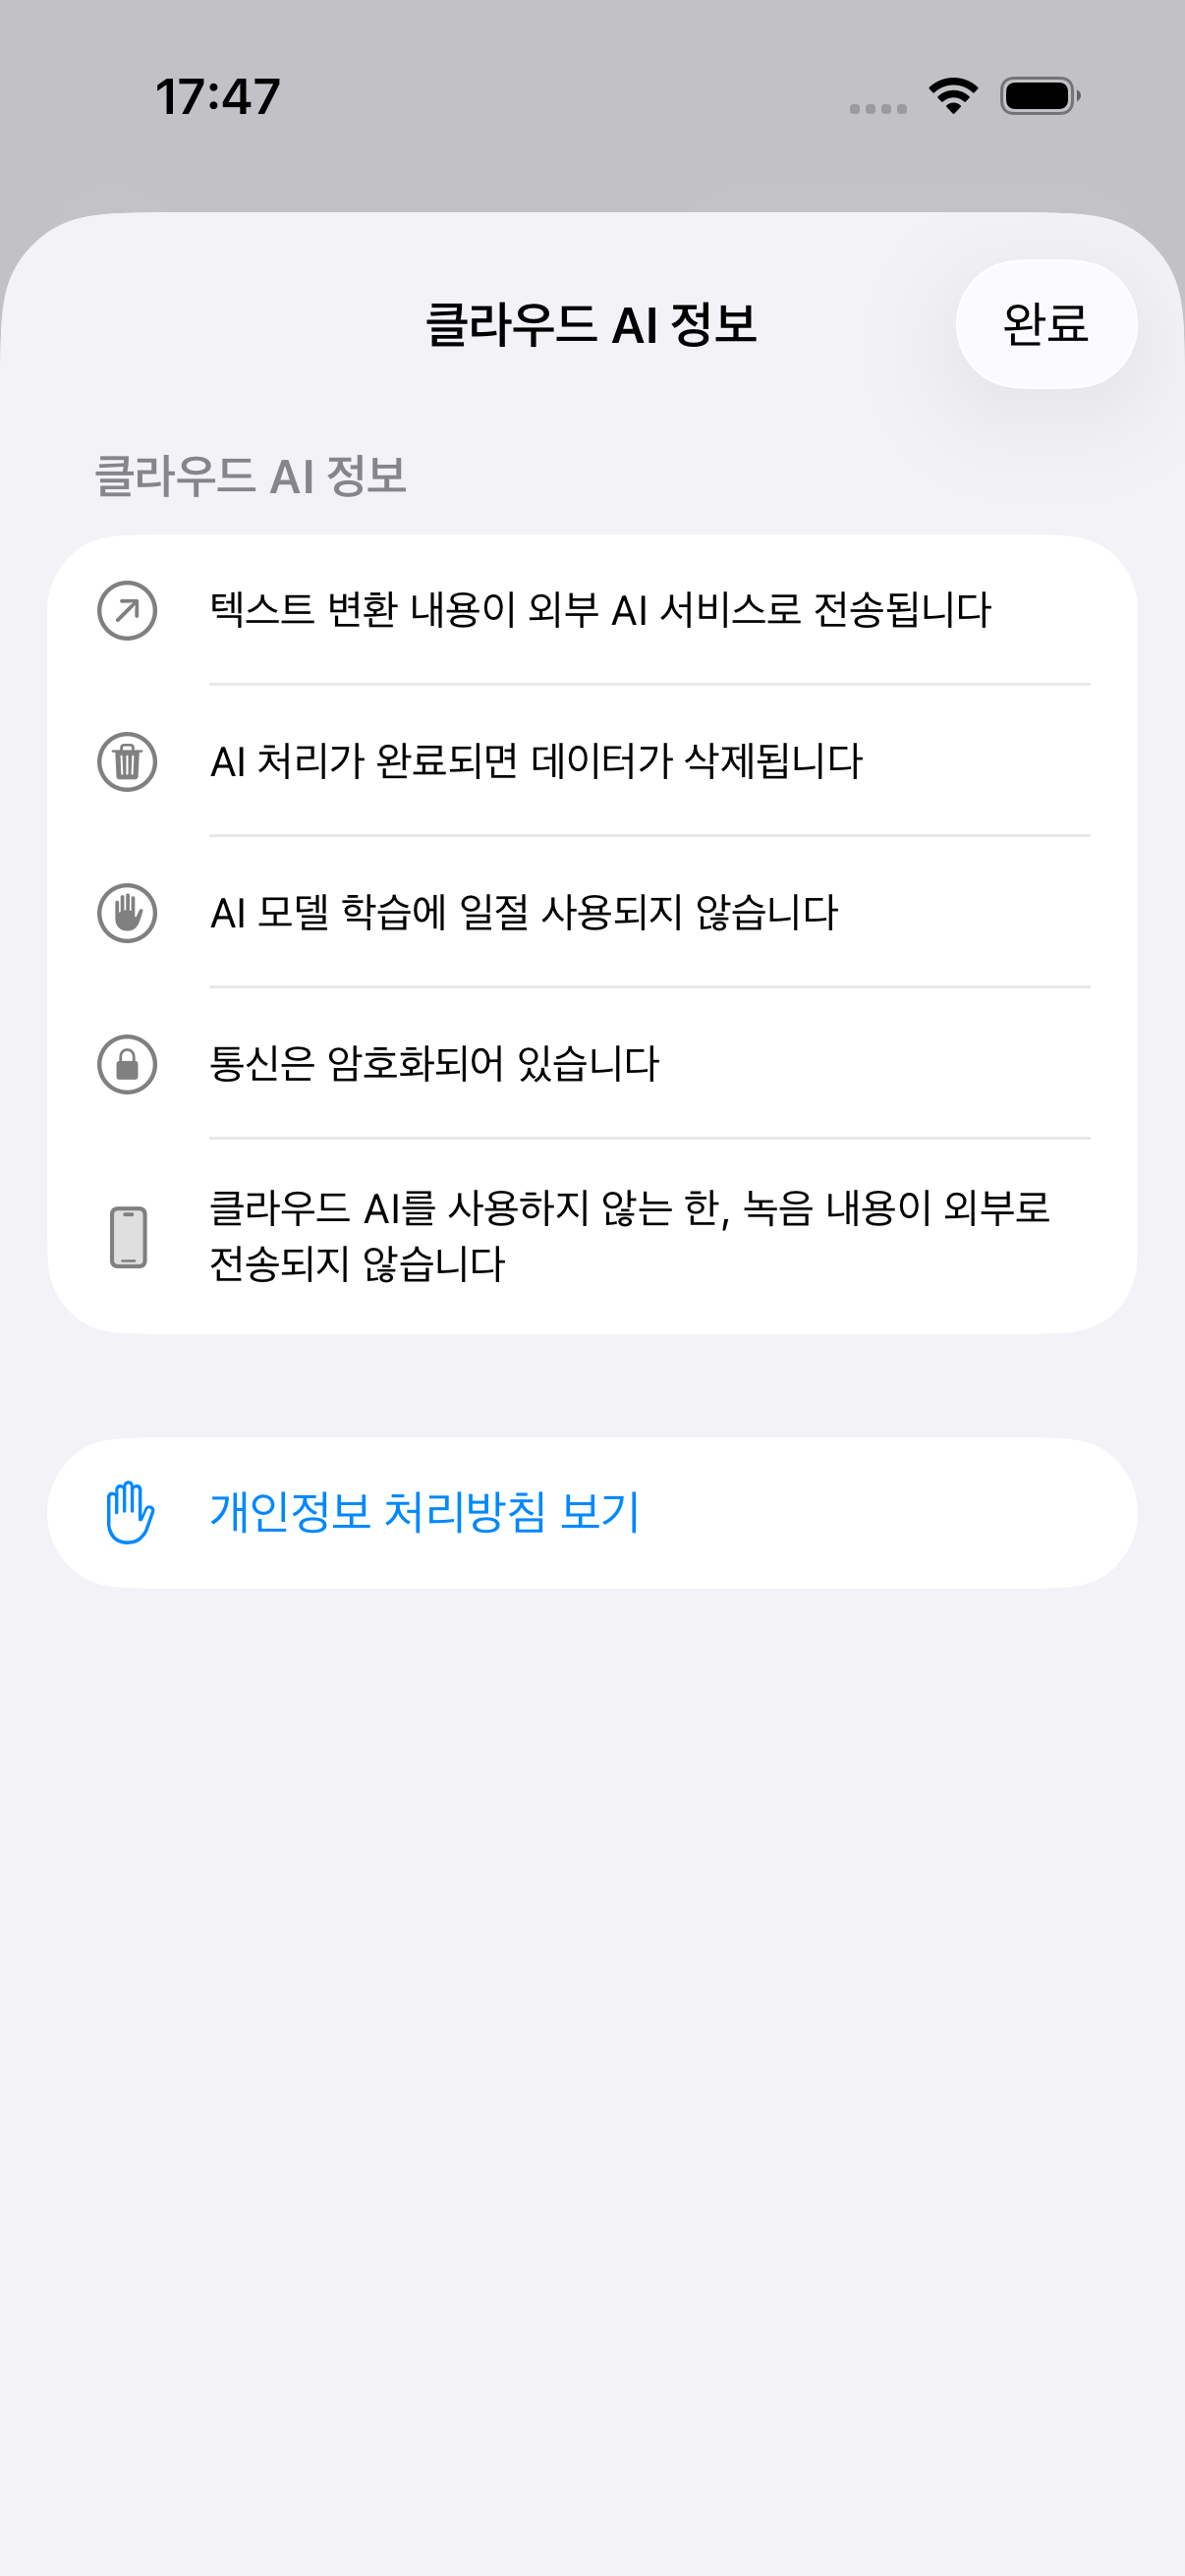
A "Summarize with Cloud AI?" consent screen appears. Confirm that your data isn't used for training and is deleted after processing, then tap "Use It" — you won't see this screen again. "Learn More" shows further detail on how Cloud AI handles your data, including encryption.
📷 images/ai-notes-2-1-en.png
📷 images/ai-notes-2-2-en.png
3
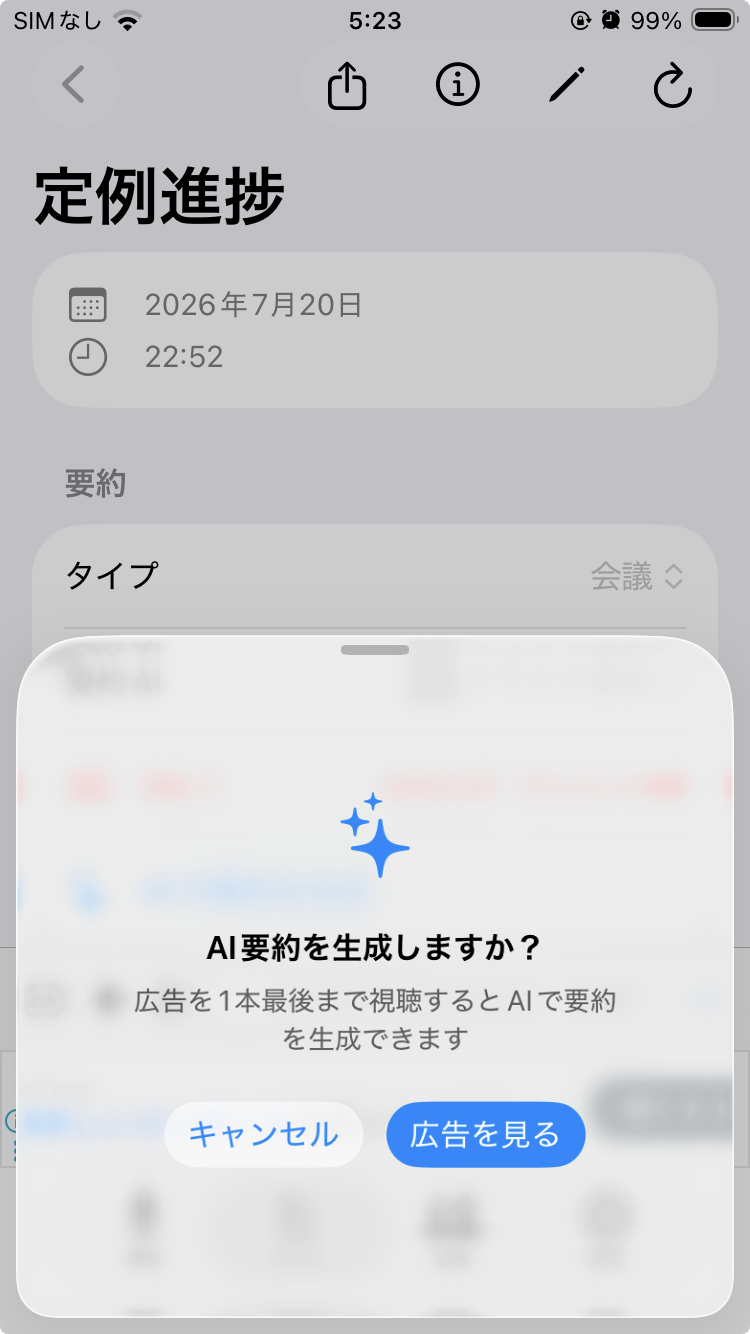
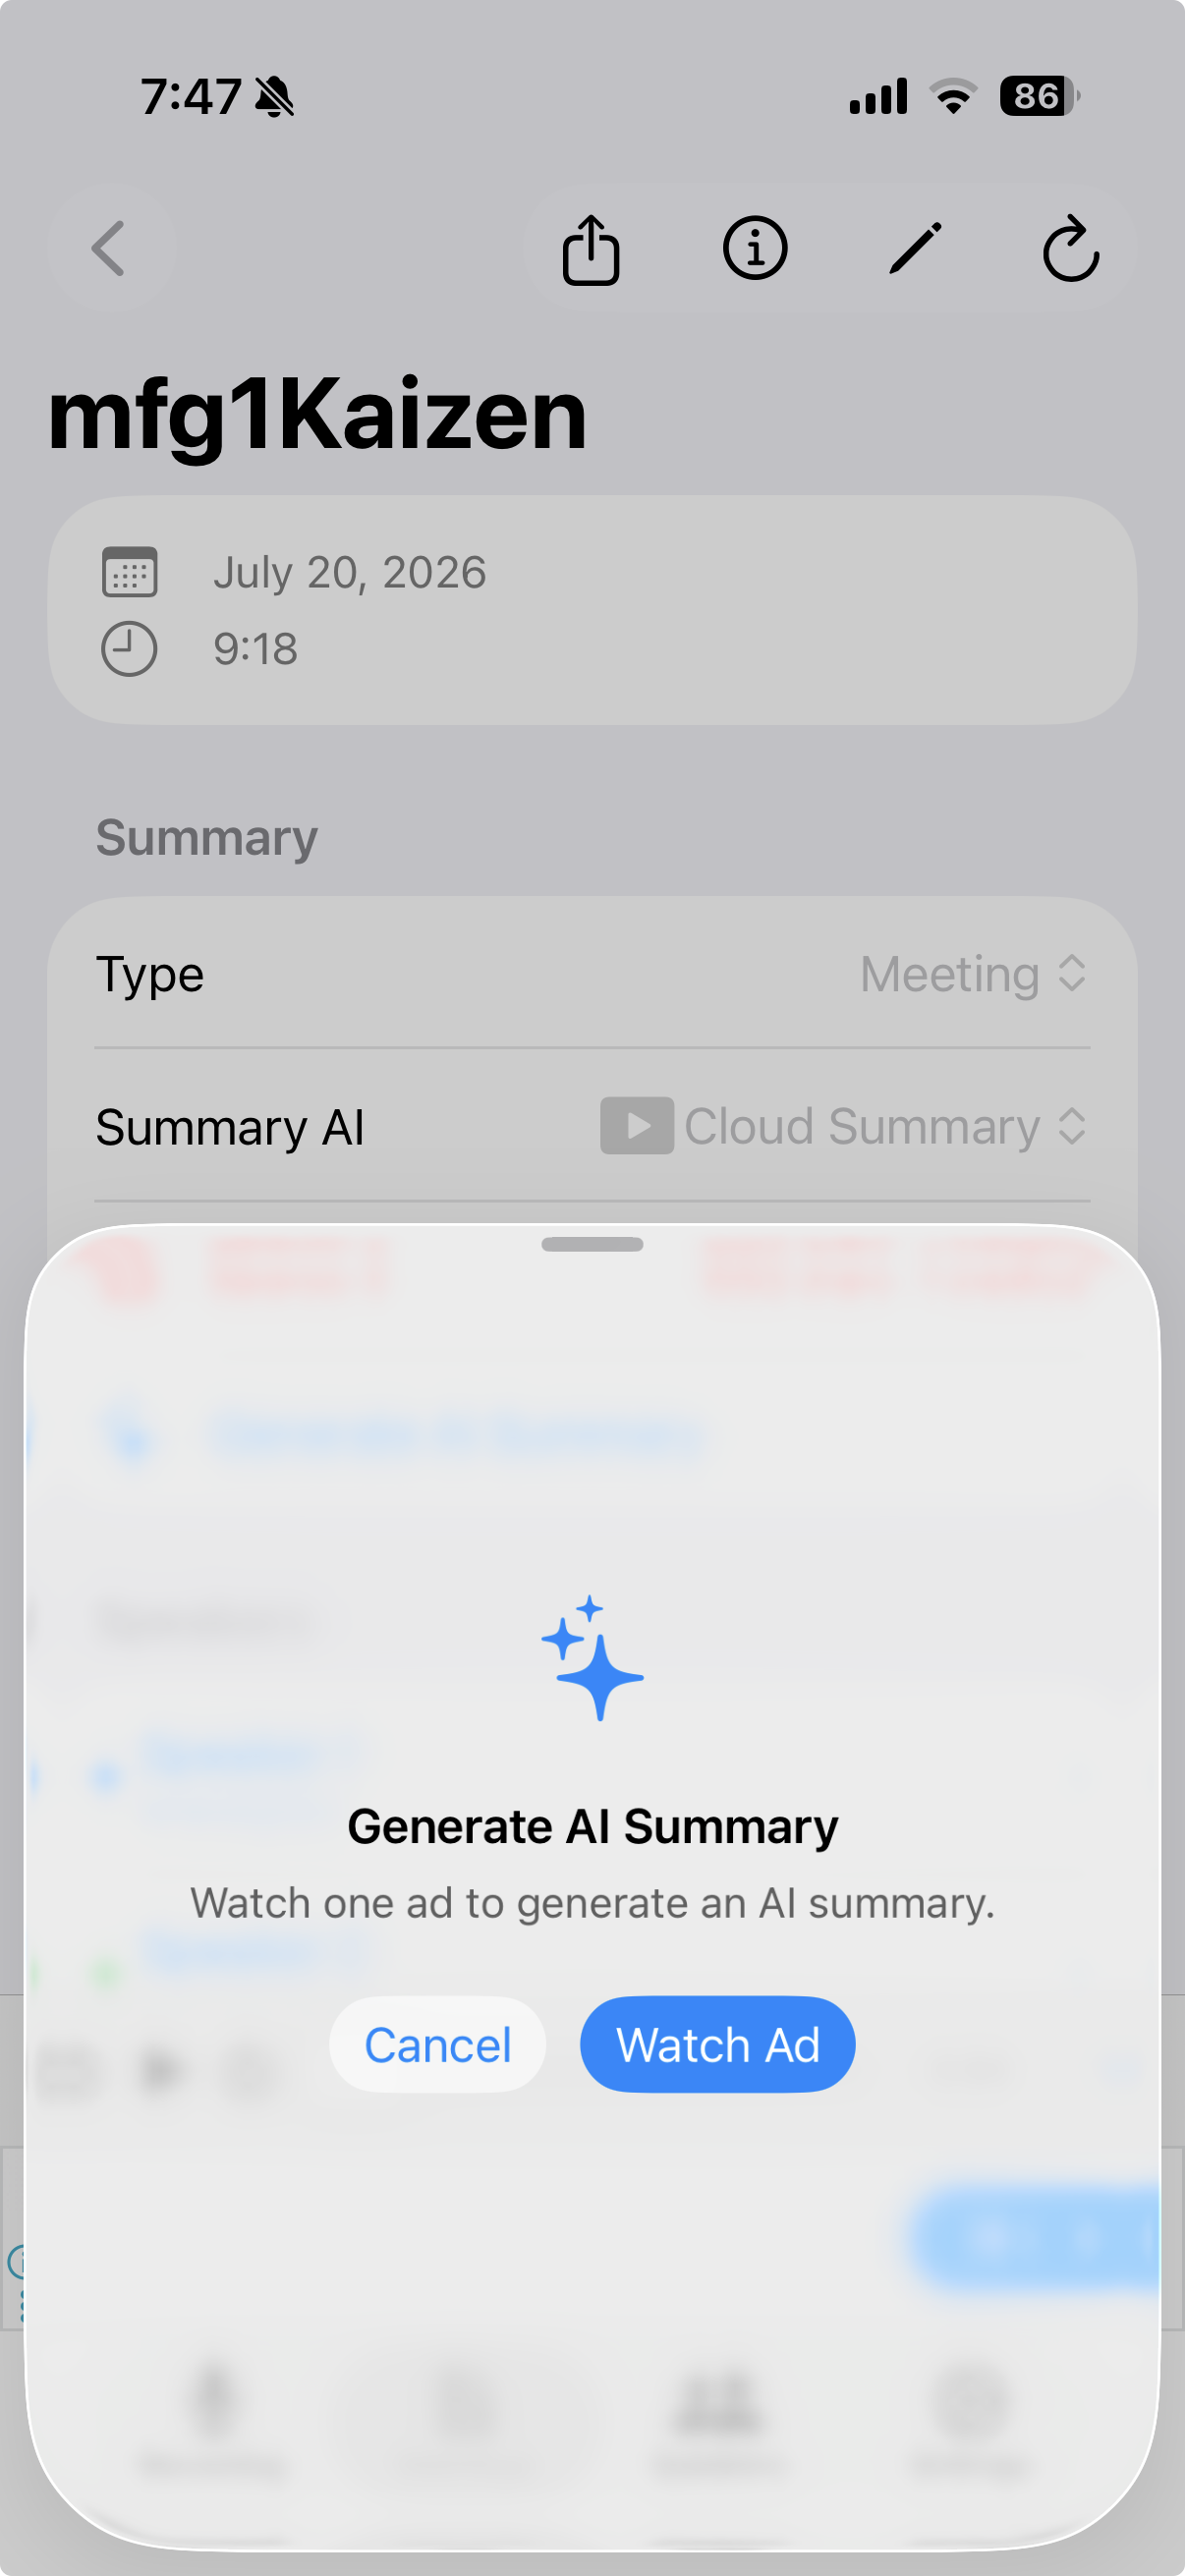
Watch an ad if you're out of credits
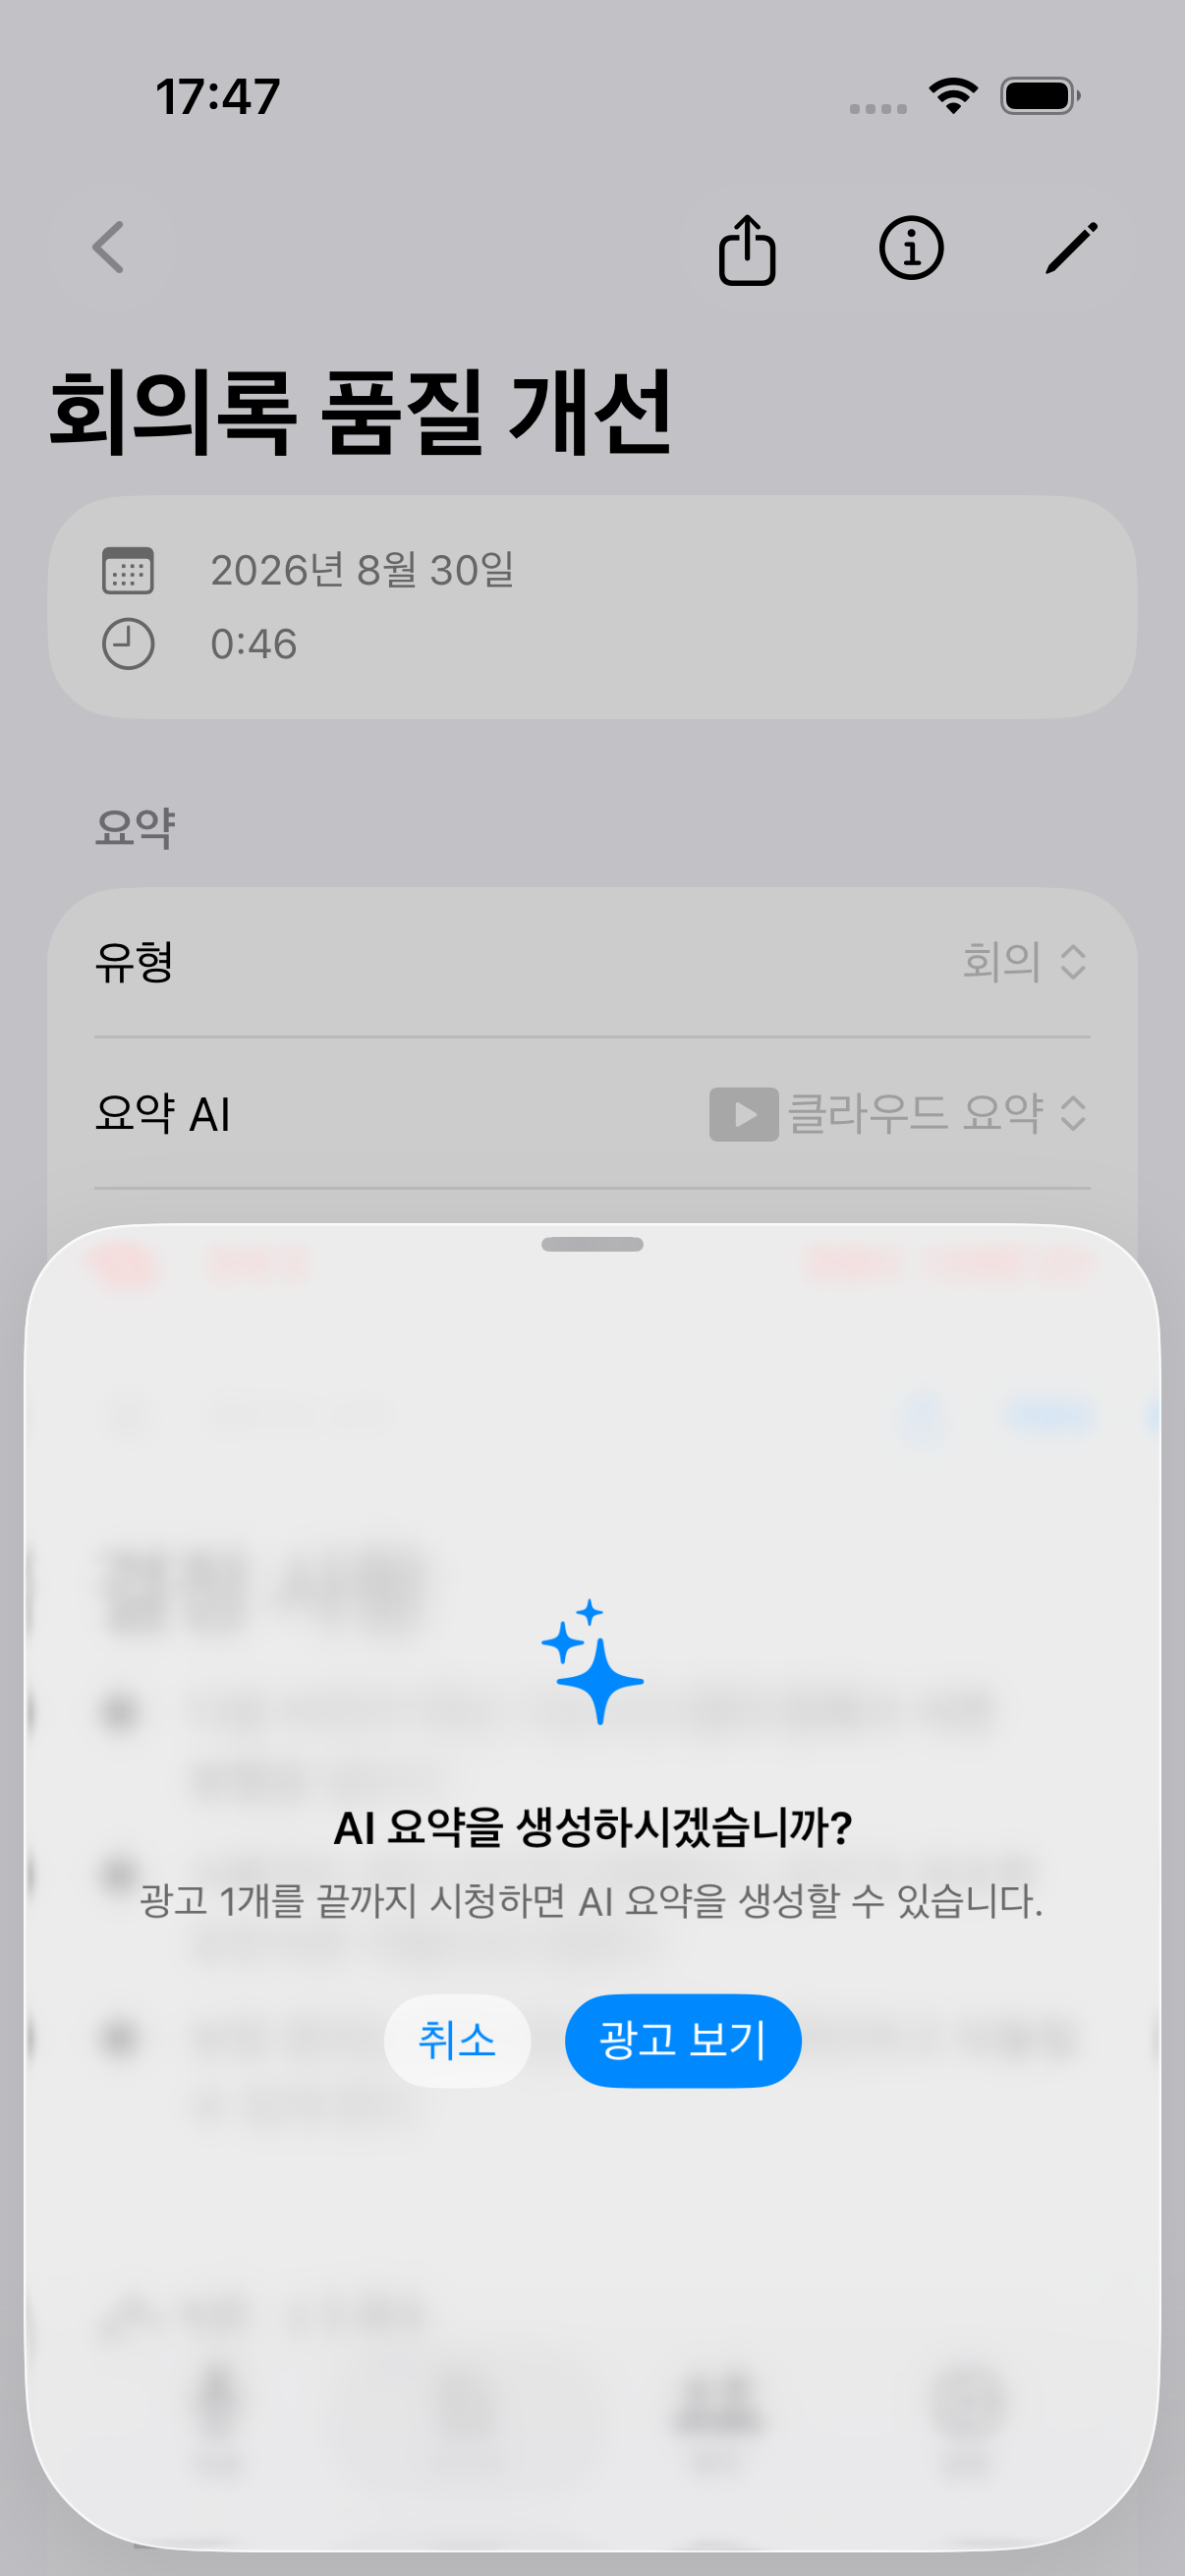
If you don't have enough credits, a "Watch Ad" button appears. Watching one ad to completion earns you a credit, and generation continues automatically. Recording, transcription, speaker identification, dictionary correction, and on-device AI summaries are all free and unlimited — credits are only needed for Cloud AI summaries. You'll also automatically receive a bonus credit once a day when your balance runs low.
📷 images/ai-notes-3-en.png
4
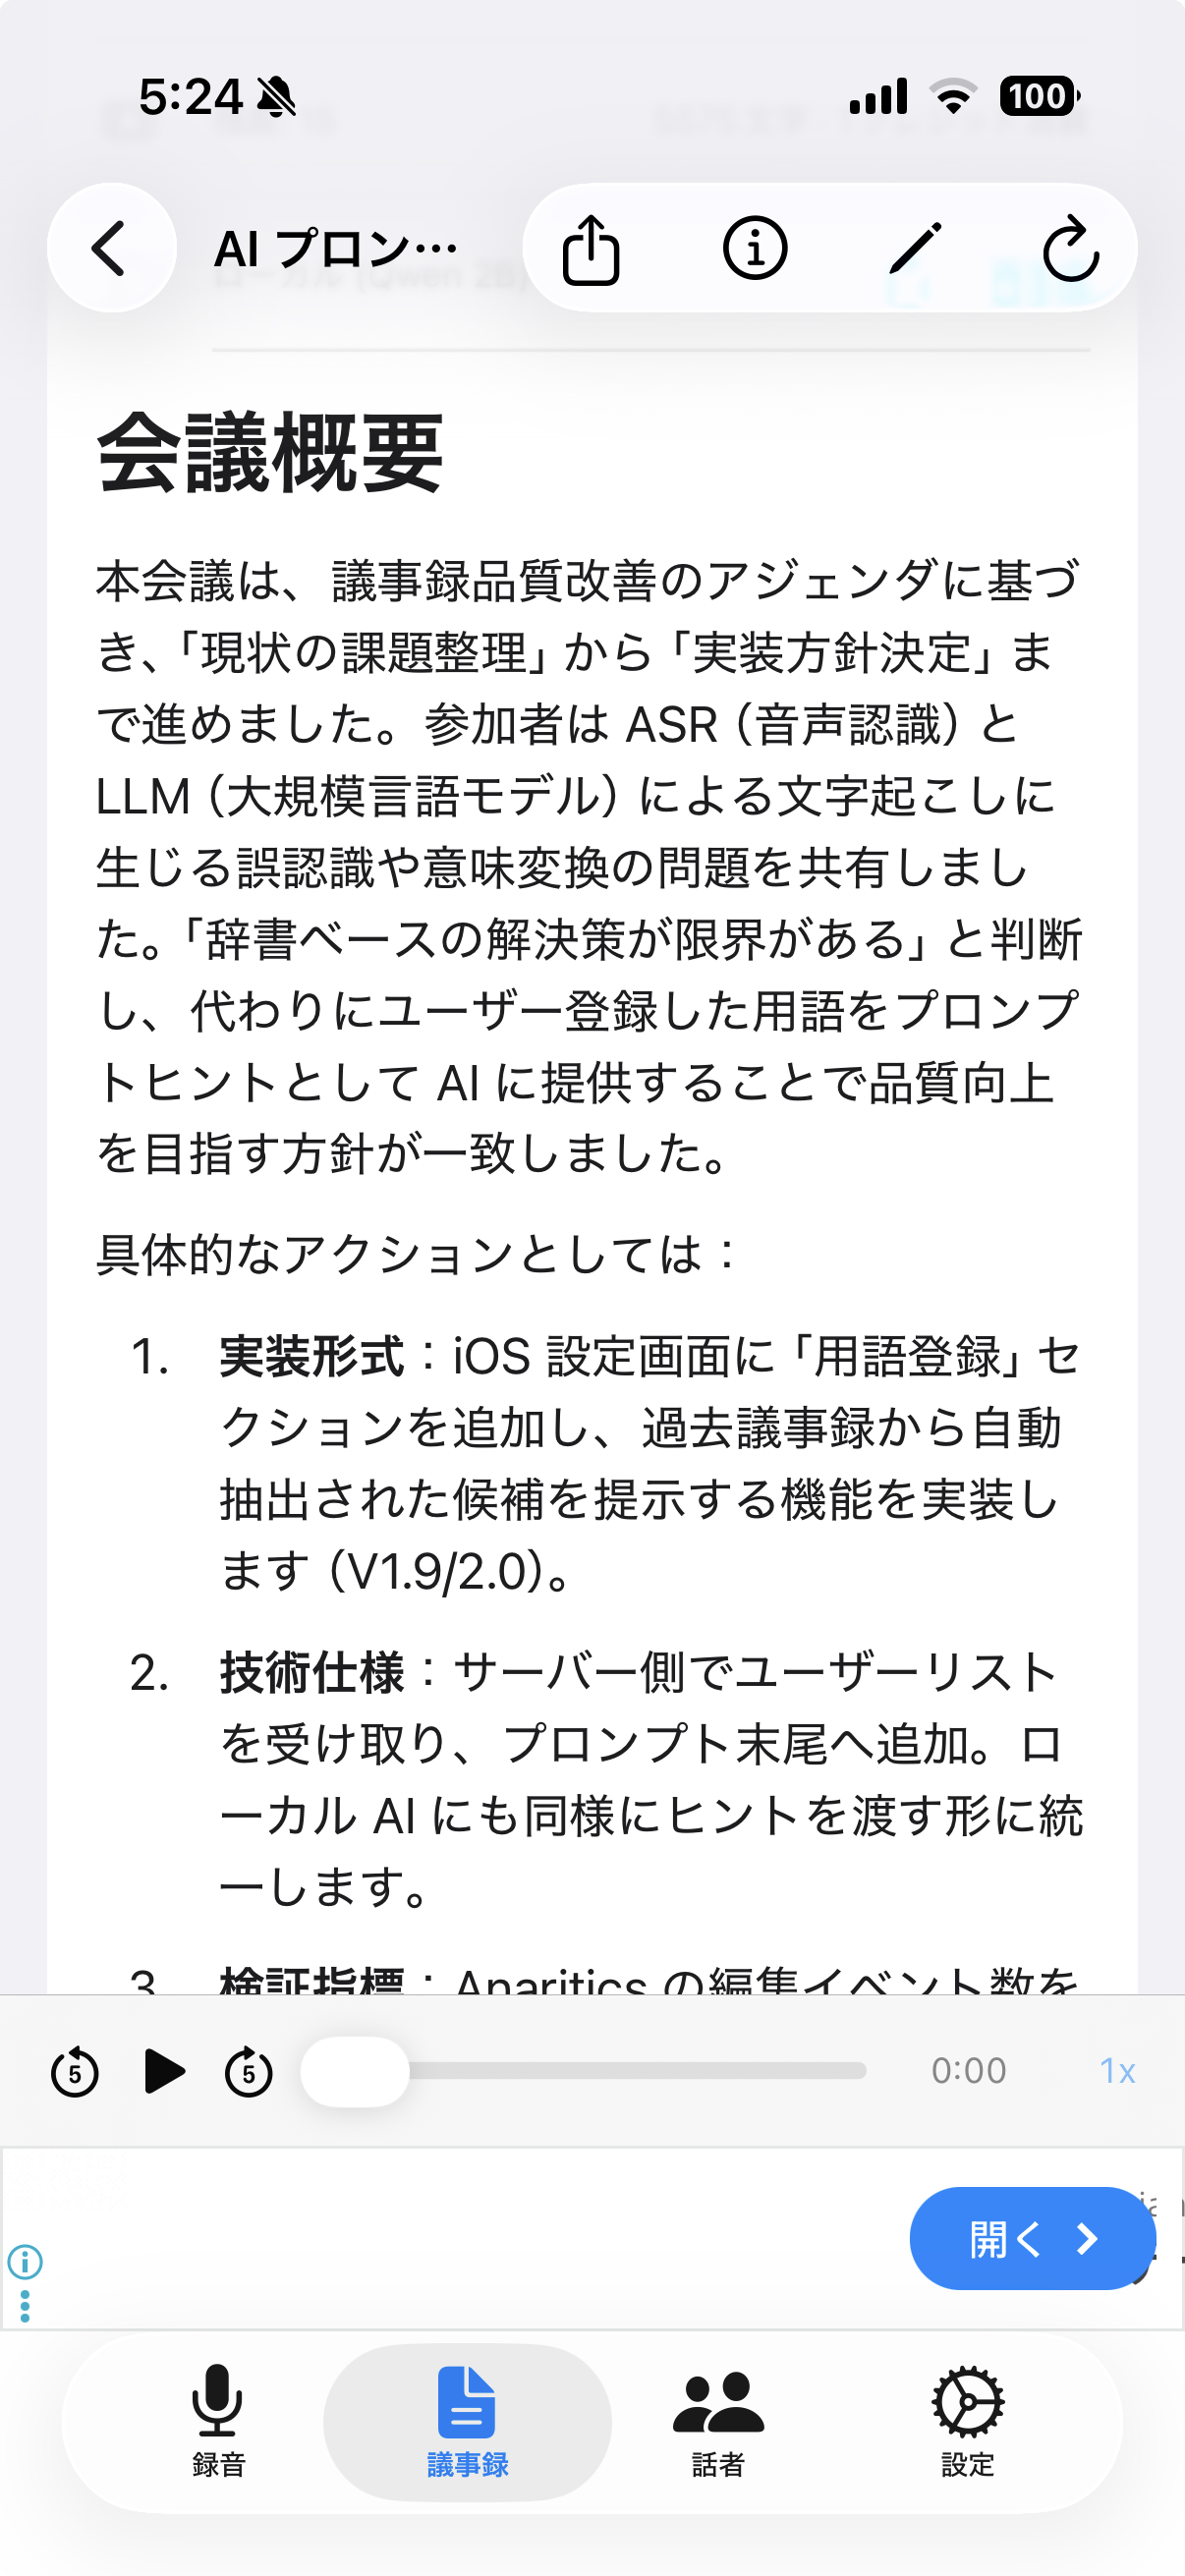
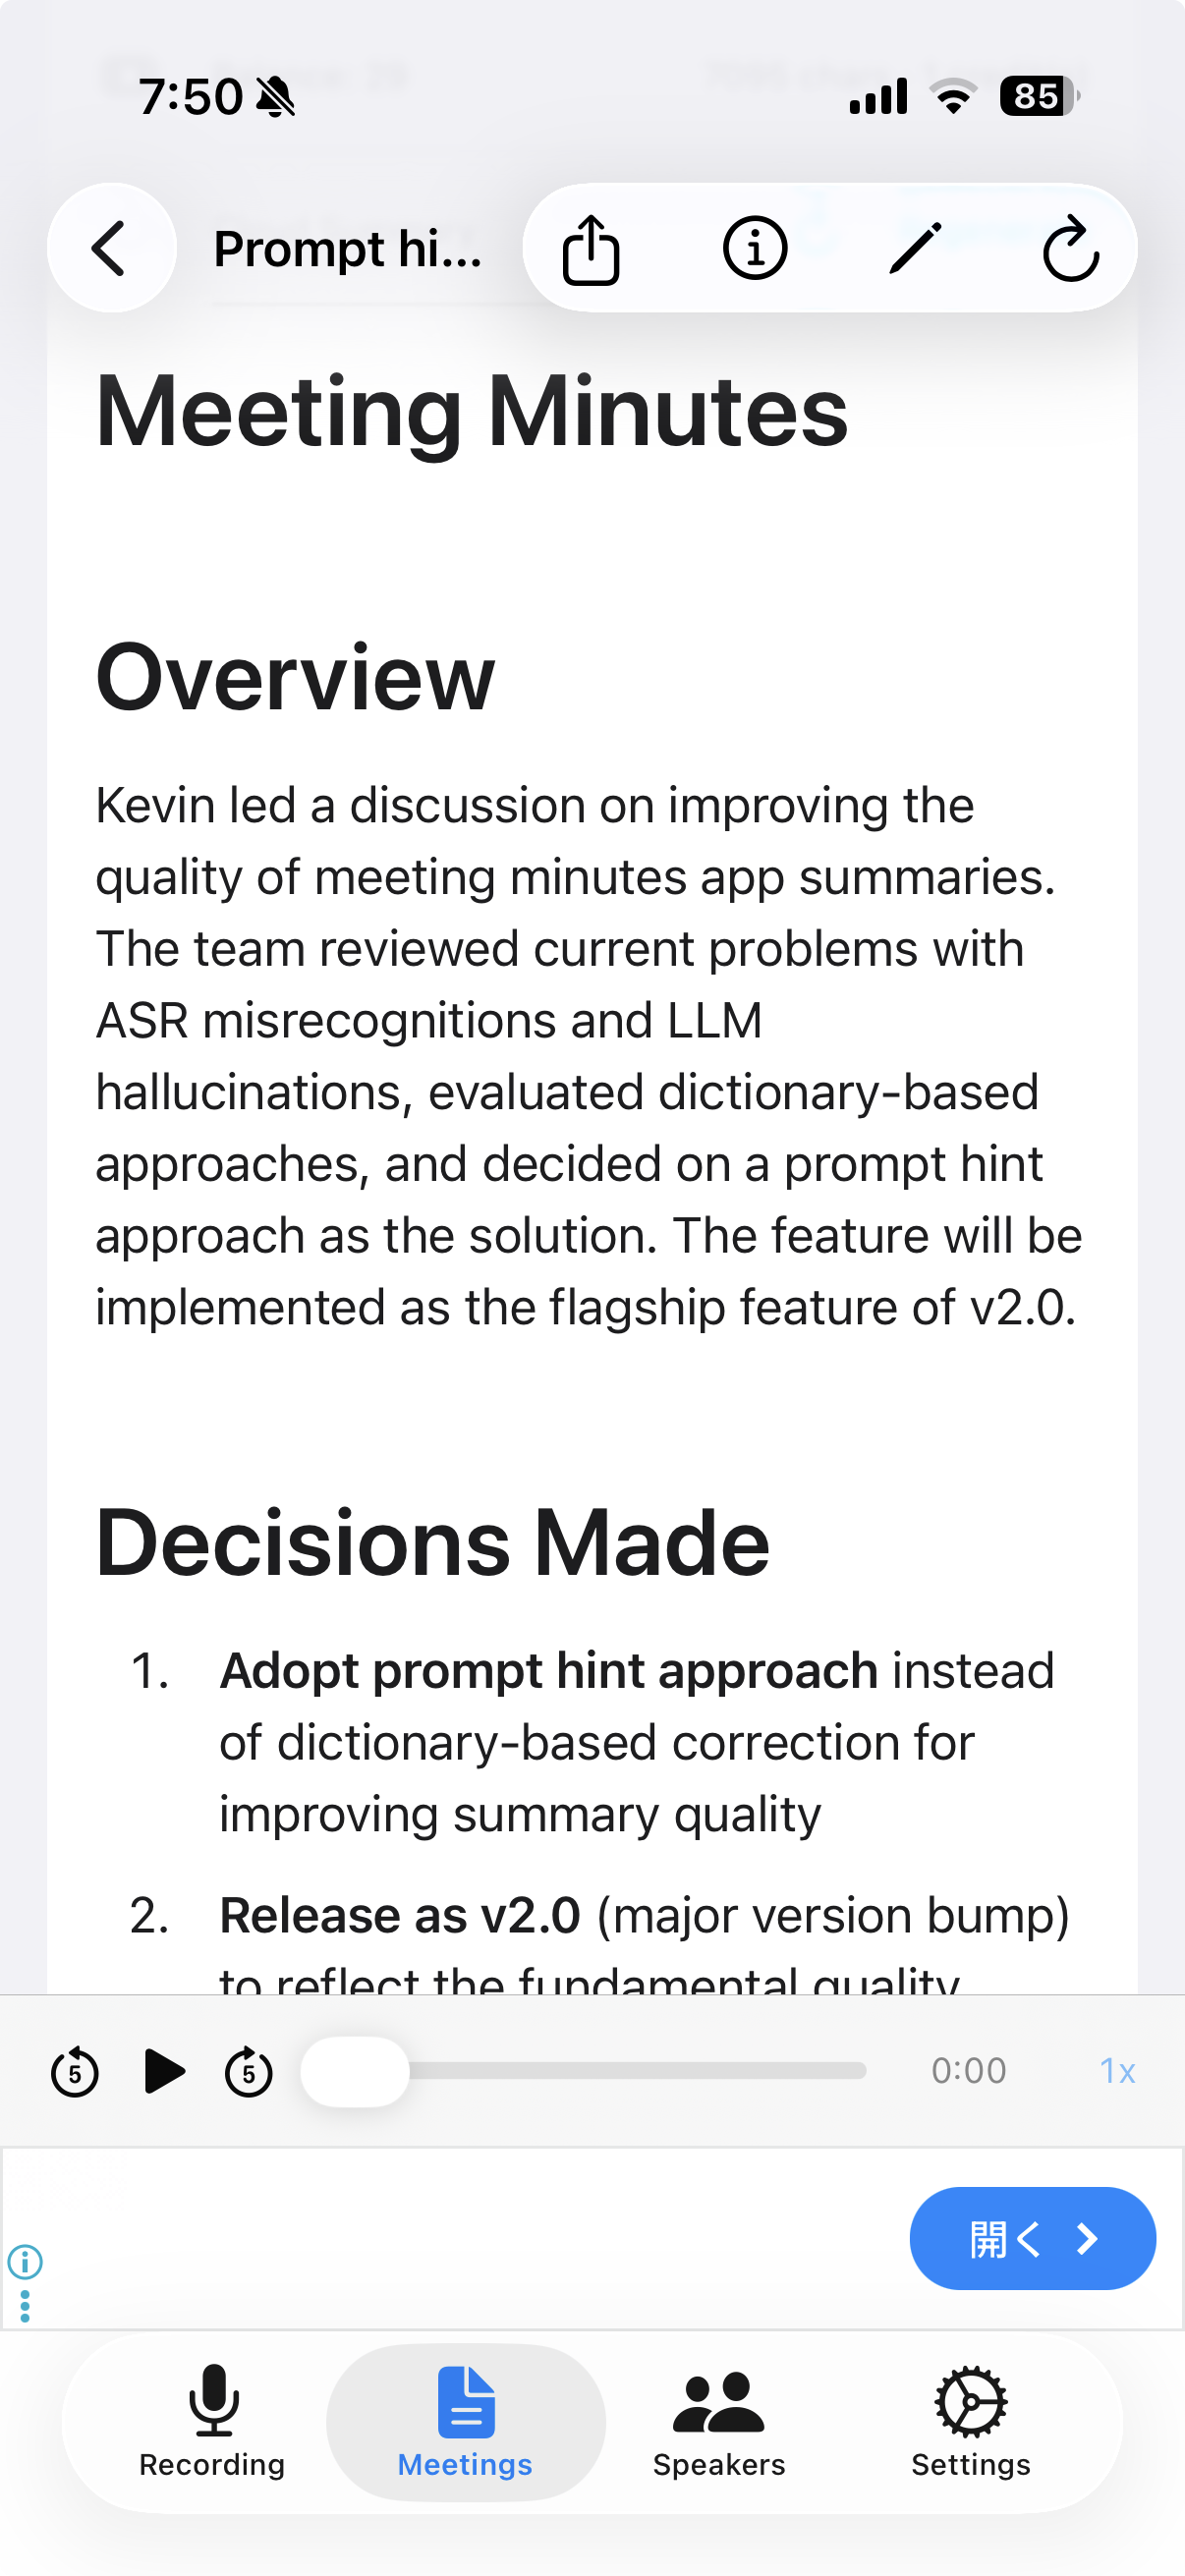
Review the result
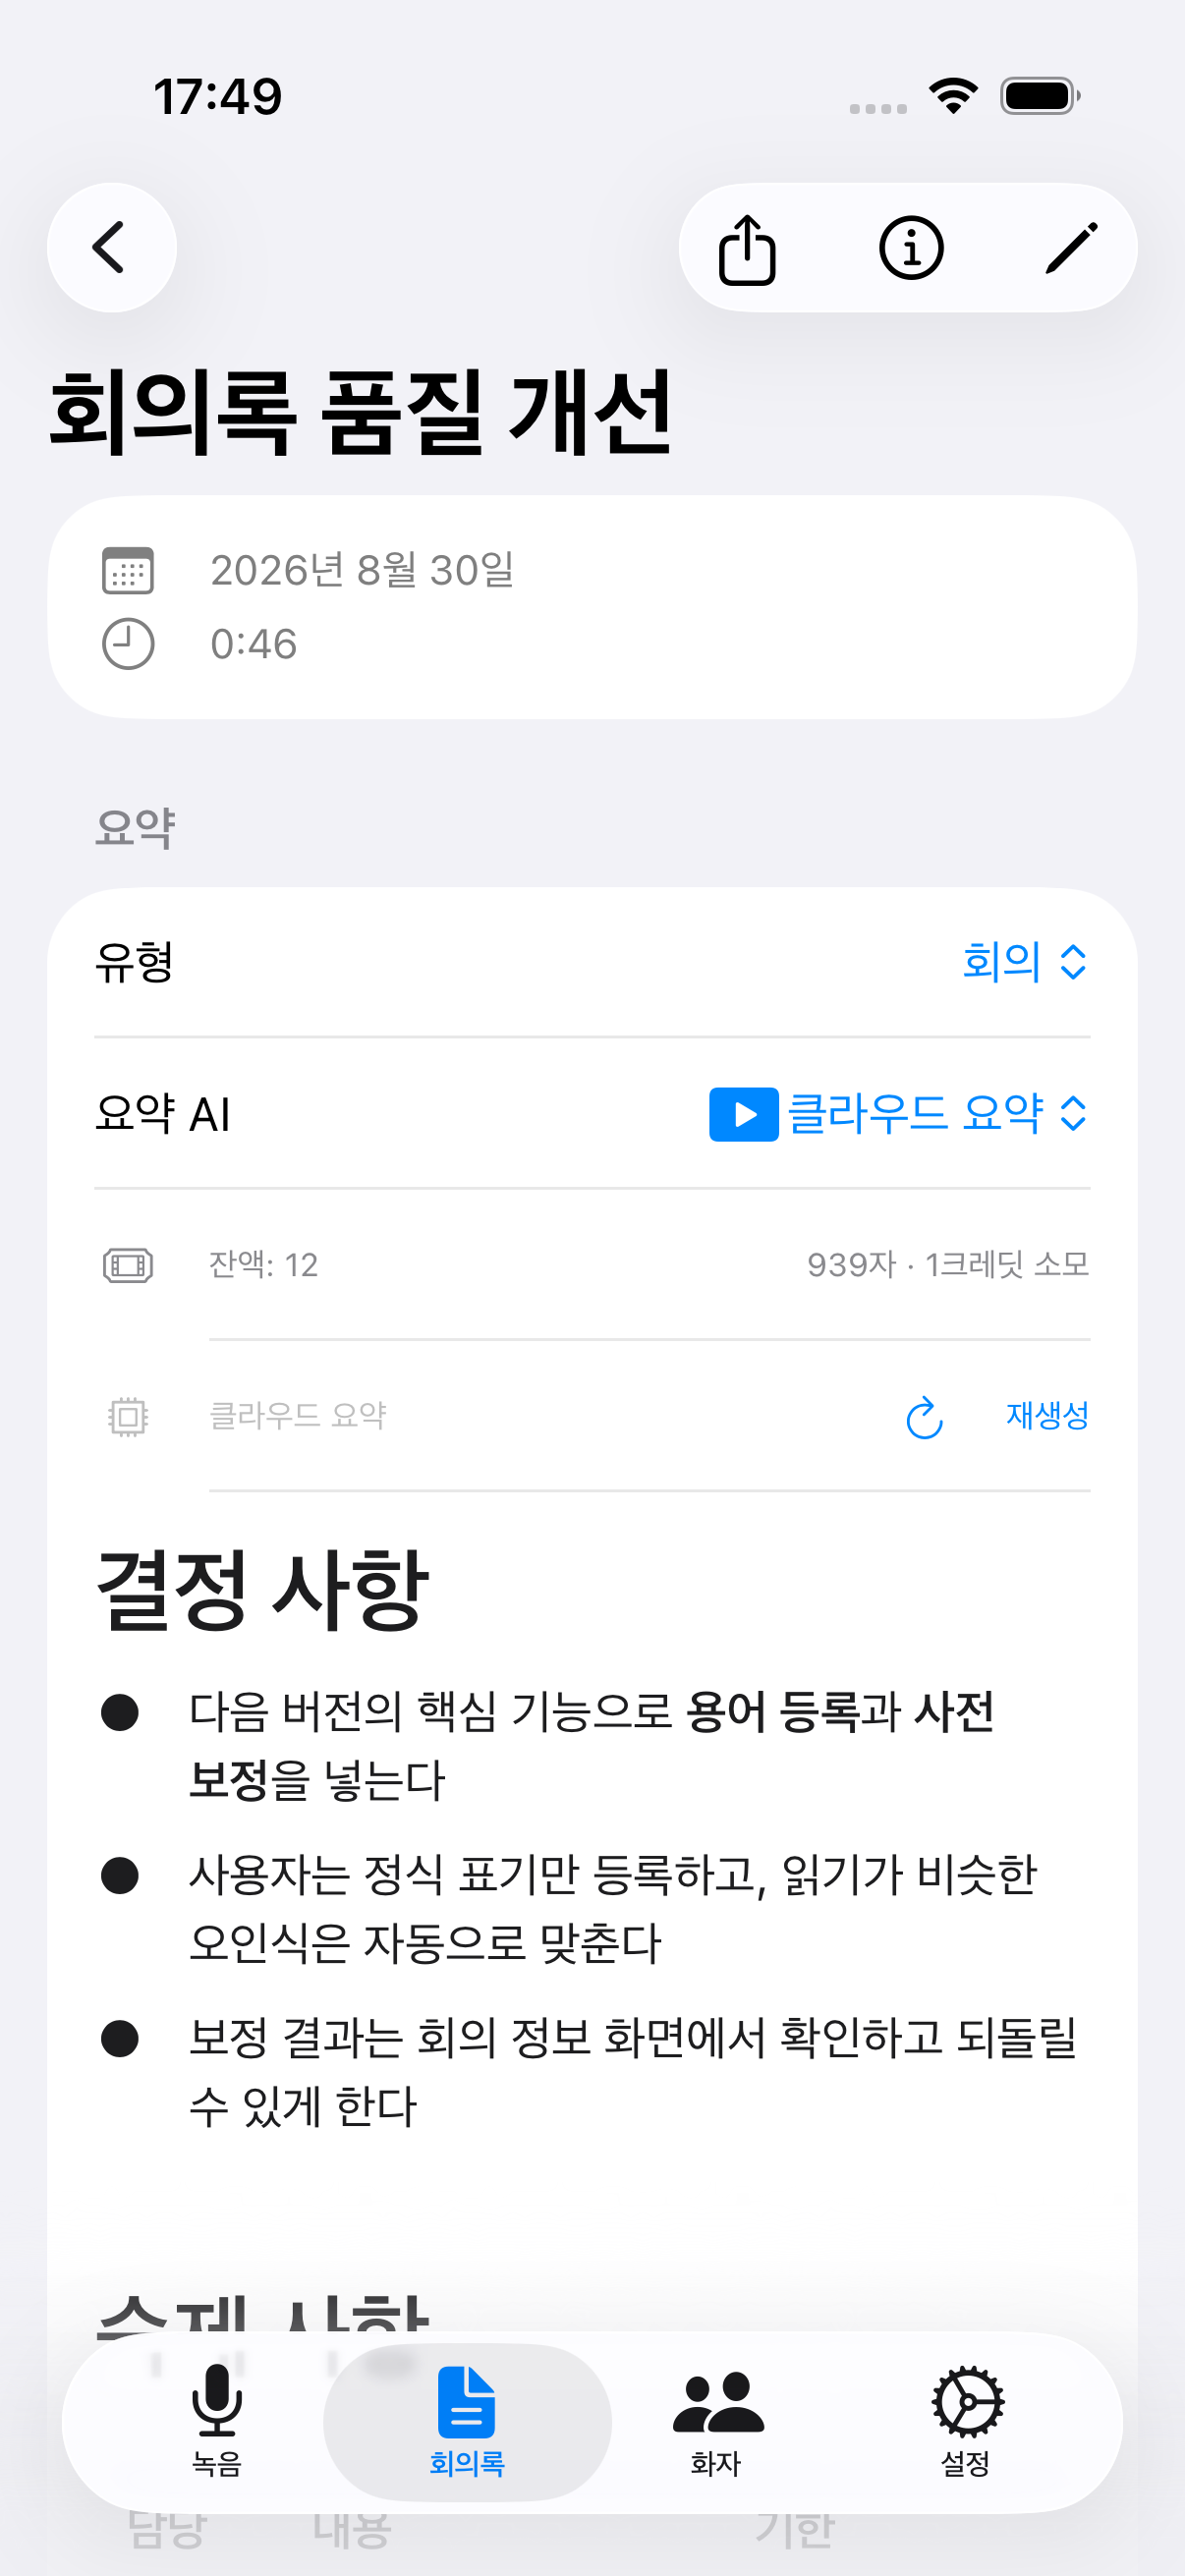
A footnote under the summary shows how it was generated (the wording differs for Cloud AI vs. on-device AI). You can also upgrade an on-device summary later via the "Summarize in more detail with Cloud AI" button.
📷 images/ai-notes-4-en.png
5
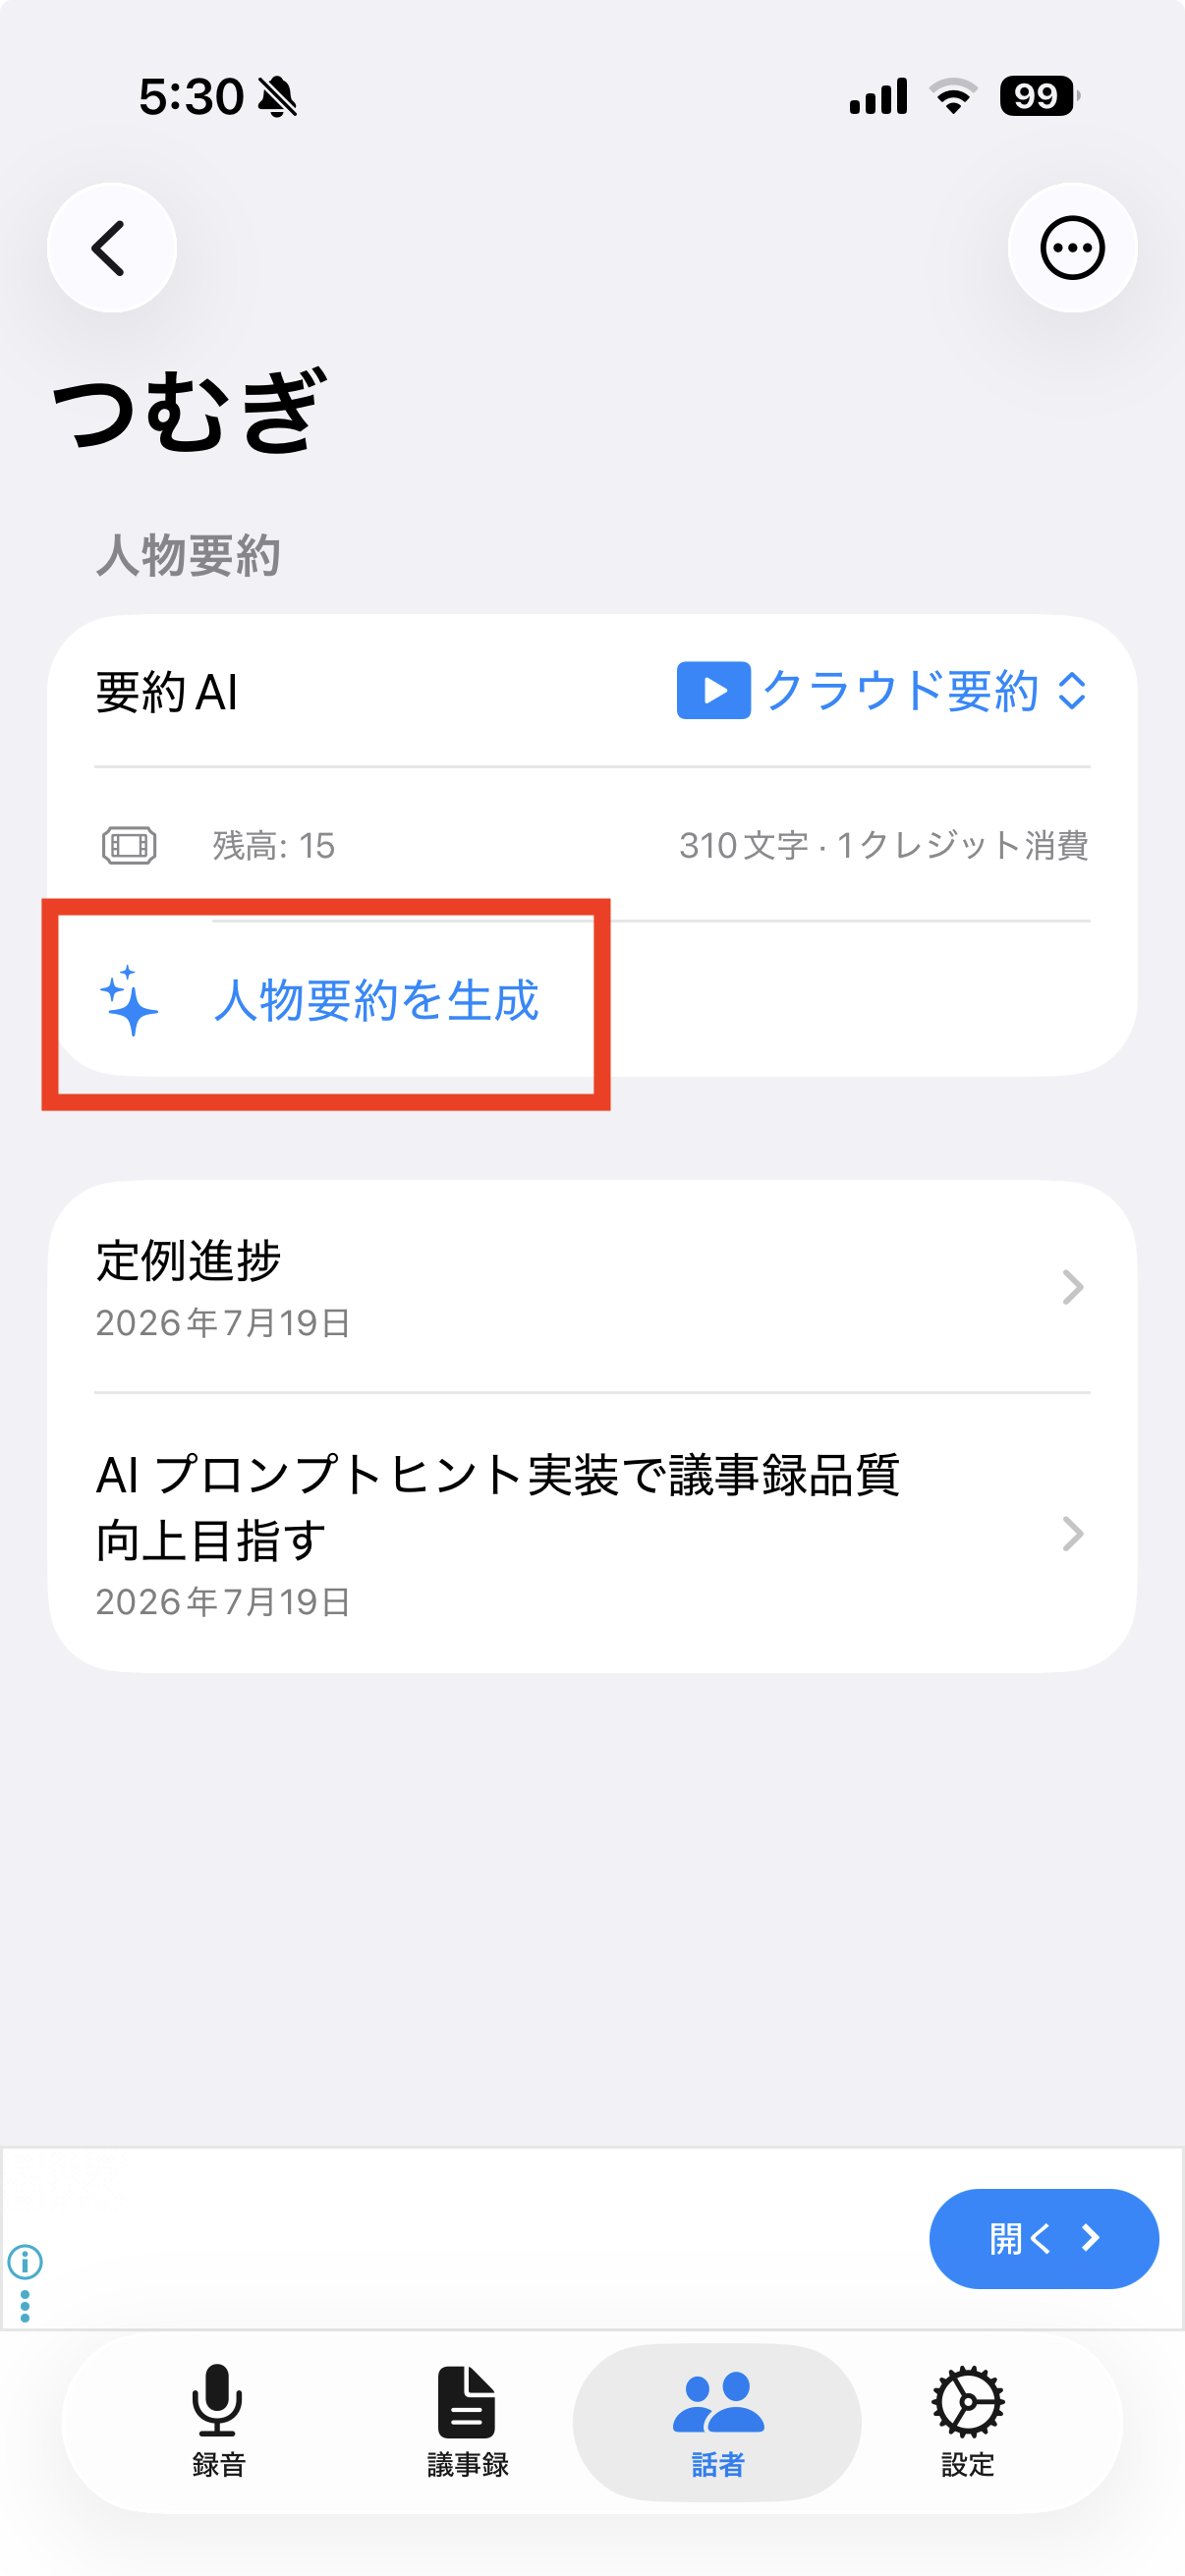
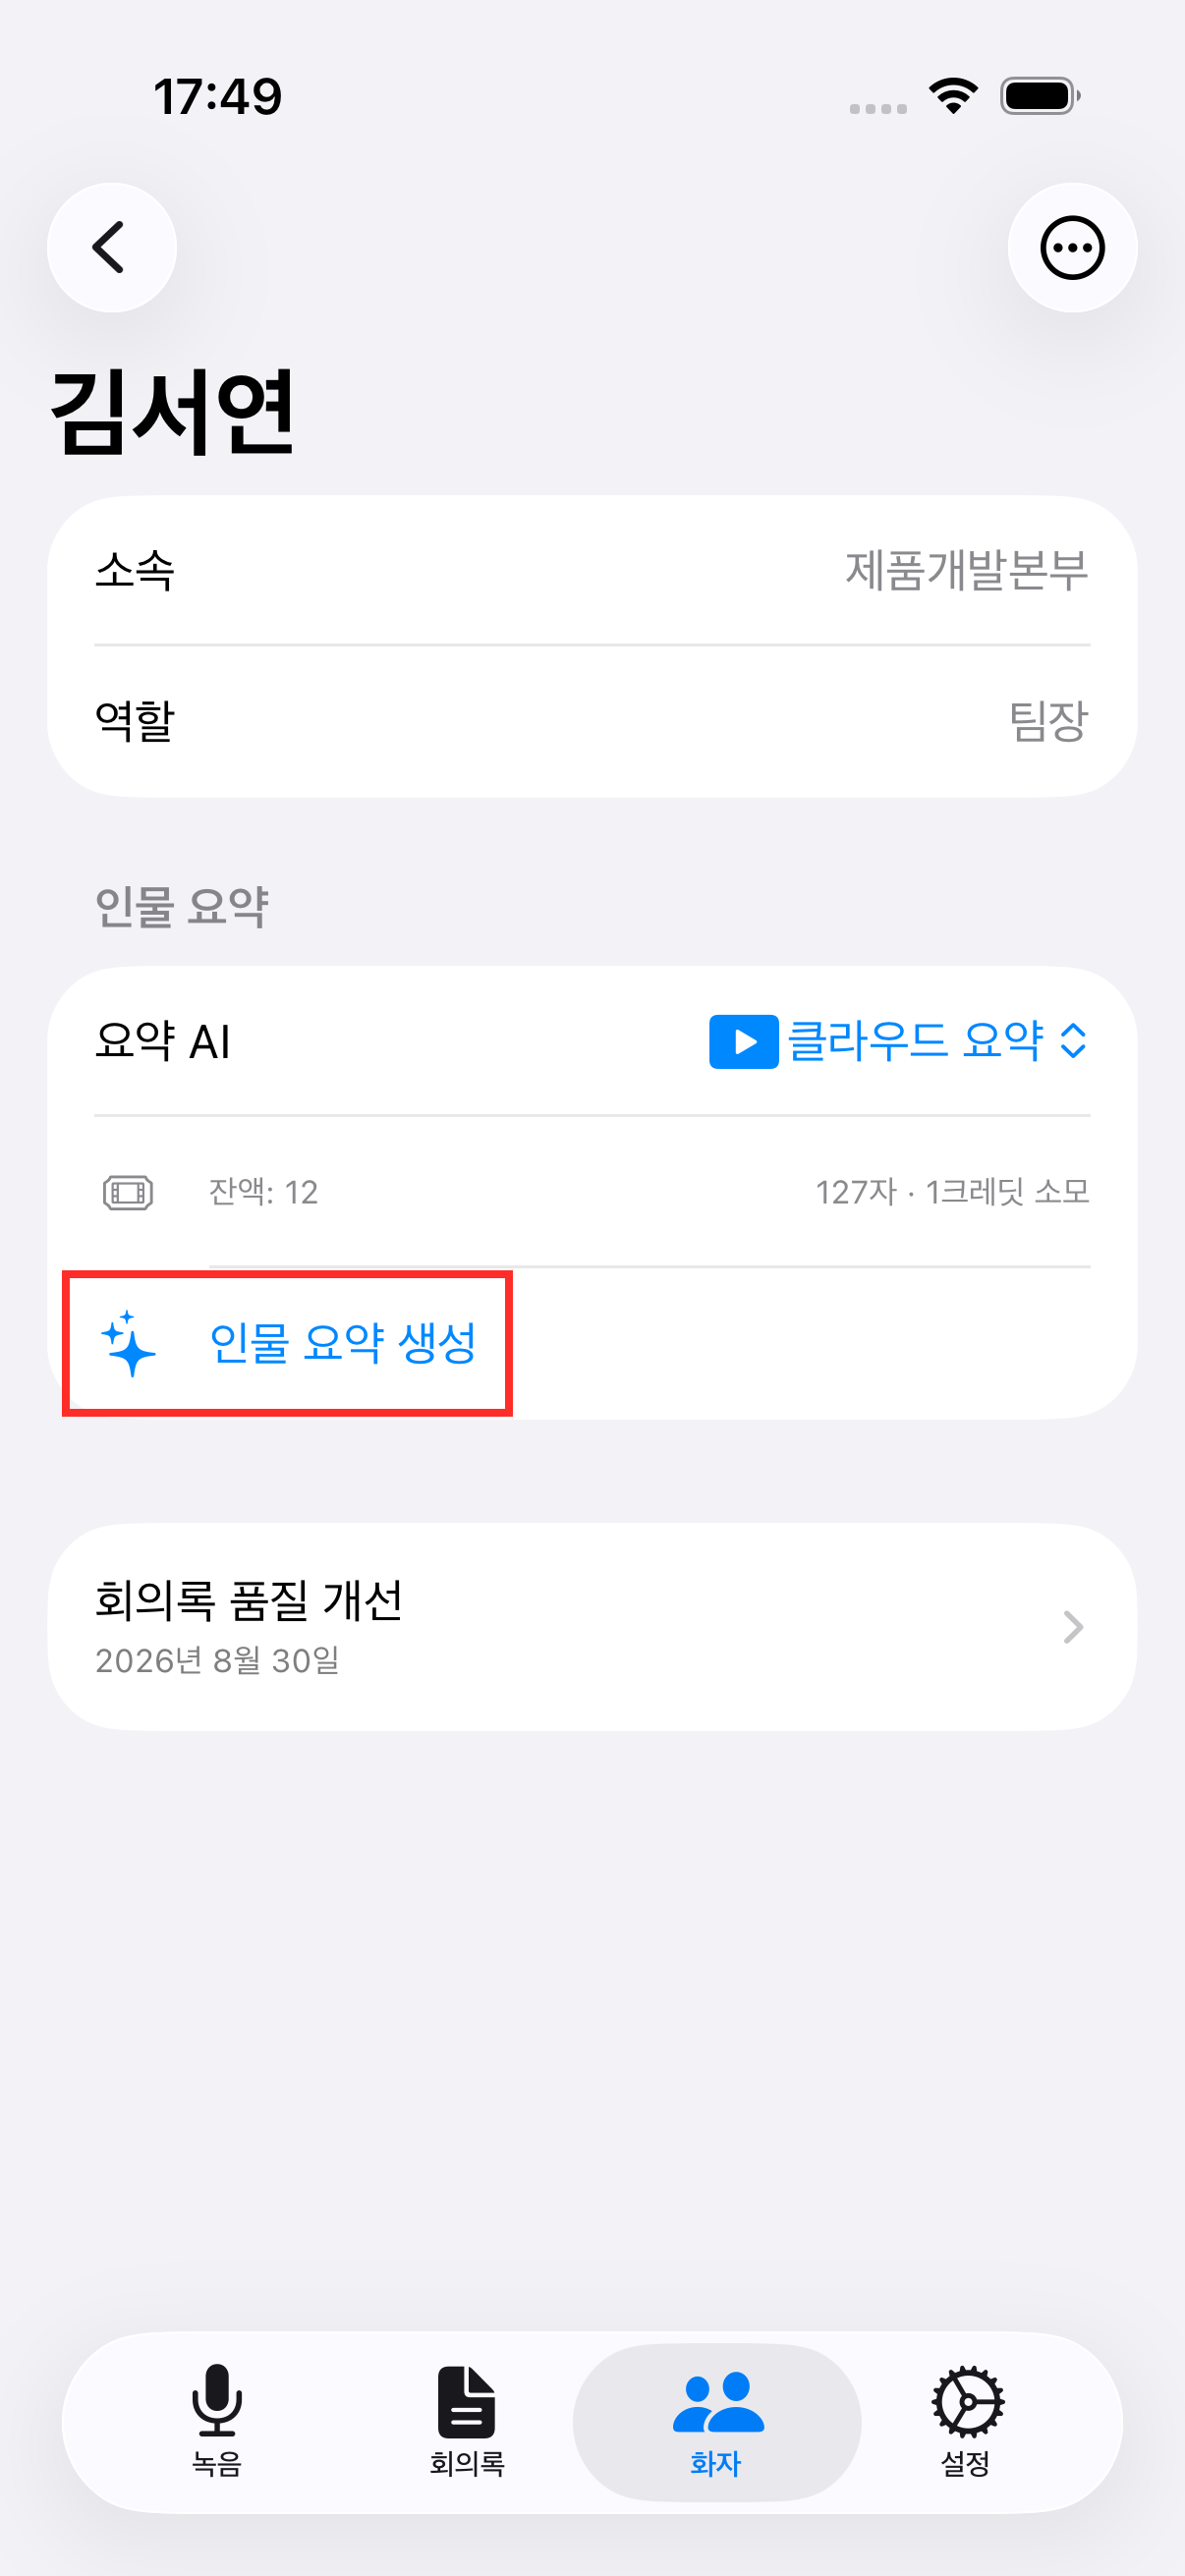
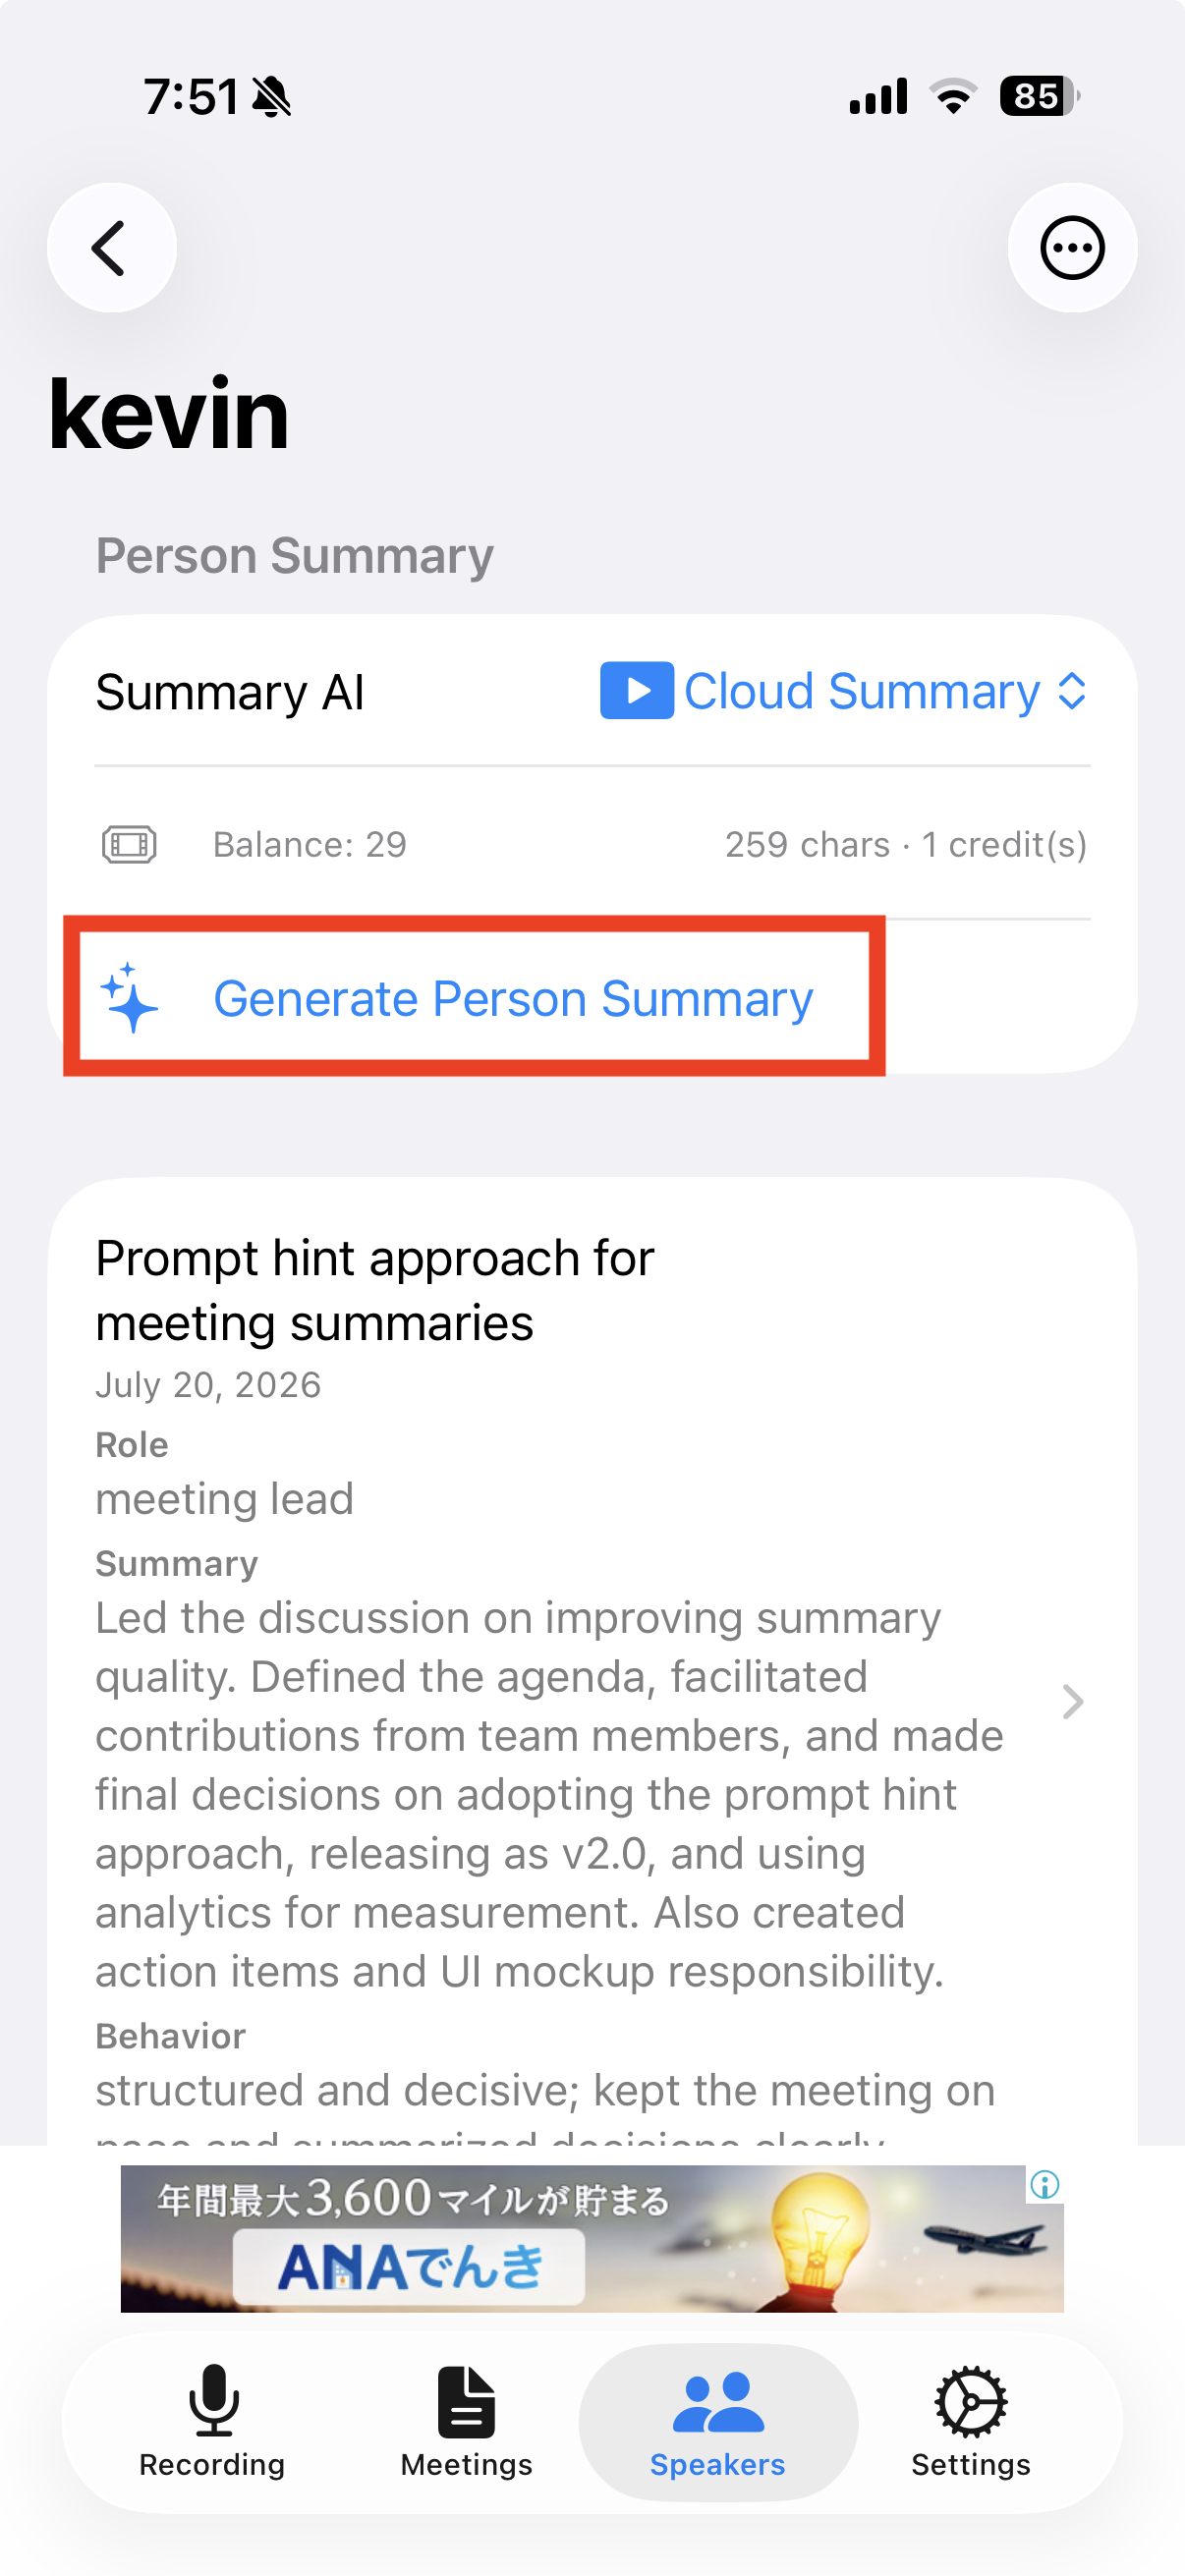
Generate a per-person summary
Select a person on the Speaker tab and tap "Generate Person Summary" to create a cross-meeting rollup of what they've said over time (Cloud AI only).
📷 images/ai-notes-5-en.png
📤 Export & Sharing
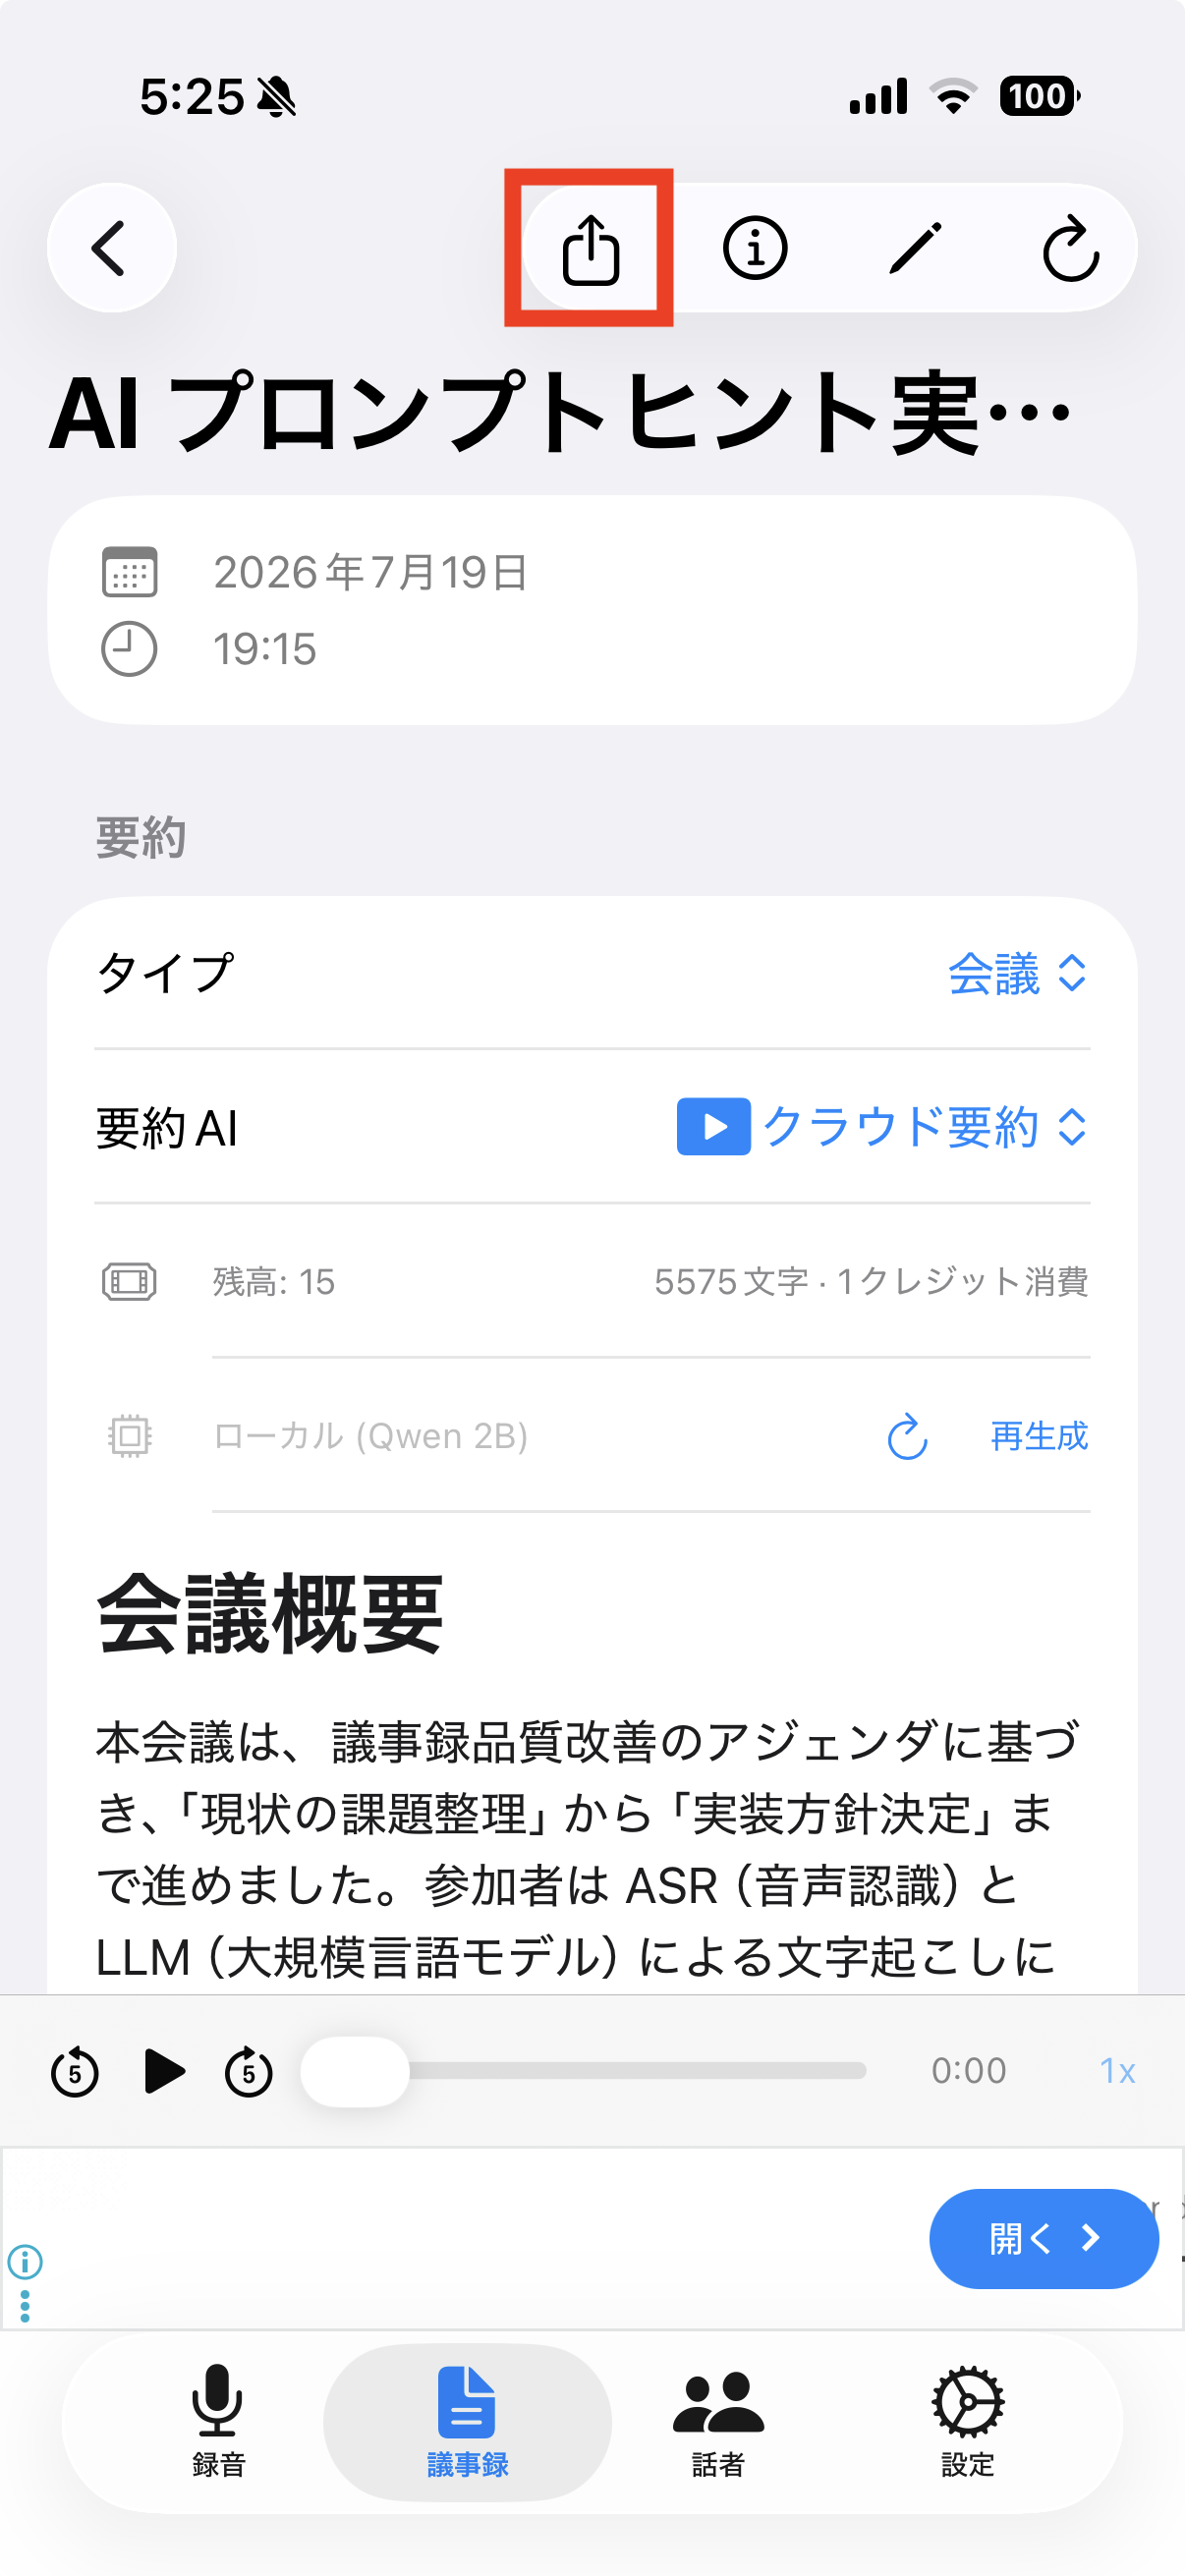
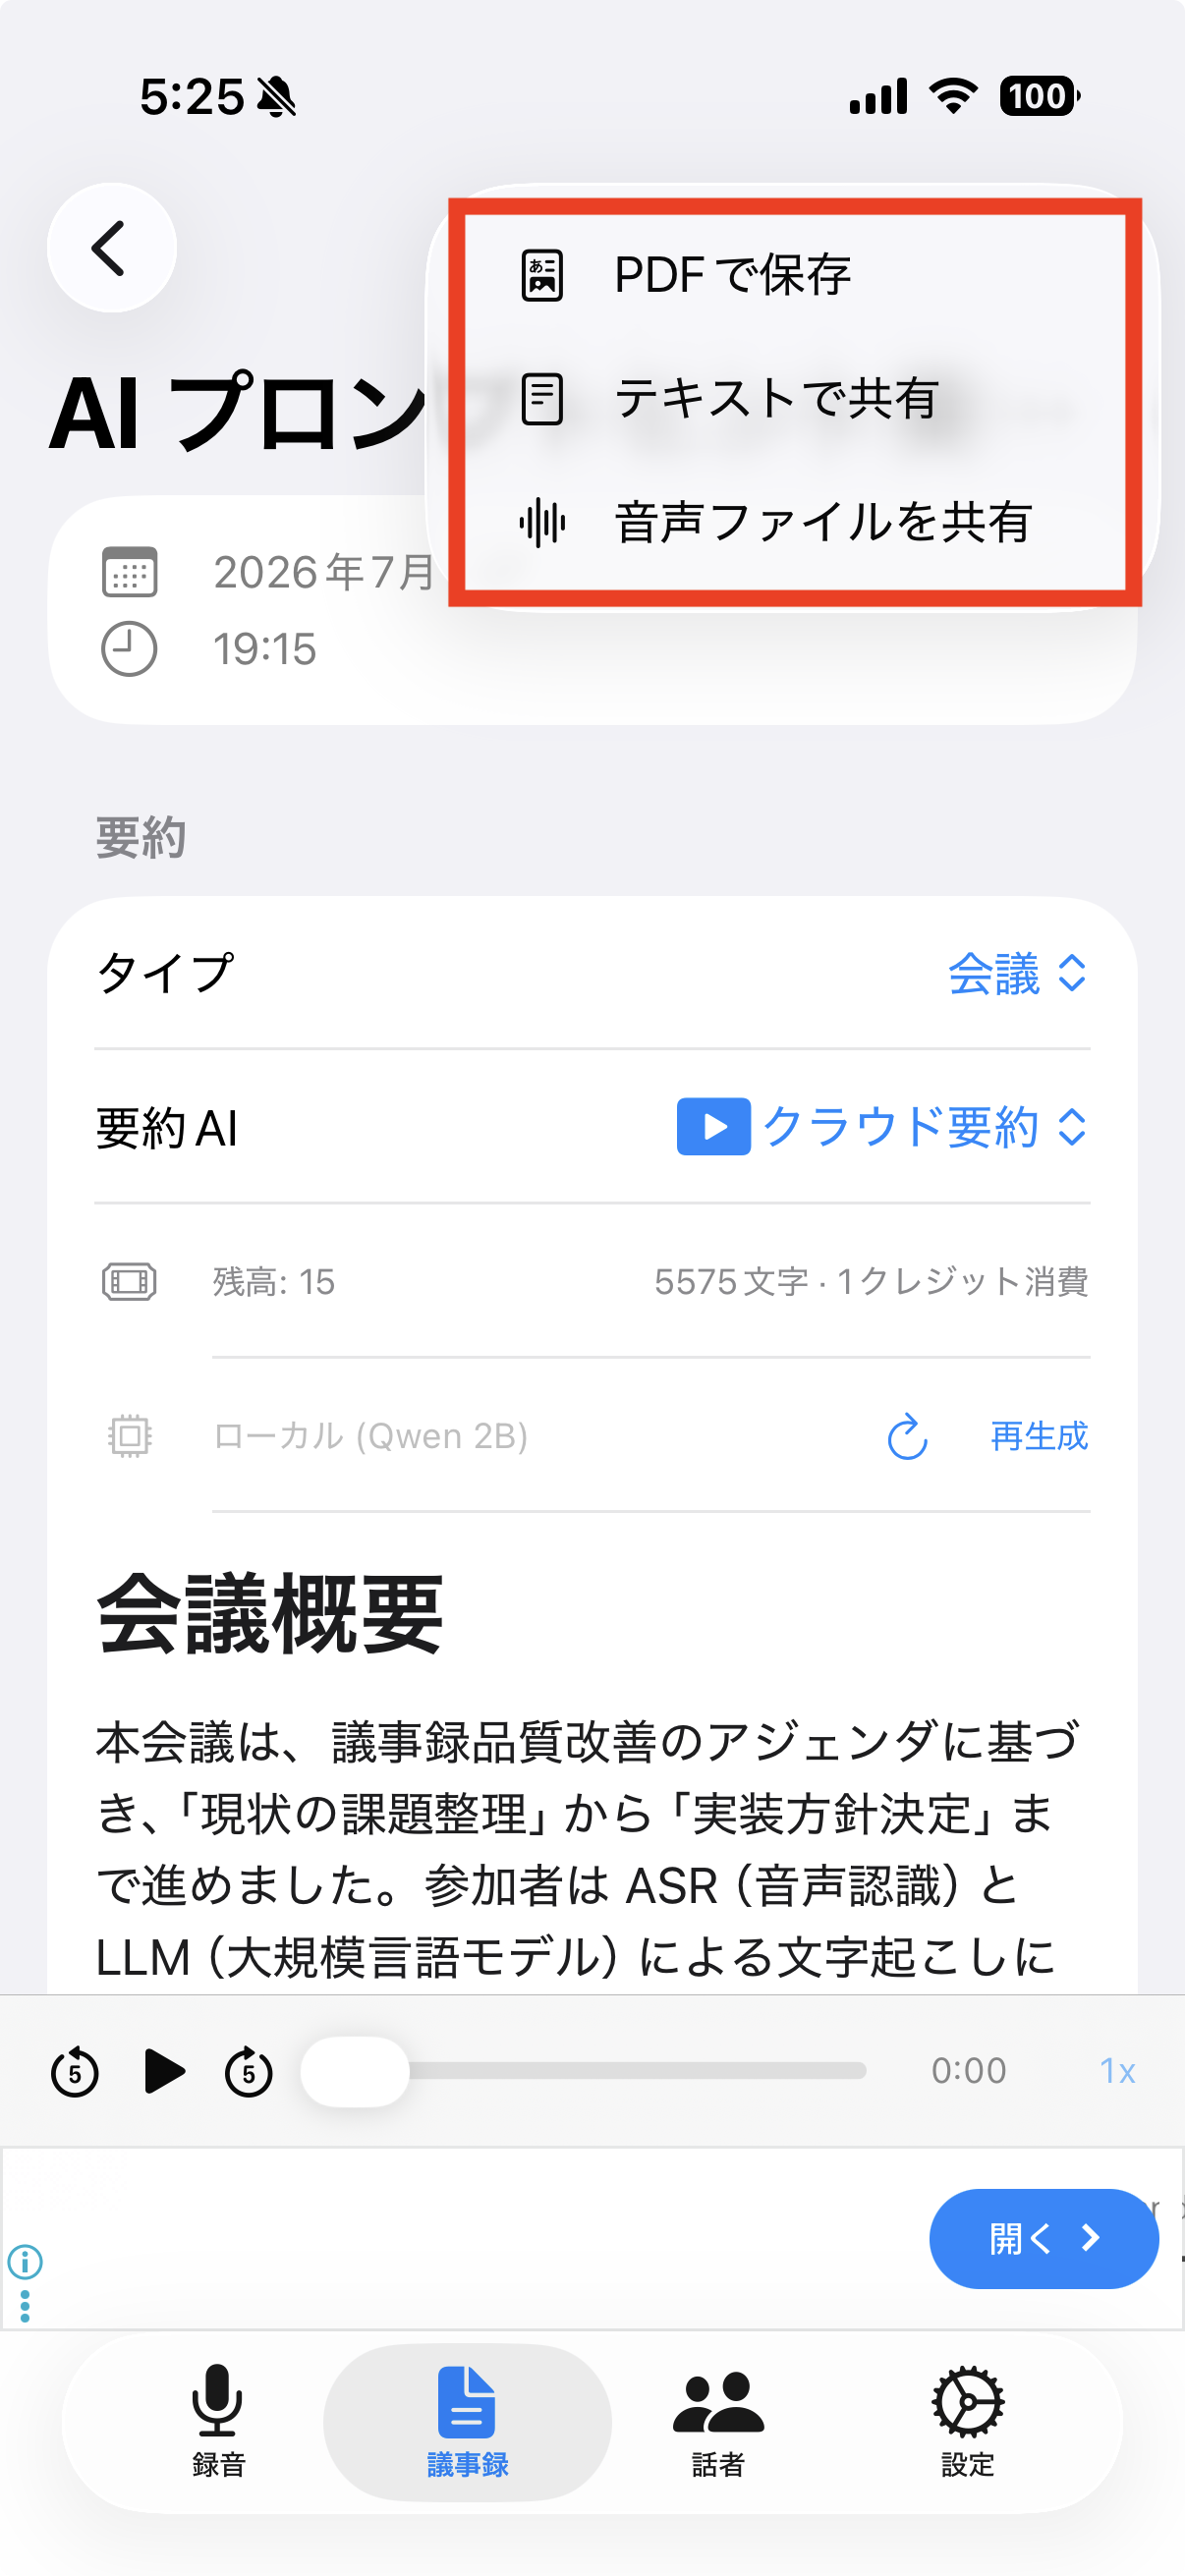
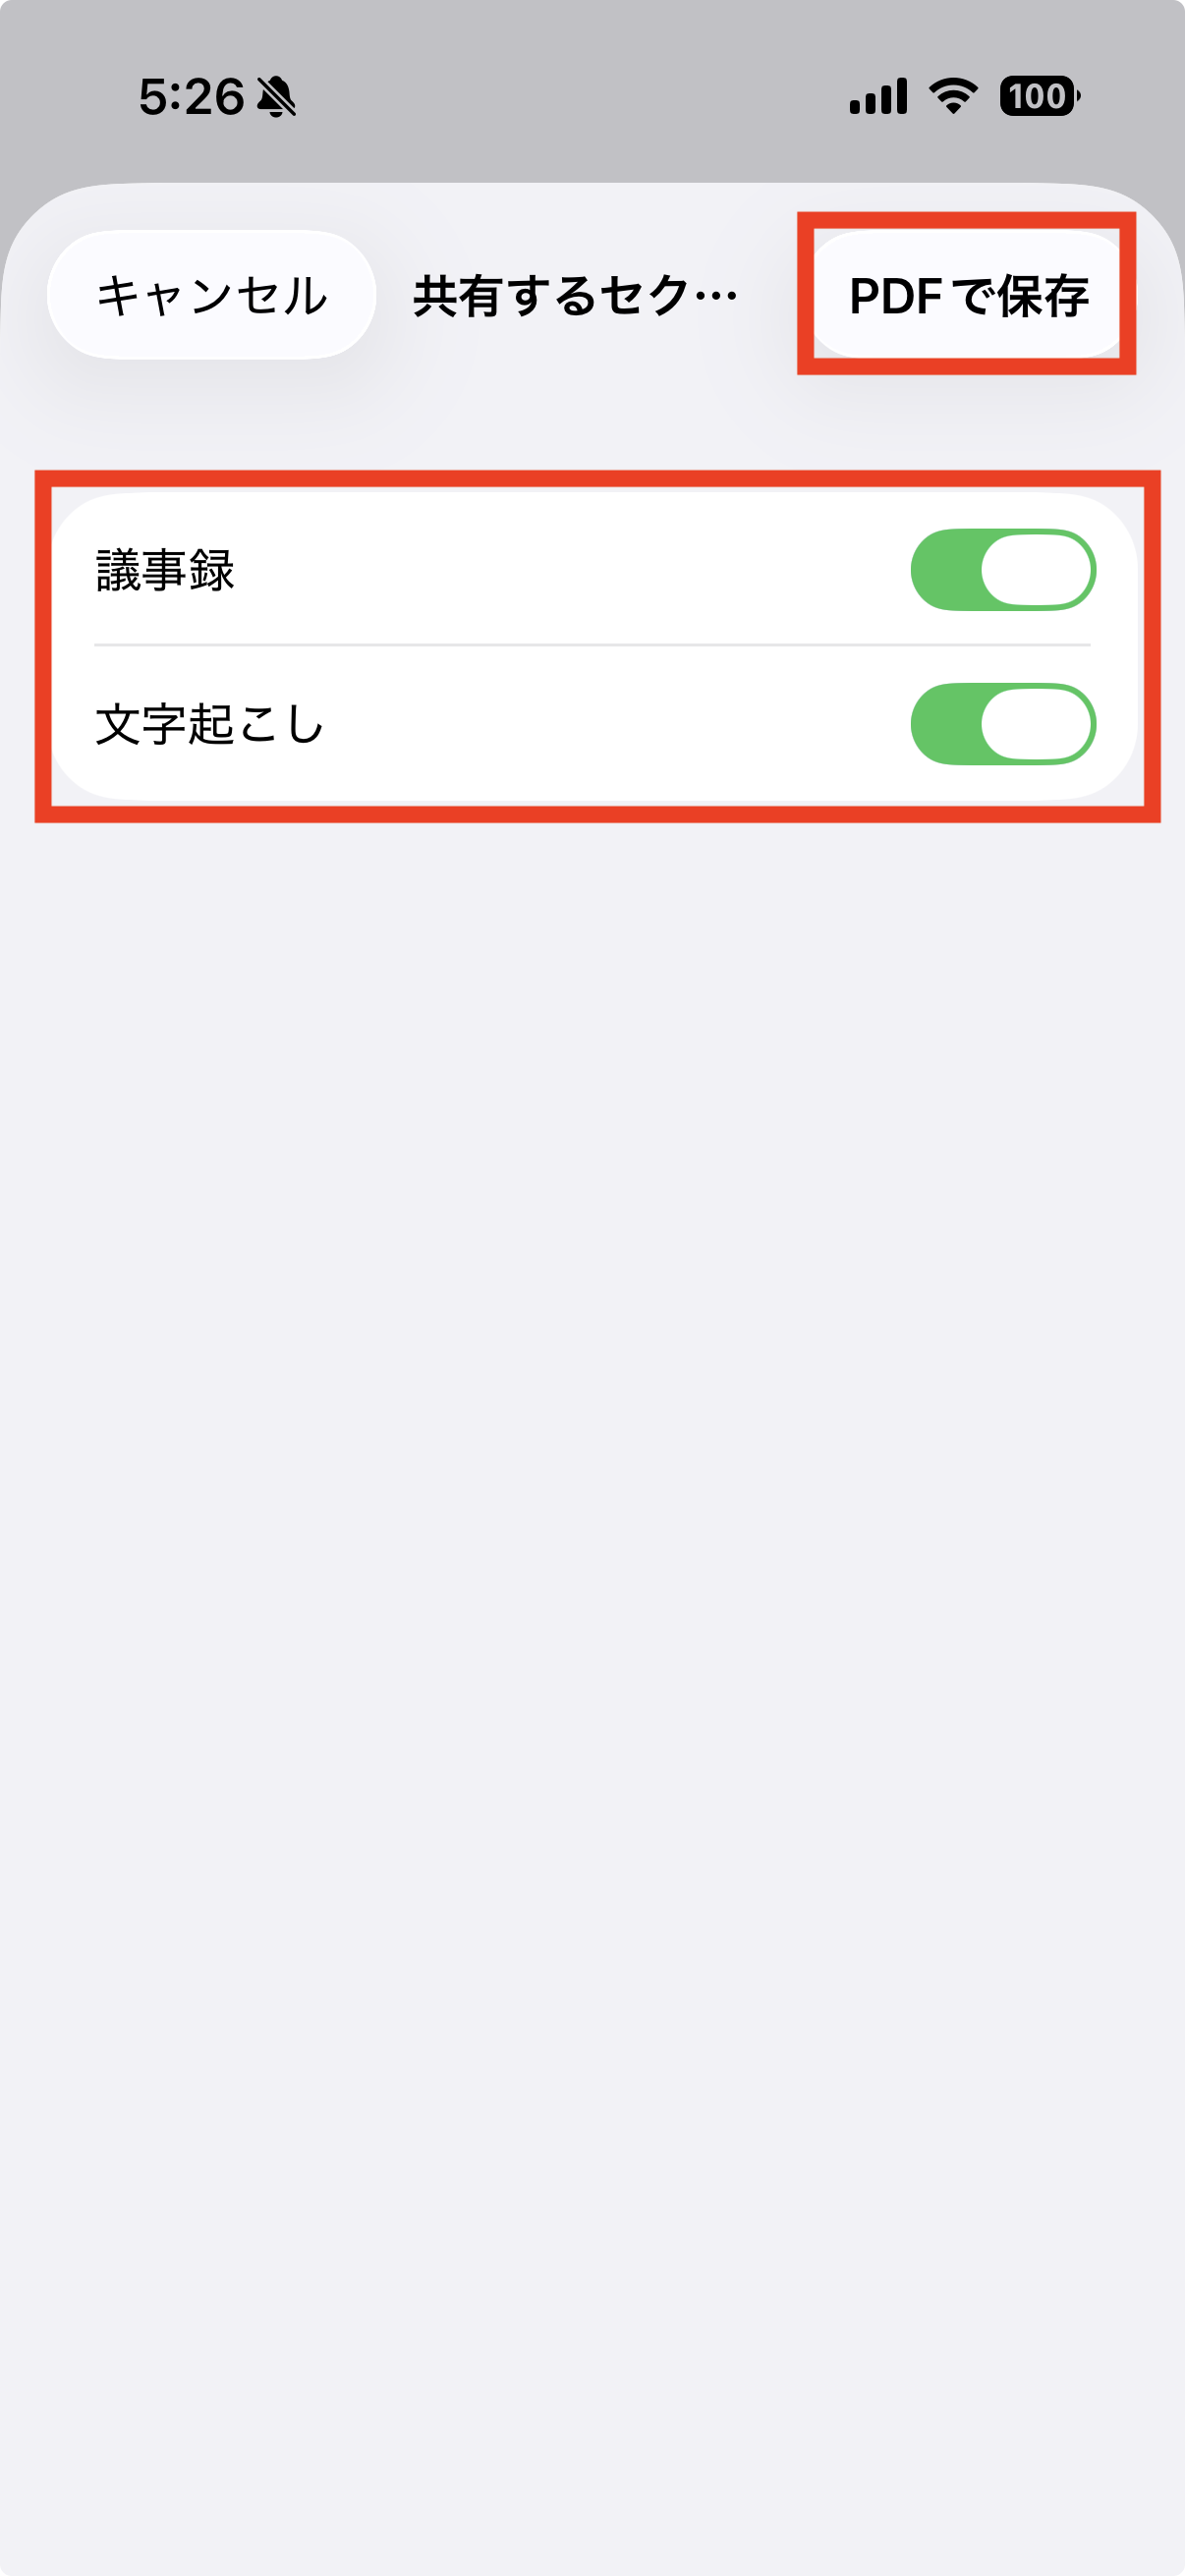
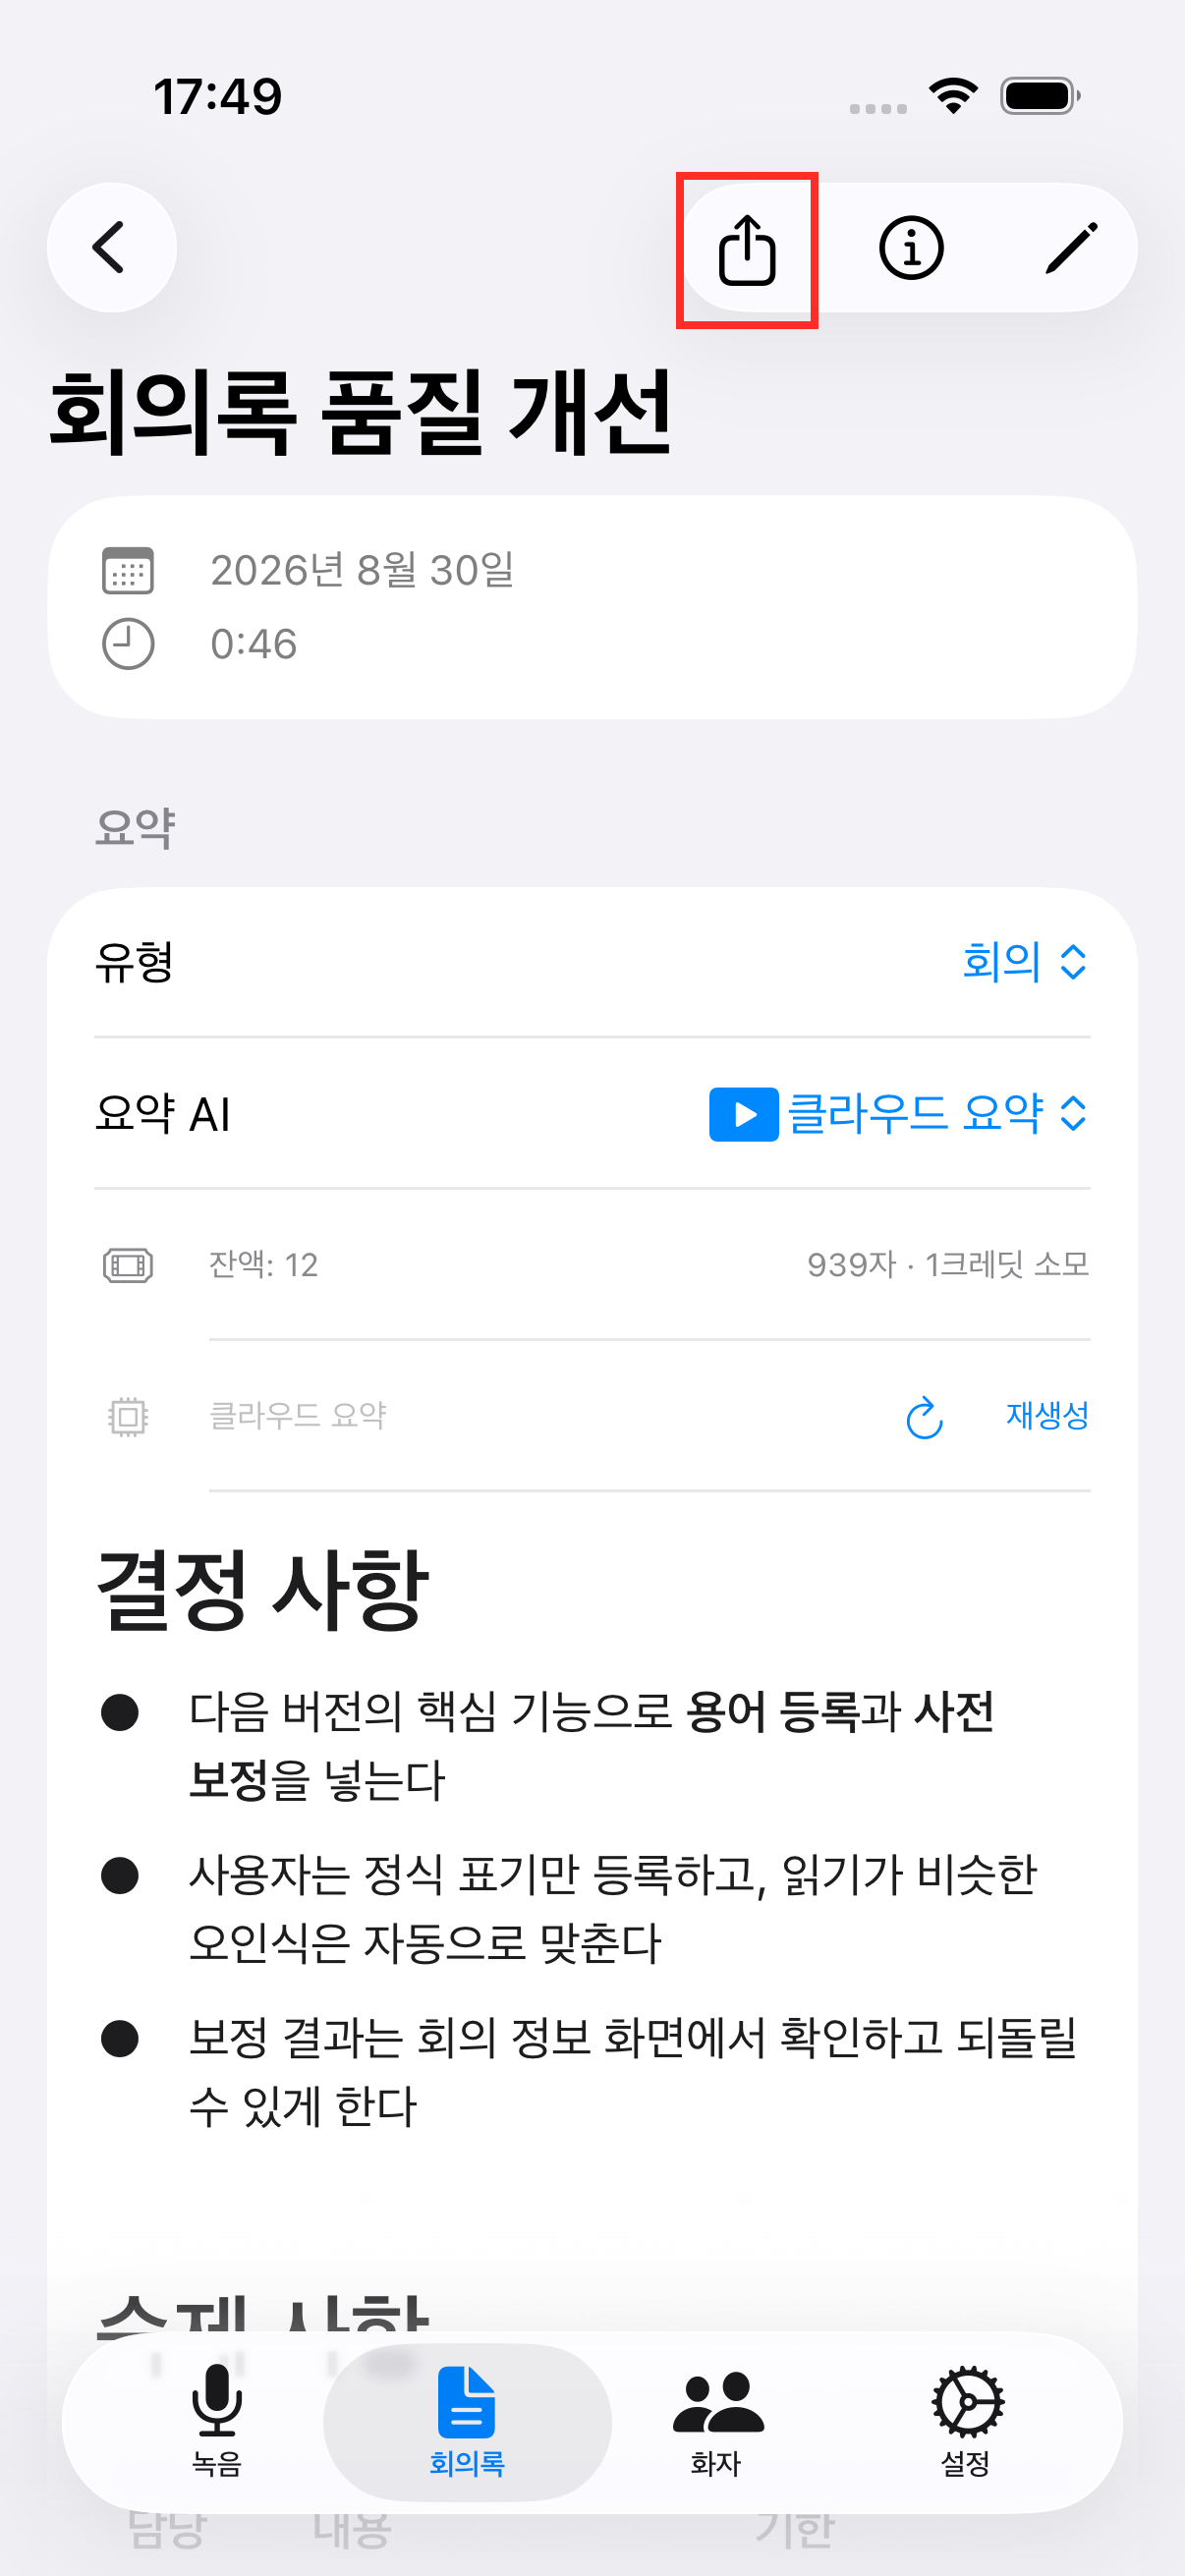
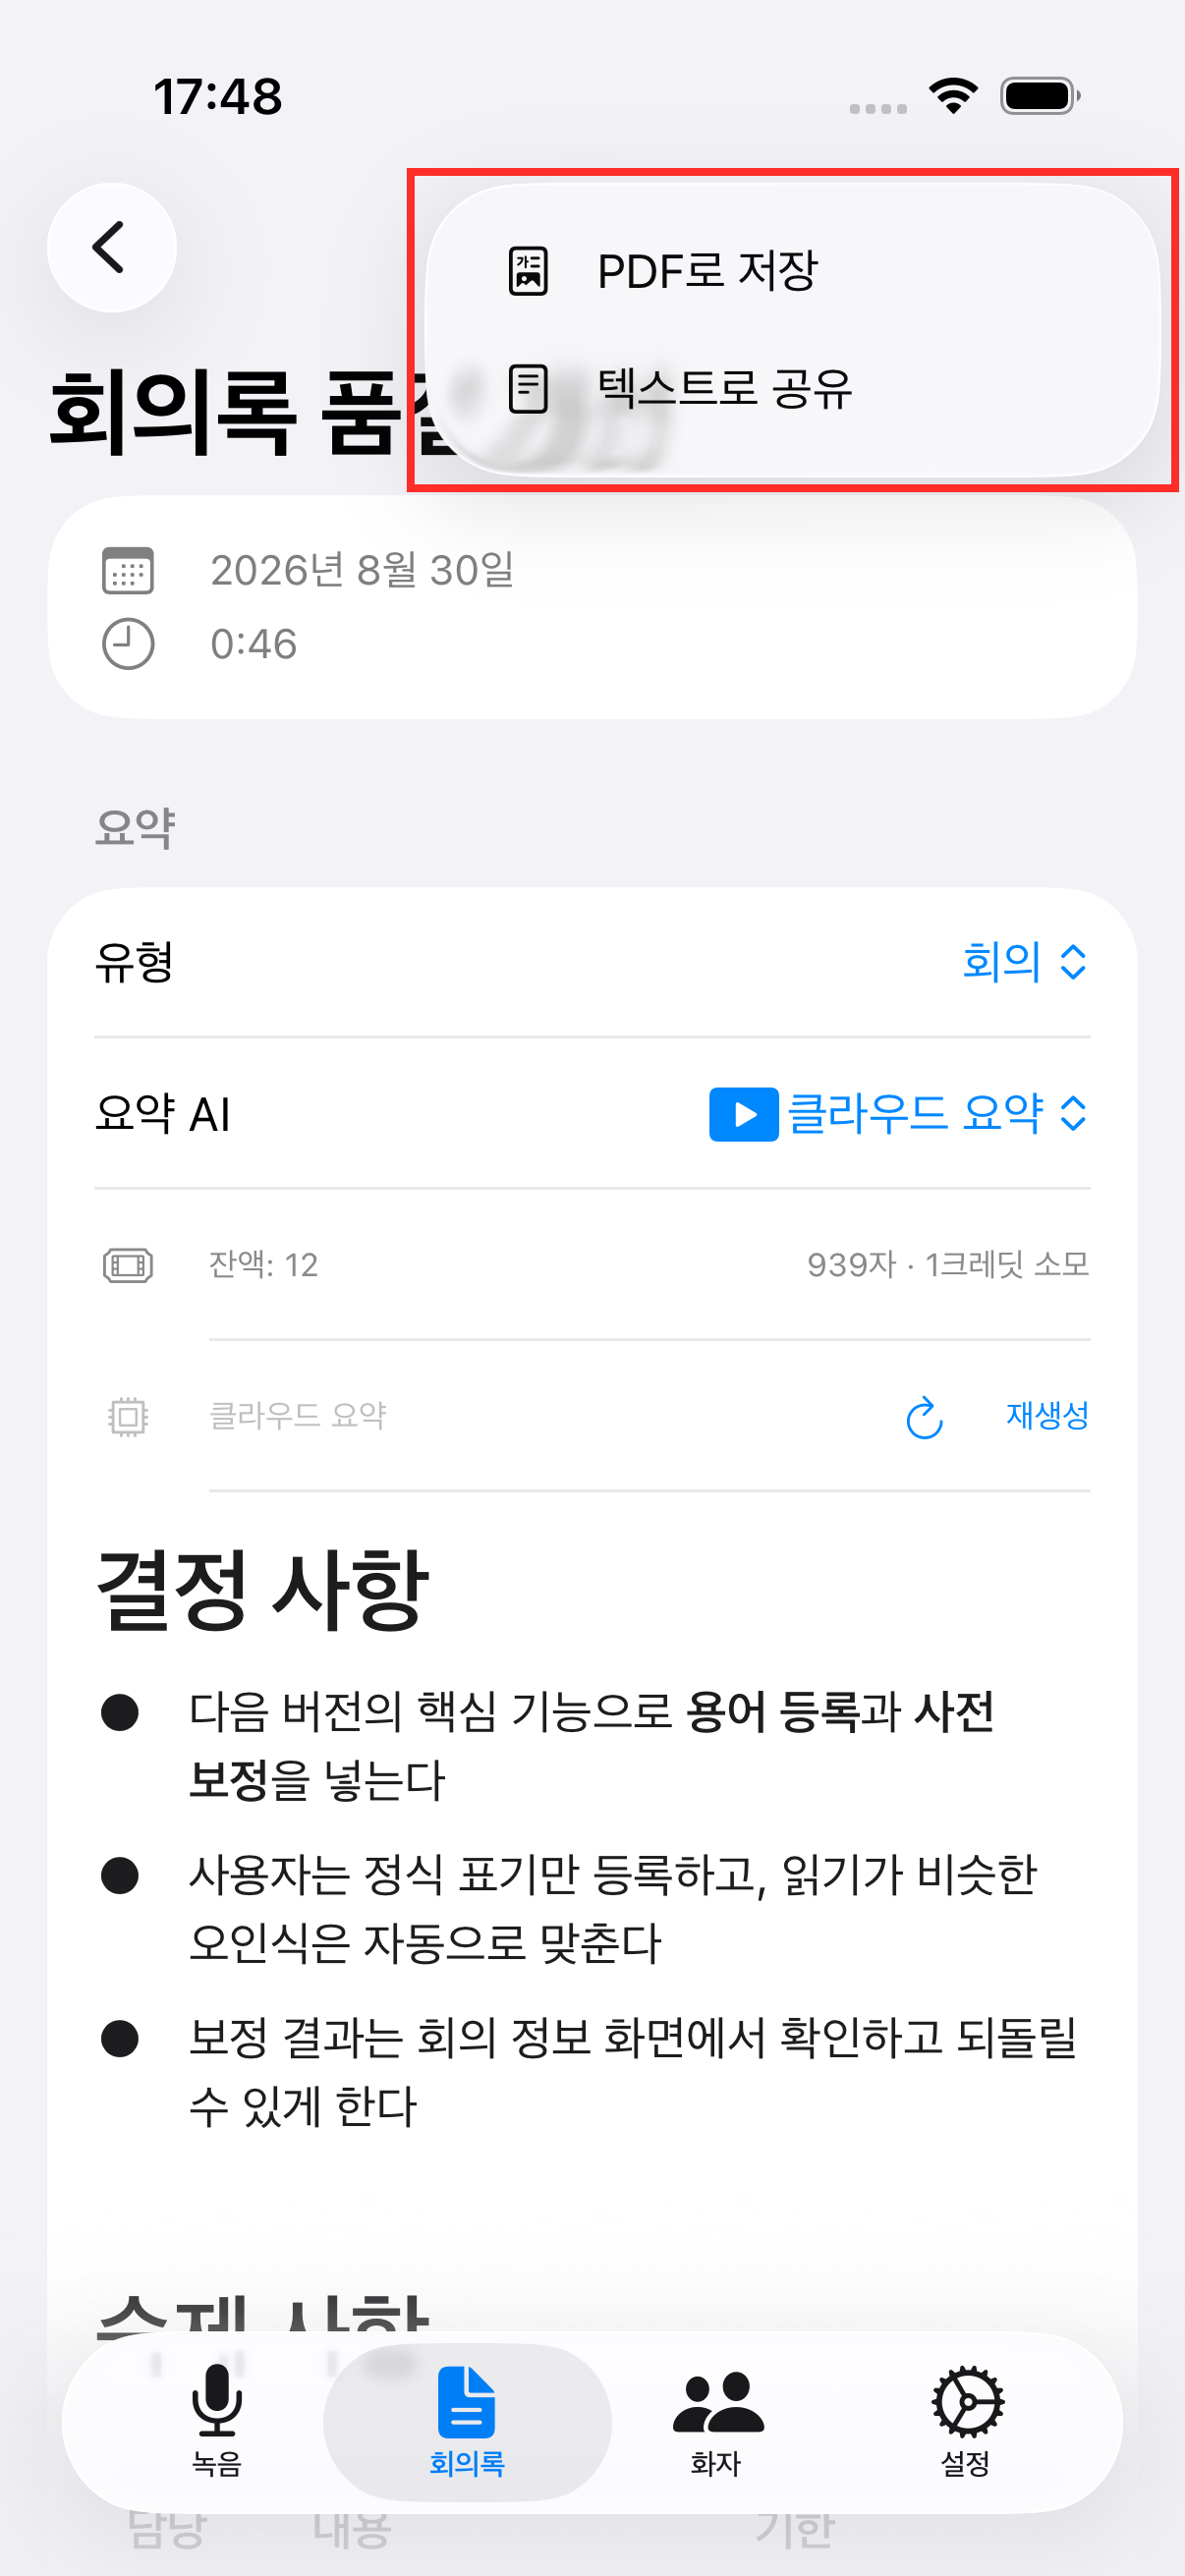
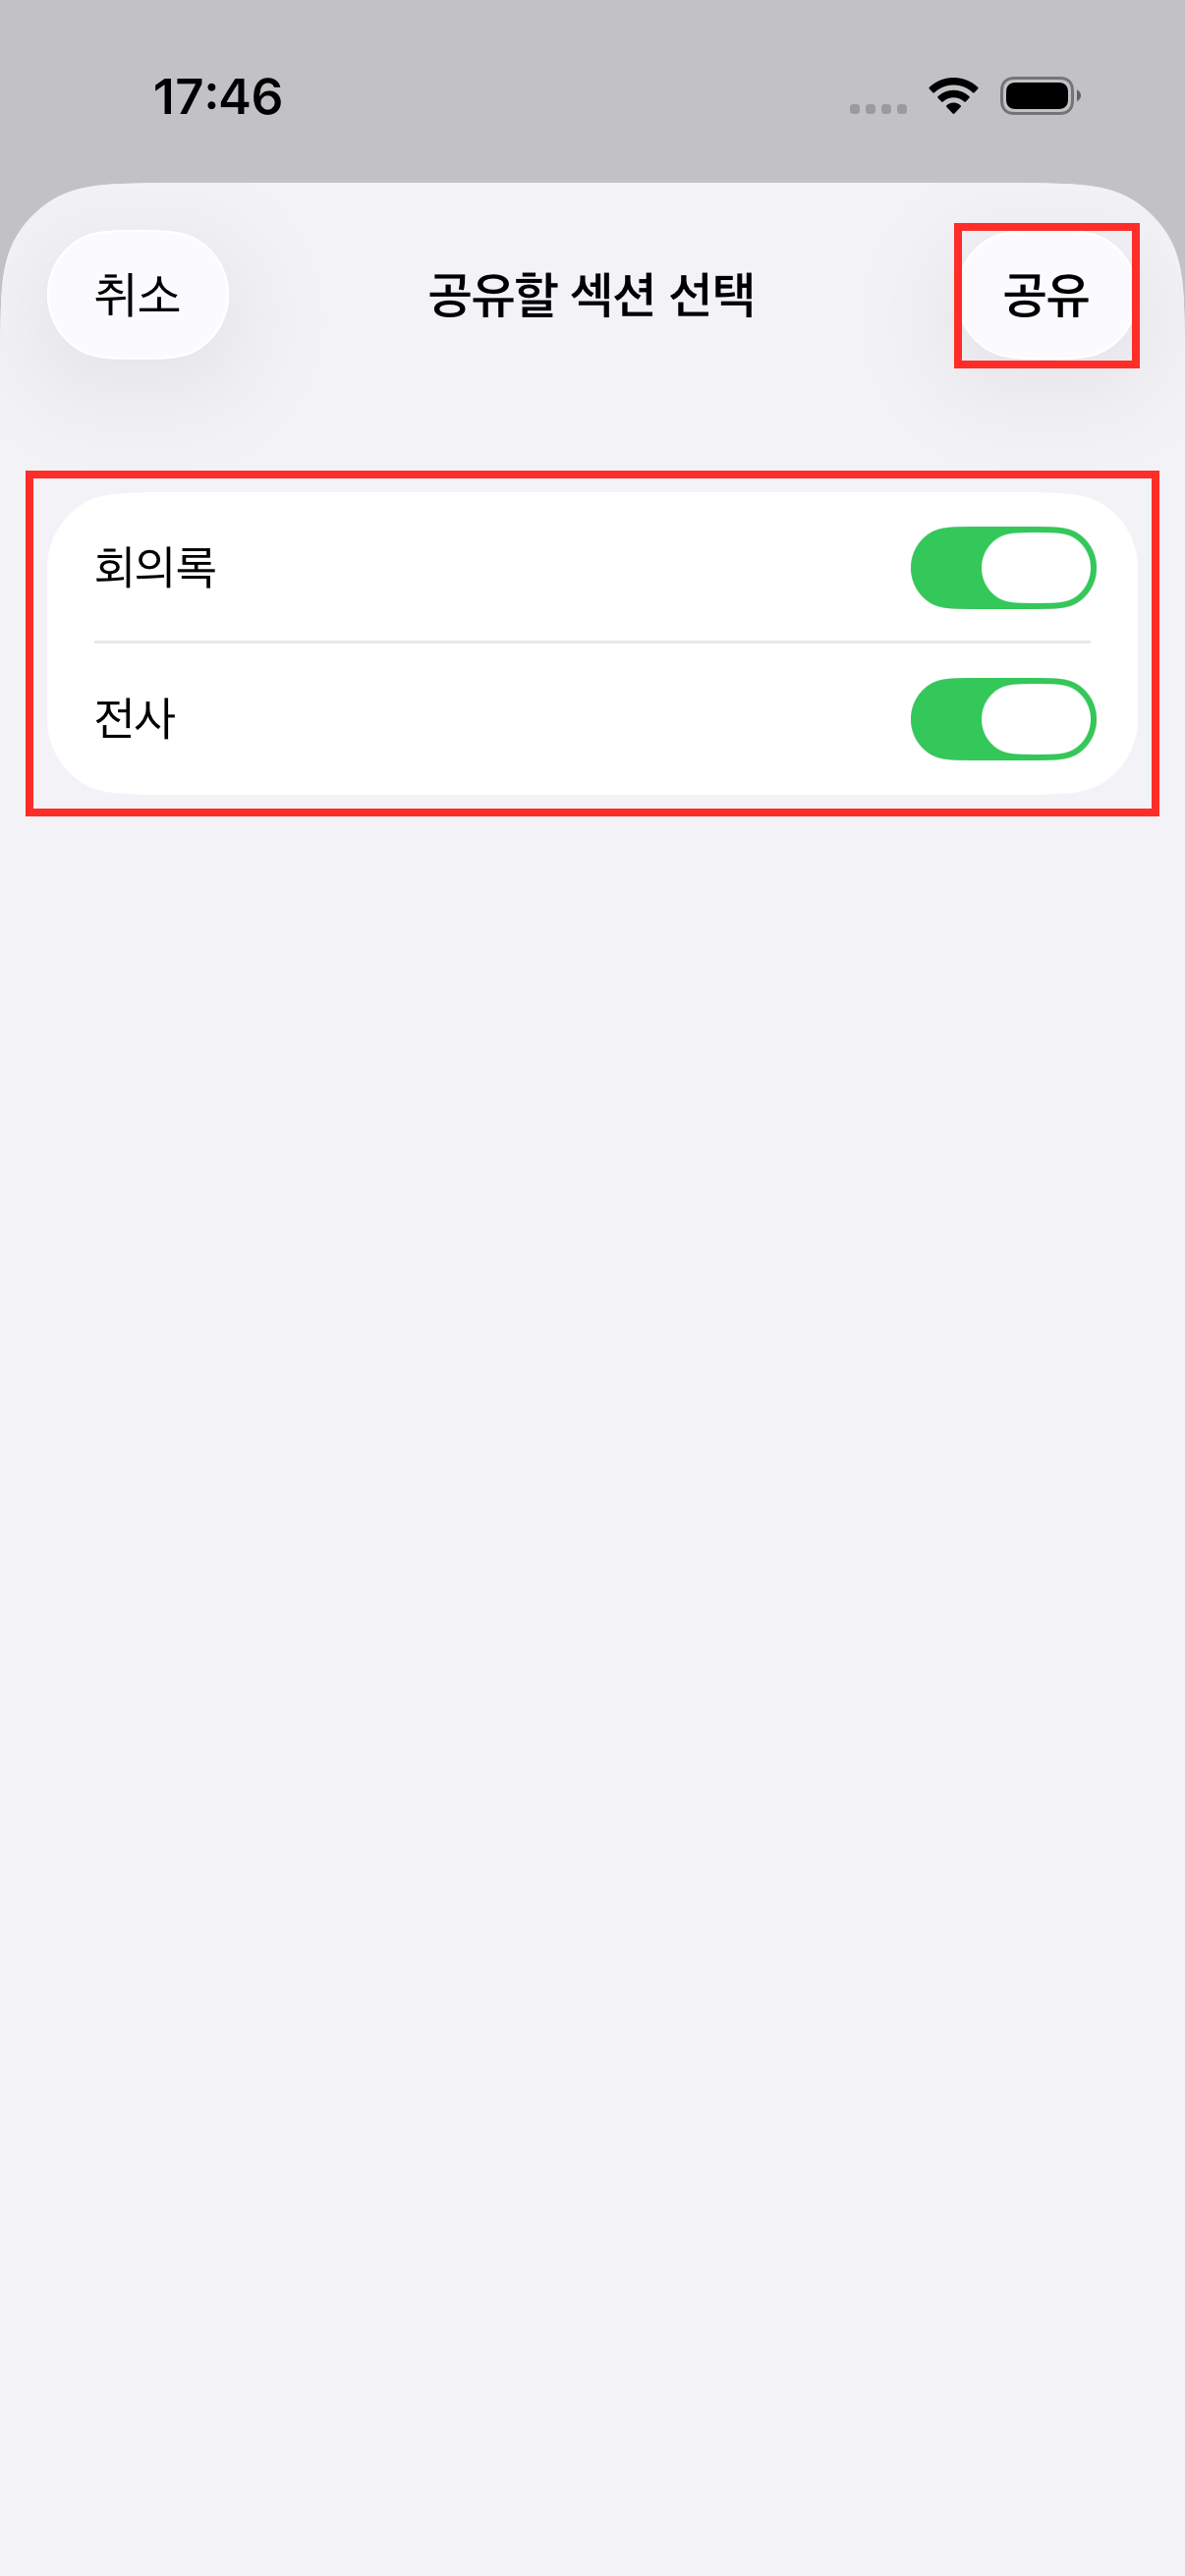
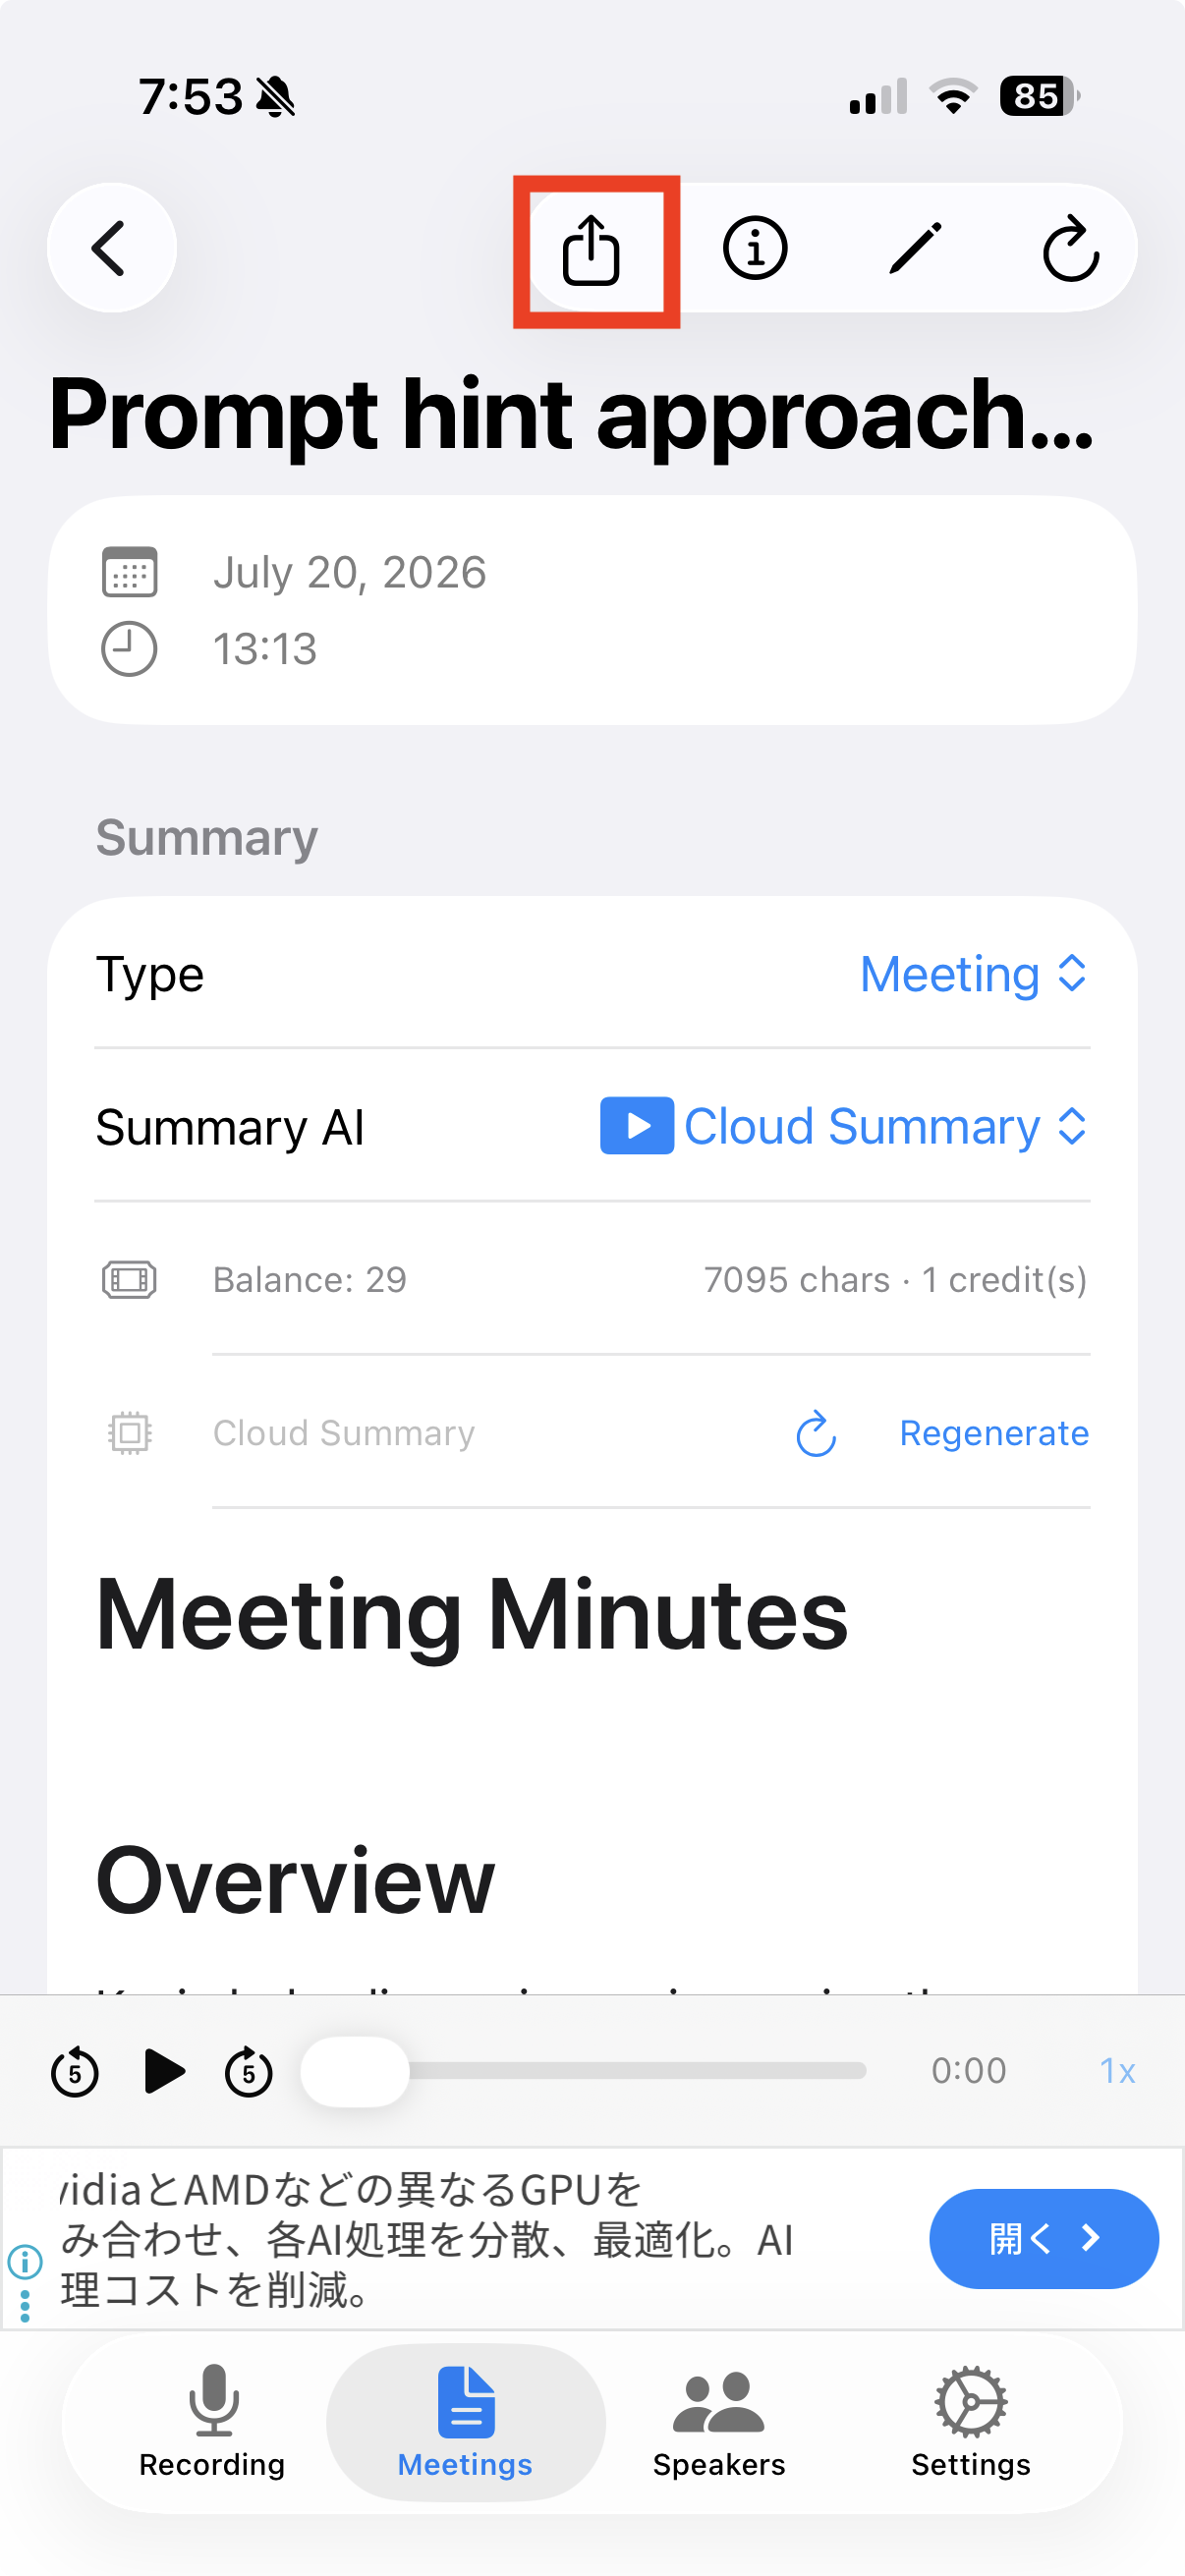
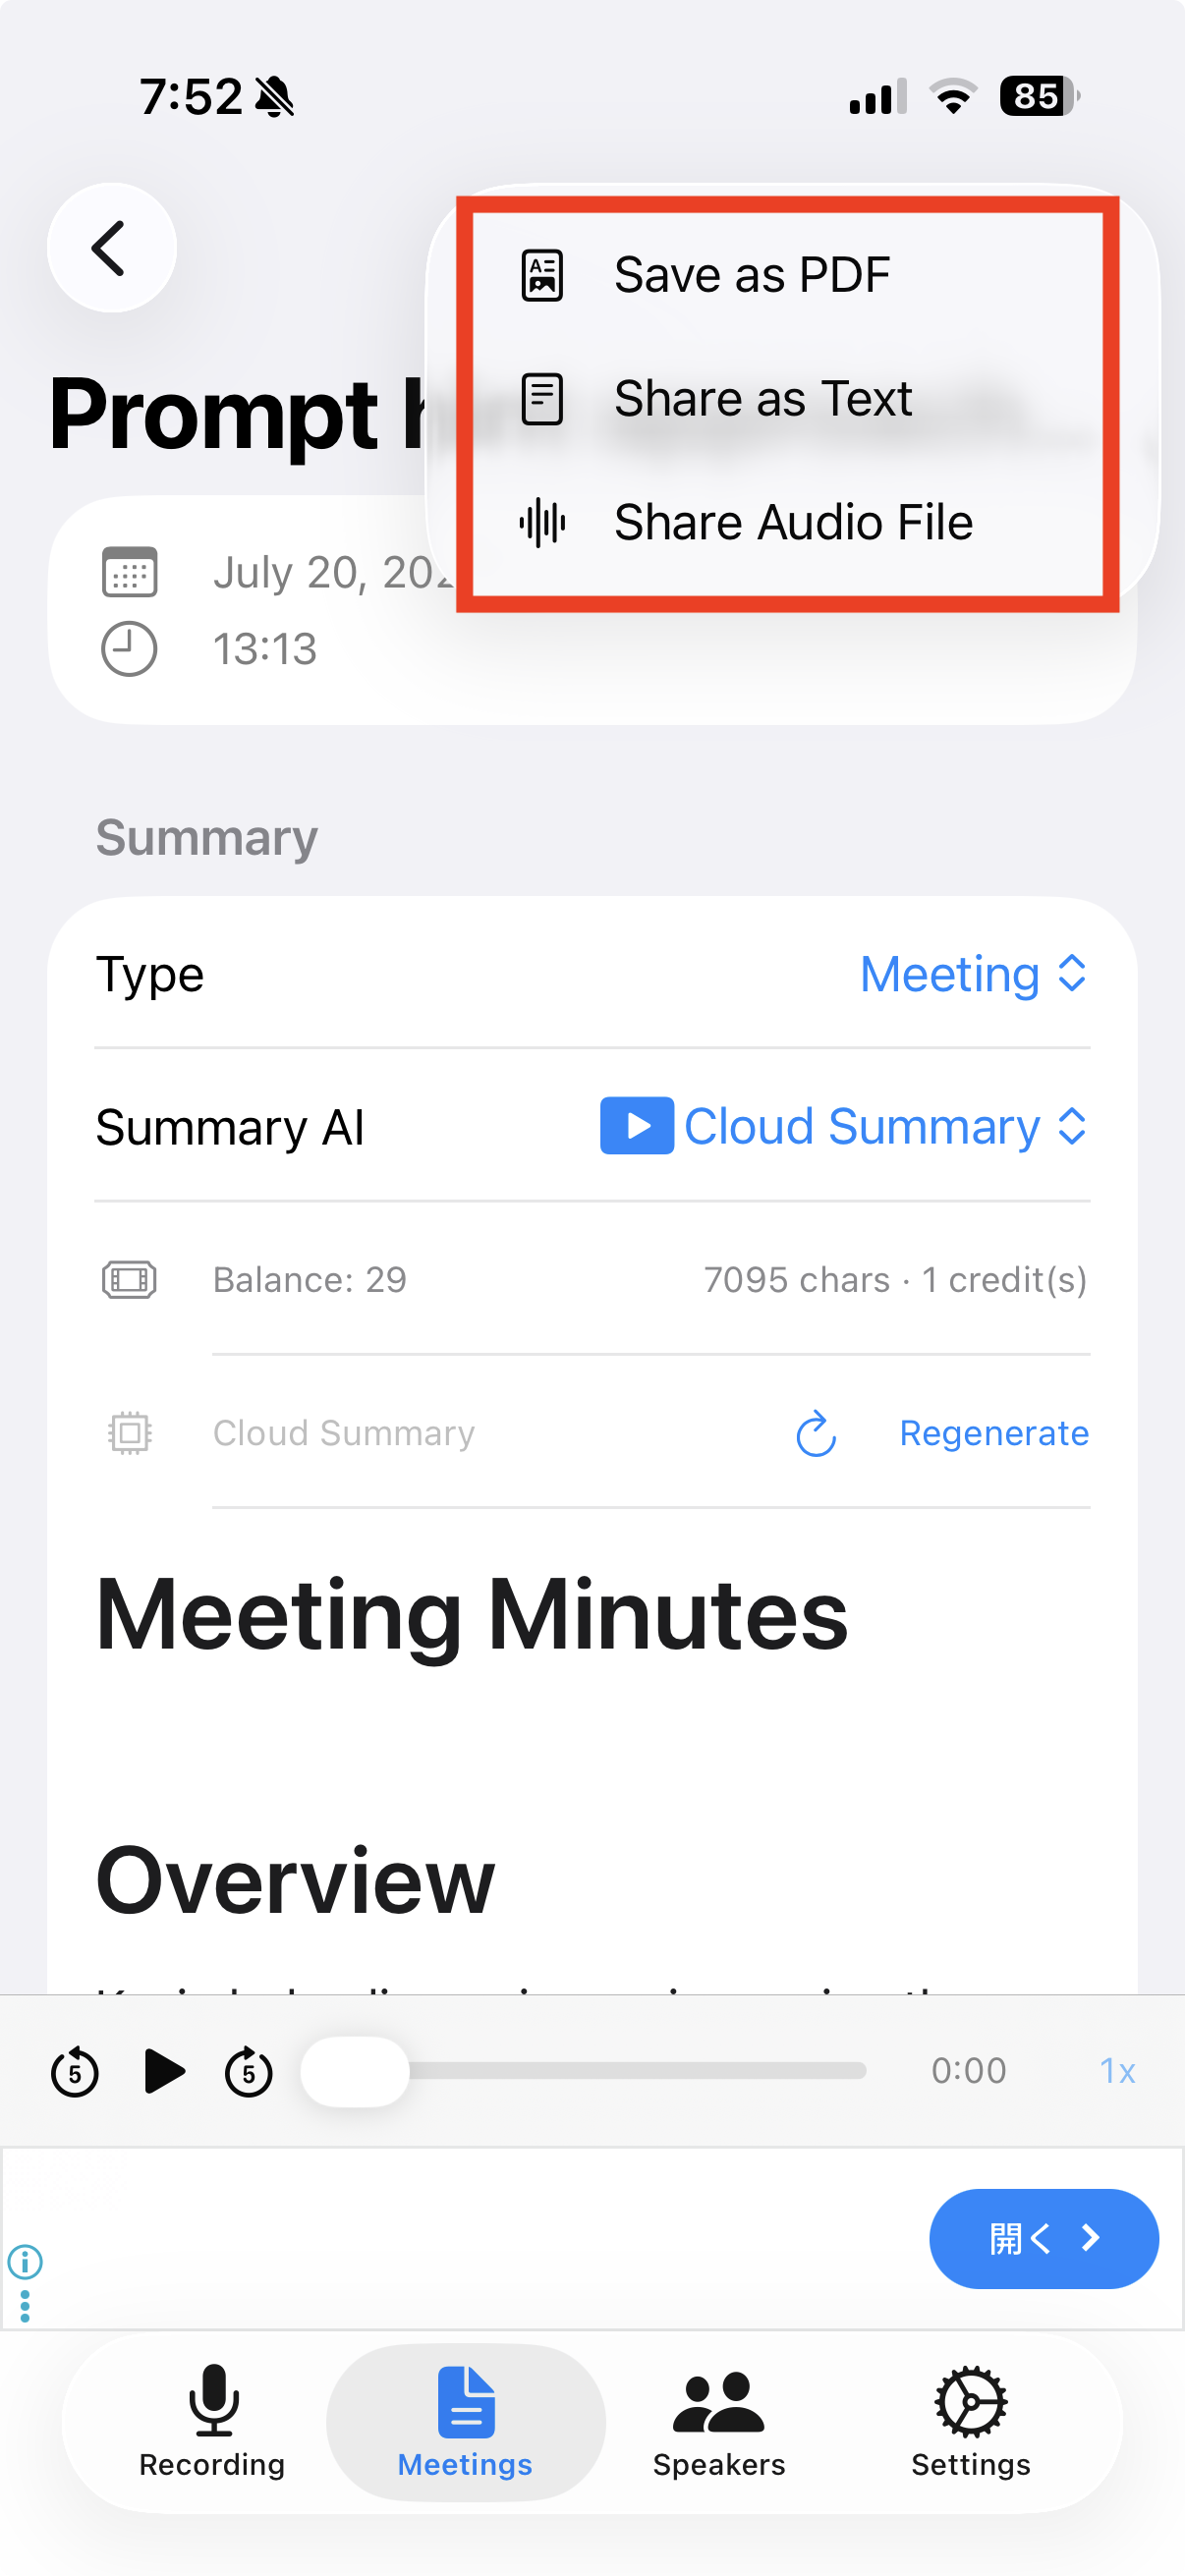
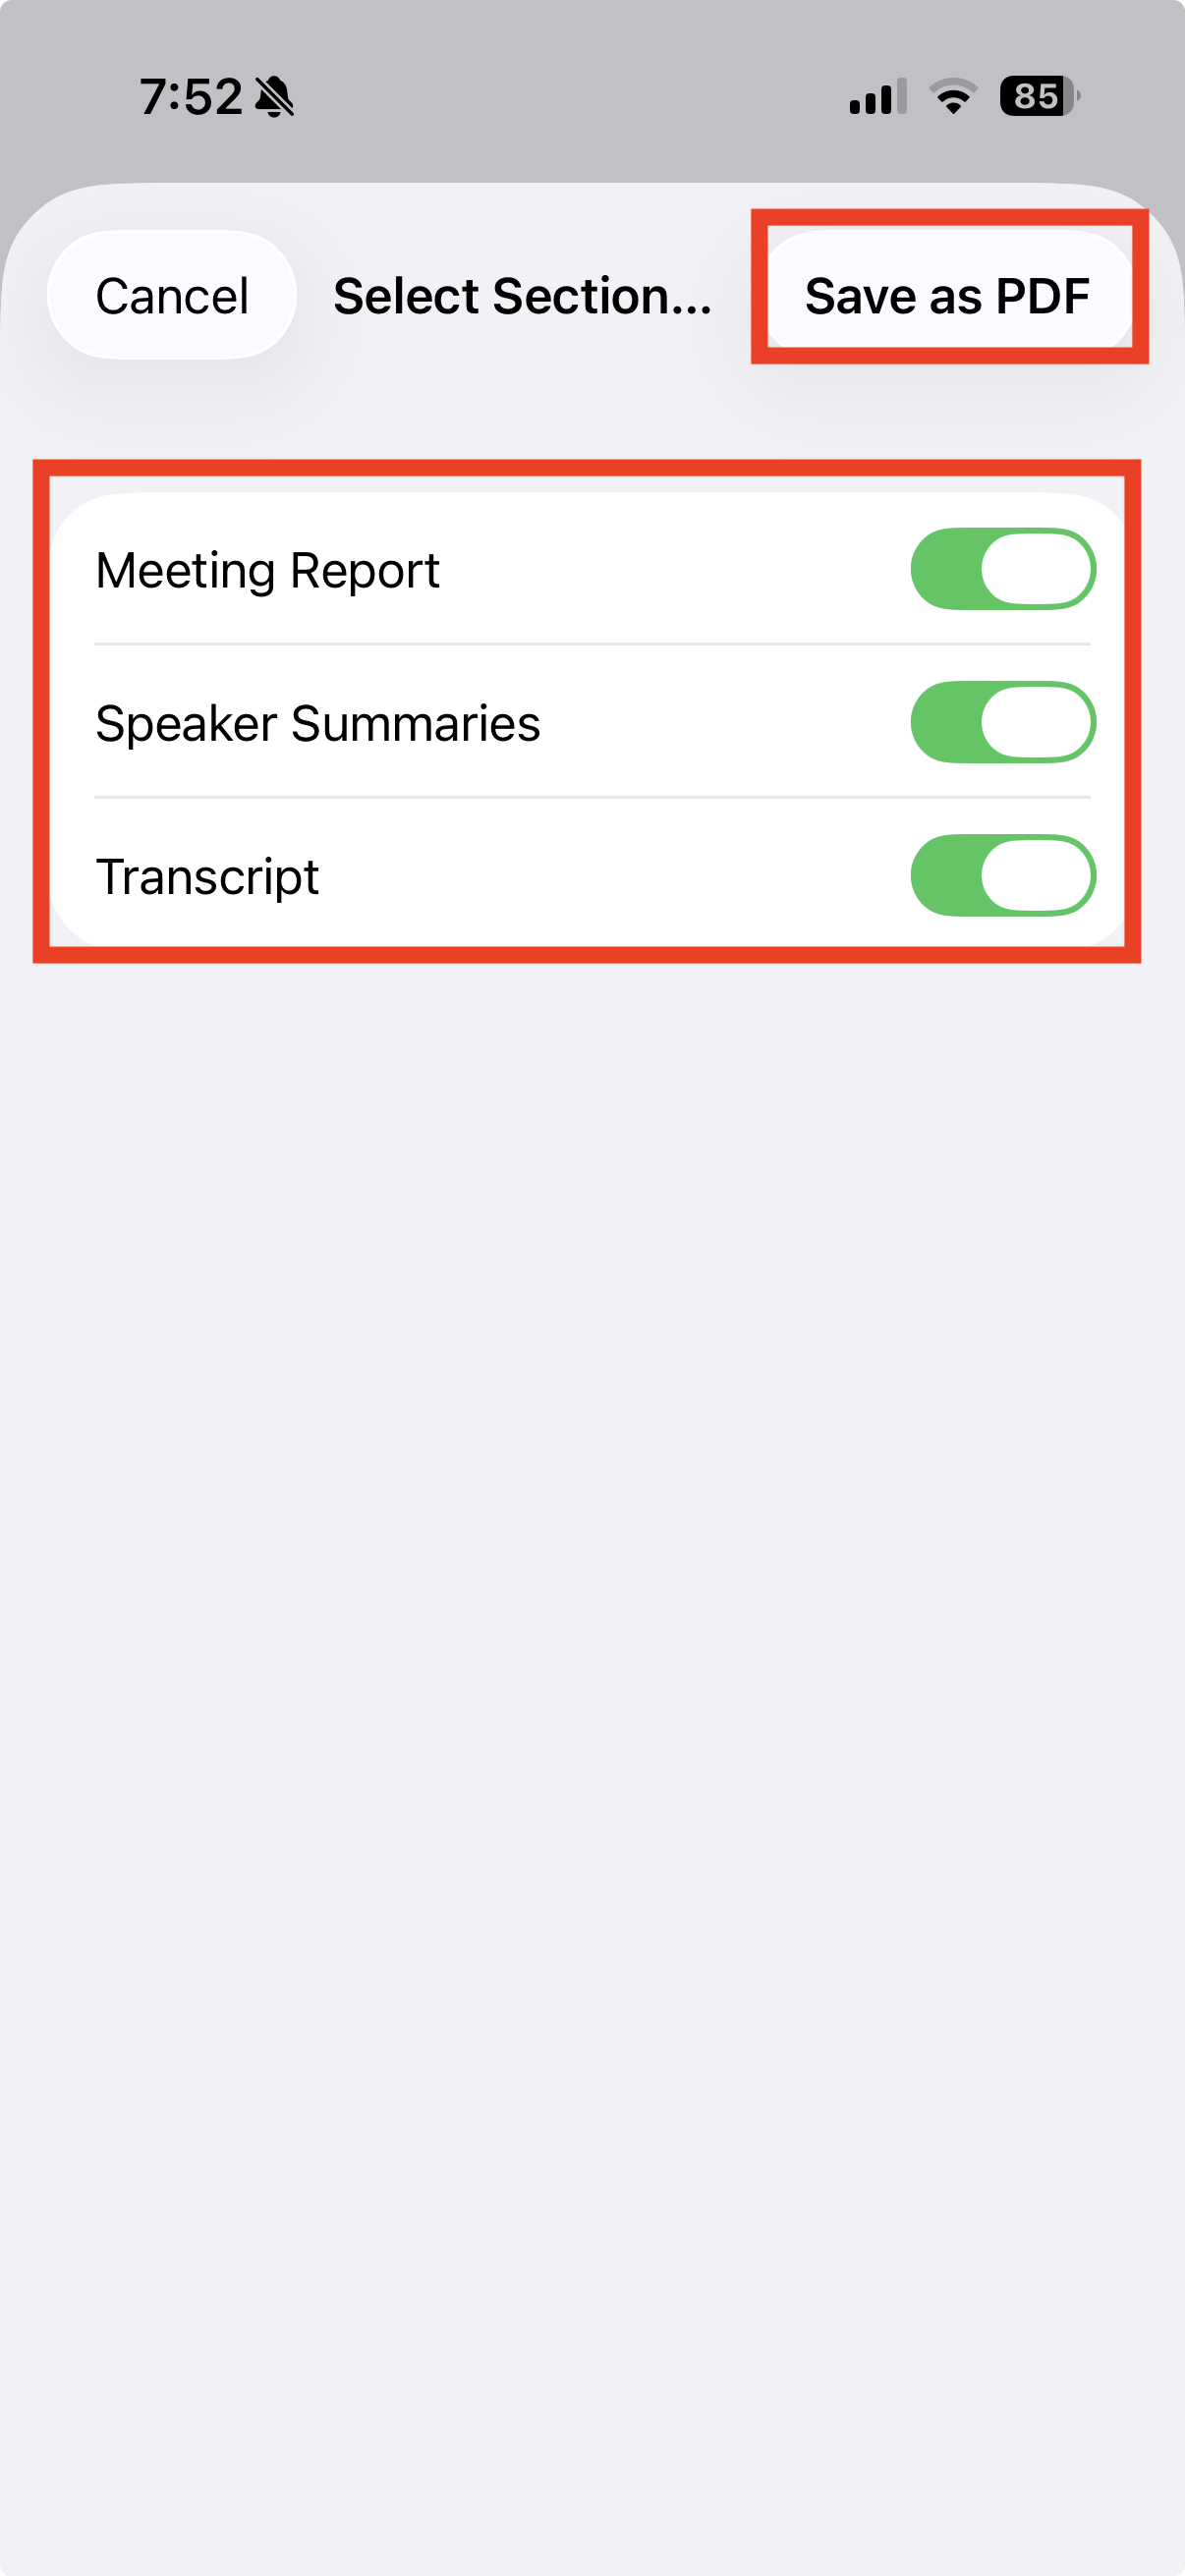
Use the share icon on the meeting detail screen to save as PDF, share as text, or share the audio file. For PDF and text sharing, you can choose which sections to include (meeting notes / speaker summaries / transcript) individually.
📷 images/export-1-1-en.png
📷 images/export-1-2-en.png
📷 images/export-1-3-en.png
🗂️ Folders & Search
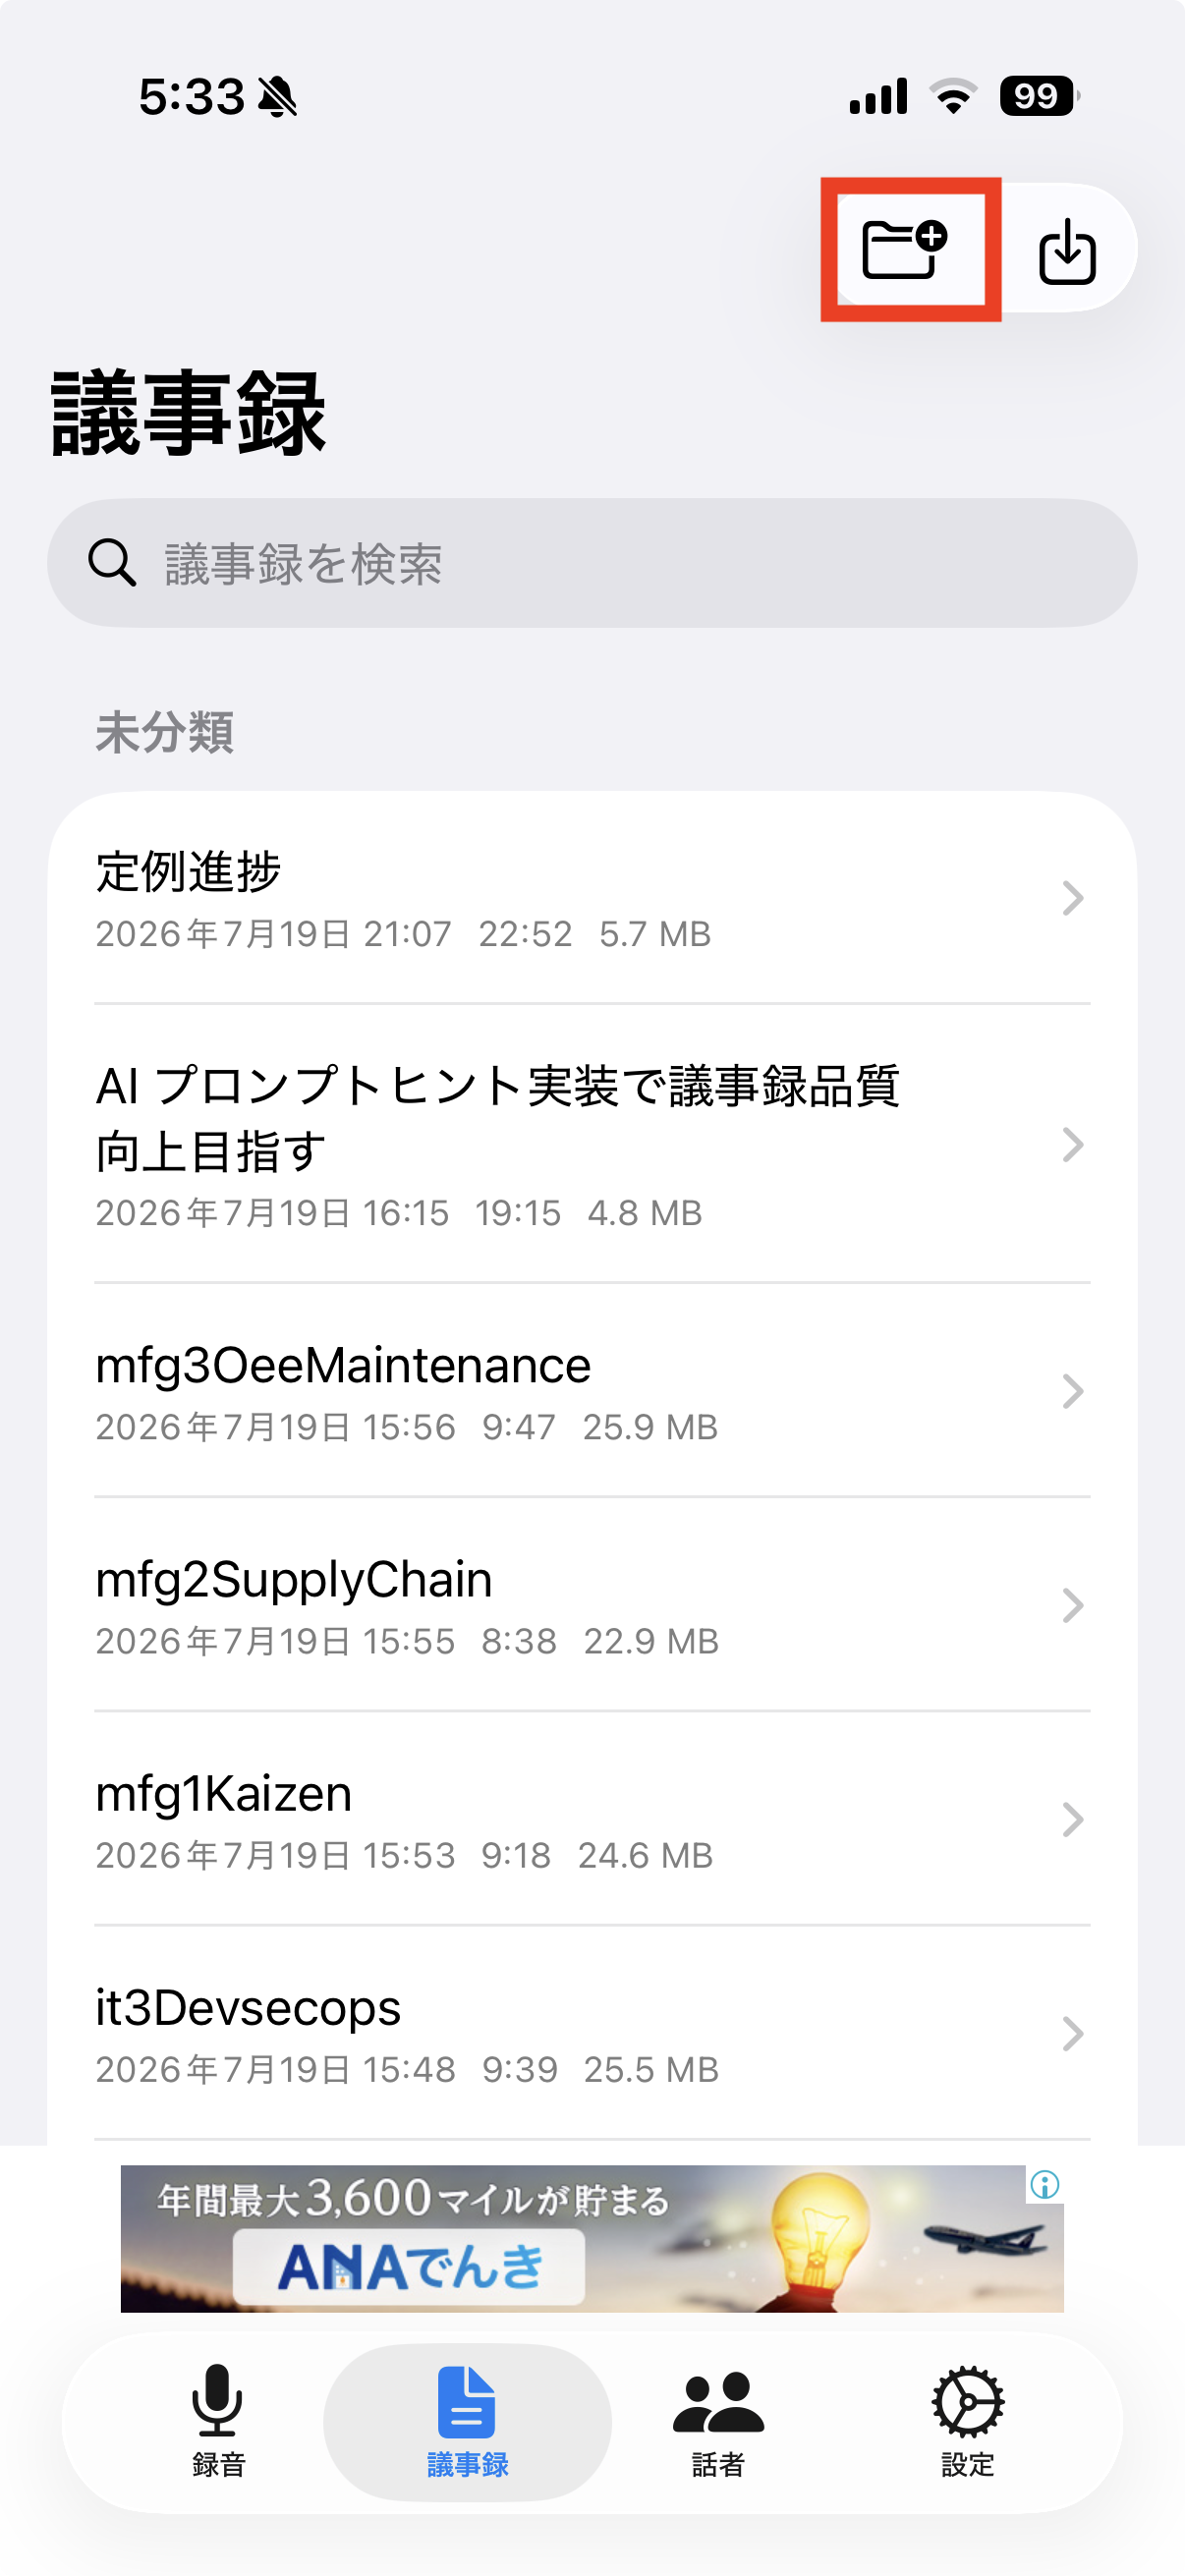
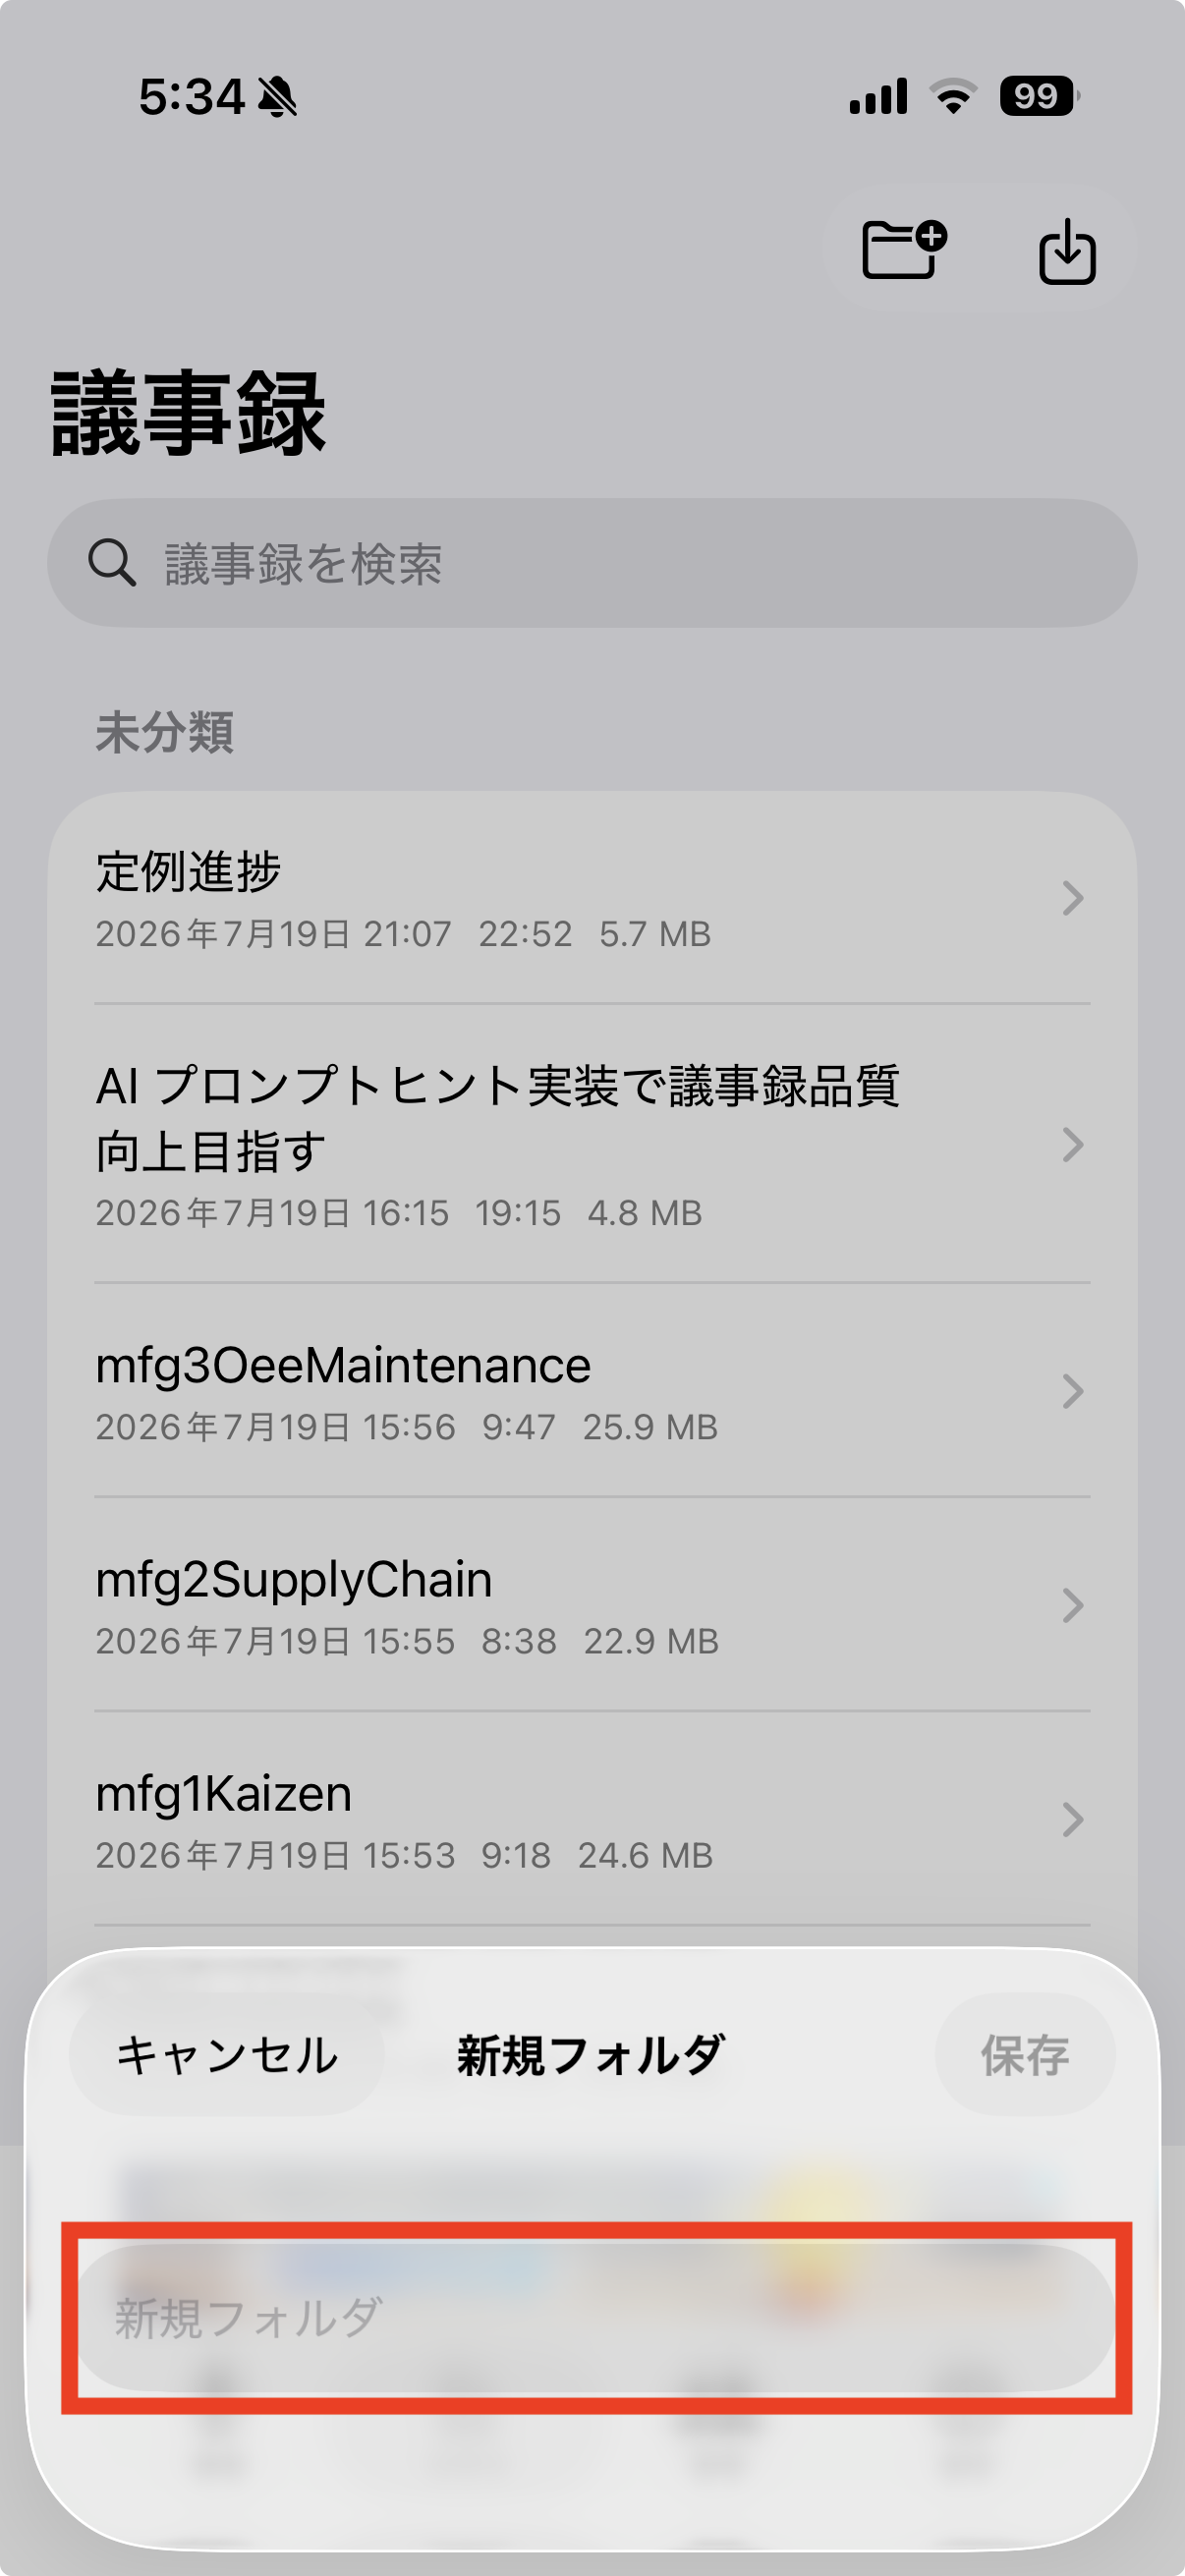
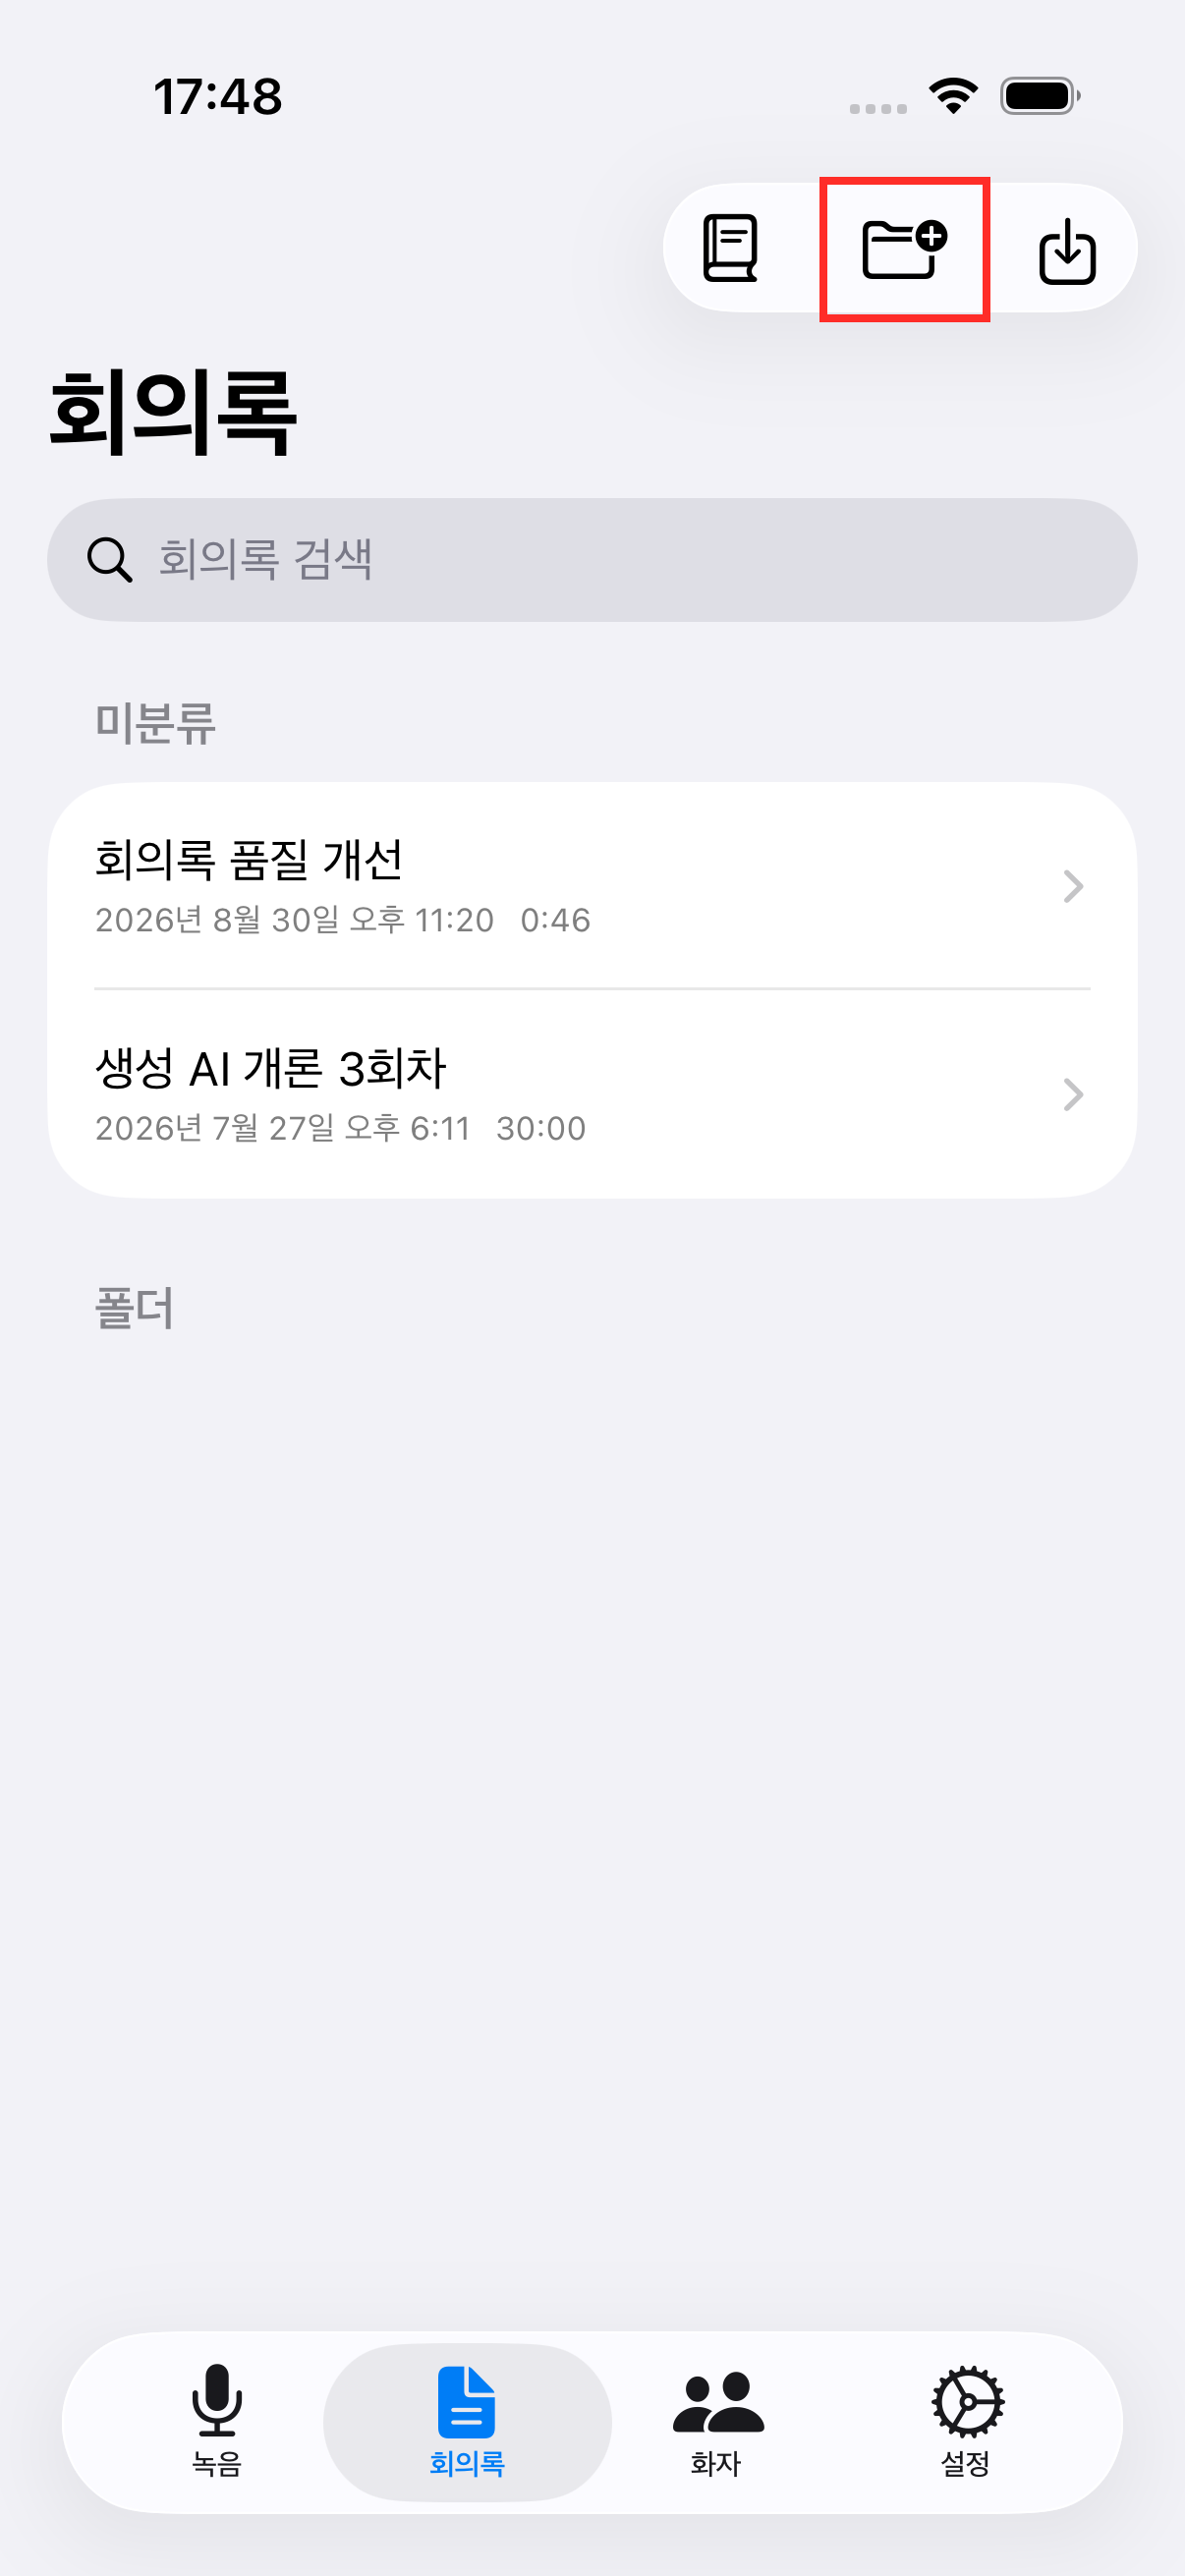
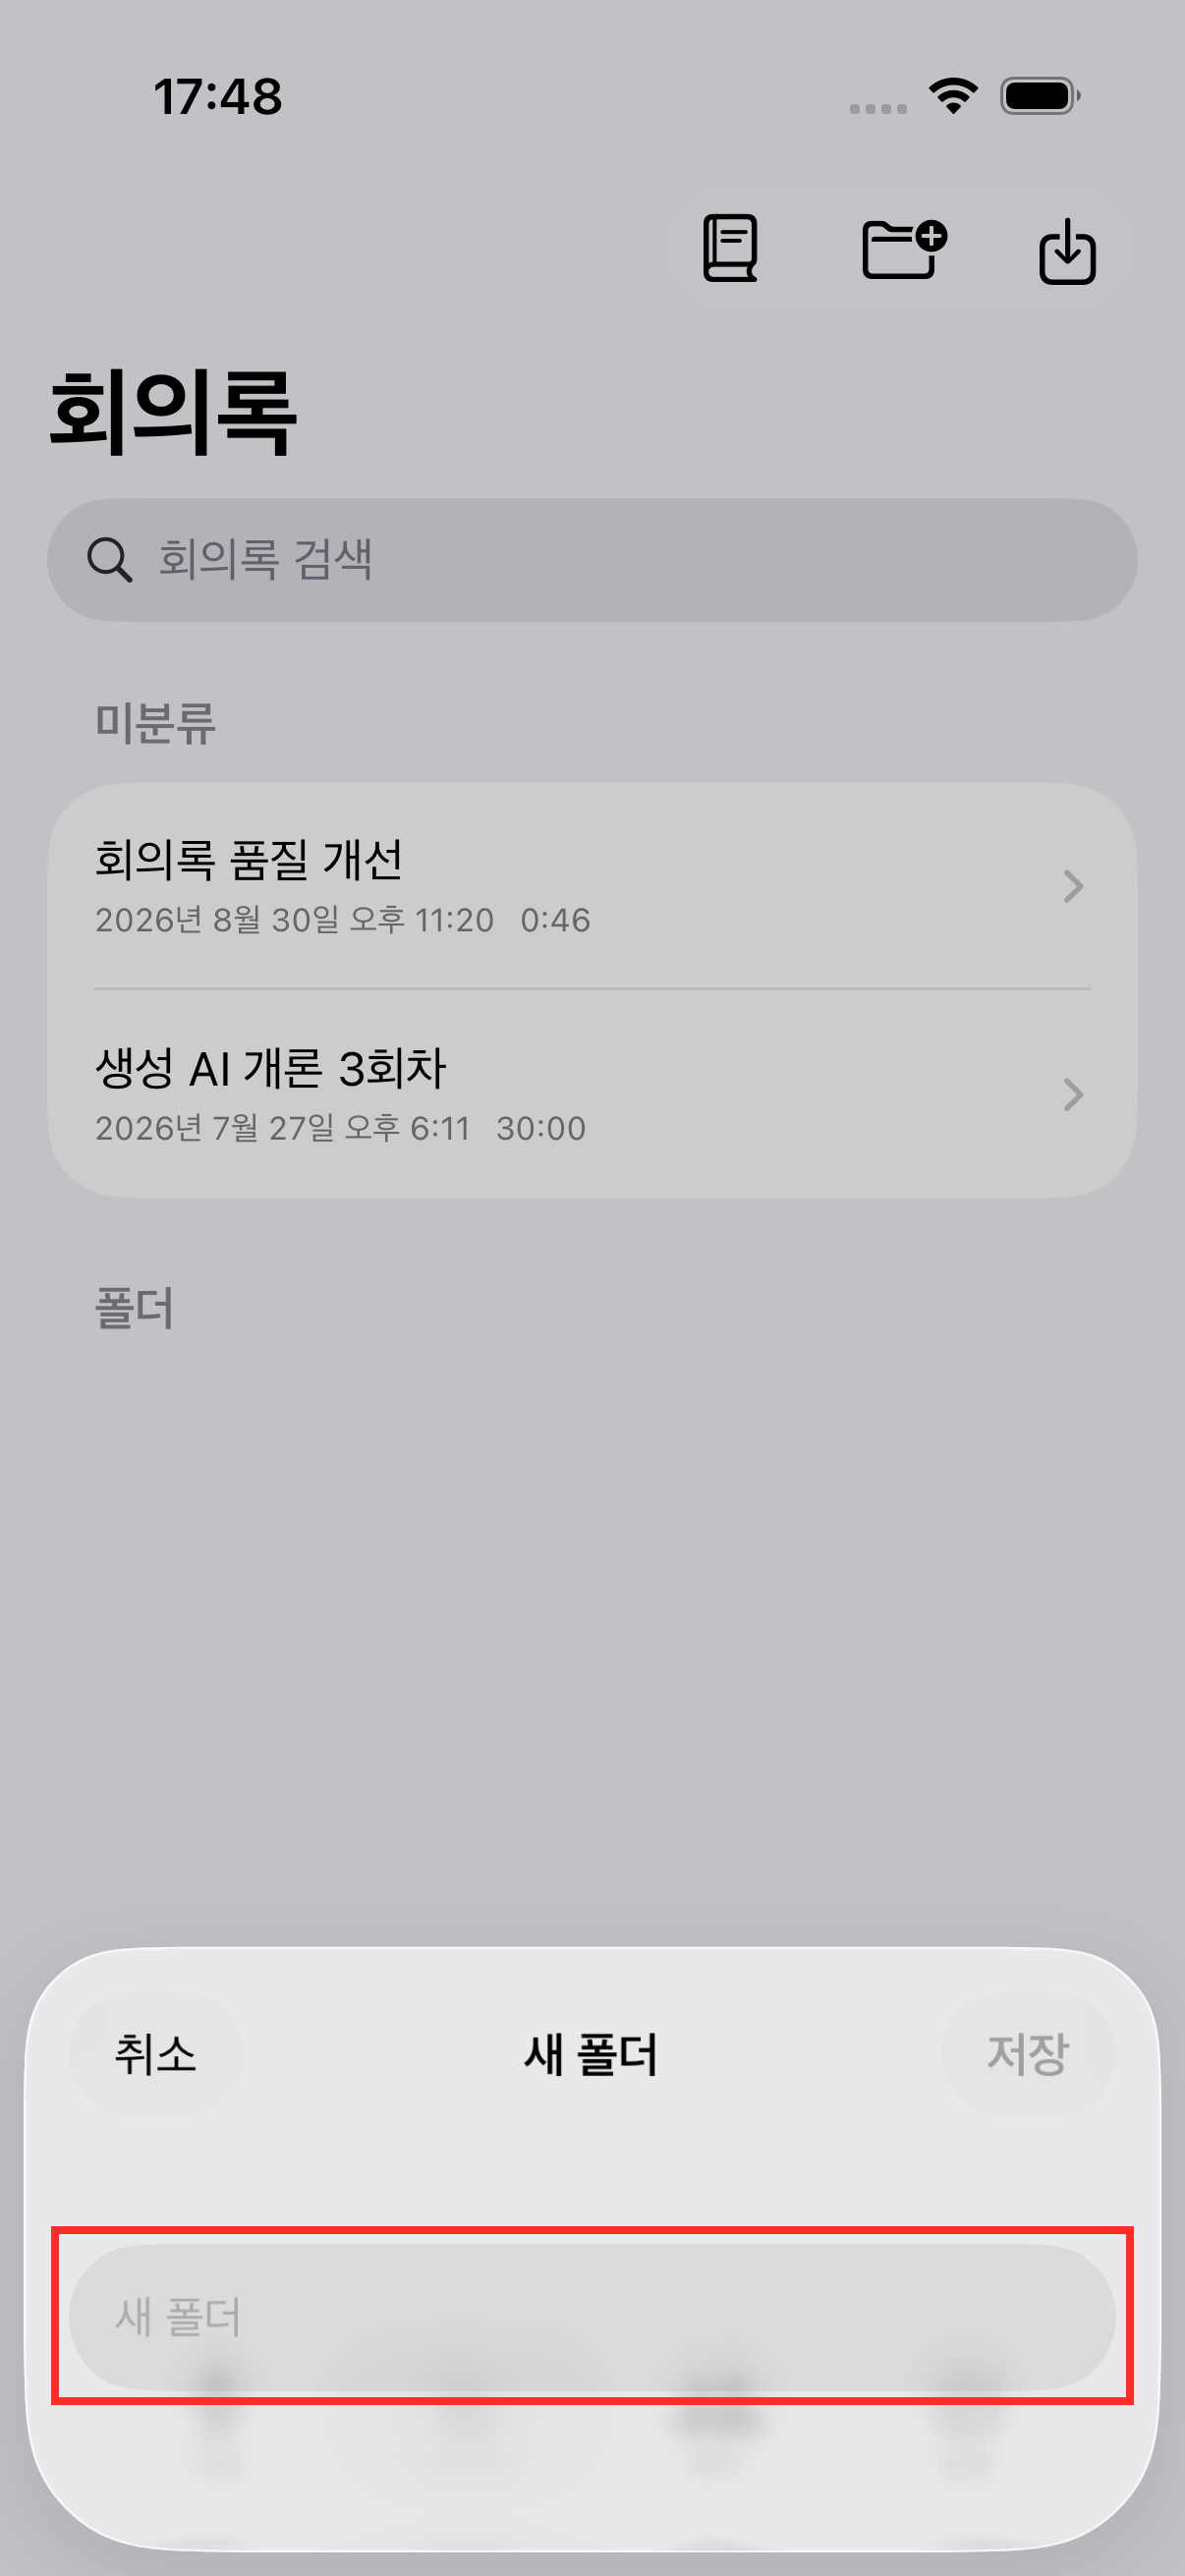
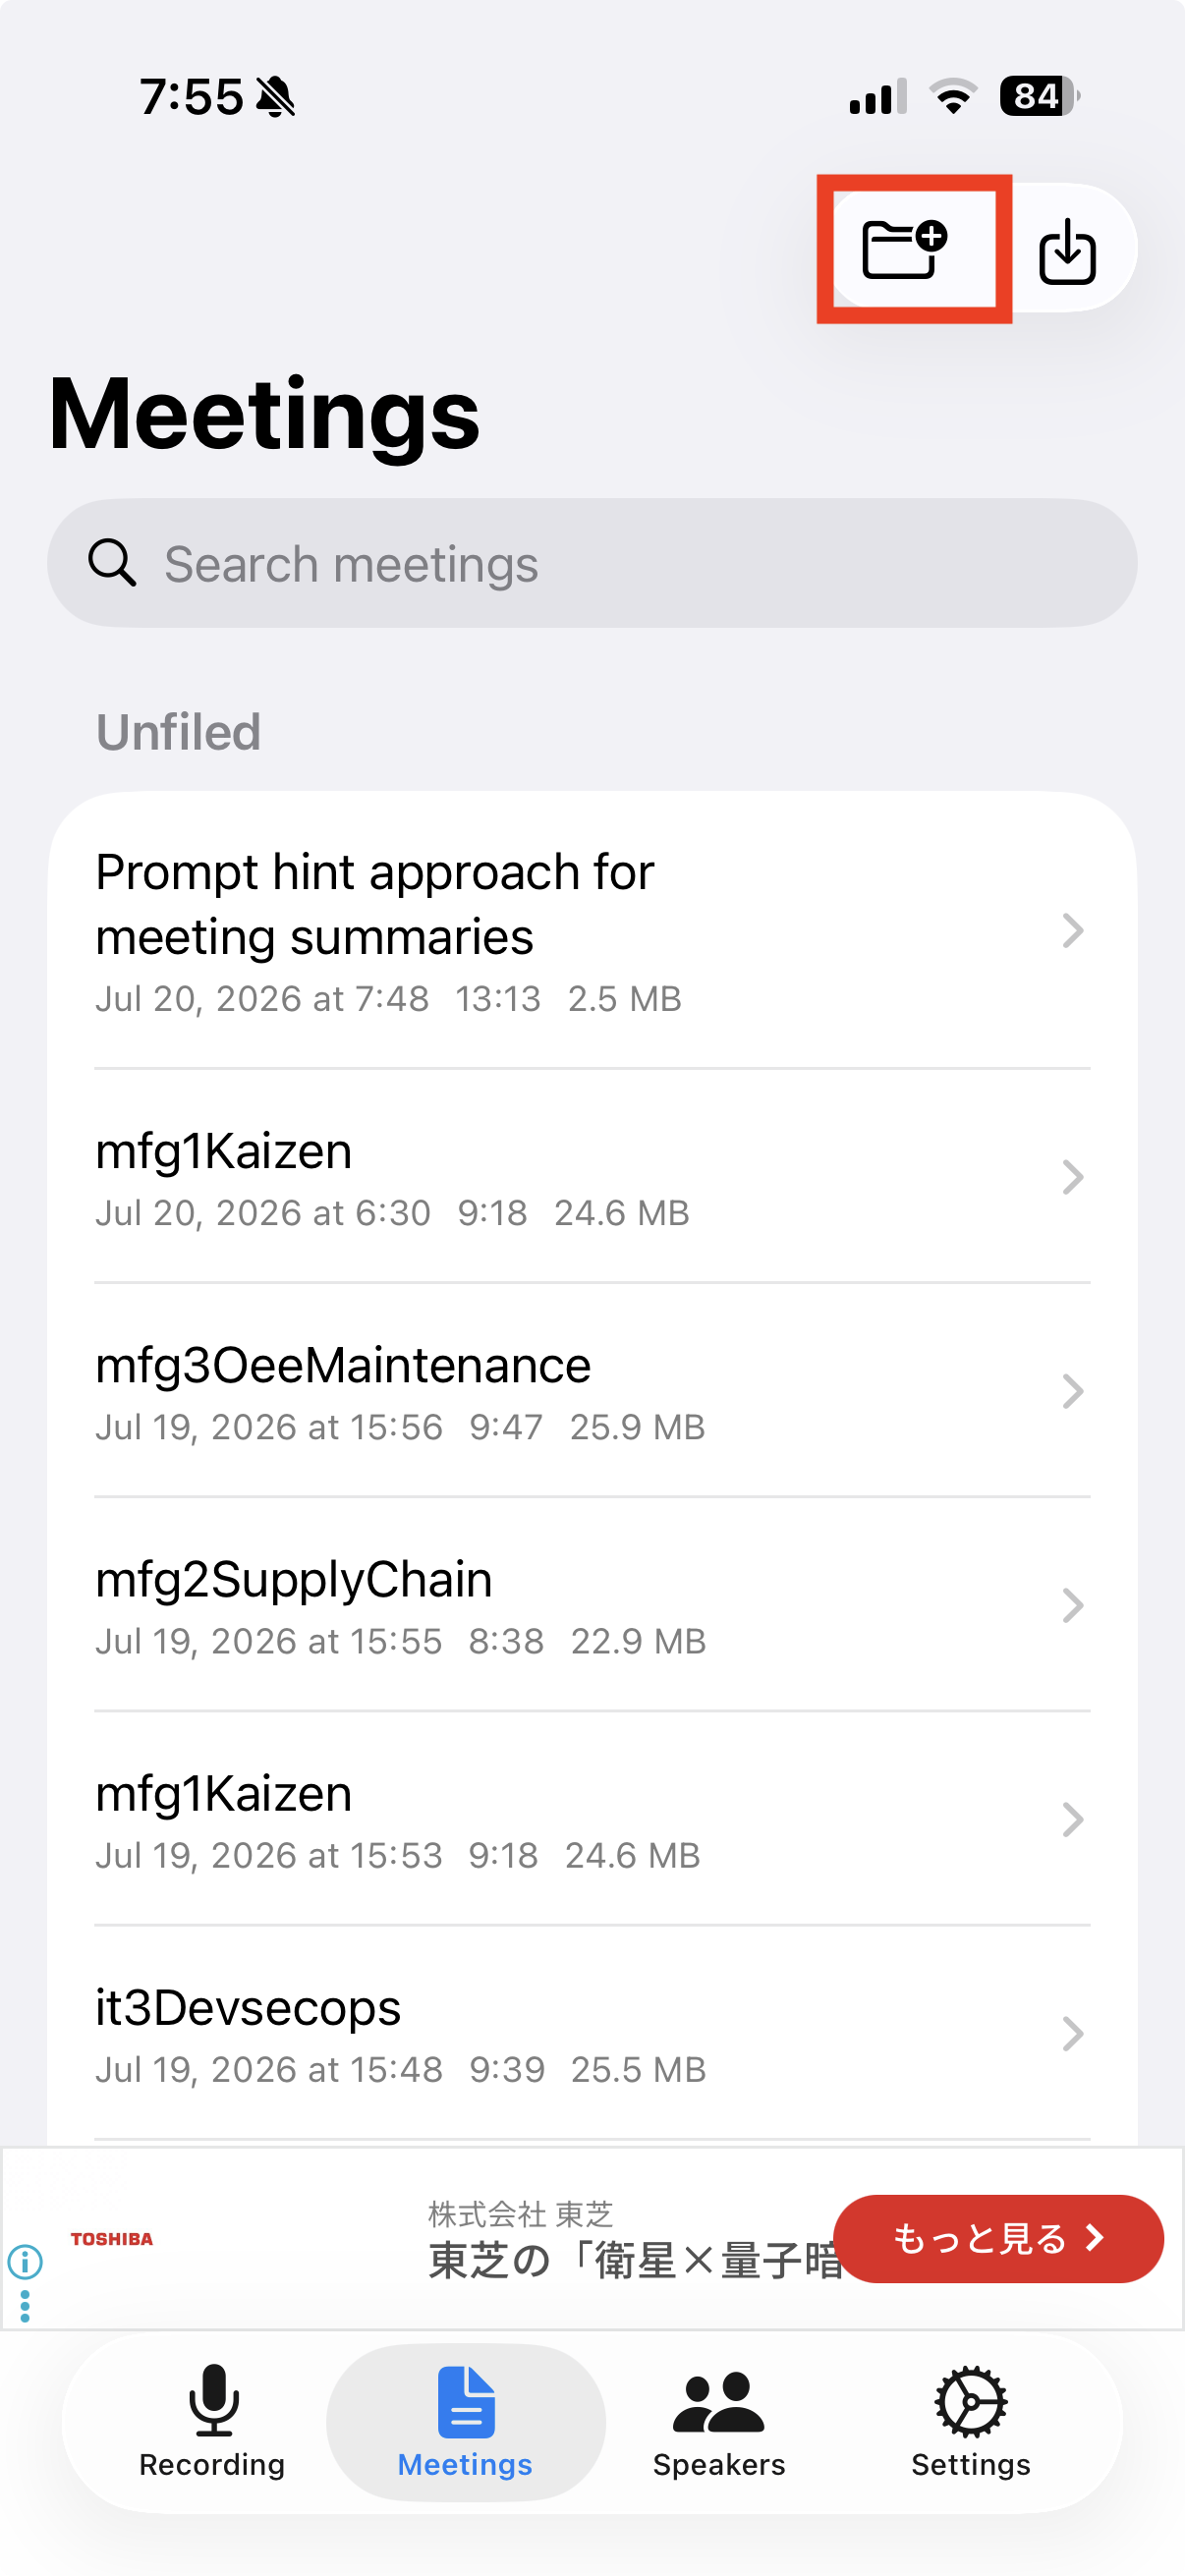
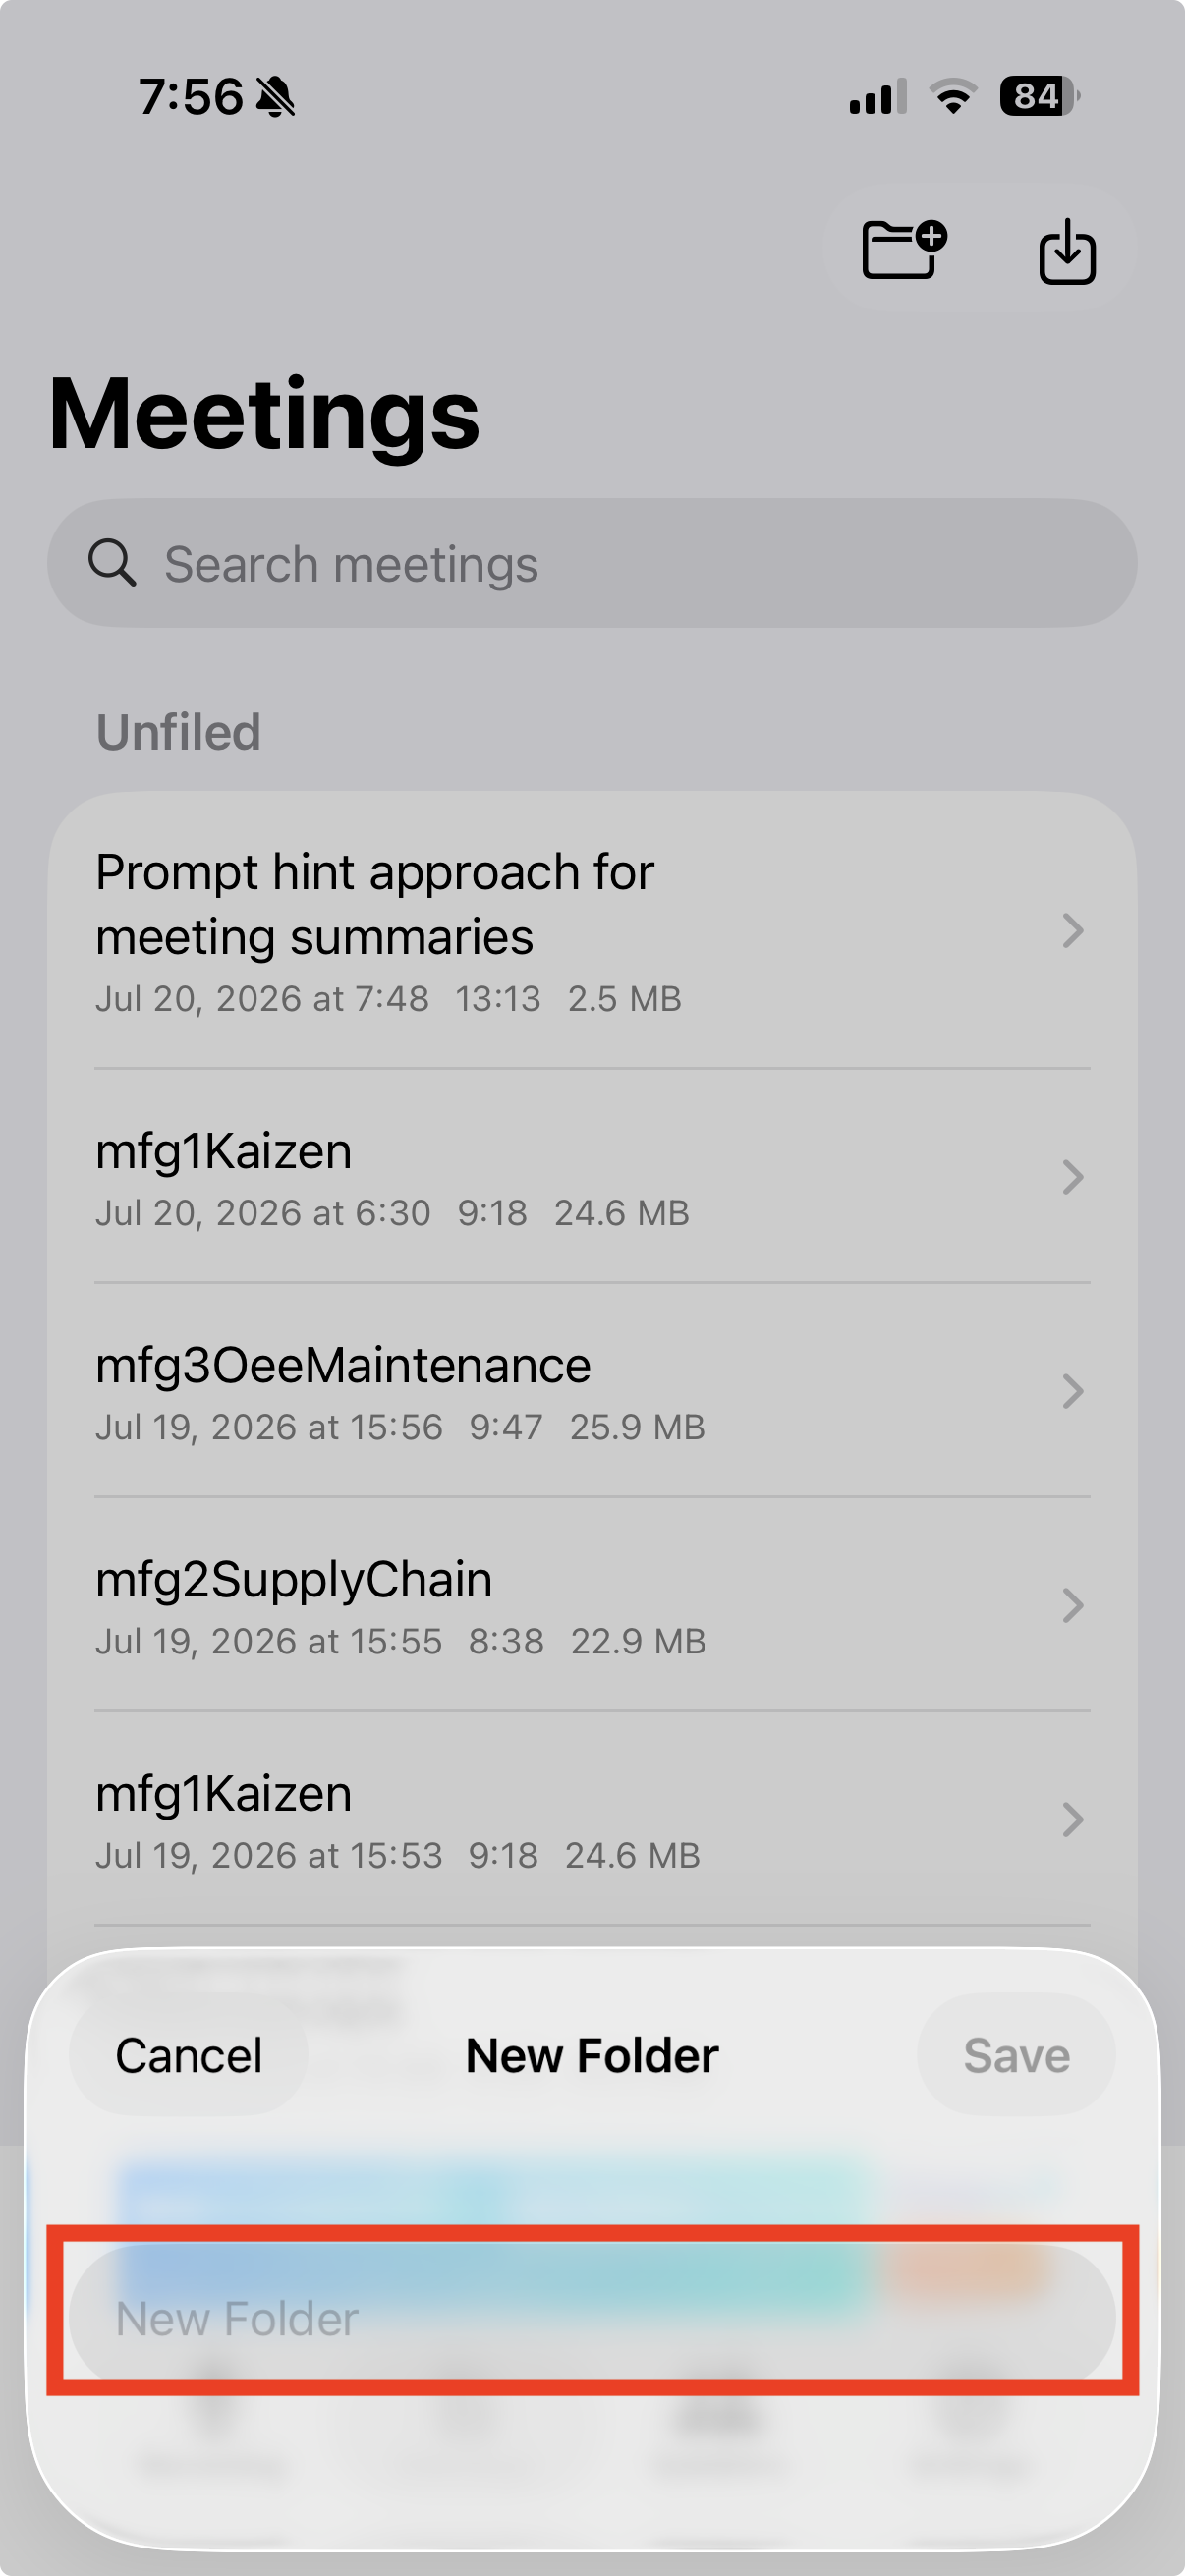
Create a new folder from the folder icon at the top of the Meetings tab. Long-press a meeting to move it into any folder. Deleting a folder never deletes the meetings inside it — they simply move back to "Unfiled," so it's safe to reorganize freely.
📷 images/folders-1-1-en.png
📷 images/folders-1-2-en.png
The search bar searches across titles, summaries, and the full transcript, and shows matching snippets in the results.
⚙️ Settings
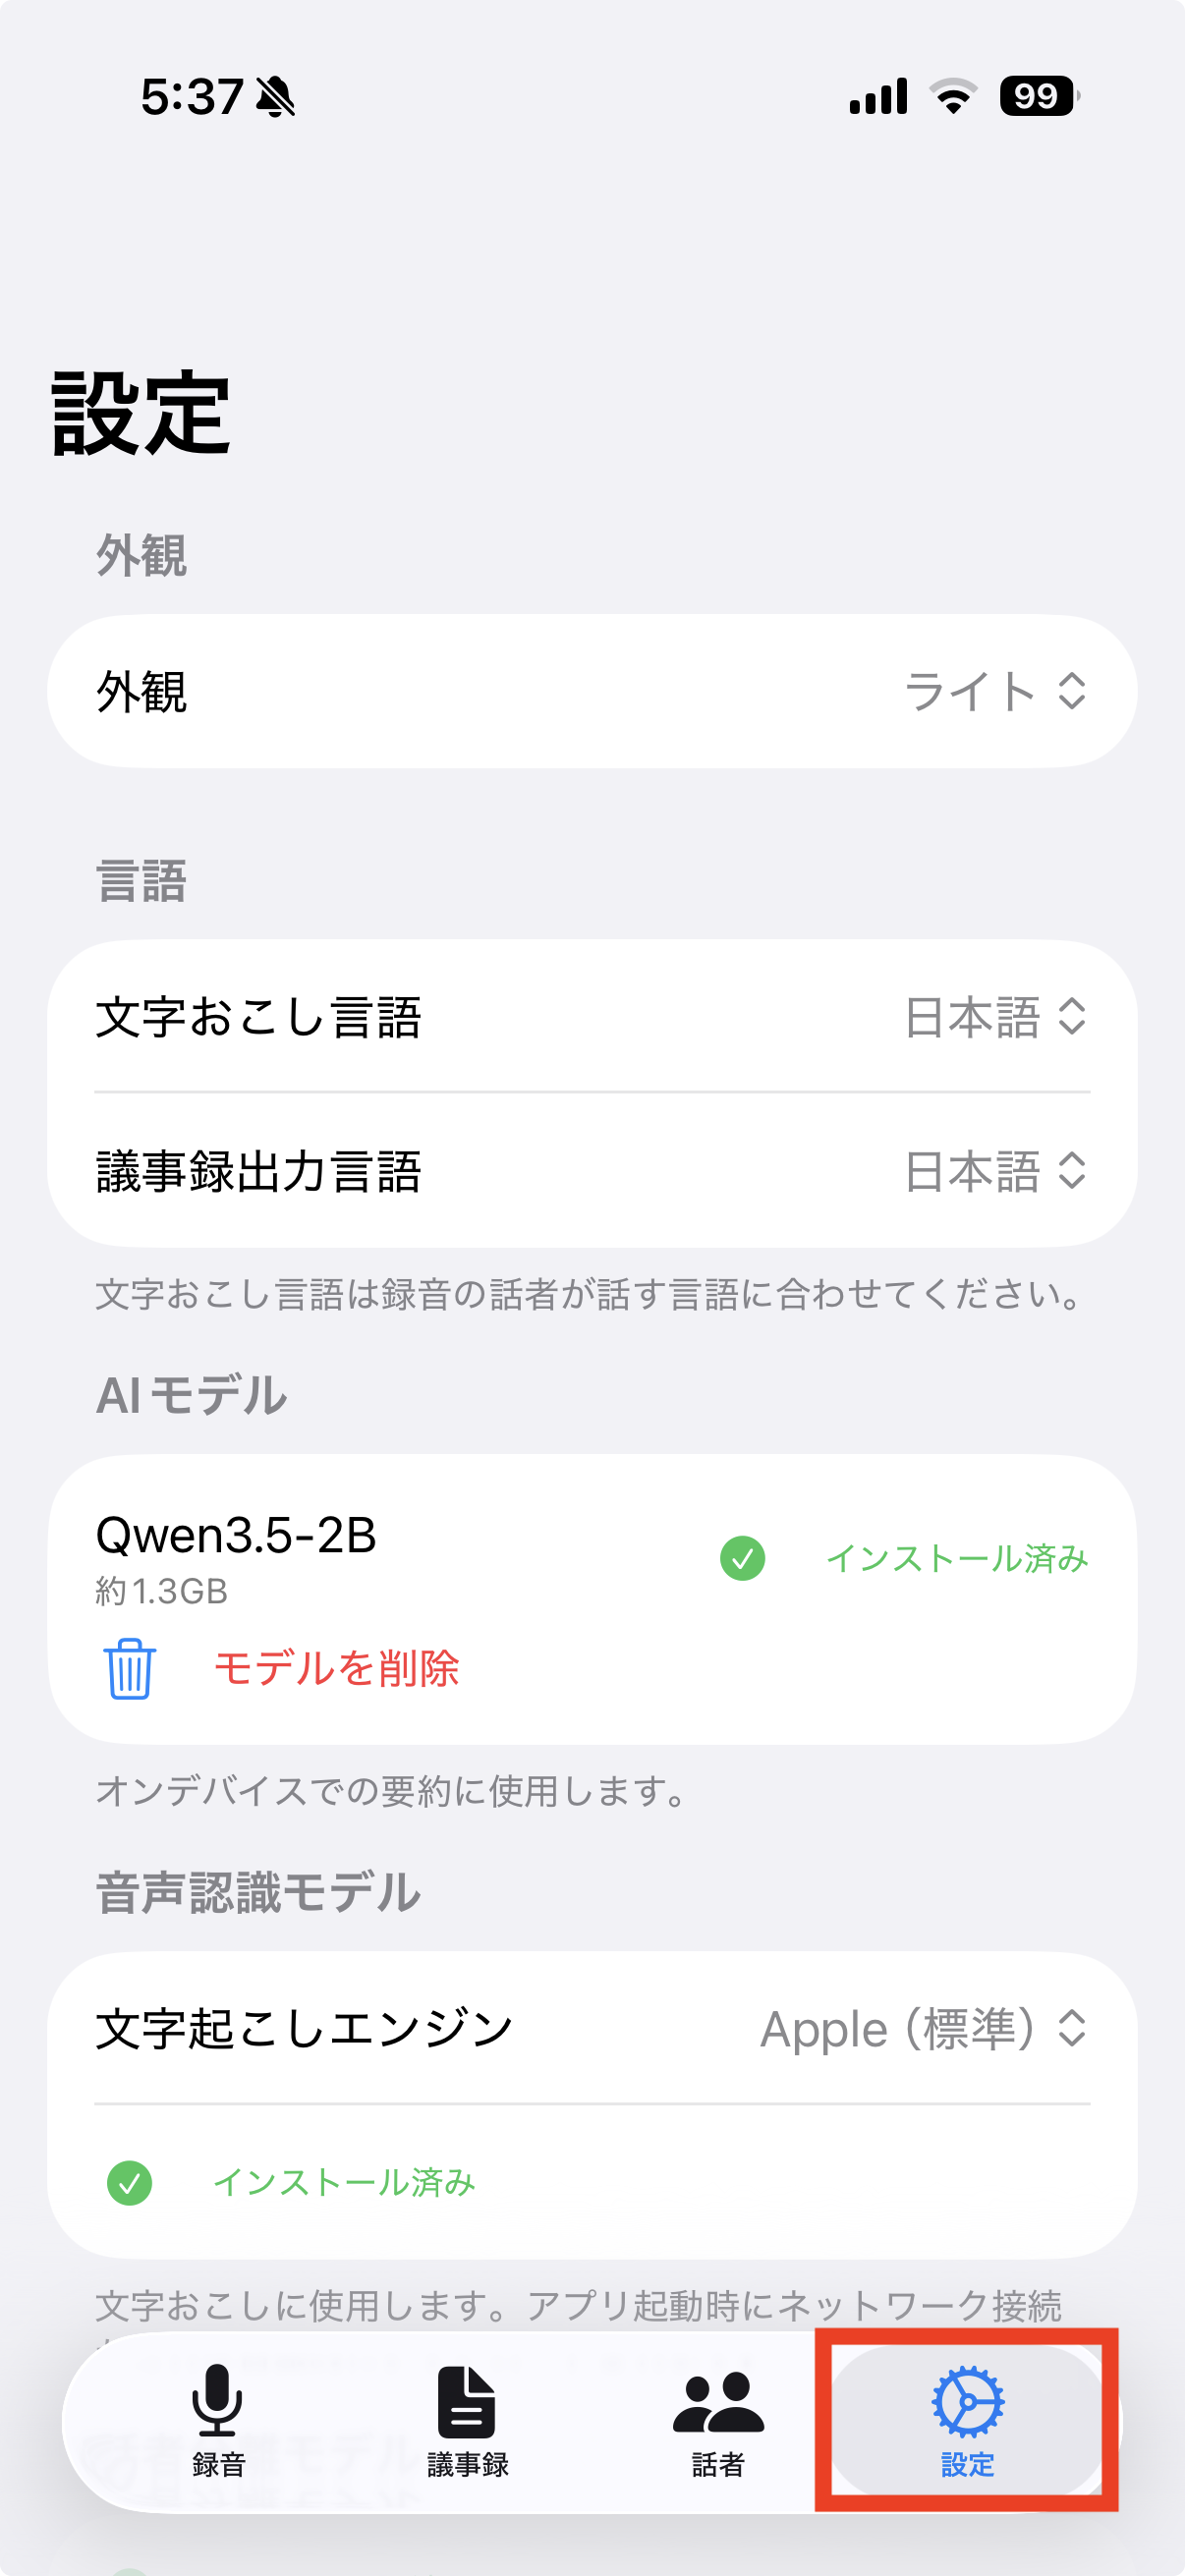
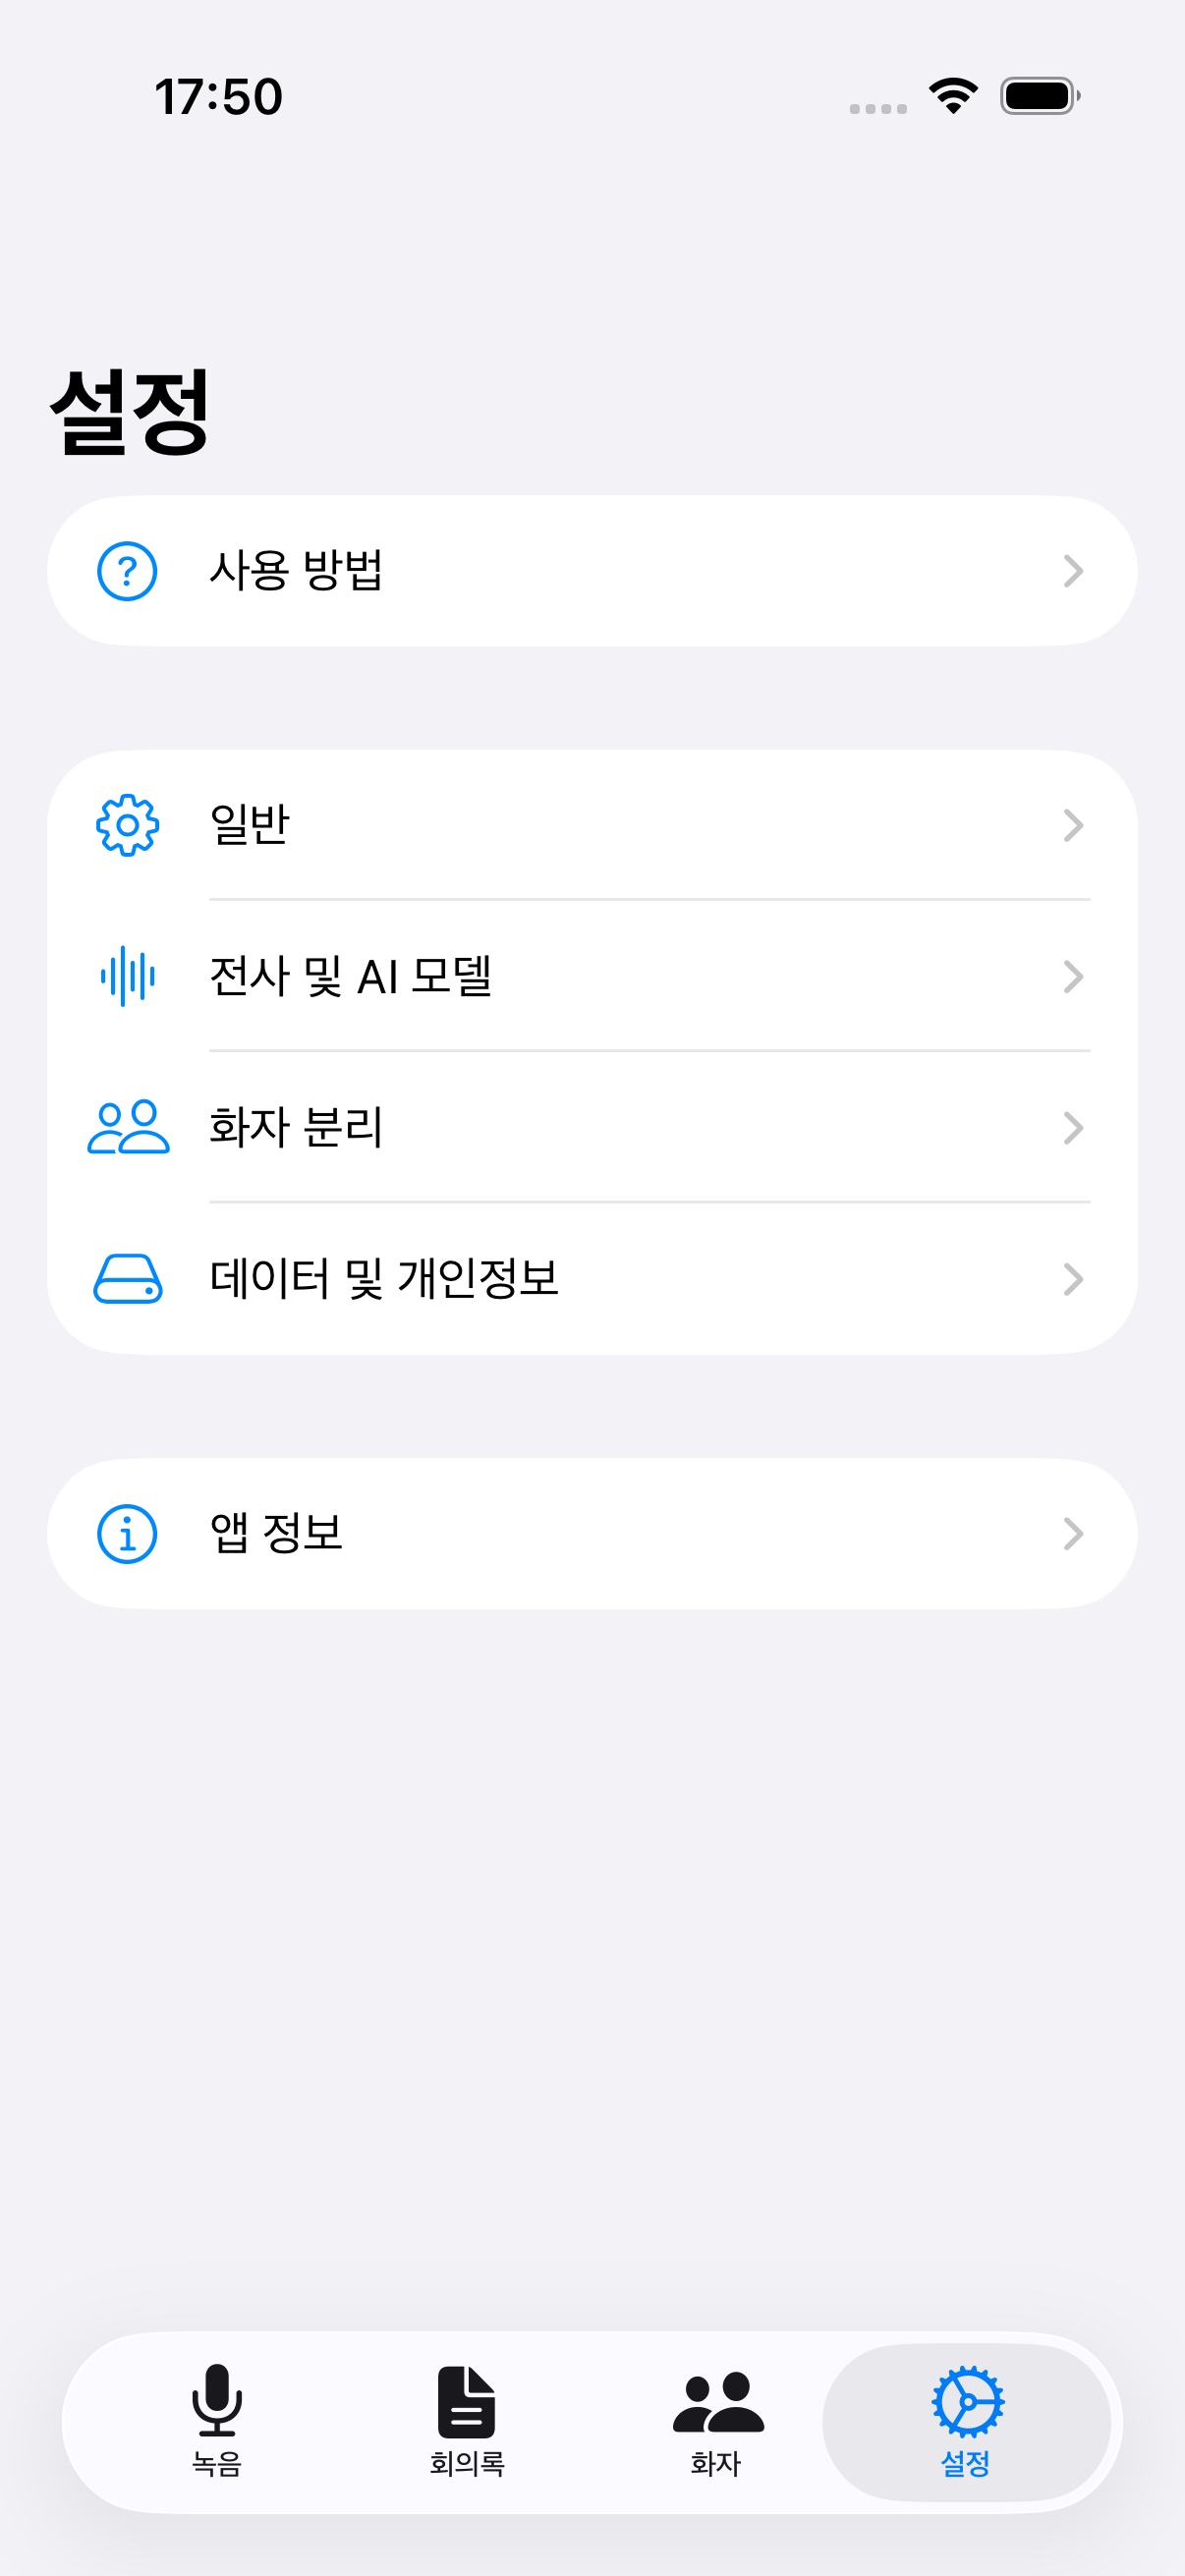
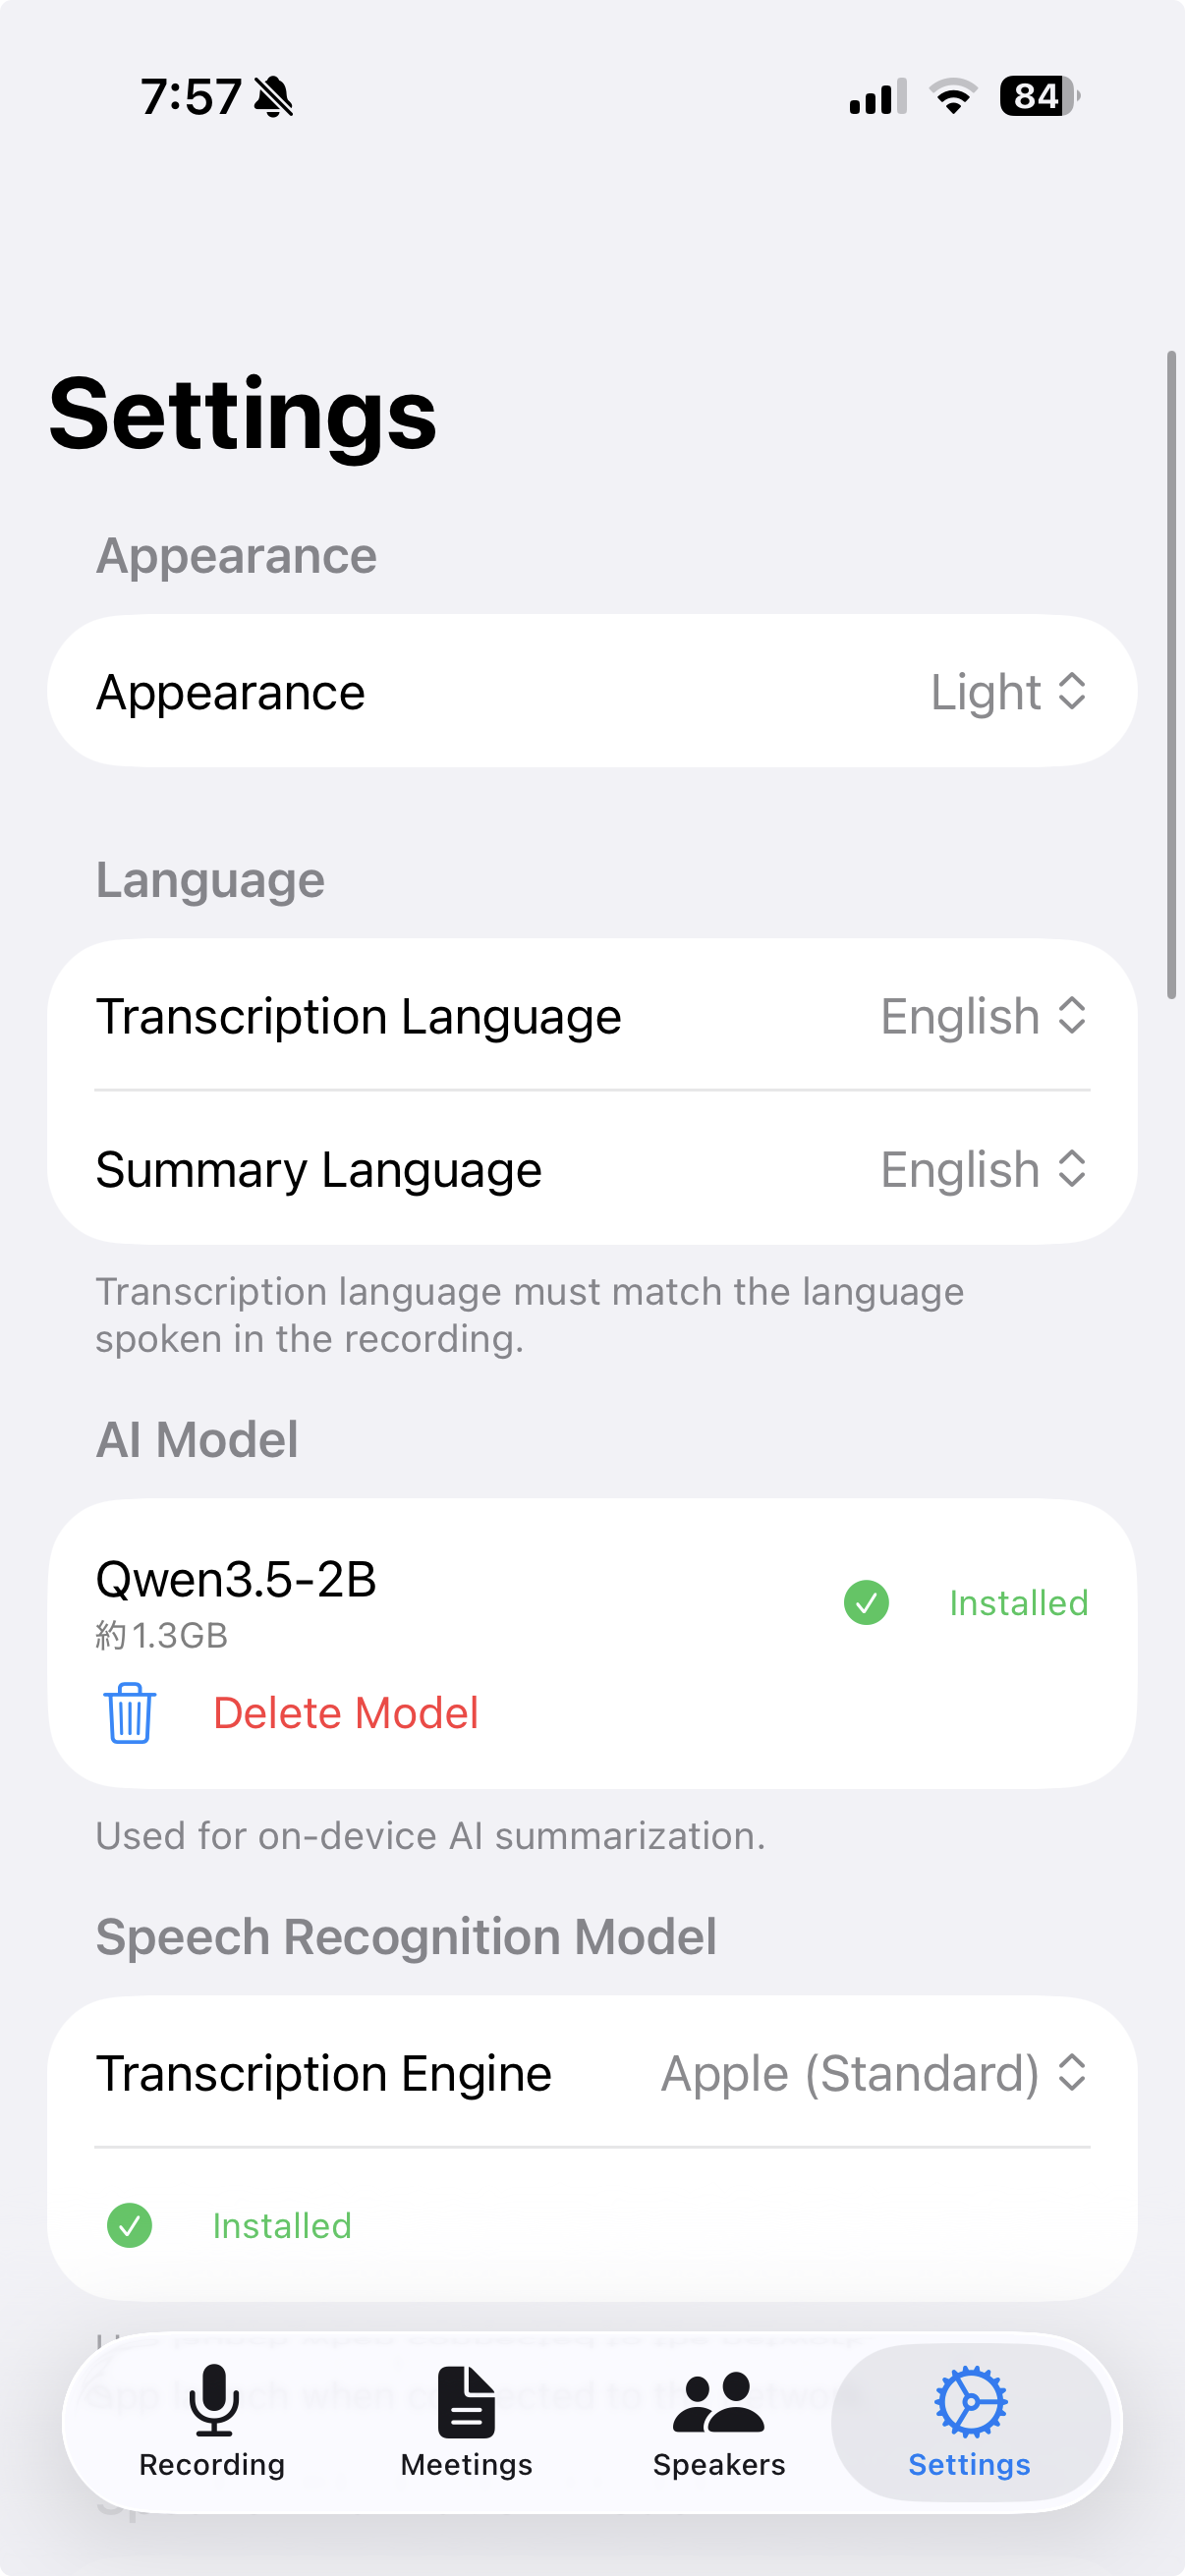
The Settings tab is split into 6 category screens, making it easier to find the setting you need.
📷 images/settings-1-en.png
1
How to Use
Opens this guide and the video tutorials. Videos open in Japanese or English depending on your device language.
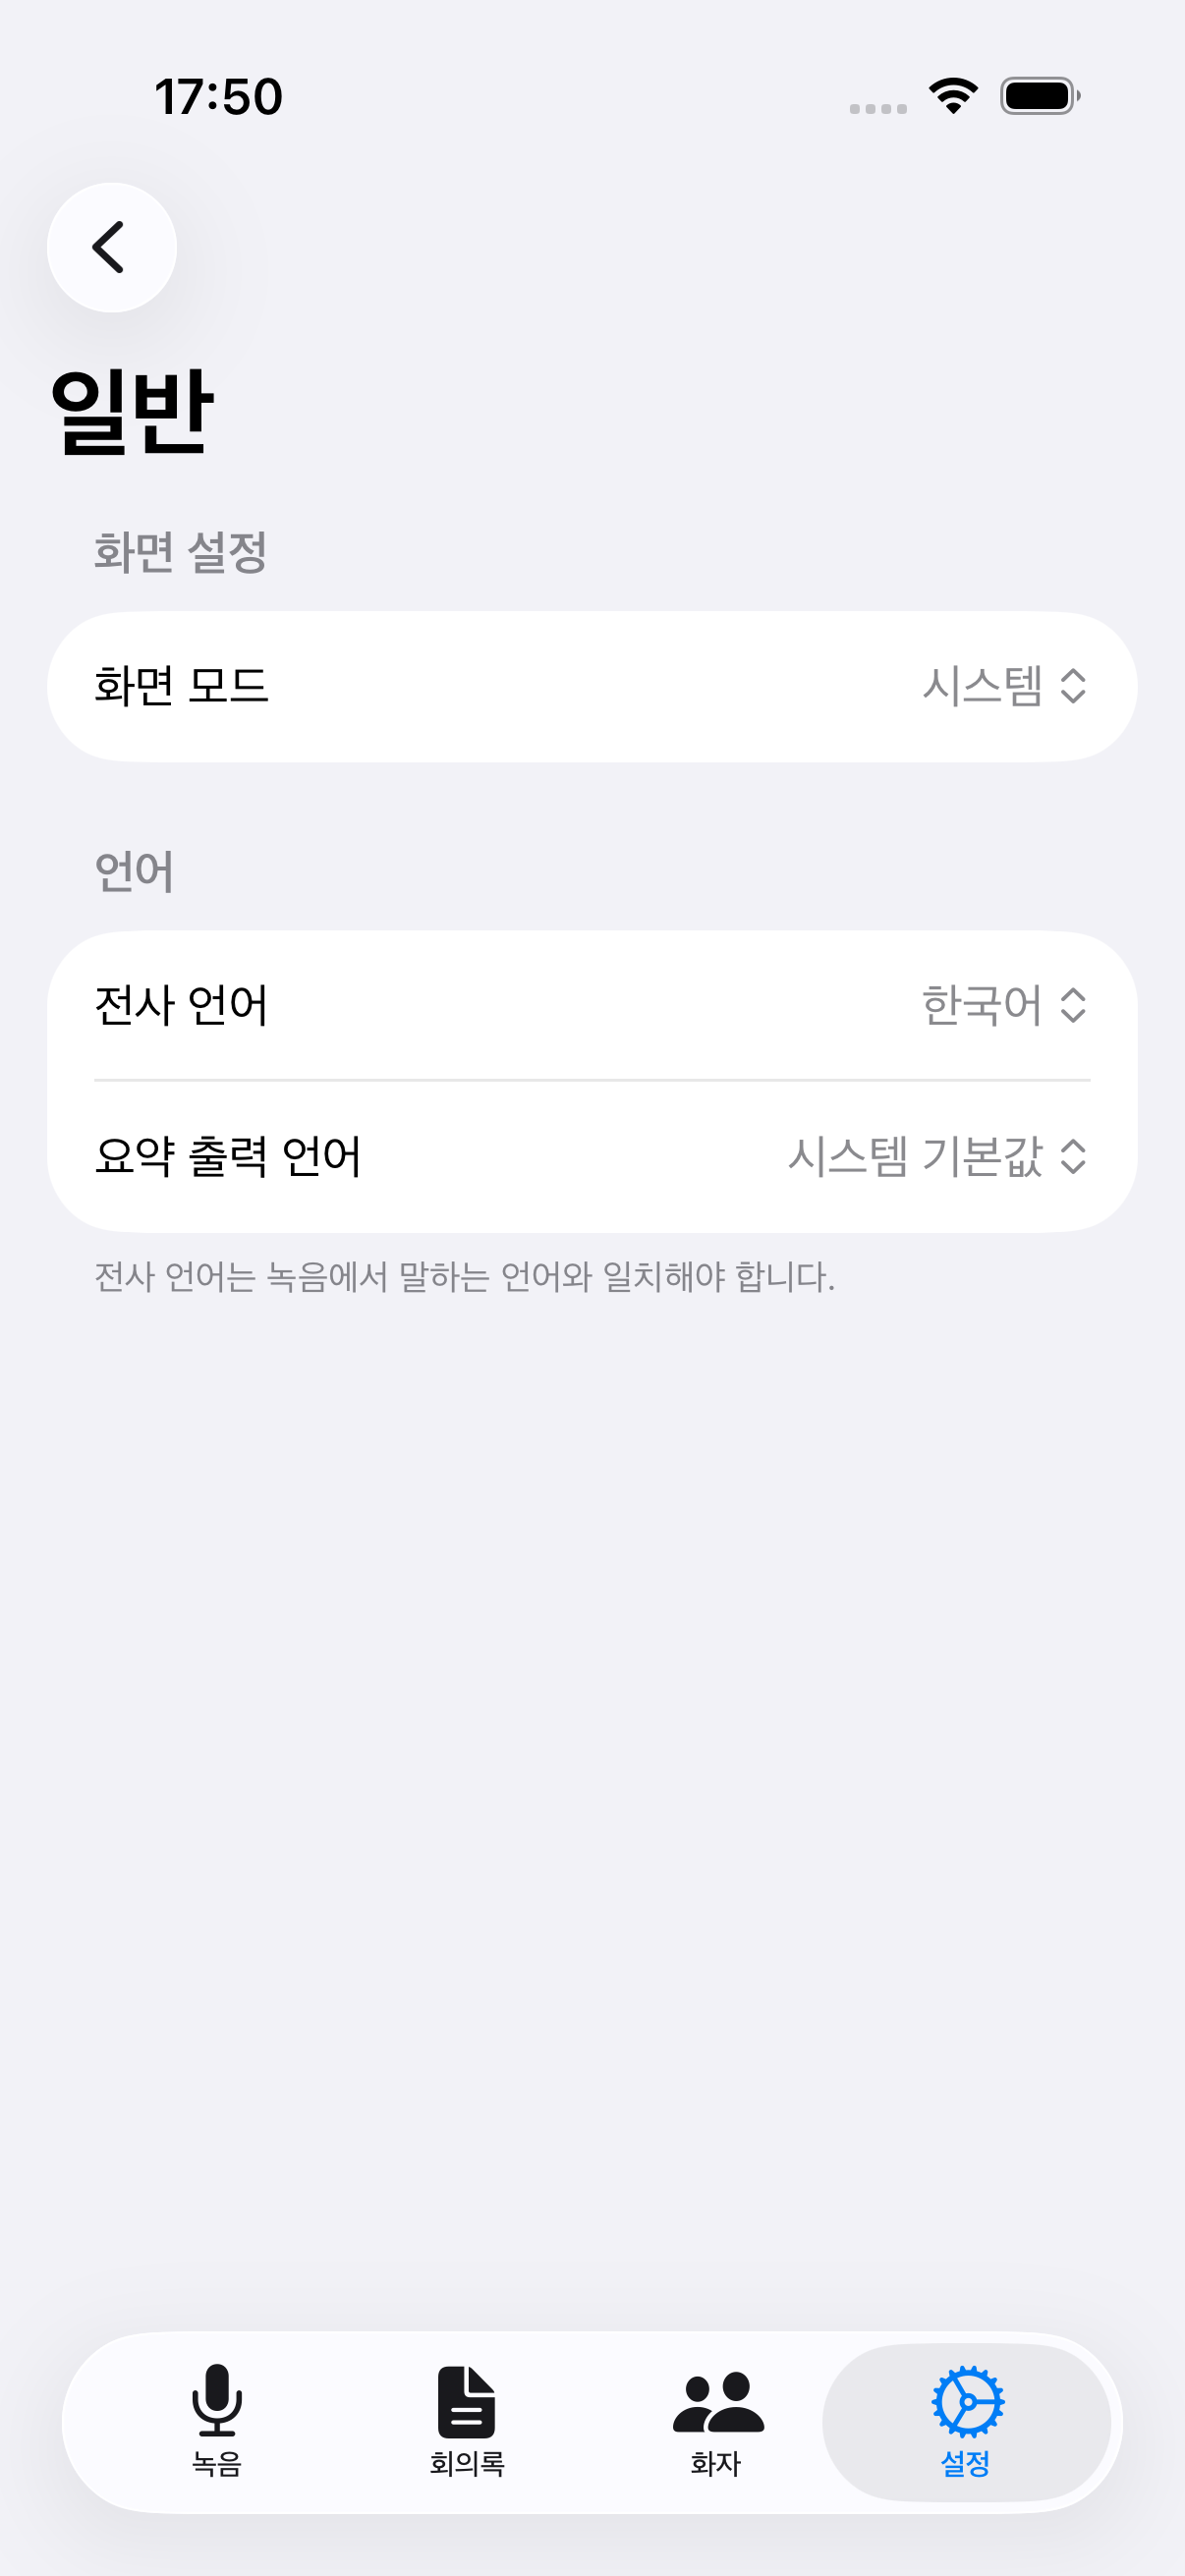
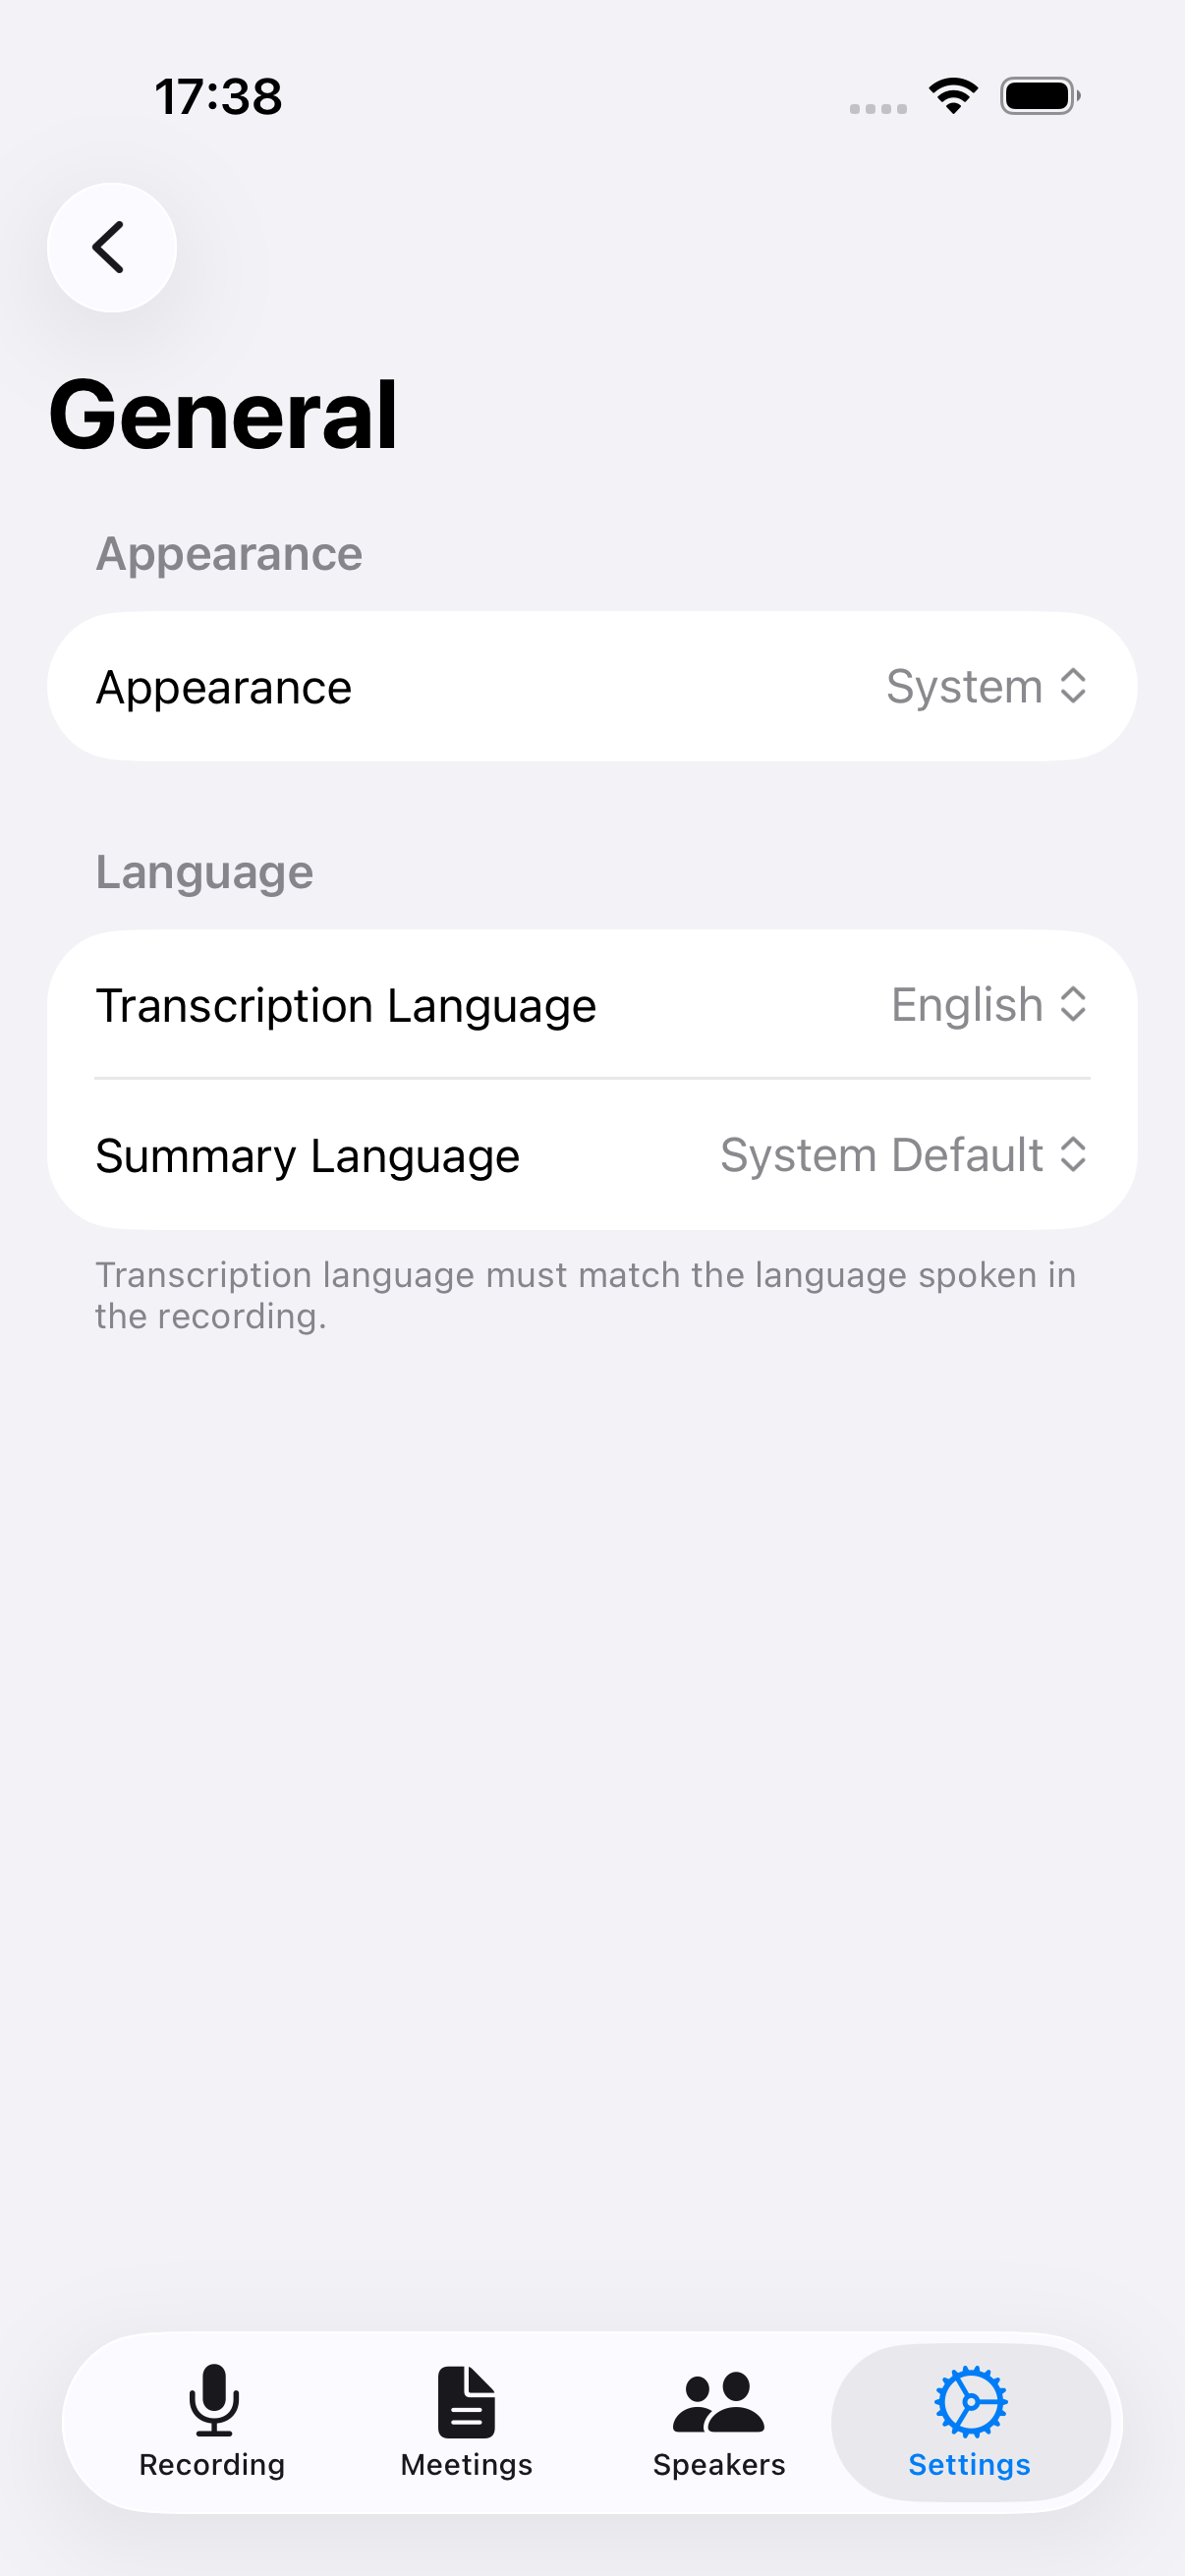
2
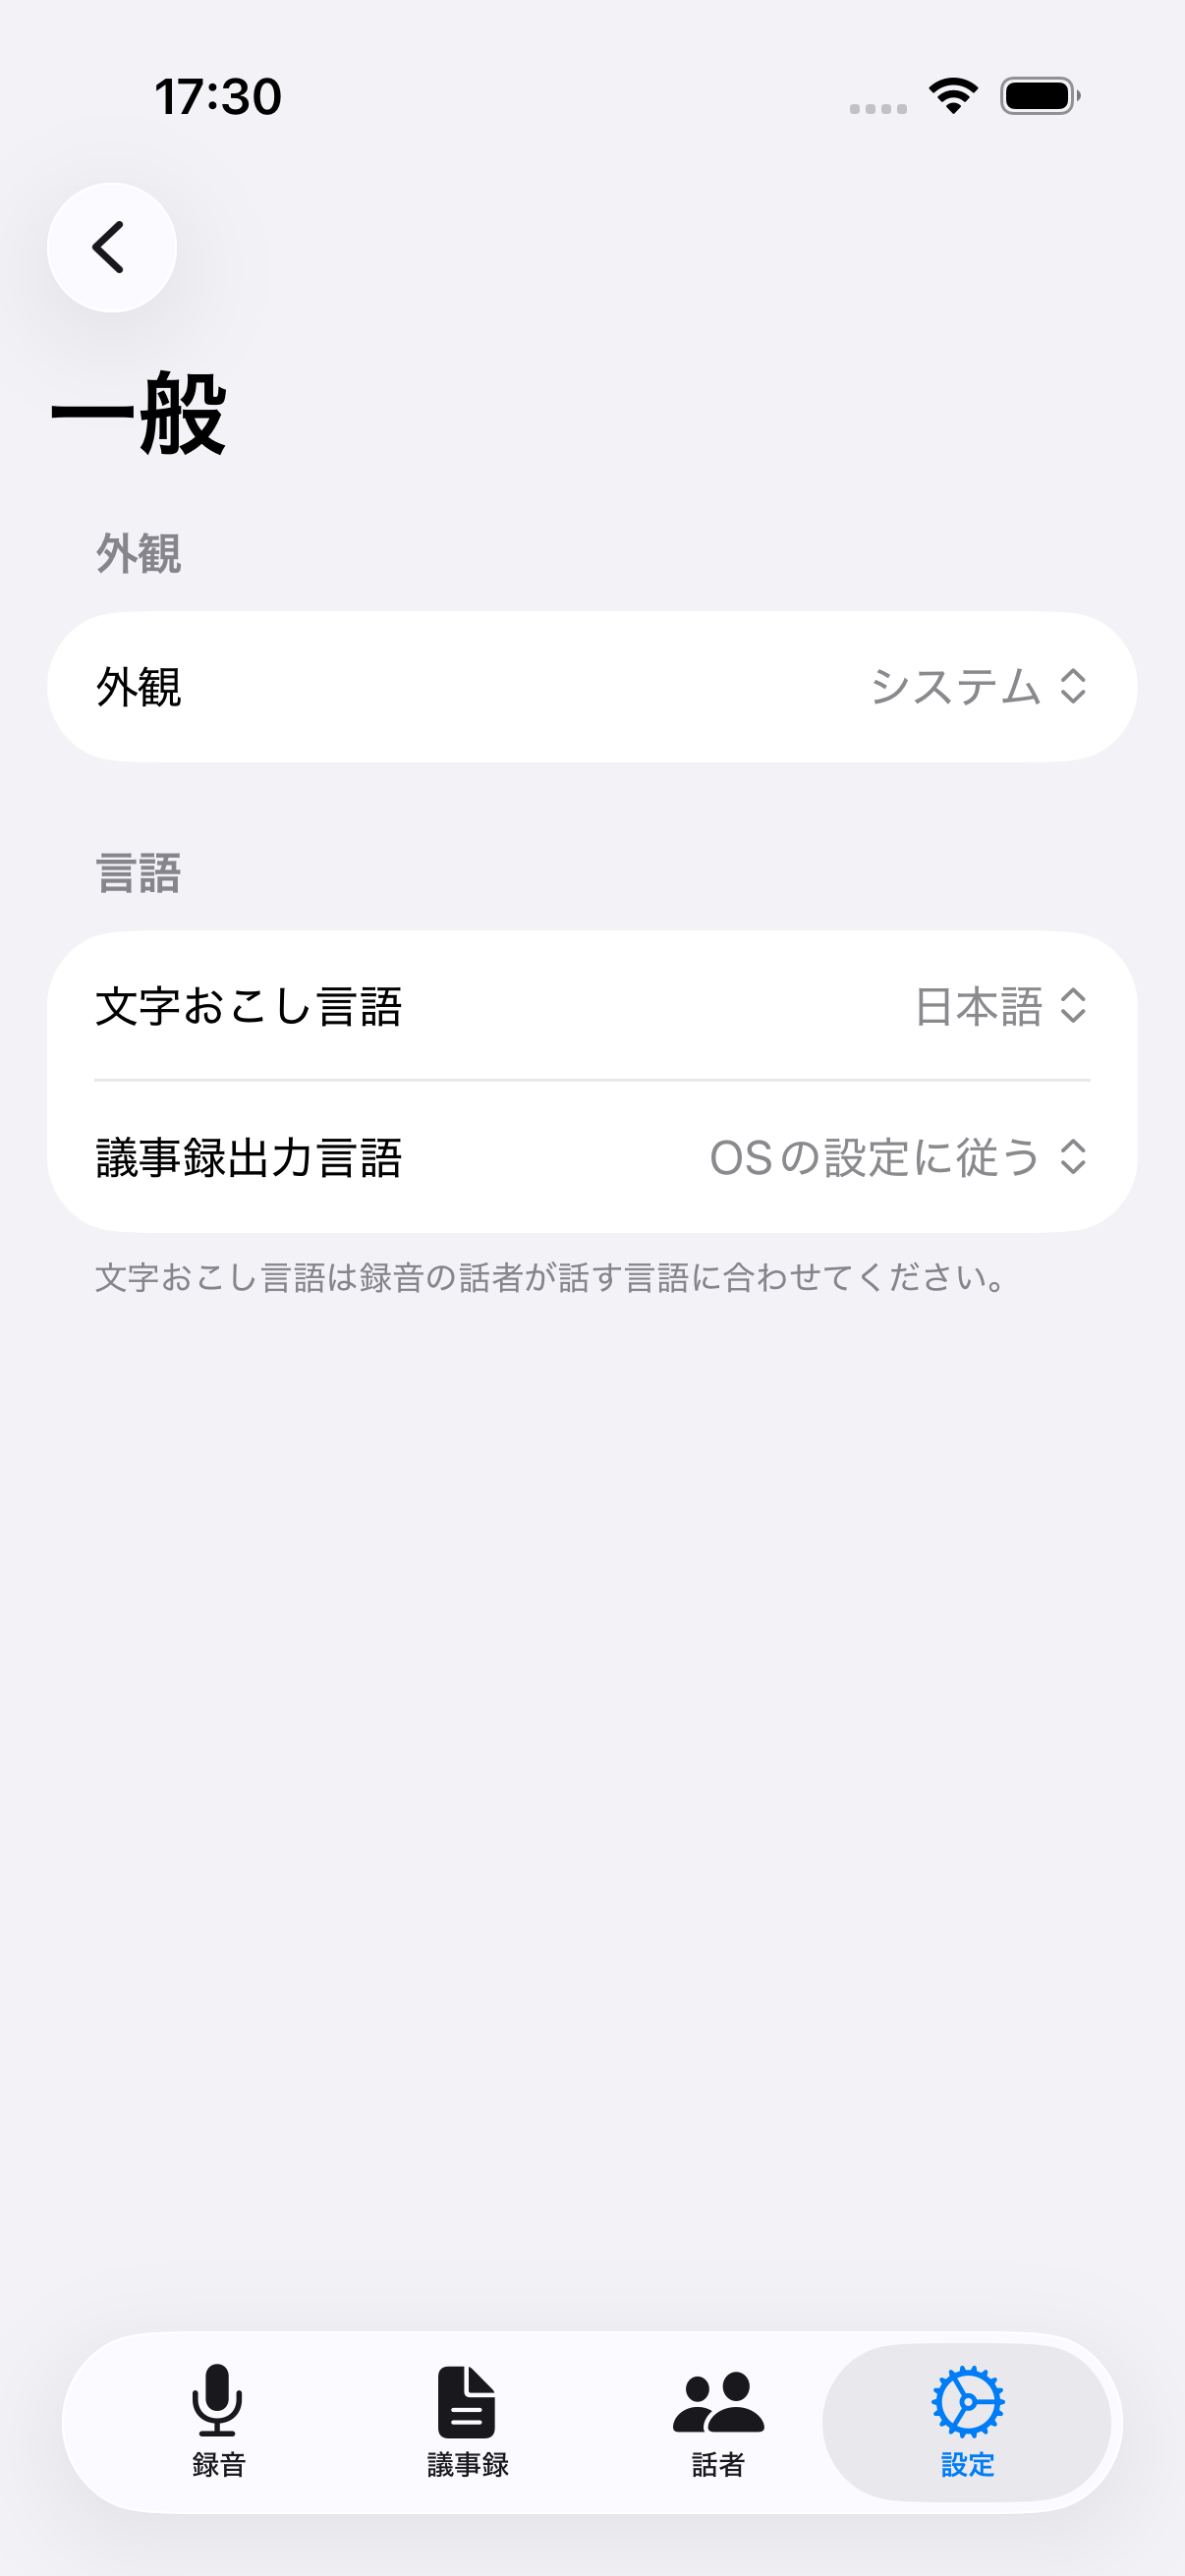
General
Appearance (System/Light/Dark), transcription language, and meeting notes output language.
📷 images/settings-2-en.png
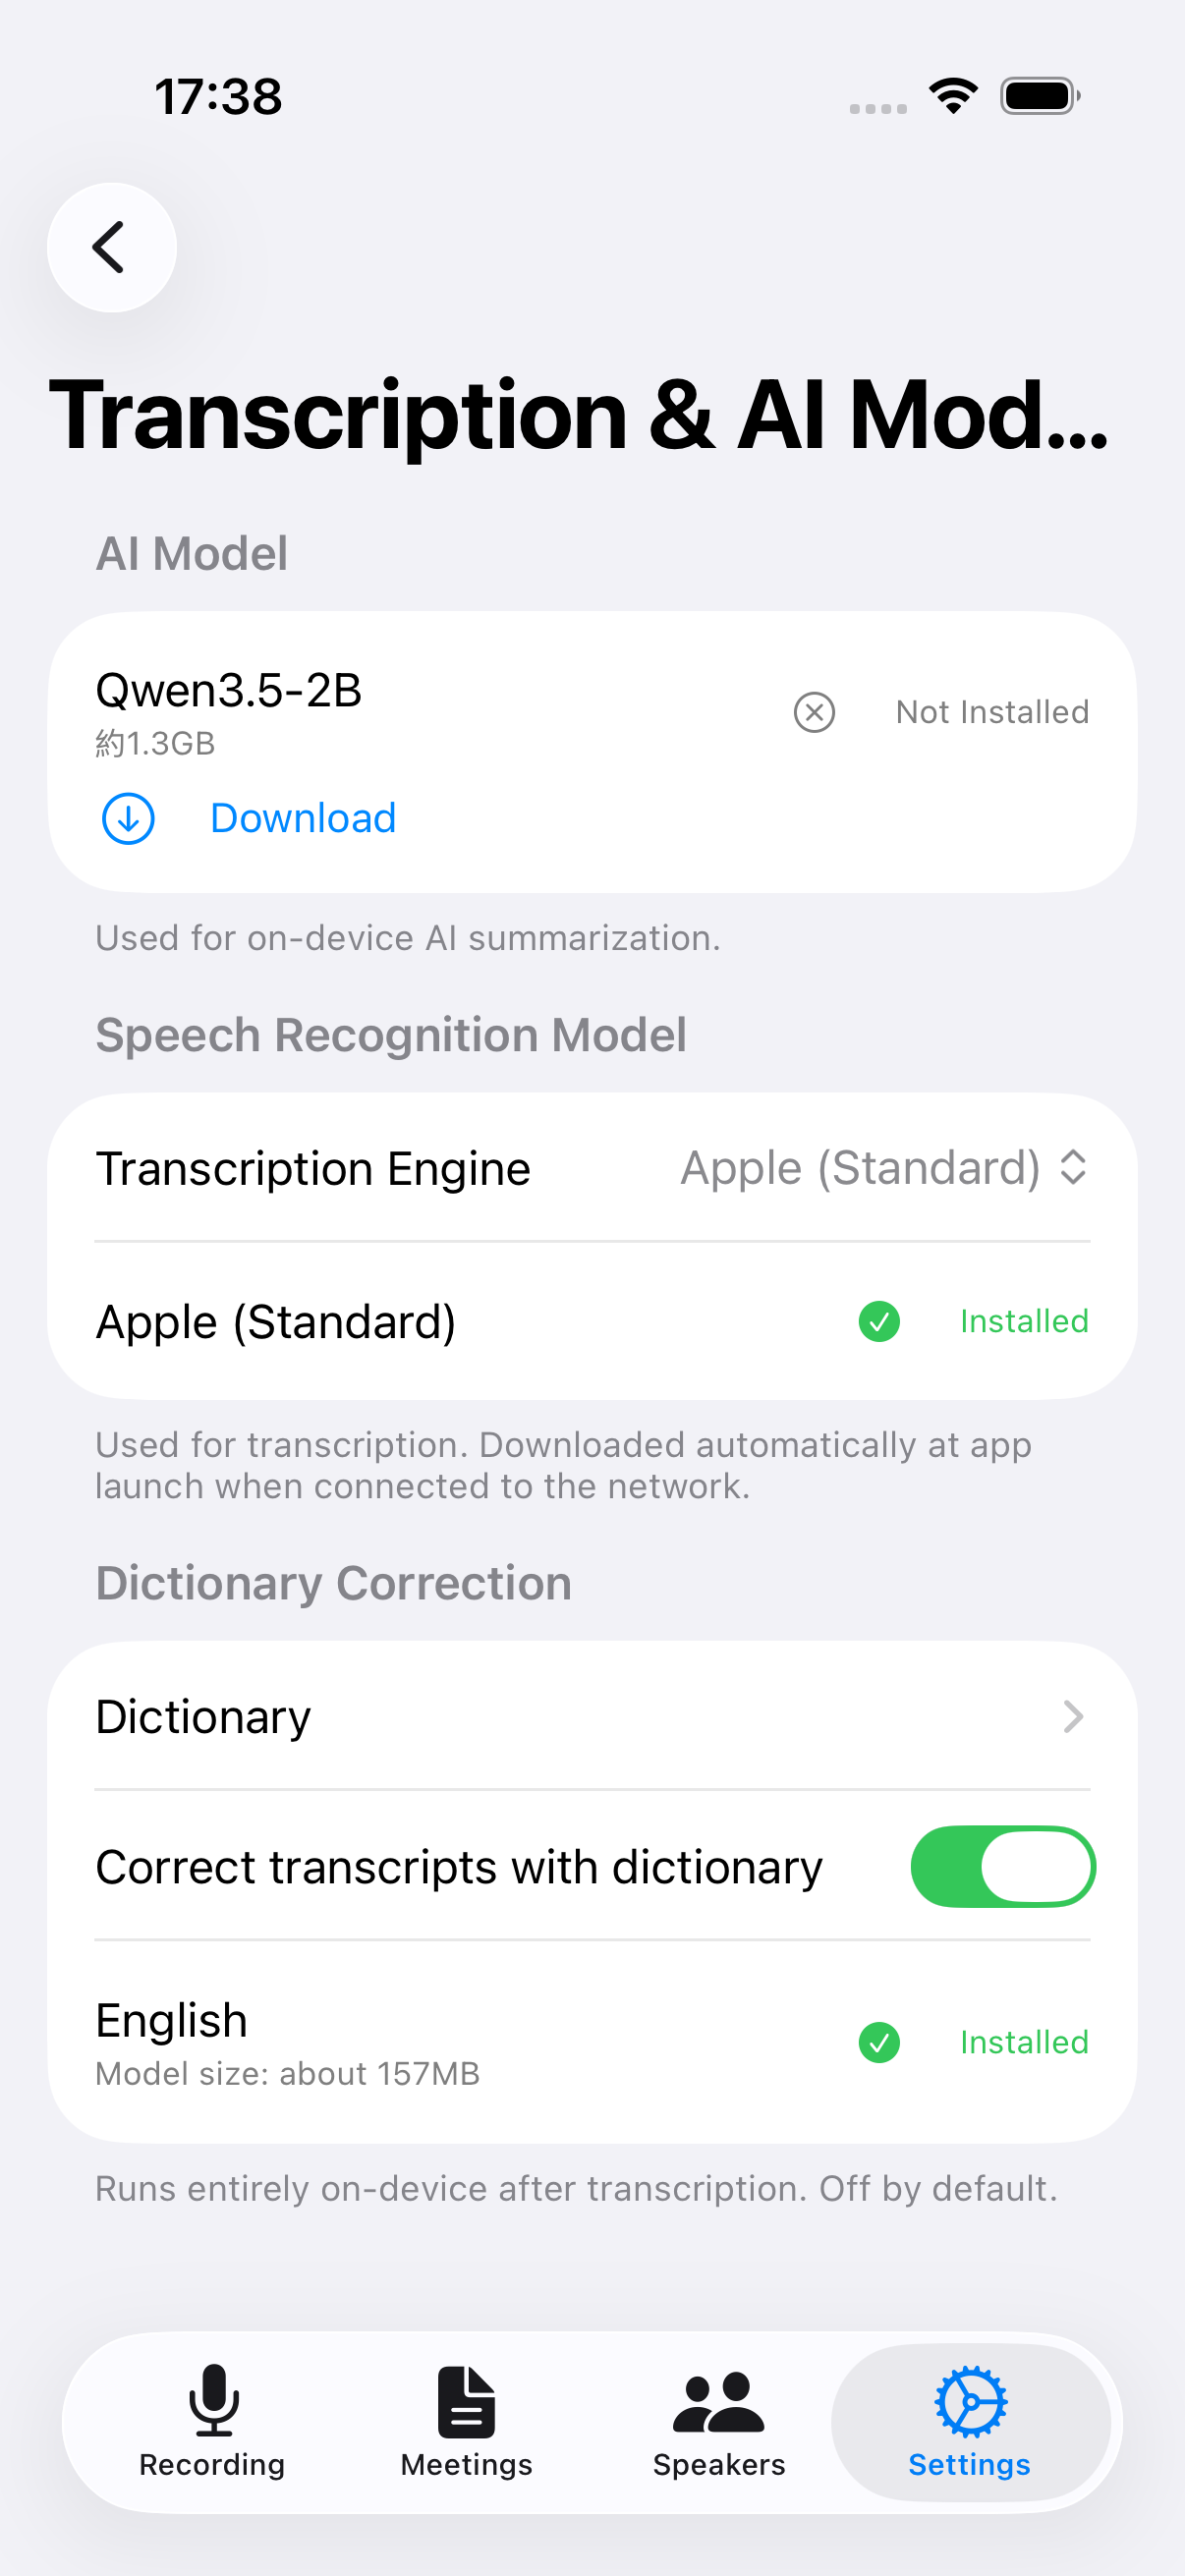
3
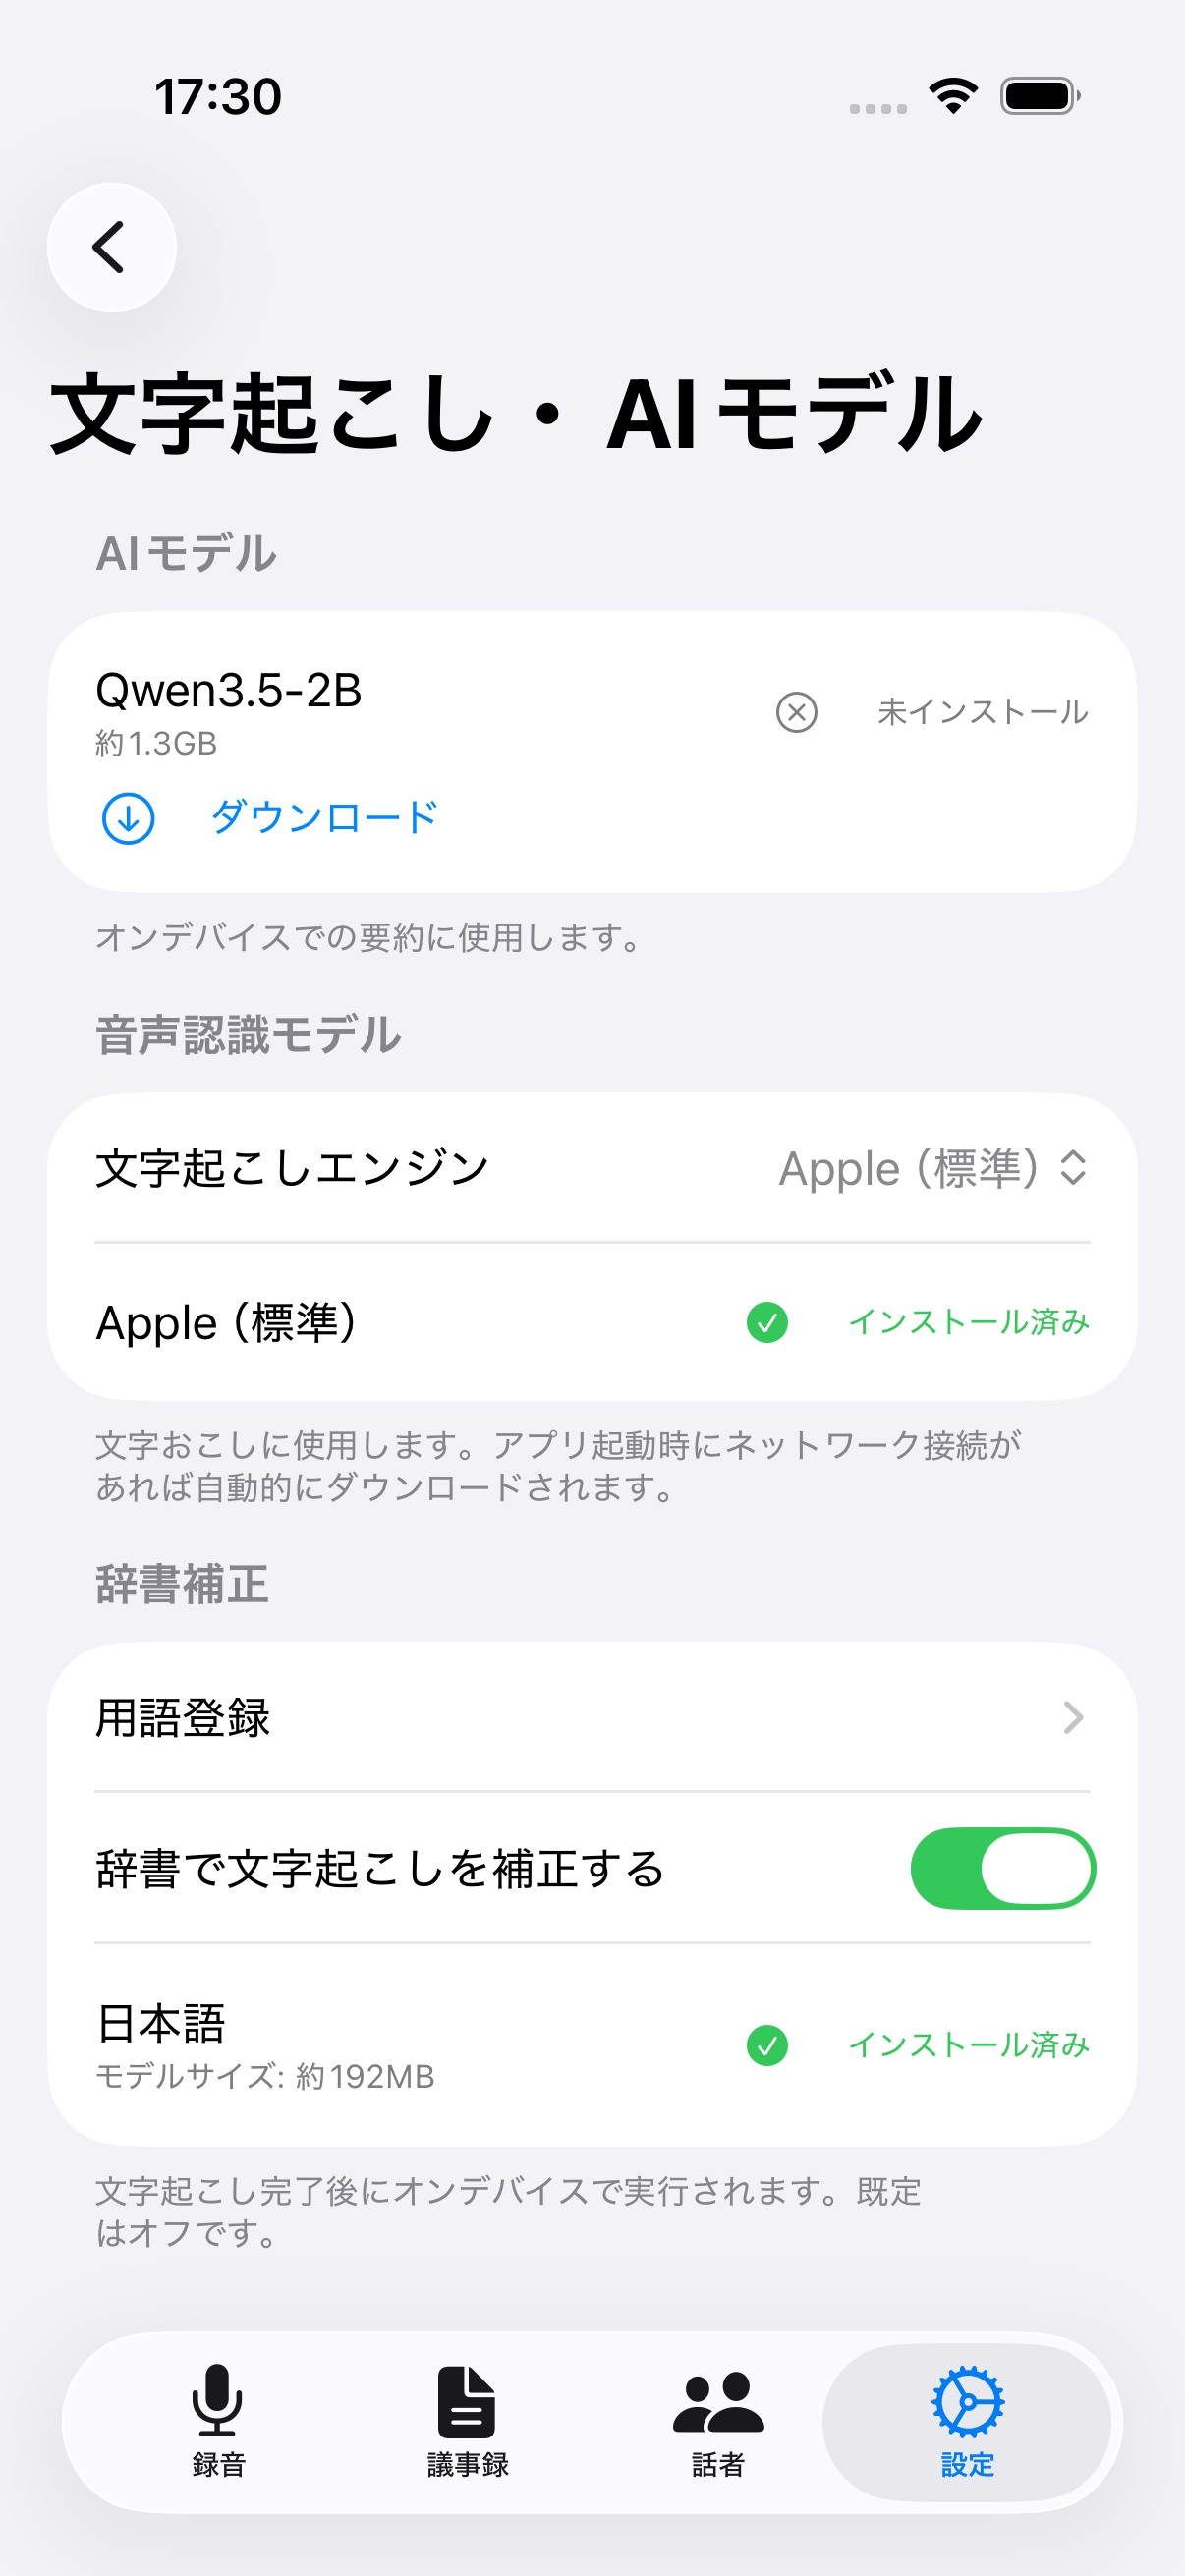
Transcription & AI Models
Downloading the transcription engine and on-device AI model, and dictionary correction on/off with term management (shown only for supported languages).
📷 images/settings-3-en.png
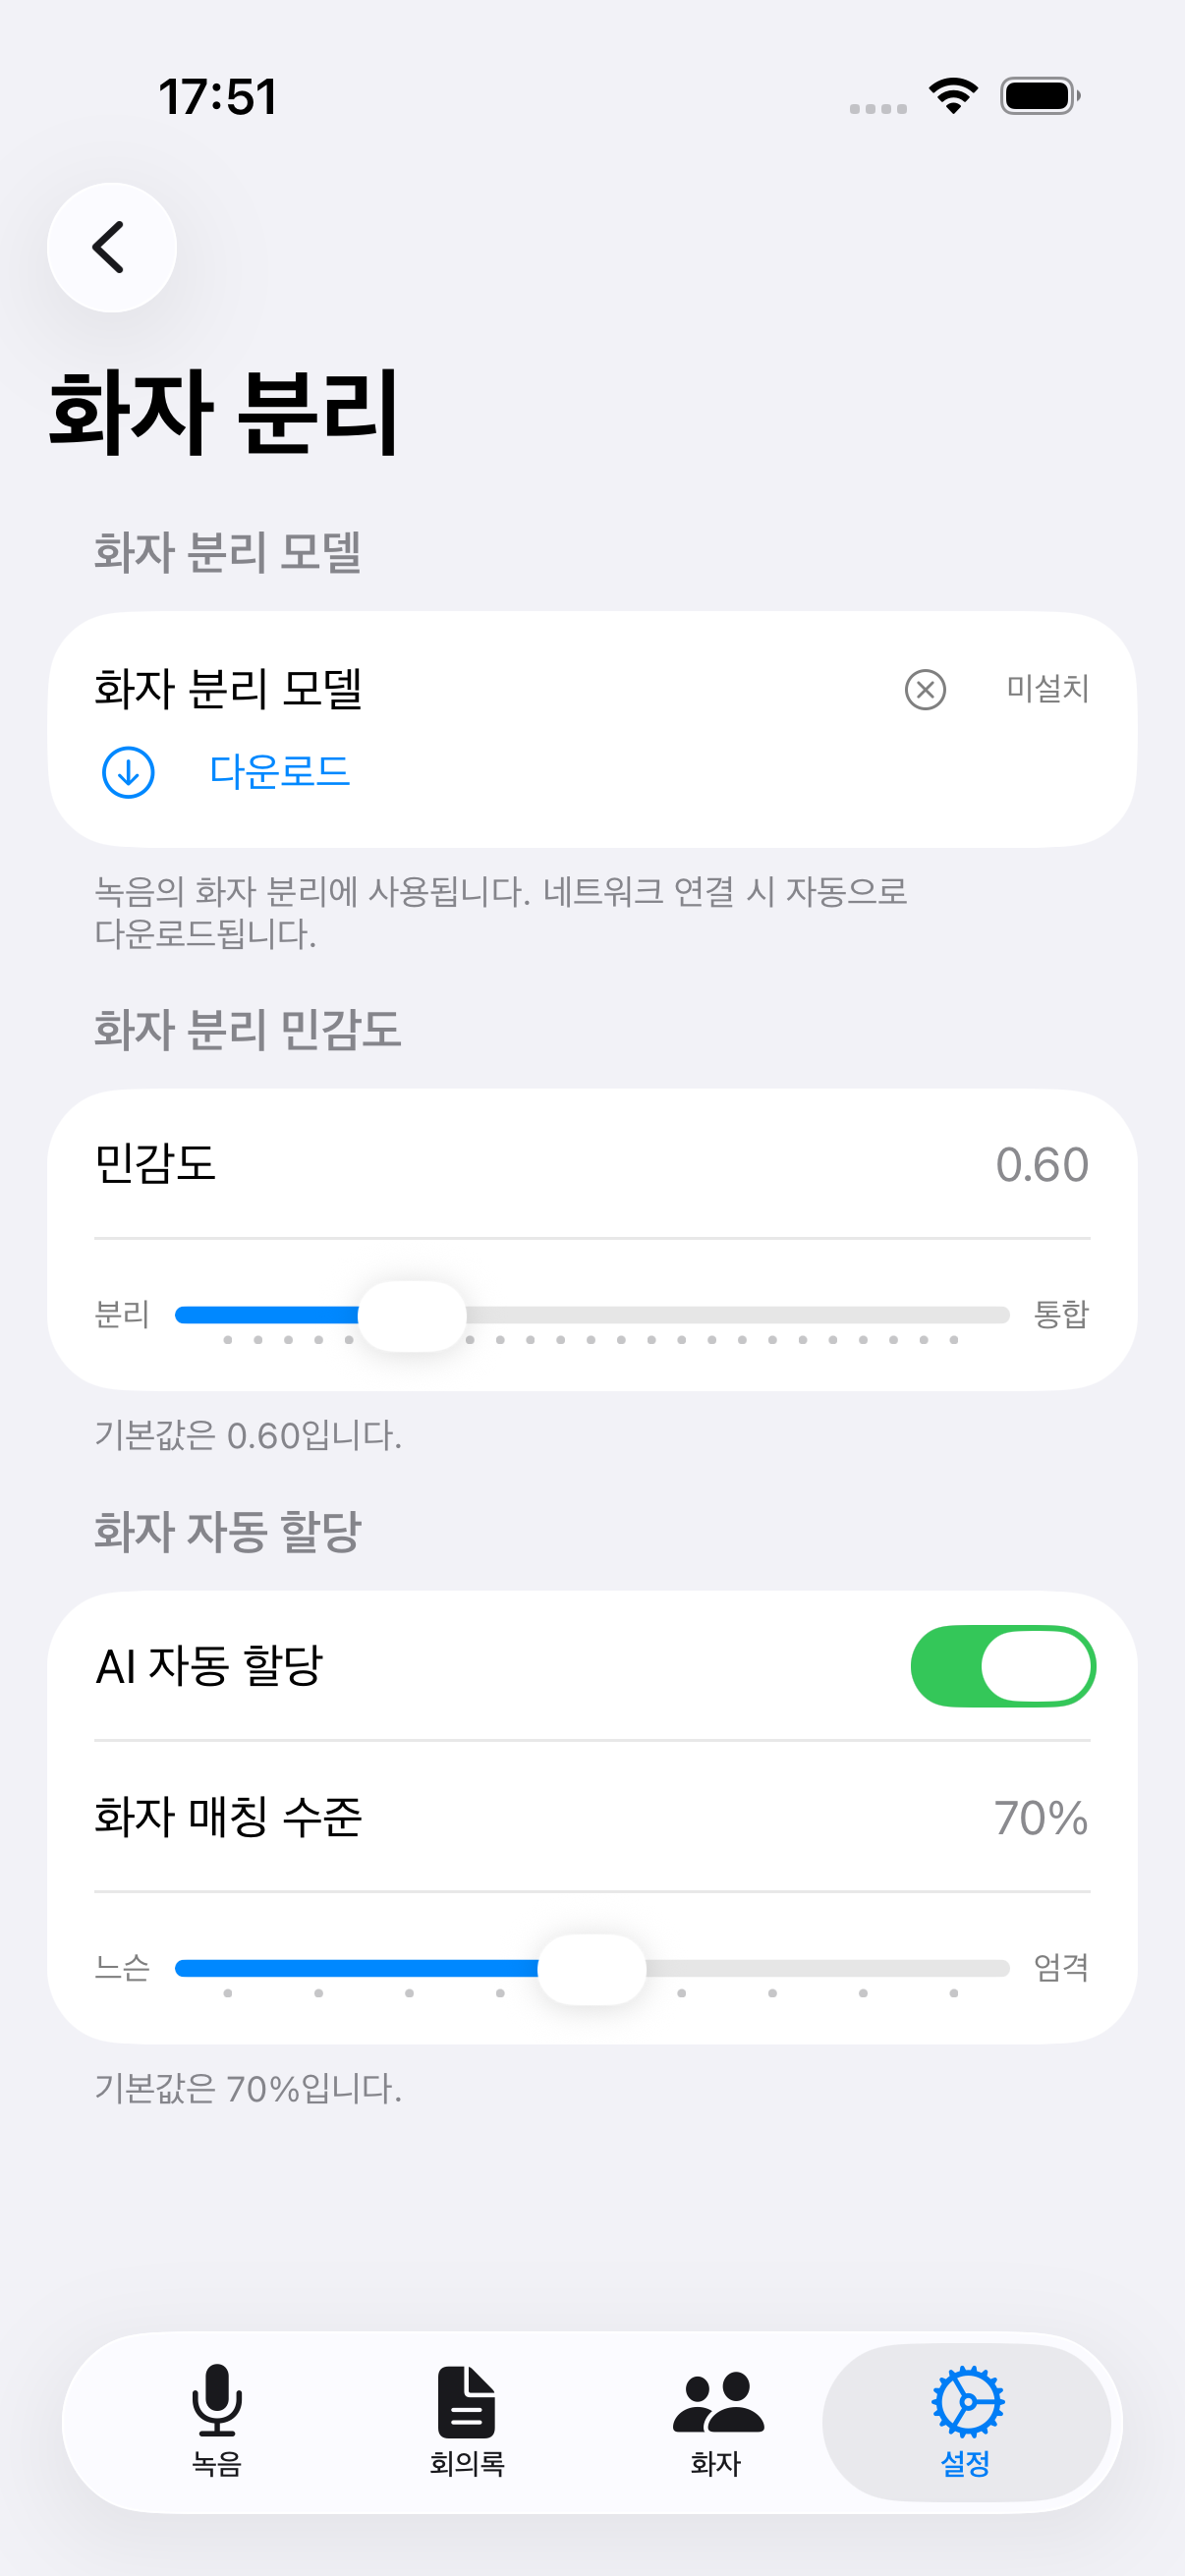
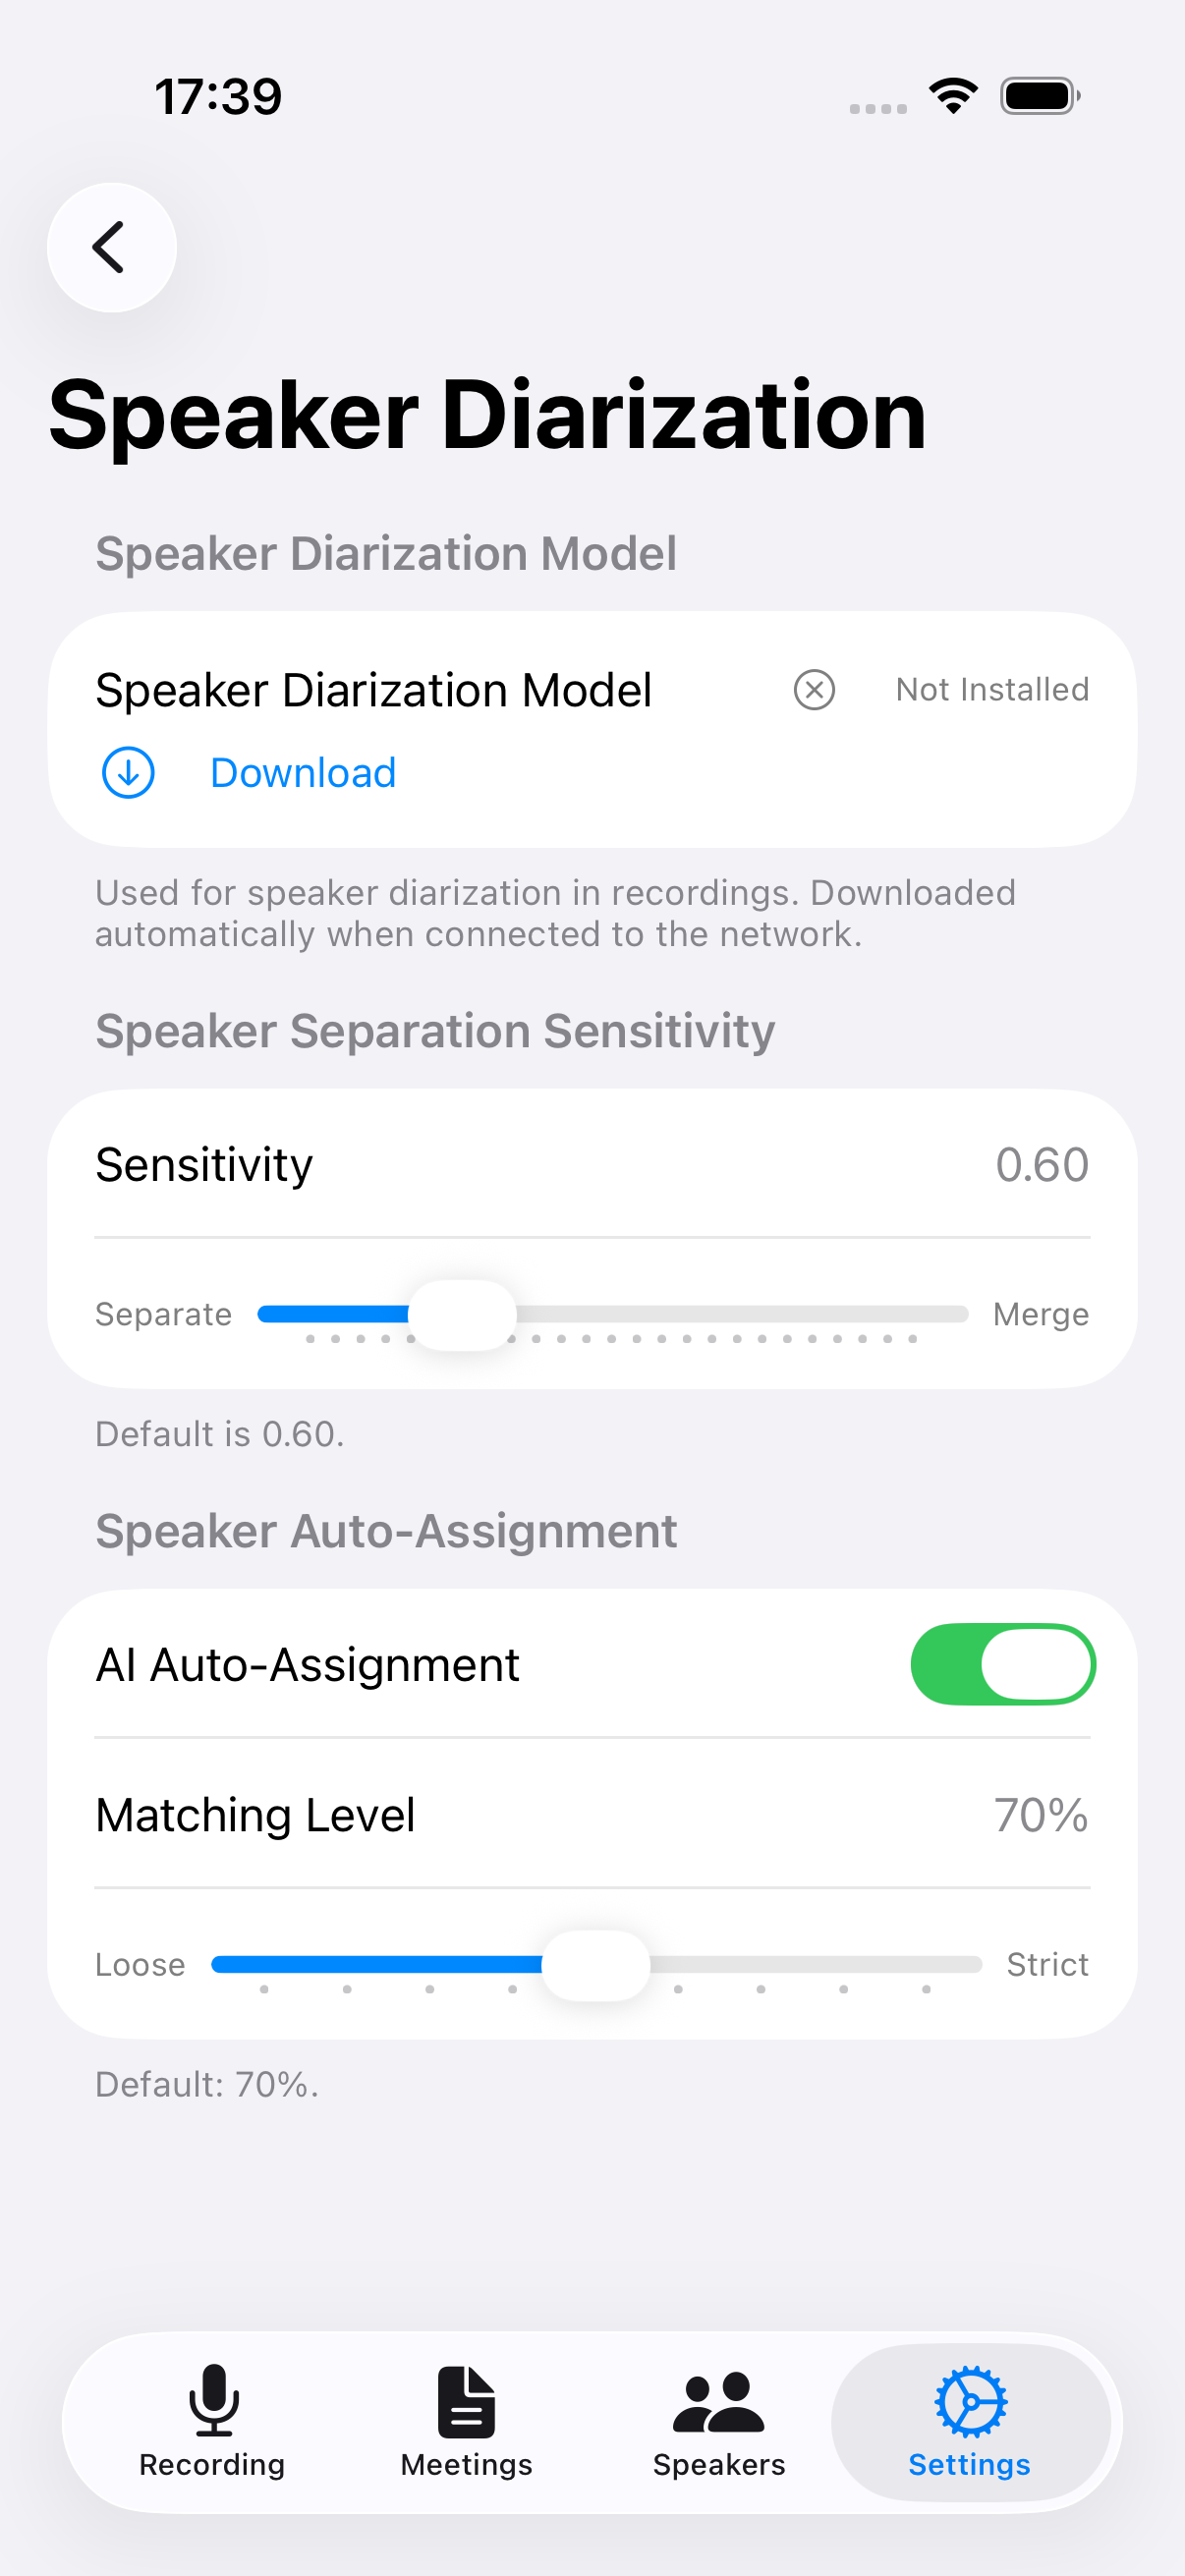
4
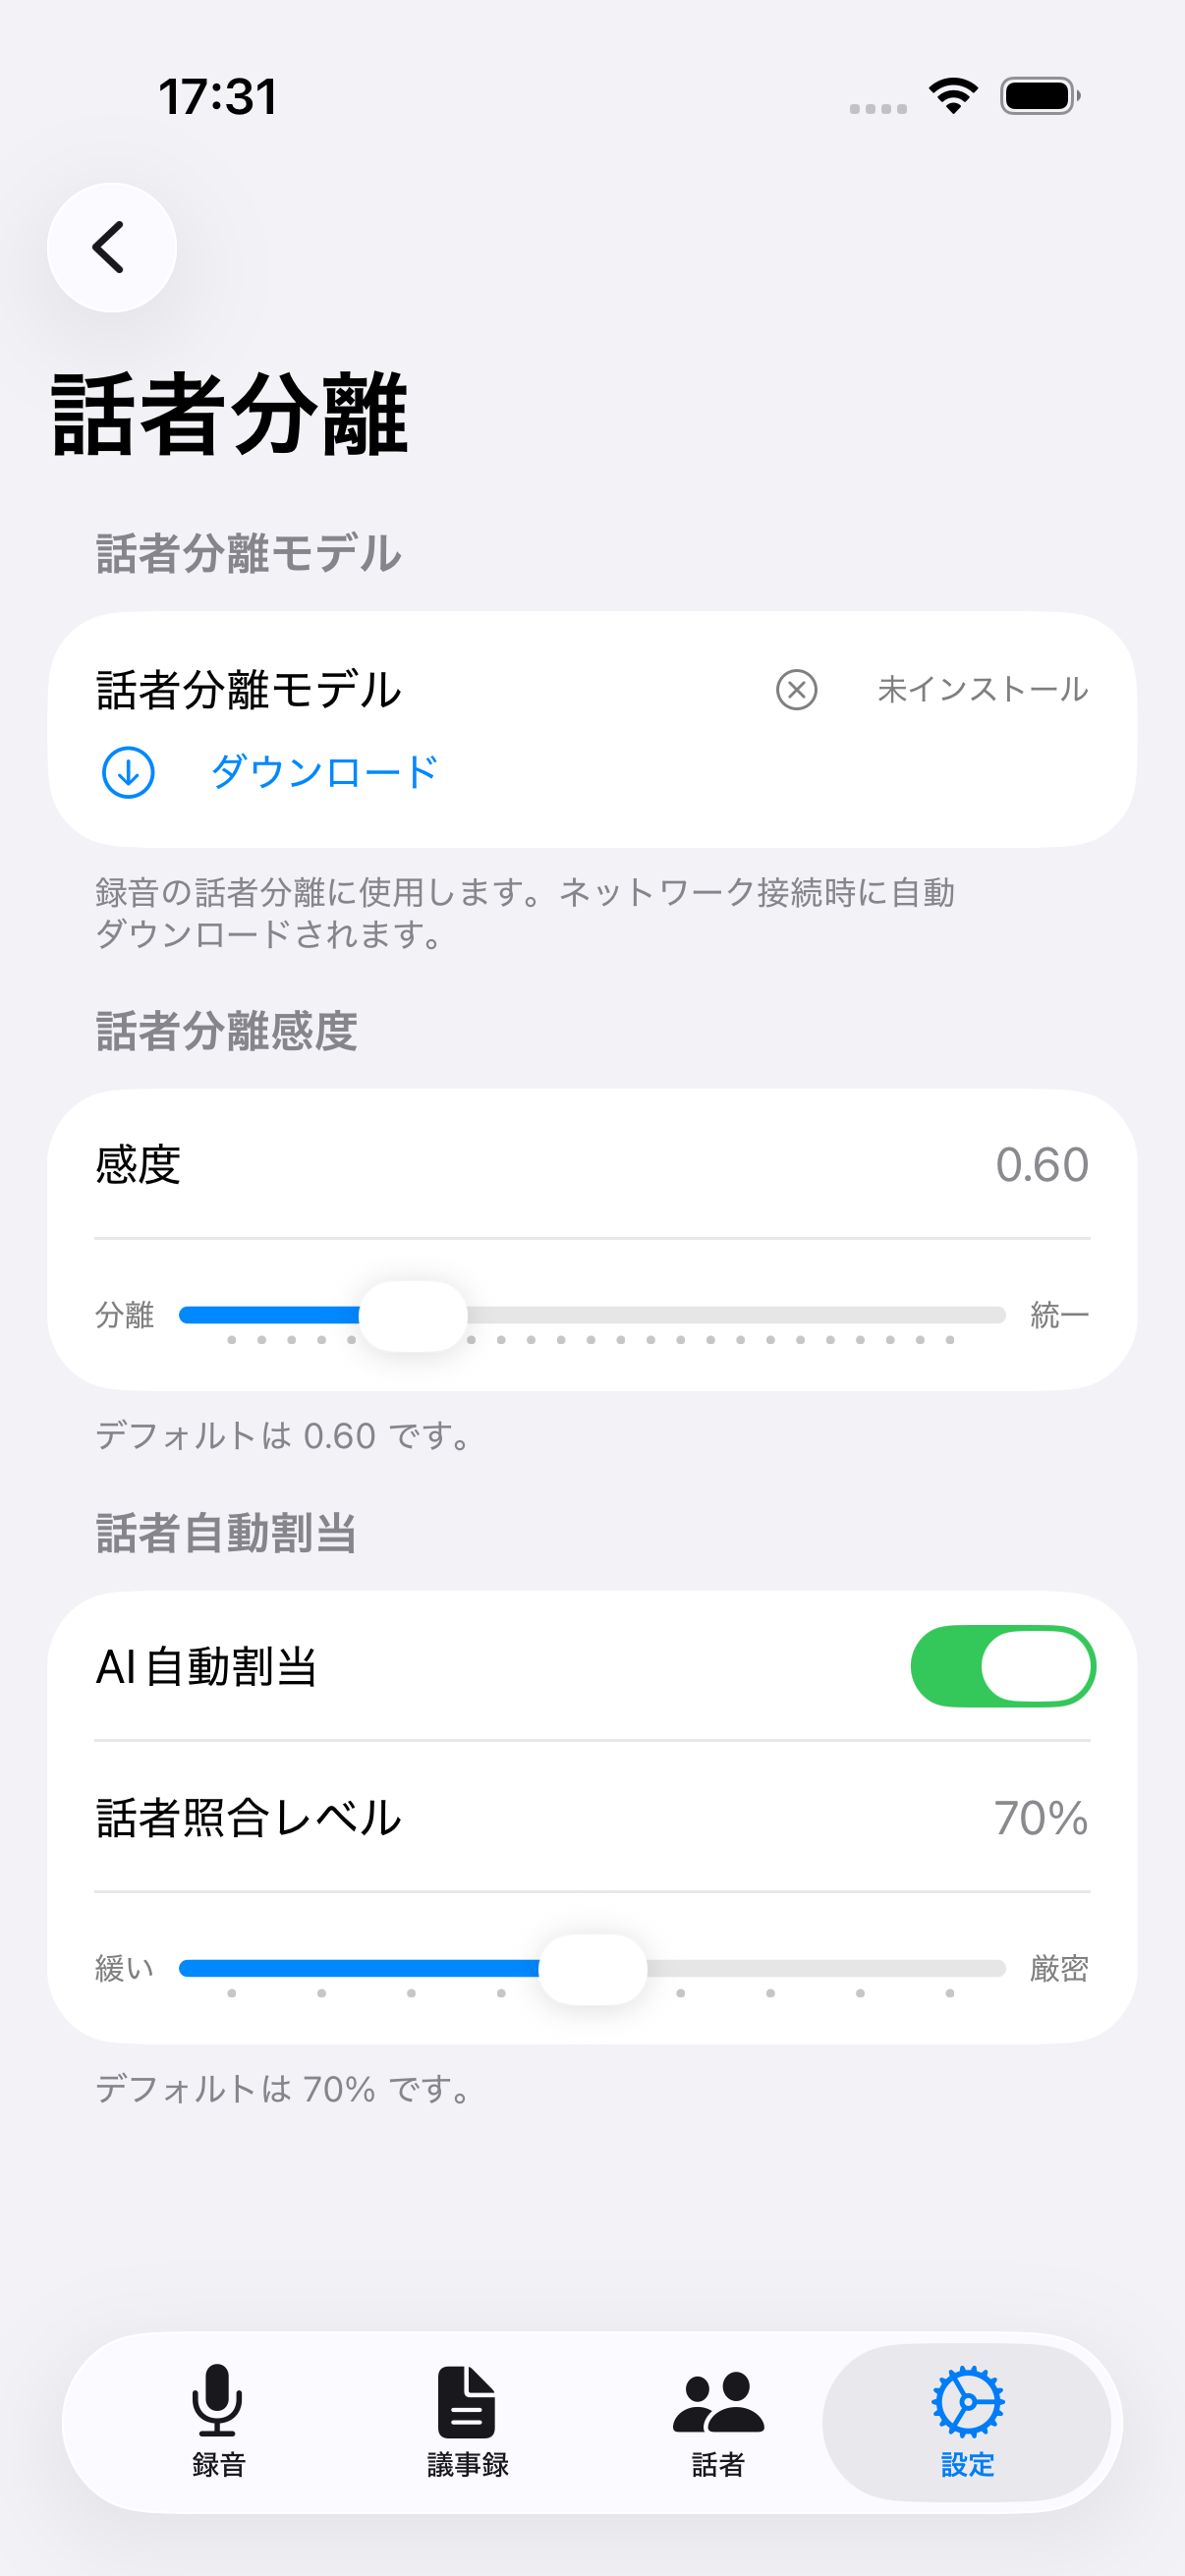
Speaker Diarization
Downloading the speaker diarization model, speaker separation sensitivity, and automatic speaker assignment on/off with a matching threshold.
📷 images/settings-4-en.png
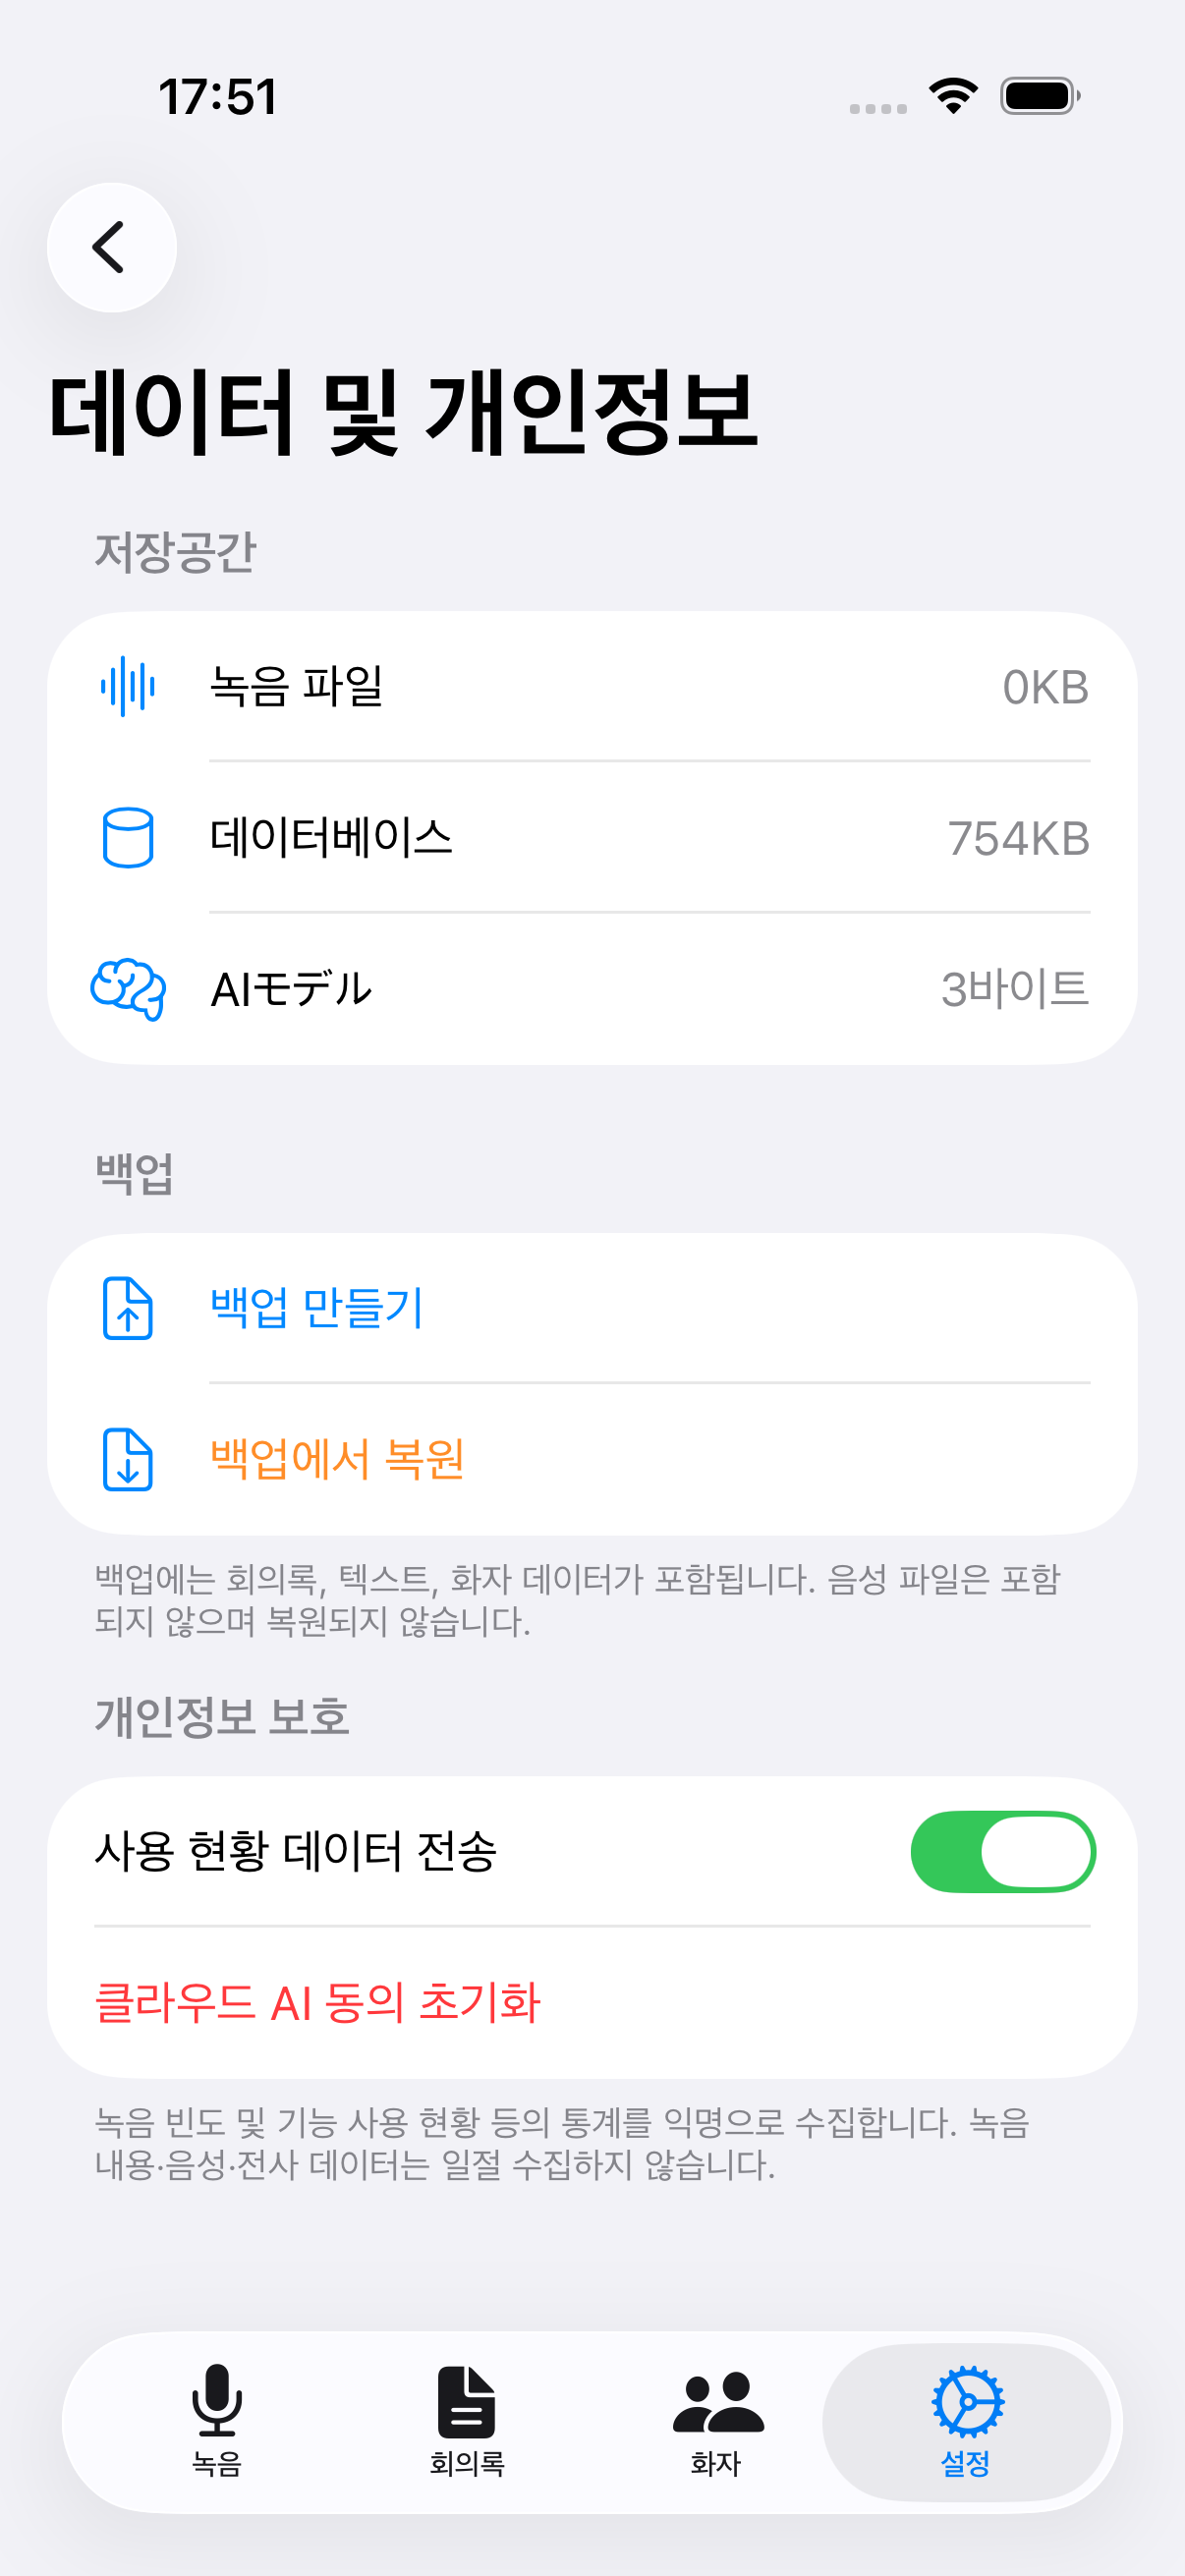
5
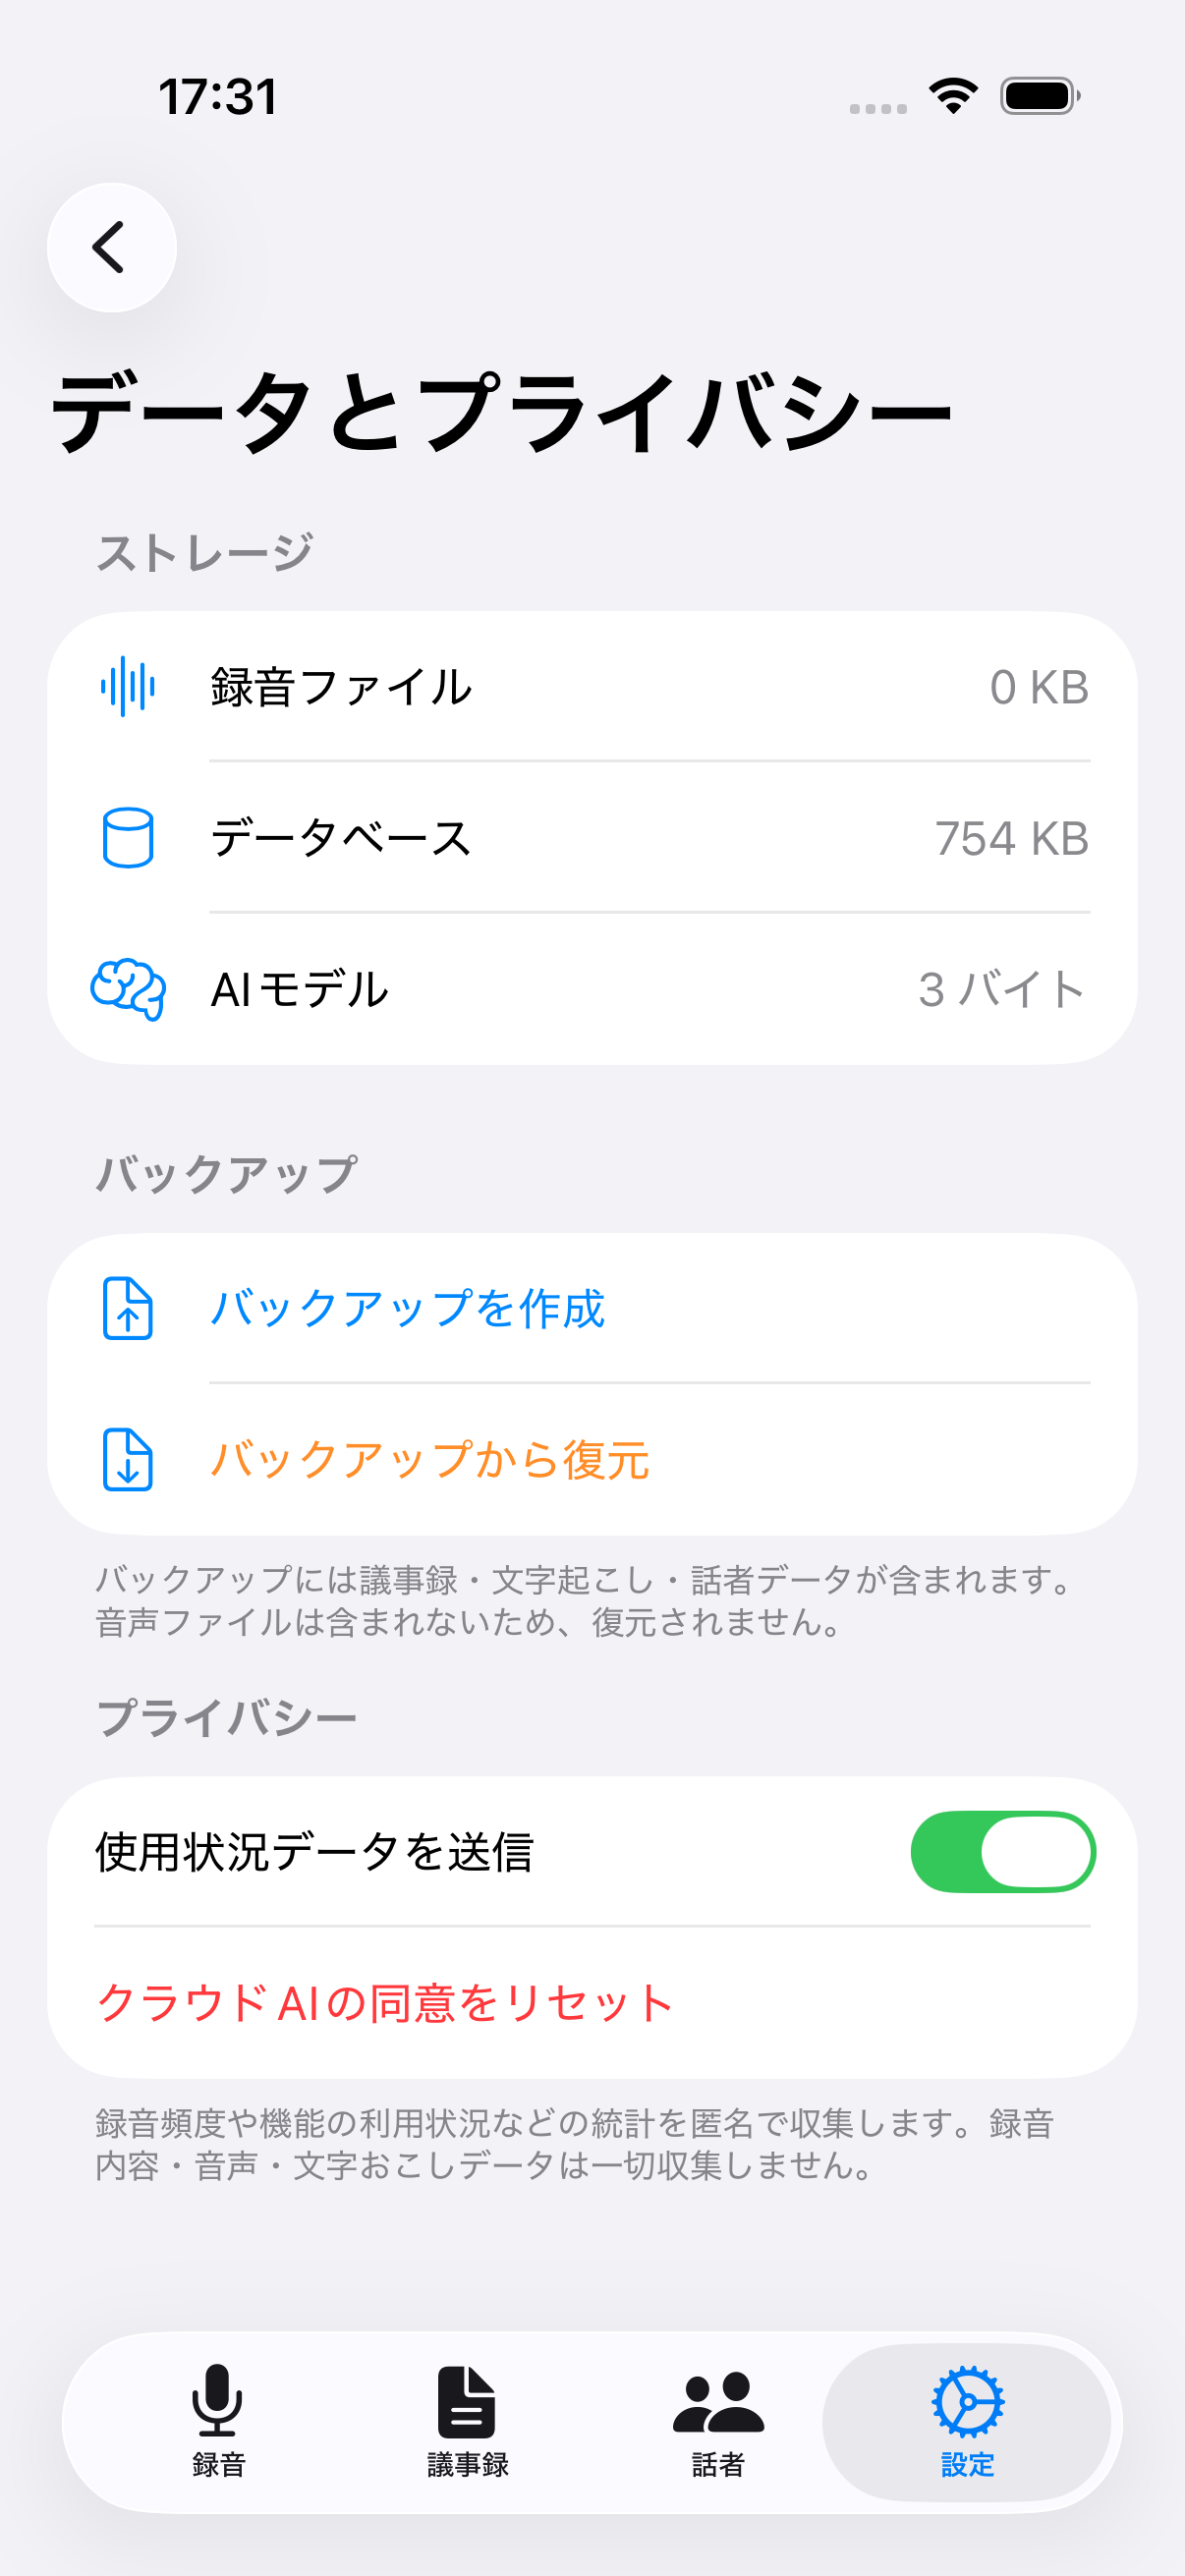
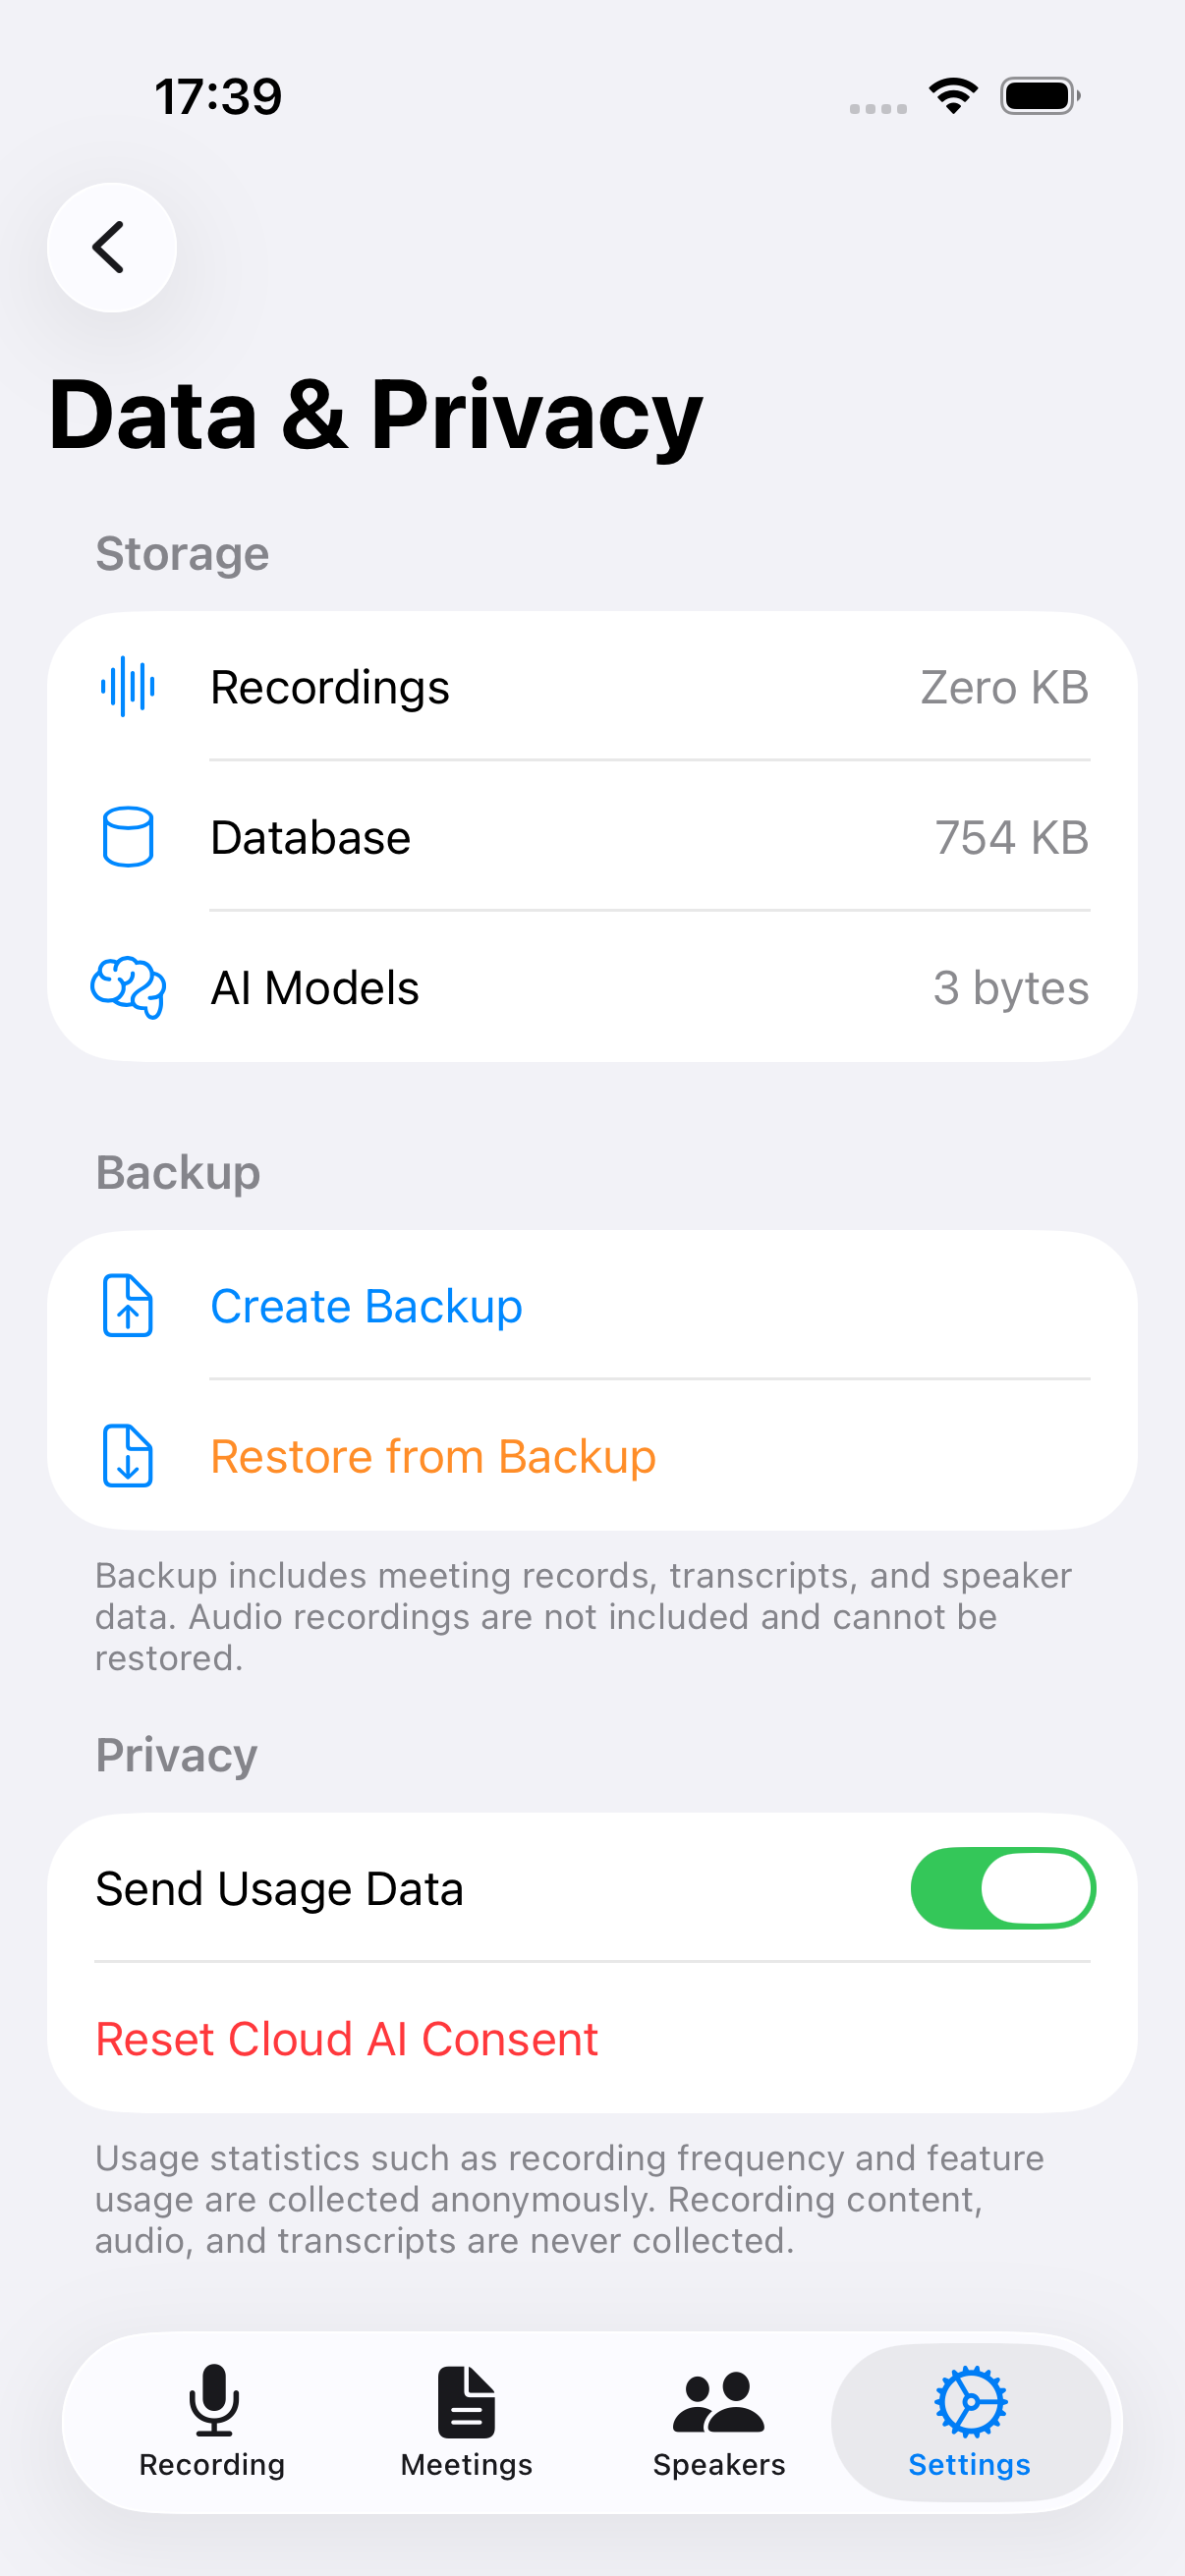
Data & Privacy
Storage usage, backup and restore (covers meetings, transcripts, and speaker data — audio files are not included), and usage data sharing on/off.
📷 images/settings-5-en.png
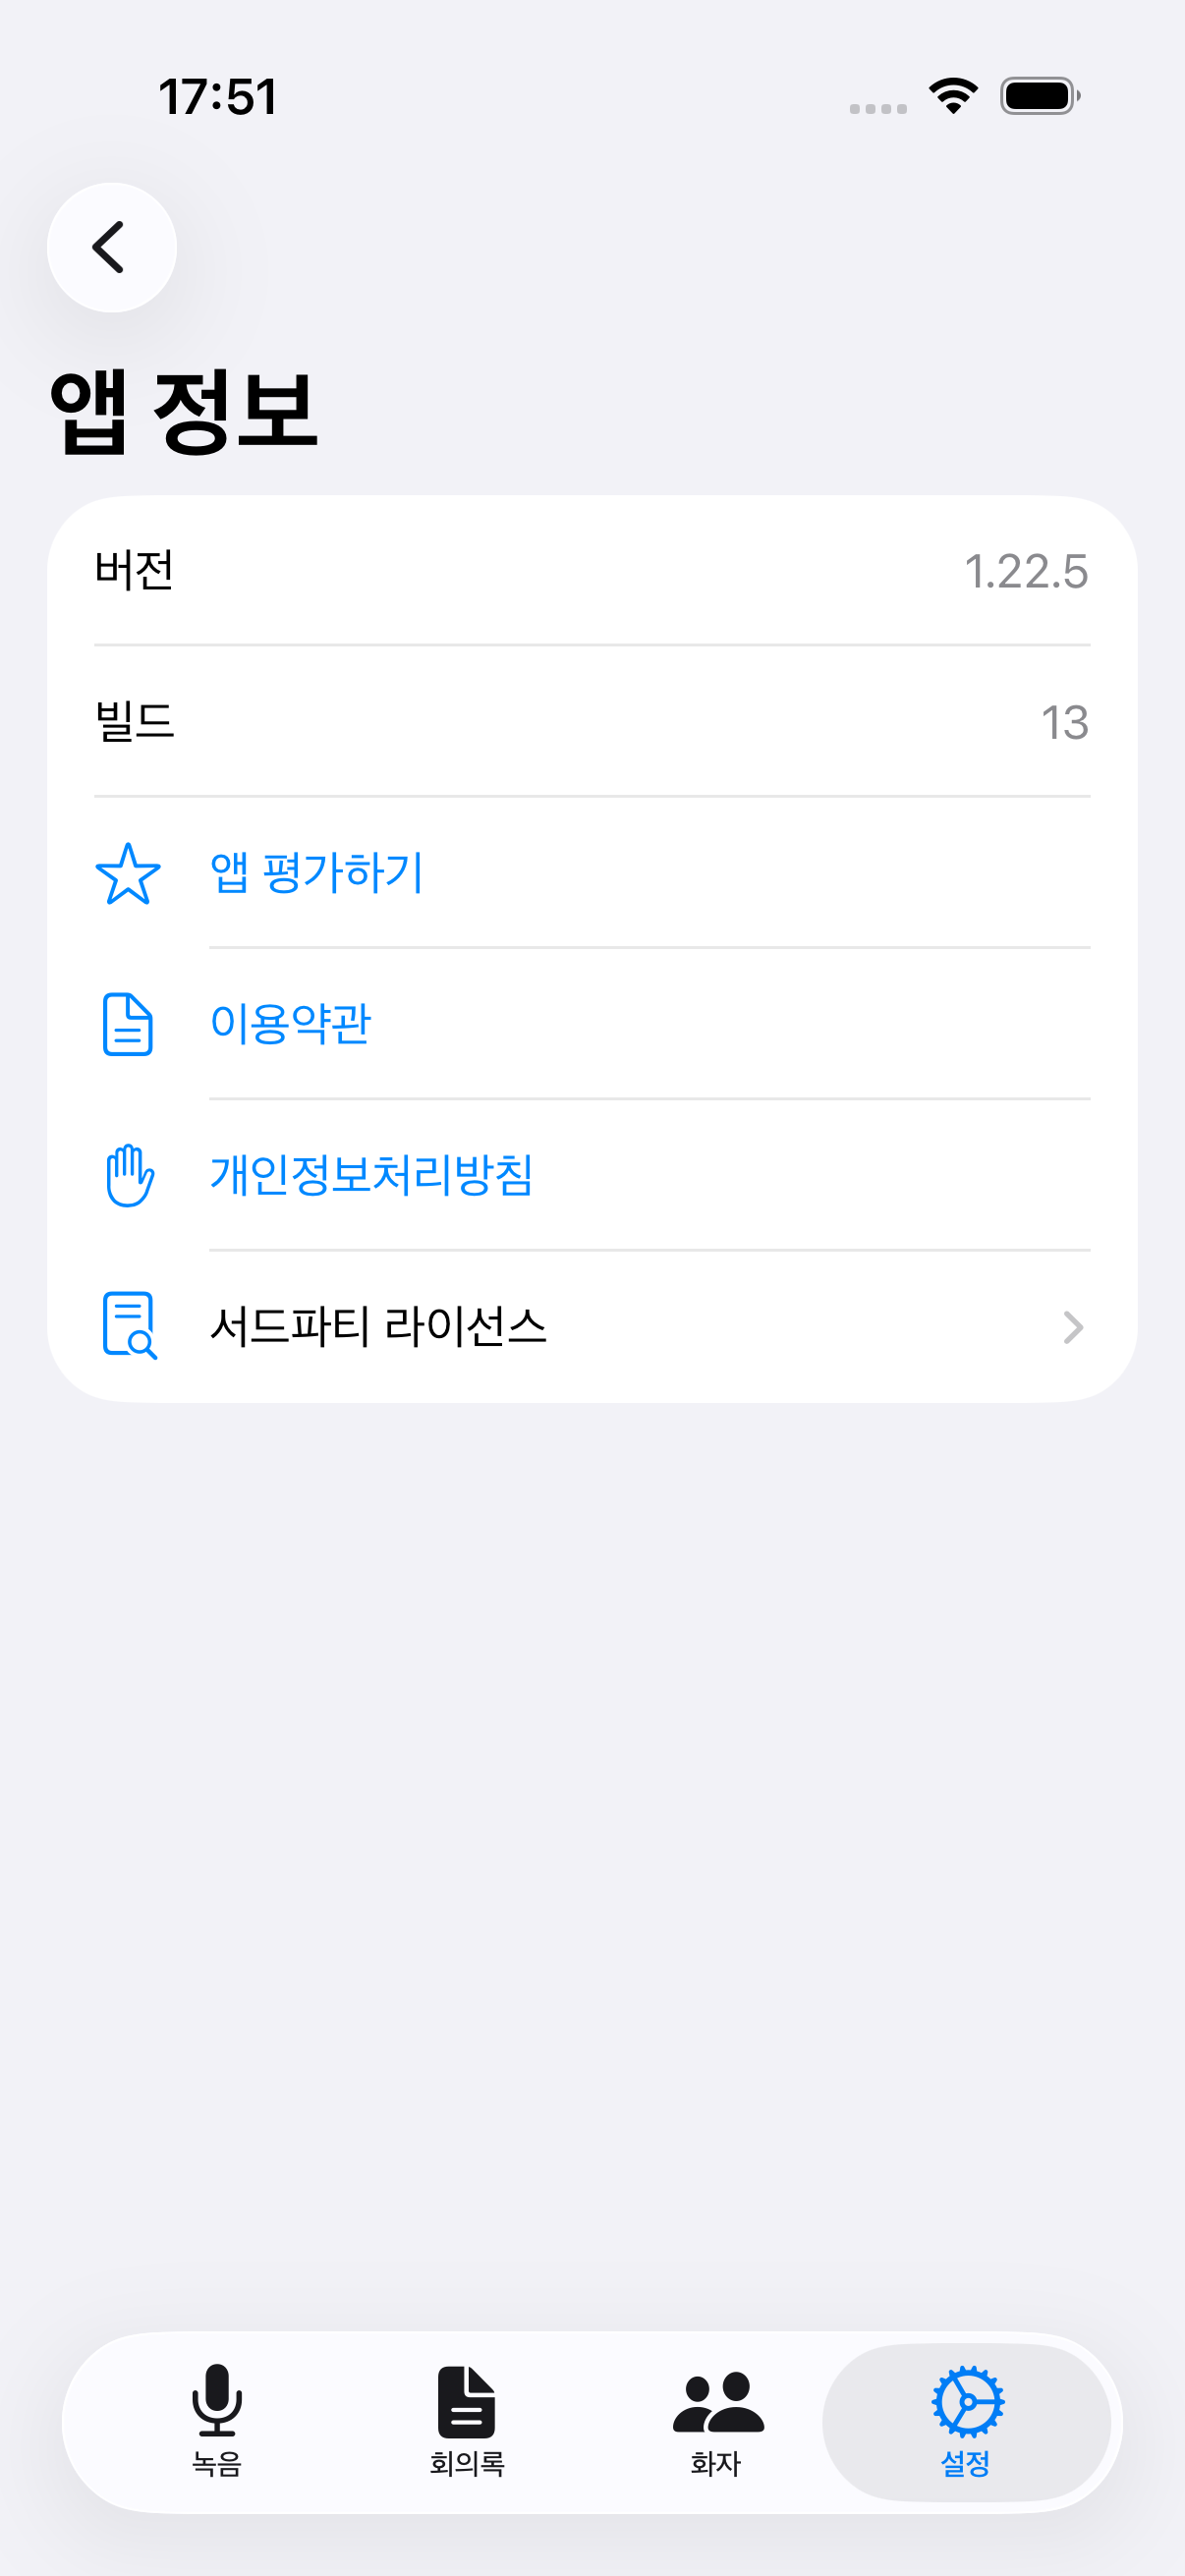
6
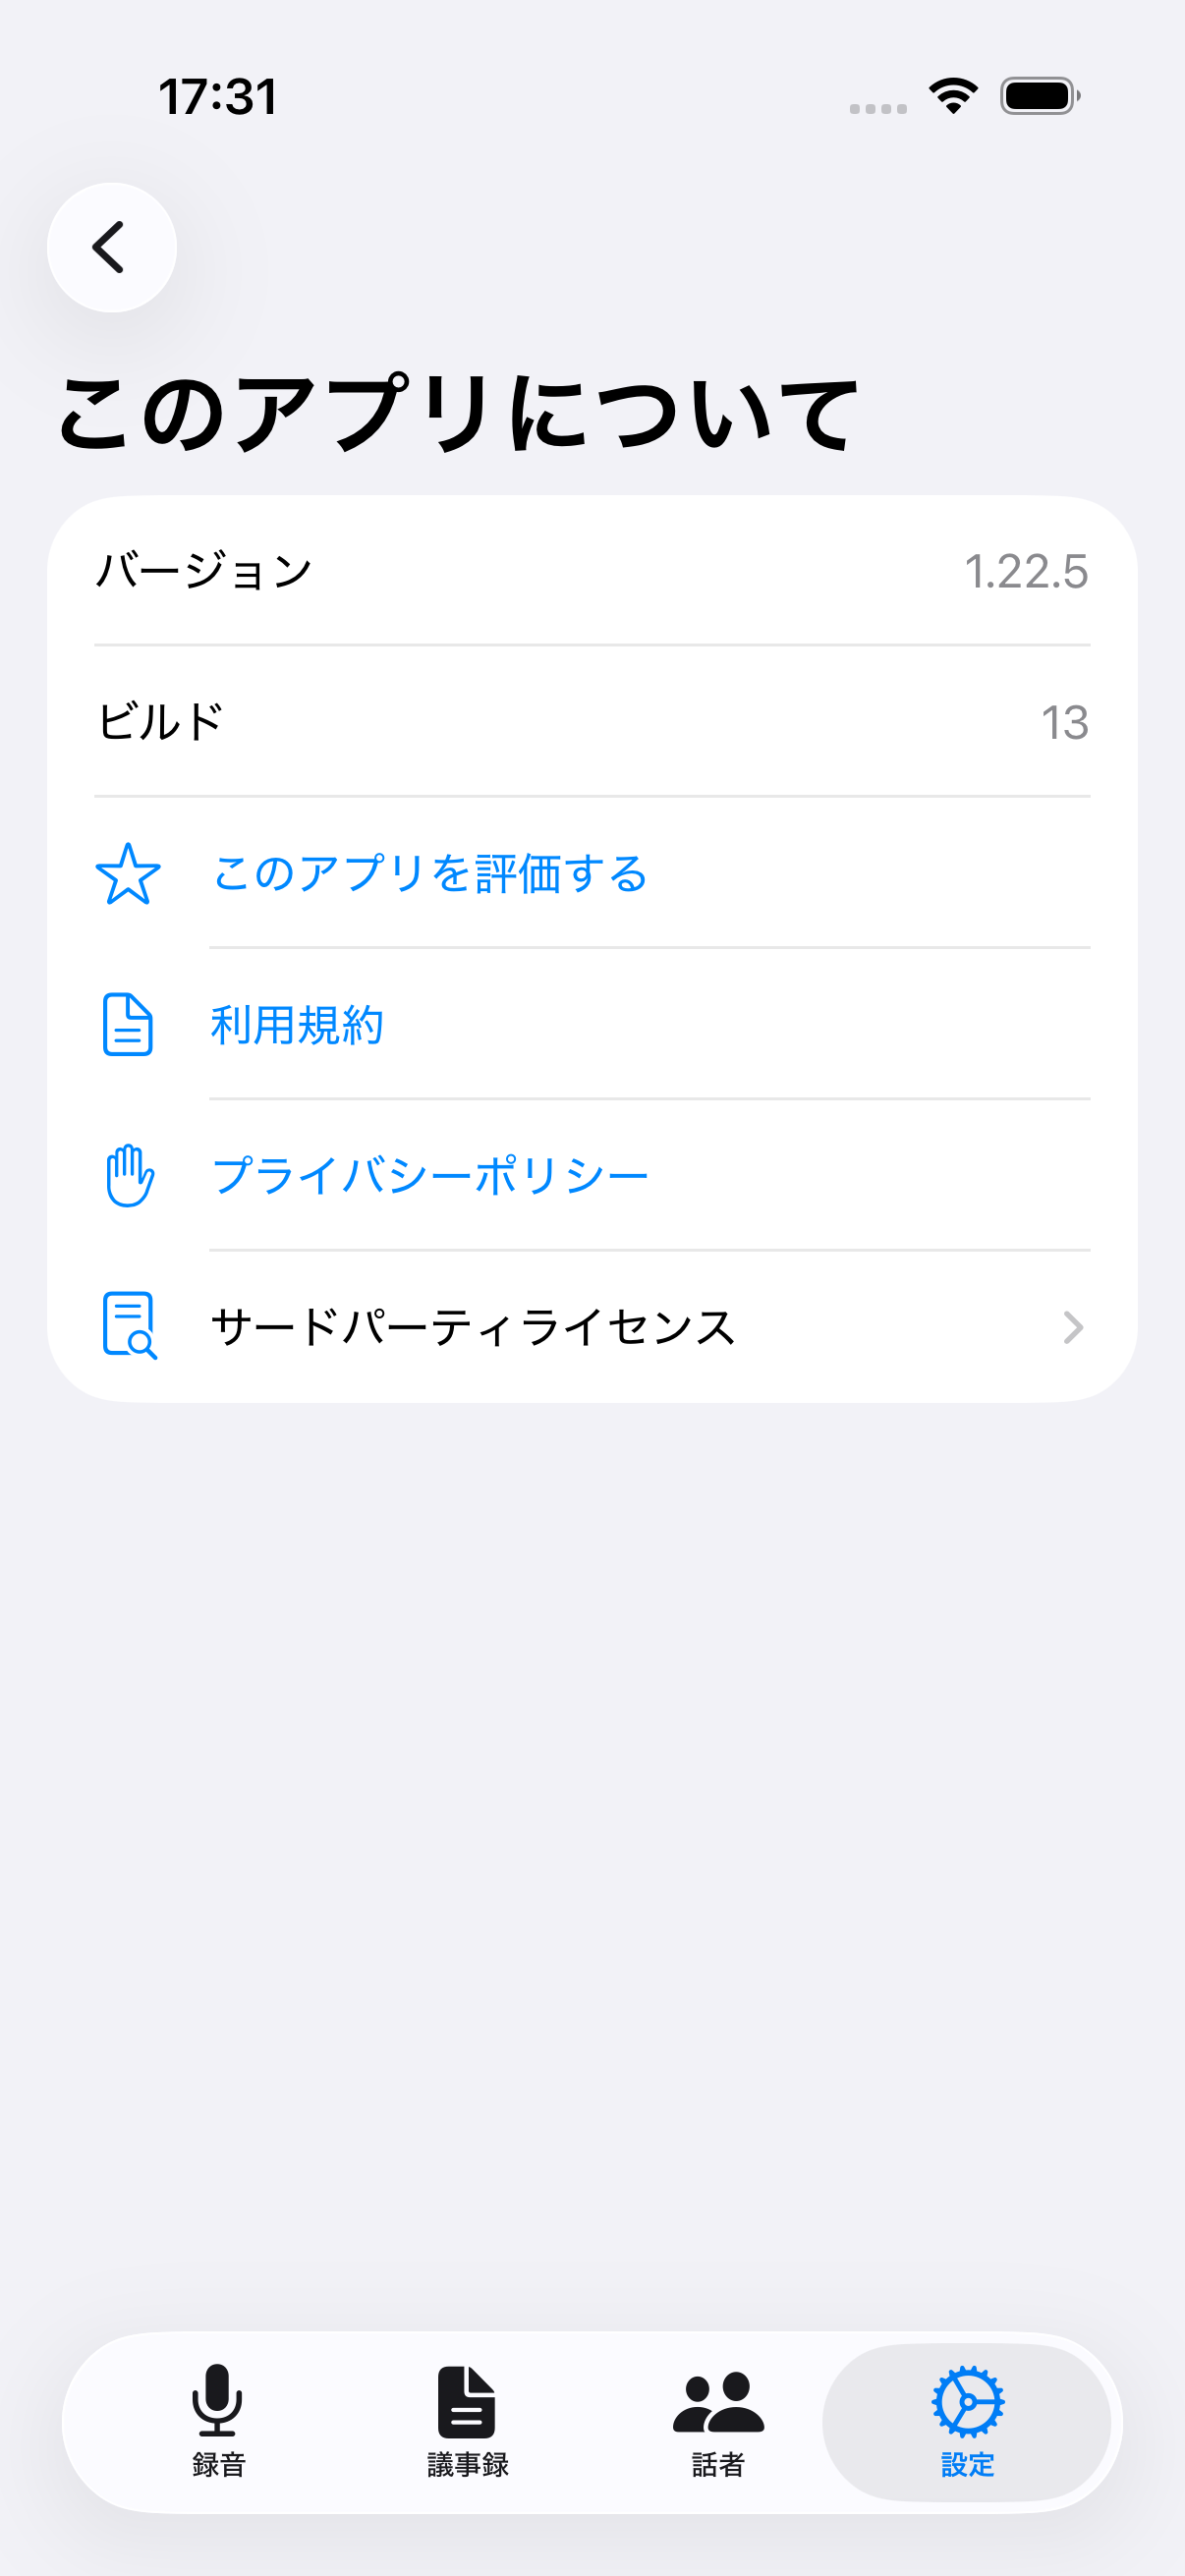
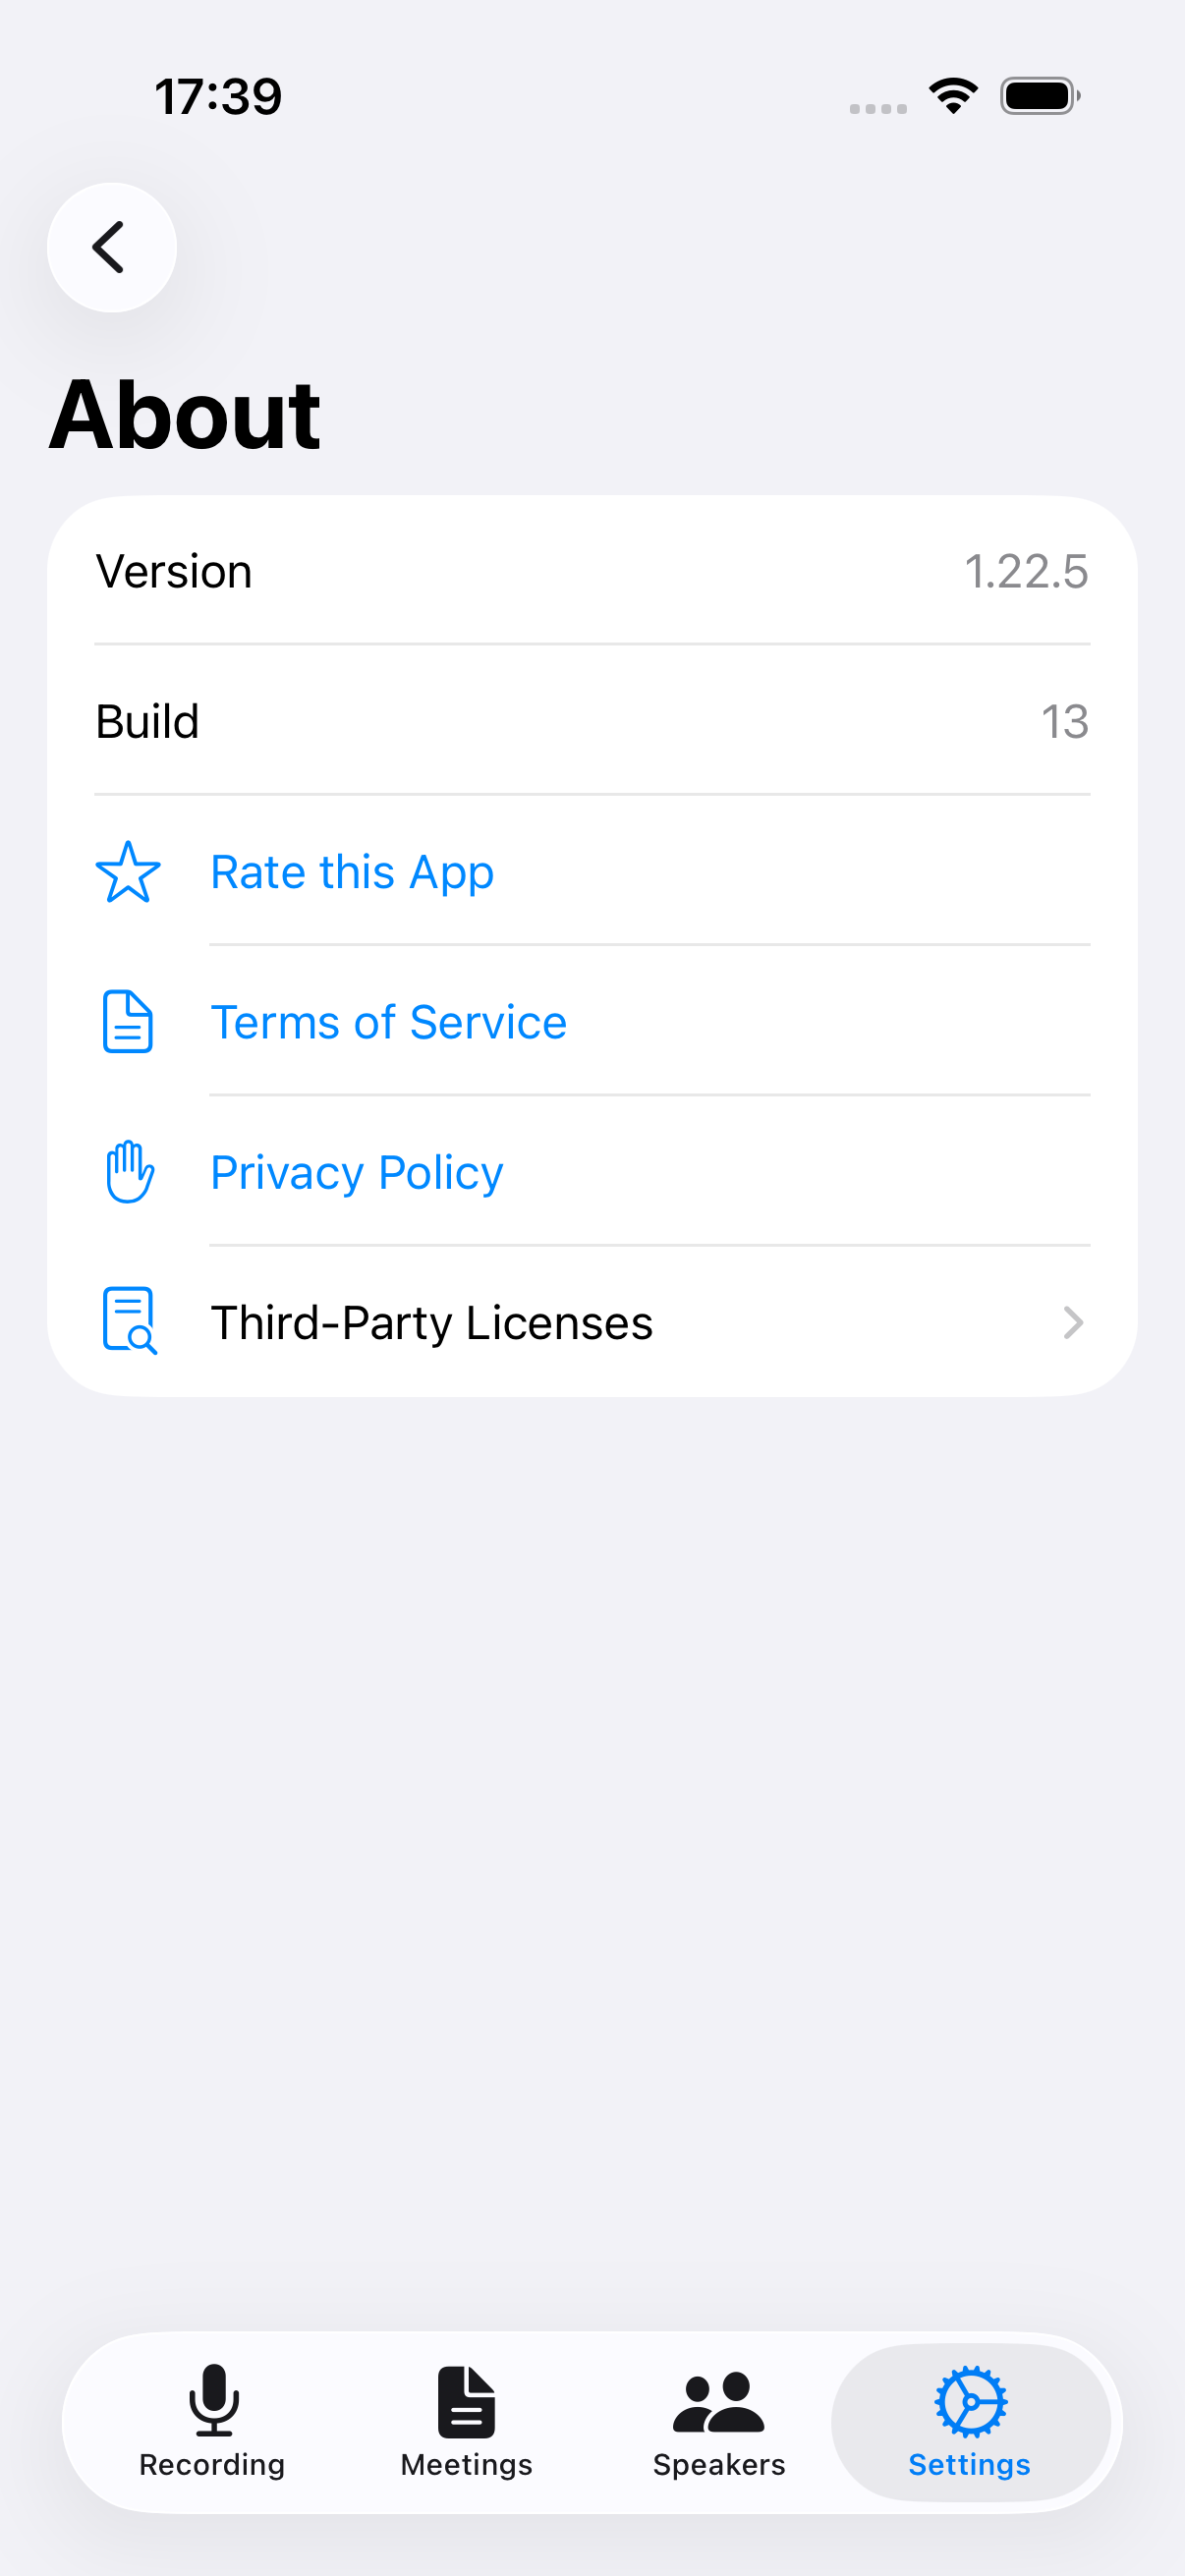
About
Version info, rating the app, Terms of Service, Privacy Policy, and third-party licenses.
📷 images/settings-6-en.png
❓ FAQ
Does it work offline?
Recording, transcription, speaker identification, dictionary correction, and on-device AI summaries all work fully offline. A network connection is only needed for features like Cloud AI summaries.
If I delete a folder, are the meetings inside it deleted too?
No. Meetings in a deleted folder simply move to "Unfiled."
Dictionary correction isn't taking effect right away
The correction model needs to be downloaded the first time. Go to Settings > Transcription & AI Models, in the Dictionary Correction section, to download it.
Is it safe to send content to Cloud AI?
You only need to consent once, not every time. Your content is never used for training and is deleted after processing.
Do I have to watch ads to use the app?
No. Every core feature besides Cloud AI summaries — recording, transcription, speaker identification, dictionary correction, and on-device AI summaries — is free and unlimited without watching any ads.